Migration
When you deploy a new version of a process or case, instances that are already running keep executing on the version they started on. Migration is how you move those running instances onto a newer (or older) version of the definition — applying a bug fix to in-flight work, rolling out a process change to everything currently running, or rolling back a problematic version.
Because the two versions can differ structurally, migration is not a blind switch: you tell Hub how the activities of the source version map onto the activities of the target version, so that every token in a running instance lands on a sensible step in the new version. Hub gives you two ways to define that mapping — Assisted (Hub proposes the mapping) and Manual (you define it yourself) — a side-by-side visual mapping editor, and, for the hard cases, an expert JSON mode. It can even follow a migration down into the child processes and cases an instance has started.
Migration changes running instances. Always confirm you are migrating the right definition and version, and review the mapping carefully before executing — there is no automatic undo.
When to migrate
- A fix or change has been deployed as a new definition version and you want instances that are still on the old version to benefit from it.
- You need to roll back instances to a previous version because the latest one has a problem.
- You are retiring an old version and want nothing left running on it.
If the change is purely additive and you are happy to let existing instances finish on their current version, you do not need to migrate at all — only new instances will use the new version.
Where migration starts
You can start a migration at two scopes, and both open the same wizard. Migrating requires the appropriate
permission — hub:definition:general:migrate-instances to migrate a whole definition, or
hub:instance:work:migrate to migrate a single instance.
- All instances of a definition. Open the definition you want to migrate from and click Migrate definition instances in the top-right corner. The button is enabled when the definition has more than one version. For a case definition there is also Migrate historic definition instances, which re-migrates already-completed instances (used to keep historic data consistent after a model change).
- A single instance. Open a work instance and click Migrate instance (or, for a completed case, Migrate historic instance). This is the surgical option when only one instance needs to move.
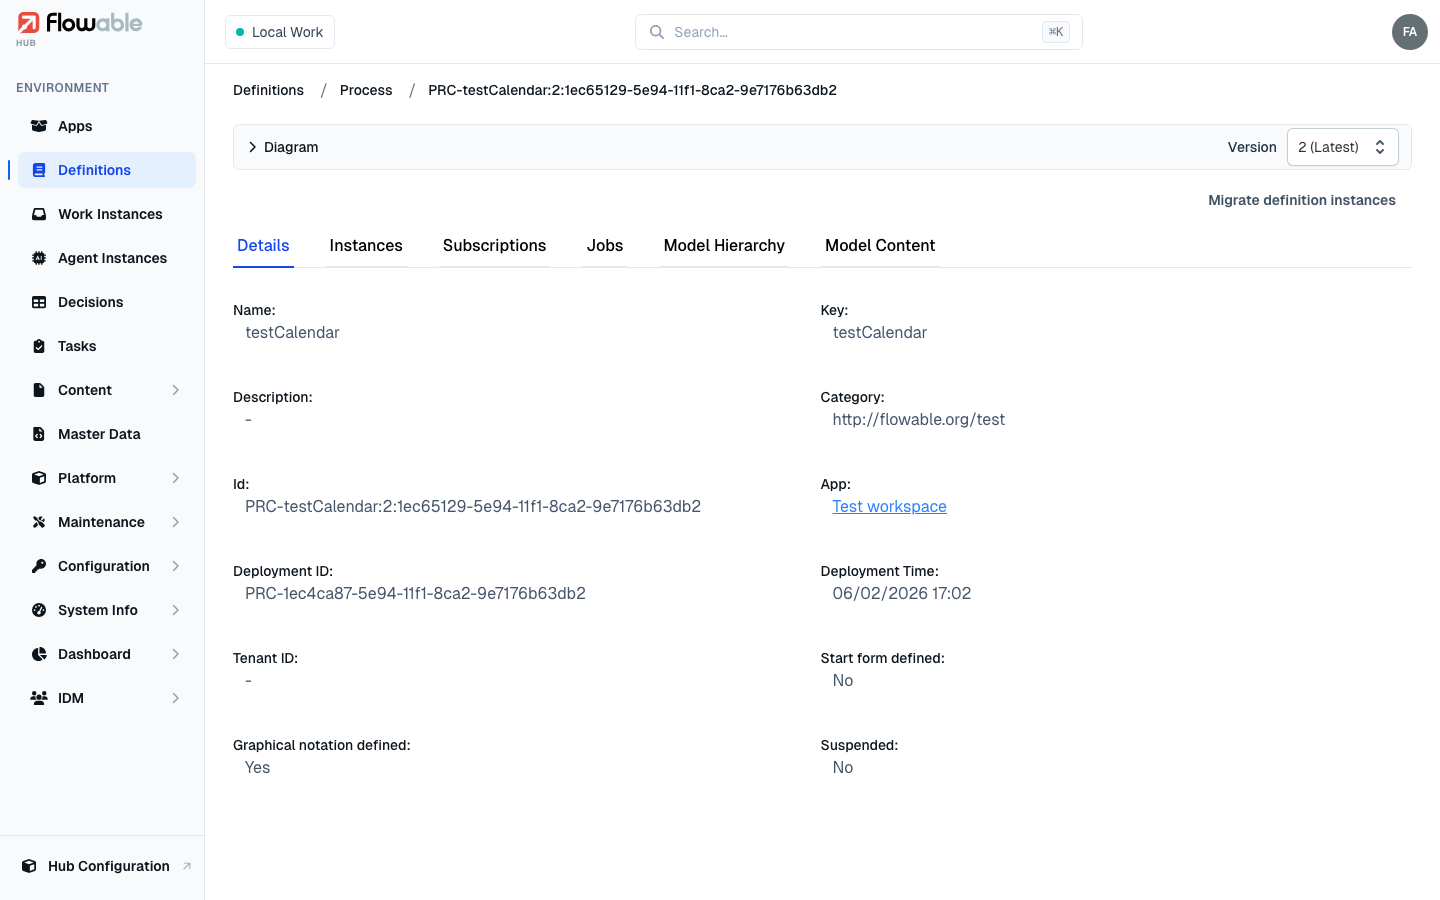
Step 1 — Choose how to define the mapping
The wizard first asks how you want to build the activity mapping:
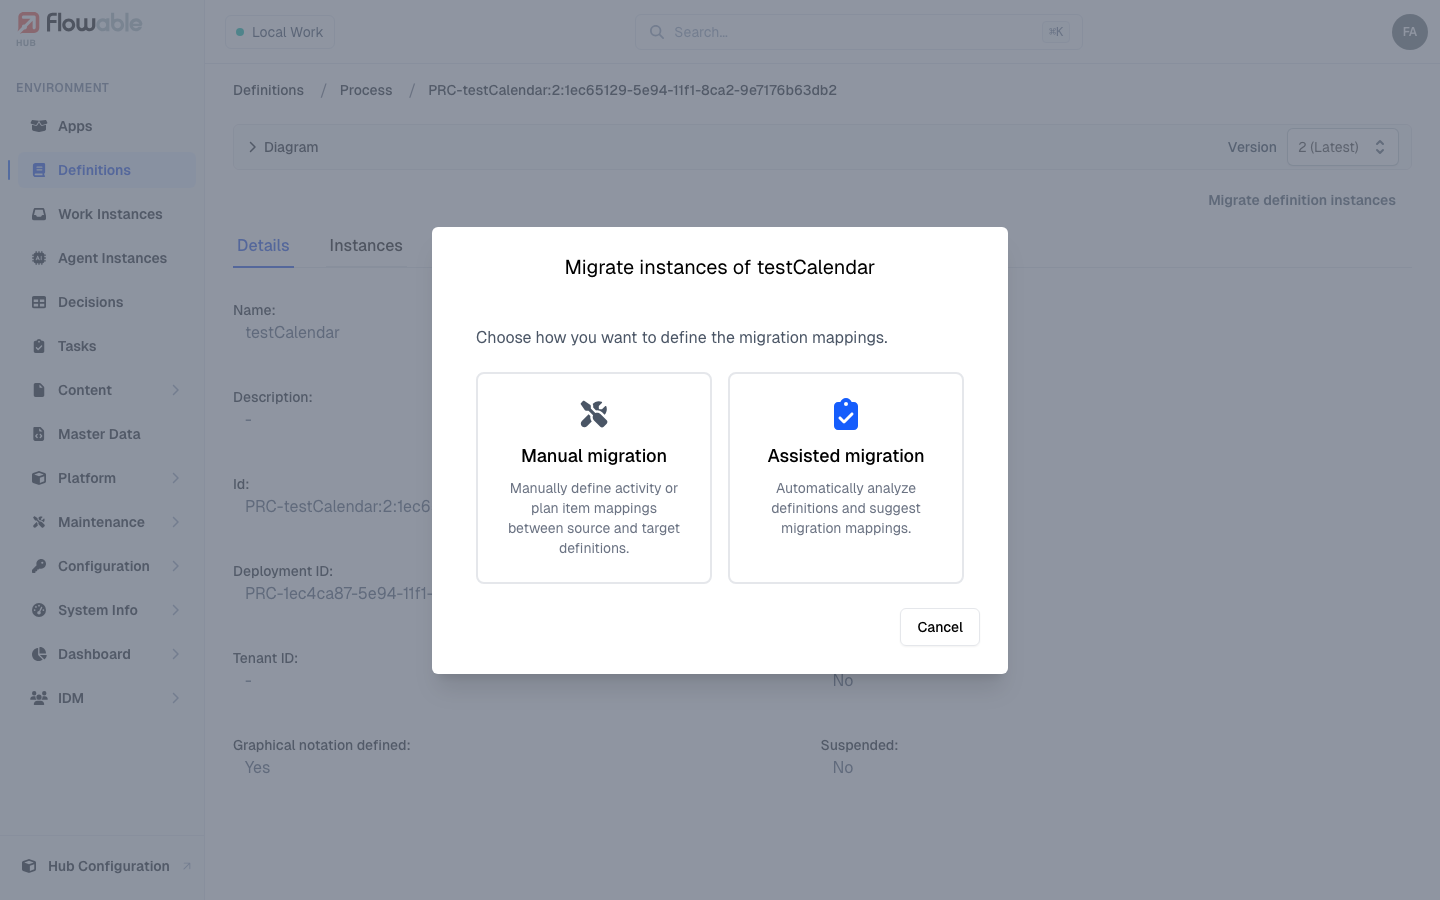
- Assisted migration — Hub automatically analyzes the source and target definitions and proposes a mapping (matching activities by their identifiers and structure). This is the fastest path when the two versions are similar, and you can review the suggestion before executing.
- Manual migration — you define every activity mapping yourself in the visual editor. Use this when the versions differ significantly, or when you need precise control over where each token ends up.
Assisted migration
If you choose Assisted, Hub confirms the target version and reports how many running instances are eligible — if there are none, there is nothing to migrate. Hub then analyzes the two versions and classifies each activity as compatible (it can migrate automatically) or incompatible (it needs your attention). For cases, the analysis can also propose per-plan-item actions — activate, move to the available state, terminate, or add/remove a repetition — and activate newly introduced start or event-subprocess elements.
Assisted mode adds a few conveniences: you can filter which instances are included (by business key, name, start date or a variable value), review a Show REST API JSON view of exactly what will be sent, and consult the analysis history of earlier runs.
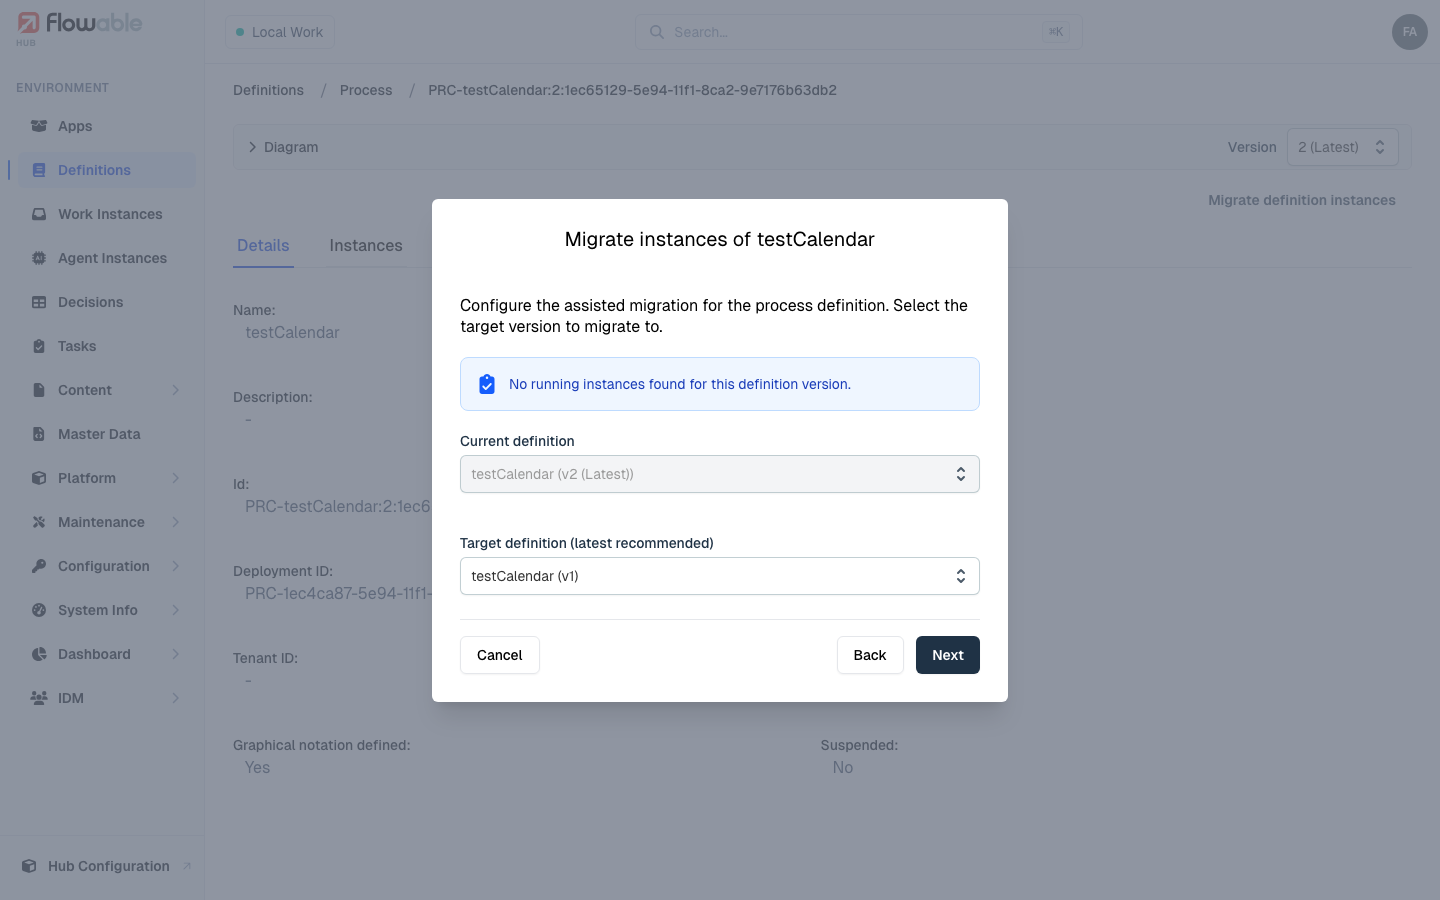
Step 2 — Select the target version
You confirm the Current definition (the source — the version you are migrating from) and pick the Target definition version to migrate to. You can move forward to a newer version or back to an older one. In assisted mode the source is fixed to the current version and the target defaults to the latest.
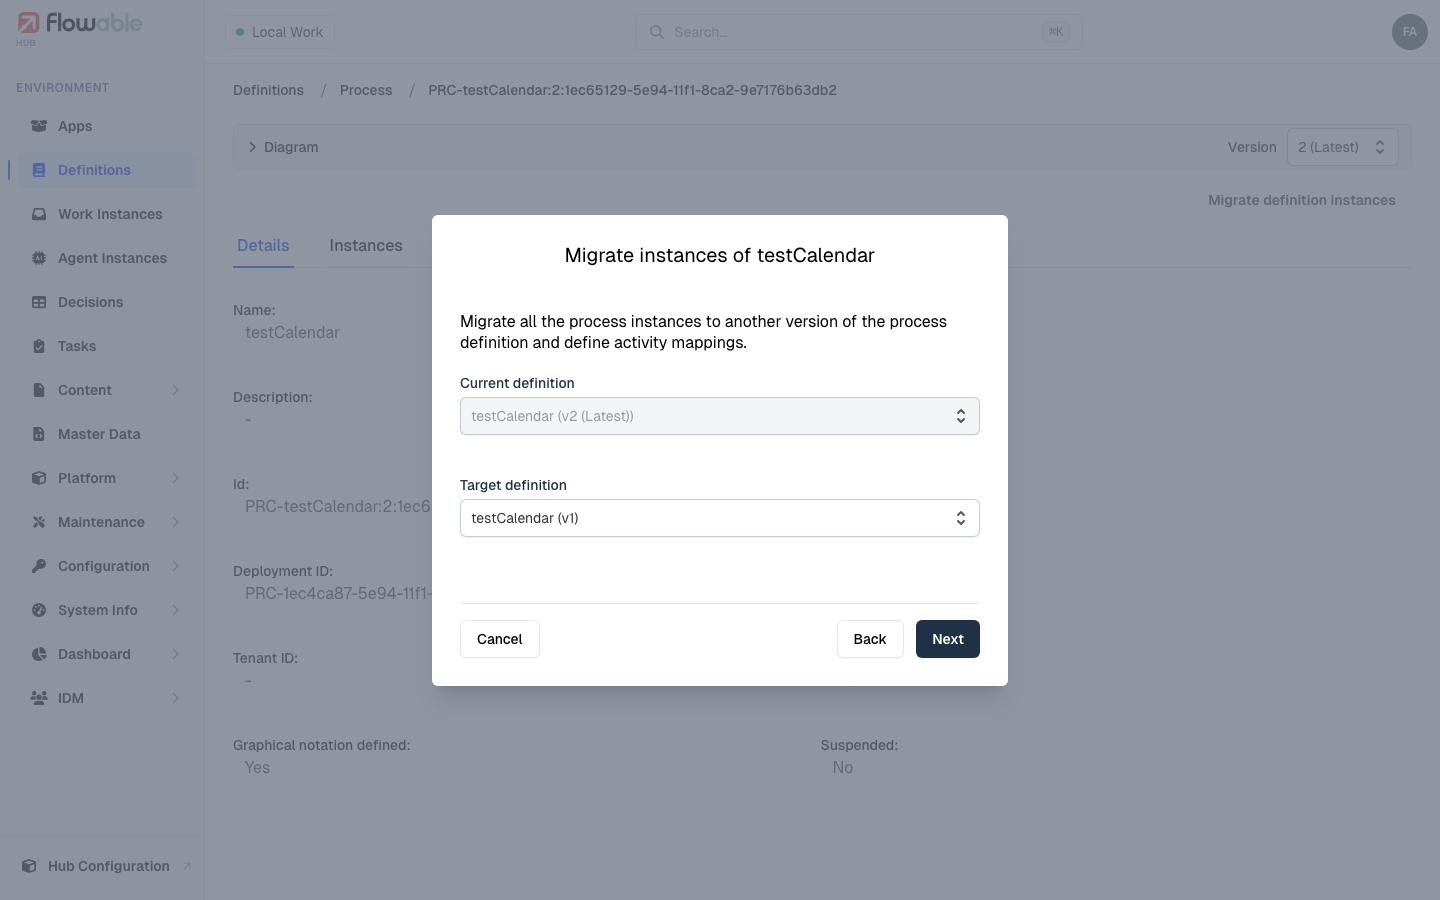
Step 3 — Map the activities
This is the heart of a manual migration. The mapping editor shows the source version on the left and the target version on the right, each rendered as its diagram so you can see the structural differences at a glance.
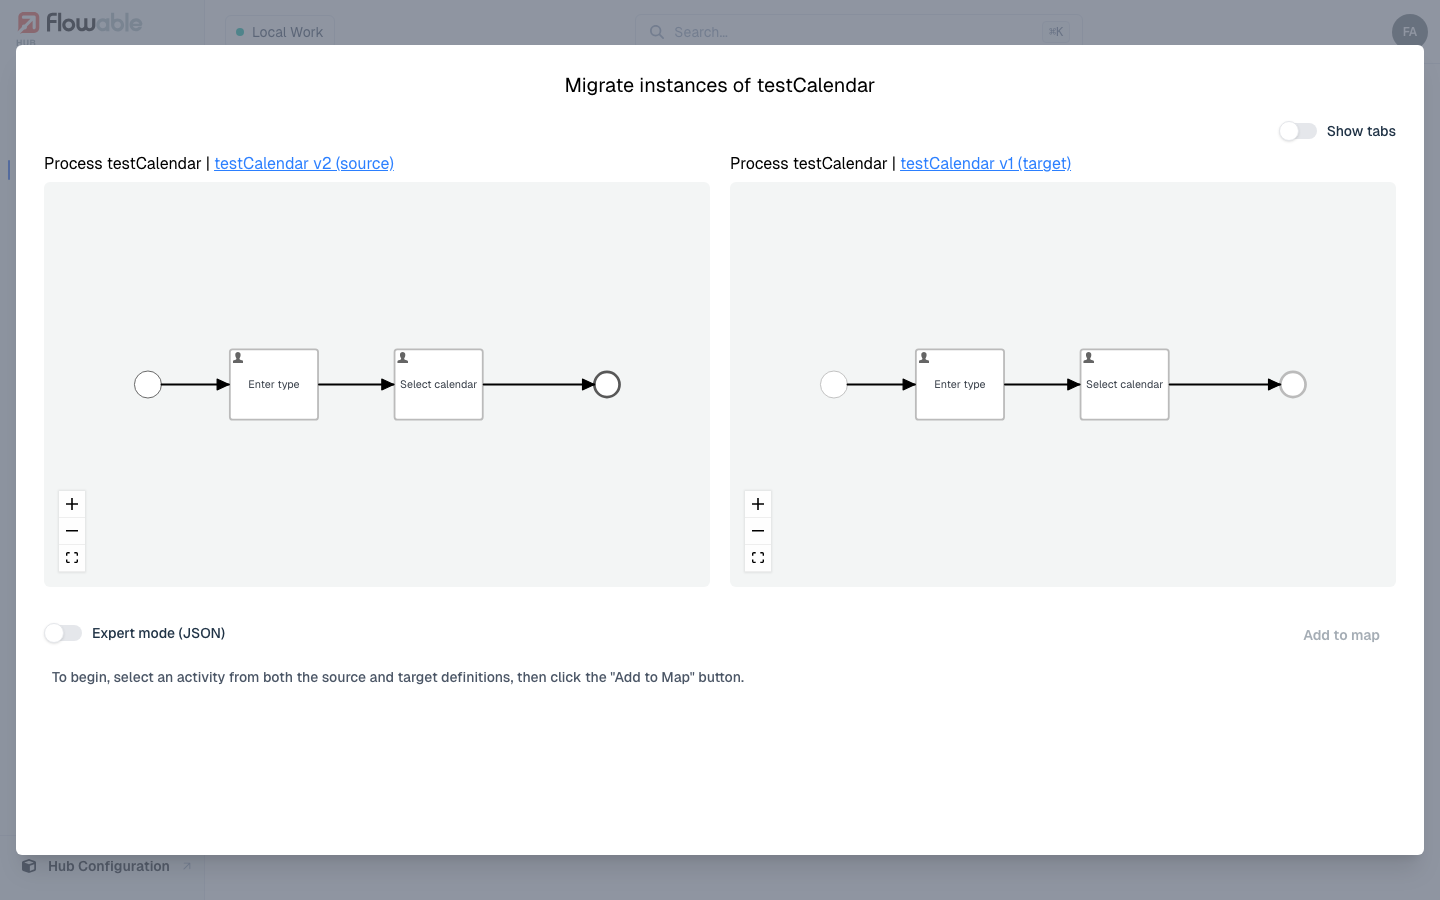
To build the mapping:
- Select an activity in the source (left) diagram.
- Select the corresponding activity in the target (right) diagram — the step where tokens currently sitting on the source activity should resume.
- Click Add to map to record the mapping.
- Repeat for every activity that needs an explicit mapping. Activities that are unchanged between versions are handled automatically; you only need to map the ones that moved, were renamed, or were restructured.
Each mapping appears in the list as a source → target pair that you can remove. Process mappings may fan out or in (one source activity to several targets, or several sources to one), but not arbitrary many-to-many combinations. A Show tabs toggle switches the editor between the diagram view and a tabular list of activities, which is easier for large models.
Expert mode (JSON)
For complex migrations, the Expert mode (JSON) toggle reveals the REST migration document Hub has generated from your visual mapping. It stays in sync as you map, and you can hand-edit it to express things the visual editor cannot — then send it verbatim when you execute. Reset to generated discards your manual edits and regenerates the document from the current mapping, and there is a copy-to-clipboard shortcut.
If you turn expert mode off again after editing, Hub asks you to confirm discarding your JSON changes; on confirmation it reverts to the mapping built in the visual editor, so a stale hand-edited document is never submitted by mistake.
Migrating child processes and cases
When an instance has started child instances — through a call activity, a process task, or a case task — those children run on their own definition versions and may need migrating too. When Hub detects them, the wizard adds steps to migrate the whole tree in one operation:
- Children are discovered recursively and migrated deepest level first, so a parent is only migrated once its children are consistent. Circular references are detected and skipped.
- An overview step lists every discovered child instance with its status — Configured, Skipped, Pending, or No instances — and lets you configure them in any order. For each child you pick a target version (or keep it on the same deployment), let Hub analyze its active activities or plan items, map anything that is missing, and optionally set user-task properties.
- Re-opening a child you have already configured restores your previous choices, so you can revisit it without starting over.
When every child is configured, Execute all migrations applies the whole tree.
Step 4 — Review and execute
Once the mapping is complete, review it and Execute migration. When migrating a single instance you can also choose Execute automatic migration, which applies Hub's default mapping without manual steps (offered only when validation finds no problems). Hub then repositions each eligible instance's tokens according to the mapping. For a large number of instances the work runs as a batch, which you can monitor to completion.
After migration, the affected instances report the target version on their Work Instance detail, and continue executing from where your mapping placed them.
Related
- Definitions — versions and where migration starts.
- Work Instances — inspect an individual instance, including the version it runs on; for fine-grained, single-instance intervention you can also move a token directly with Change process state.
- Batches — monitor a large migration as it processes.