Integrate Okta SSO with Flowable Work
Target audience: Developer
Introduction
For all Flowable products (Work, Design, Control, etc.) Spring Boot Starter dependencies exist to customize them. One typical customization that is often required is to integrate Single-Sign on (SSO).
This How-To describes how you can integrate Okta SSO with Flowable Work. The principles here can also be used to integrate Flowable Engage.
 tip
tipThis integration is also available out-of-the-box for the Flowable Work and Engage applications provided by Flowable.
It can be enabled by setting application.security.type to oauth2 (in addition to the other properties described below).
Additionally, this How-To is an example that is meant as an inspiration when met with similar requirements. Custom code isn't covered by standard Flowable Support.
Okta SSO Setup
The first thing we need to do before starting with the Flowable Project setup is to make sure that we have an Okta project instance. If you don't have one then we suggest following the Implement OAuth for Okta guide.
When performing the above setup there are a couple of settings you need to know.
- Redirect_Uri should reference your Flowable application.
For example:http://localhost:8090/login/oauth2/code/<name>
Thenameto use will be the same name used for registration in the Flowable client configuration. (e.g.flowable-work) - In the Sign-On section of the application configuration make sure you set the
Group Claims Typeset toFilterand theGroup Claim Filtertogroupswith an appropriate matching filter for the groups you wish to include.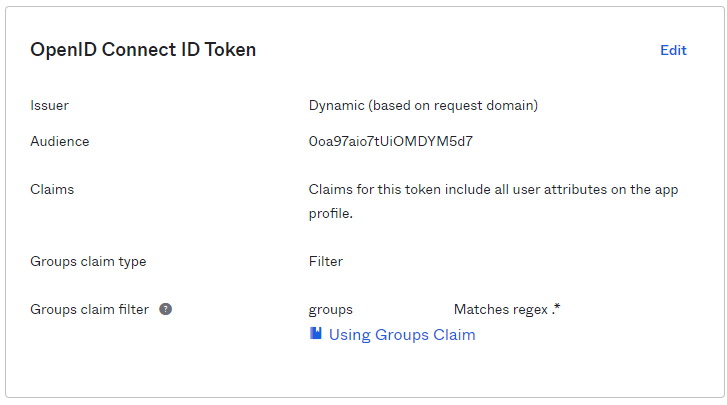
More information can be found here: Okta Groups or Attribute Missing from ID Token
In addition to the steps explained above we need to add some more configuration to support our integration with Flowable:
Add Group Claim to token for Application.
By default, groups are not included in the token returned by Okta.
In order to include groups:
- From your Okta Dashboard, navigate to Security -> API
- Select your Authorization Server from the list, in my case I am using default
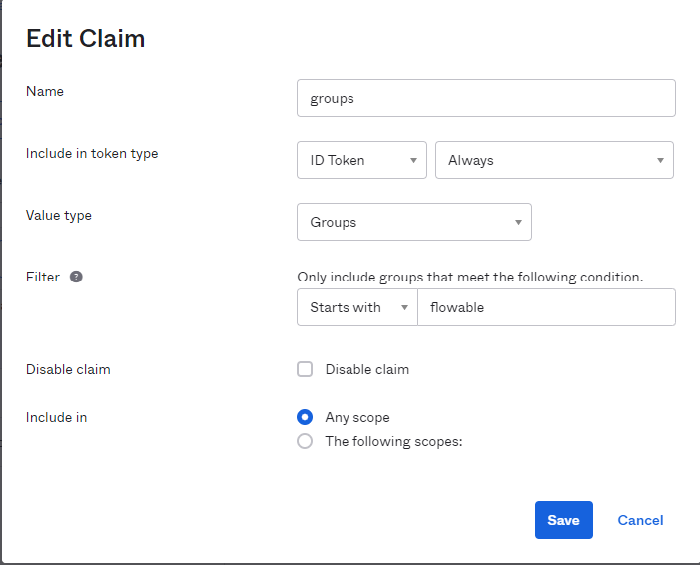
It is important to note the name of your Authorization Server as it will be used later in the Flowable configuration - Under the Claims tab, add a new claim called "groups" with the following settings
- Name : groups
- Include in token type : ID Token (ALWAYS)
- Value type : Groups
- Filter : select an appropriate filter (such as starts with flowable).
- Include in : Any scope
 note
noteYour directory administrator may wish to limit the scopes that include groups. This is fine, as long as these scopes include those configured in the Flowable configuration below.
Add Users and Groups
We are now ready to configure users and groups.
From your Okta Dashboard, select Directory and configure your Users and Groups.
noteMake sure you assign these users and groups to your Flowable application.
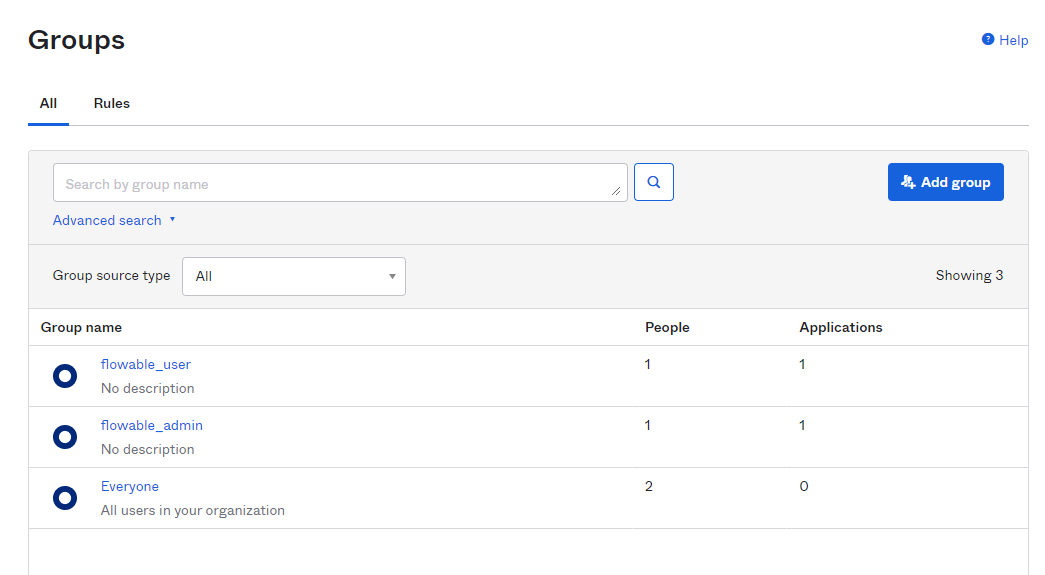
Add User Definition Groups
Okta provides no mechanism to add roles or authorities to a user so we will need to create groups to map to each Flowable User Definition.
Users should be assigned to one of these user definition groups.
noteThese user definition group assignments are in addition to any application group assignments you need.
Project Setup
 info
infoThis section can be skipped when you are using the out-of-the-box Flowable images.
Now that we have our Okta application we will setup a Flowable Work project. In order to see how to create a Flowable Work project you can follow the steps explained in Create a custom project.
Make sure that the Flowable Frontend and Demo dependencies are also added
<dependency>
    <groupId>com.flowable.work</groupId>
    <artifactId>flowable-work-frontend</artifactId>
</dependency>

<dependency>
    <groupId>com.flowable.platform</groupId>
    <artifactId>flowable-platform-default-idm-models</artifactId>
</dependency>
<dependency>
    <groupId>com.flowable.platform</groupId>
    <artifactId>flowable-platform-example-apps</artifactId>
</dependency>
Required Dependencies
The first step of the configuration is to add the needed Spring Boot OAuth2 Client and OAuth2 Resource Server dependencies:
<dependency>
    <groupId>org.springframework.boot</groupId>
    <artifactId>spring-boot-starter-oauth2-client</artifactId>
</dependency>
<dependency>
    <groupId>org.springframework.boot</groupId>
    <artifactId>spring-boot-starter-oauth2-resource-server</artifactId>
</dependency>
The first dependency is the Spring OAuth 2.0 client itself. This allows the redirect to work seamlessly for the users. While the second one is for the Spring OAuth 2.0 resource server. This allows us to use Bearer Authentication with a JWT token e.g. for access through Flowable Control.
OAuth2 Client Configuration Properties
As a next step we need to configure the Spring Security OAuth 2.0 provider.
In the example below the following replacements are needed:
<name>- This can be any string you want. e.g.flowable-workbut must match the name used in the Oktaredirect_uri(Refer Okta SSO Setup above)<client-id>- The id of the client which we created during Okta application setup.<client-secret>- The secret of the client which we created during Okta application setup.<admin group key>- Group to be bound toadmin-flowableuser definition (e.g. flowable_admin)<flowable user key>- Group to be bound to a default user (e.g. flowable_user)<authorization server name>- The name of the Okta Authorization server being used (e.g. default)<okta hostname>- The hostname for your Okta instance
spring.security.oauth2.client.registration.<name>.client-name=Okta Work
spring.security.oauth2.client.registration.<name>.client-id=<client-id>
spring.security.oauth2.client.registration.<name>.client-secret=<client-secret>
spring.security.oauth2.client.registration.<name>.scope=openid,profile,email
spring.security.oauth2.client.registration.<name>.authorization-grant-type=authorization_code
spring.security.oauth2.client.provider.flowable-work.issuer-uri=https://<okta hostname>.okta.com/oauth2/<authorization server name>
spring.security.oauth2.client.provider.<name>.user-name-attribute=preferred_username

flowable.security.oauth2.client.mapper.groups-attributes=groups
flowable.security.oauth2.client.mapper.user-definition-group-mappings[0].group-key=<admin group key>
flowable.security.oauth2.client.mapper.user-definition-group-mappings[0].user-definition-key=user-admin
flowable.security.oauth2.client.mapper.user-definition-group-mappings[1].group-key=<flowable user key>
flowable.security.oauth2.client.mapper.user-definition-group-mappings[1].user-definition-key=user-default
This will hook up Spring with Okta as an OpenID Connect provider, and it will configure the Flowable beans to extract the authorities and groups from the User Info.
OAuth2 Resource Server Configuration Properties
As a next step we need to configure the Spring Security OAuth 2.0 resource server.
In the example below the following replacements are needed:
<authorization server name>- The name of the Okta Authorization server being used (e.g. default)<okta hostname>- The hostname for your Okta instance
spring.security.oauth2.resourceserver.jwt.issuer-uri=https://<okta hostname>.okta.com/oauth2/<authorization server name>

flowable.security.oauth2.resourceserver.jwt.principal-claim-name=preferred_username
flowable.security.oauth2.resourceserver.mapper.authorities-attributes=roles
flowable.security.oauth2.resourceserver.mapper.groups-attributes=groups
This will make sure that the Flowable REST APIs are available using the Bearer Authentication Token.
The roles can also be used to assign users to a group or a tenant.
When a role is prefixed with GROUP_ then the user will be member of the group that comes after the prefix, e.g. when the role is GROUP_myCustomGroup the user will be member of the group with a key myCustomGroup.
When a role is prefixed with TENANT_ then the user will be member of the tenant that comes after the prefix, e.g. when the role is TENANT_acme the user will be member of the acme tenant.
Security Configuration
infoThis section can be skipped when you are using the out-of-the-box Flowable images.
Flowable offers an example SecurityConfiguration and SecurityActuatorConfiguration as part of the project setup.
Those configurations are for HTTP Basic authentication.
In order to use OAuth2 we would need to adapt them like this:
tipWhen you use the Flowable Initializr and select "OAuth2" as a dependency the appropriate configuration will be automatically generated.
import org.springframework.core.annotation.Order;
import org.springframework.security.config.annotation.web.builders.HttpSecurity;
import org.springframework.security.config.annotation.web.configuration.EnableWebSecurity;
import org.springframework.security.oauth2.jwt.JwtDecoder;
import org.springframework.security.web.context.HttpSessionSecurityContextRepository;

@Configuration(proxyBeanMethods = false)
@EnableWebSecurity
public class SecurityOAuth2Configuration {

    @Autowired
    protected ObjectProvider<OidcClientInitiatedLogoutSuccessHandler> oidcClientInitiatedLogoutSuccessHandlerProvider;

    @Bean
    @Order(10)
    public SecurityFilterChain oauthDefaultSecurity(HttpSecurity http, ObjectProvider<FlowableHttpSecurityCustomizer> httpSecurityCustomizers) throws Exception {
        for (FlowableHttpSecurityCustomizer customizer : httpSecurityCustomizers.orderedStream()
                .collect(Collectors.toList())) {
            customizer.customize(http);
        }

        http.exceptionHandling()
                .defaultAuthenticationEntryPointFor(new HttpStatusEntryPoint(HttpStatus.UNAUTHORIZED),
                    new RequestHeaderRequestMatcher("X-Requested-With", "XMLHttpRequest"));

        // We mark all requests as authenticated in order for the redirect to happen when the application is accessed
        http.authorizeRequests().anyRequest().authenticated();
        // Currently an HttpSessionSecurityContextRepository is needed for the oauth2 to work
        HttpSessionSecurityContextRepository securityContextRepository = new HttpSessionSecurityContextRepository();
        securityContextRepository.setDisableUrlRewriting(true);
        http.securityContext().securityContextRepository(securityContextRepository);

        http.oauth2Login();
        http.oauth2Client();

        // This line sets the logout endpoint
        http.logout().logoutUrl("/app/logout");

        // This line sets the logout success handler
        // Setting the property `flowable.security.oauth2.post-logout-redirect-url` instantiates this bean
        // and configures the return URL after logging out with the SSO provider
        oidcClientInitiatedLogoutSuccessHandlerProvider.ifAvailable(http.logout()::logoutSuccessHandler);

        // This line is only needed if you want to enable Bearer token authentication
        http.oauth2ResourceServer().jwt();

        return http.build();
    }
}
import org.springframework.core.annotation.Order;
import org.springframework.security.config.annotation.web.builders.HttpSecurity;
import org.springframework.security.config.annotation.web.configuration.EnableWebSecurity;
import org.springframework.security.oauth2.jwt.JwtDecoder;
import org.springframework.security.web.context.HttpSessionSecurityContextRepository;
import org.springframework.security.web.SecurityFilterChain;

@Configuration(proxyBeanMethods = false)
public class SecurityActuatorConfiguration {

    @Bean
    @Order(6) // Actuator configuration should kick in before the Application Login
    public SecurityFilterChain oauthActuatorSecurity(HttpSecurity http) throws Exception {

        http
                .sessionManagement()
                .sessionCreationPolicy(SessionCreationPolicy.STATELESS)
                .and()
                .csrf()
                .disable();

        http
                .requestMatcher(new ActuatorRequestMatcher())
                .authorizeRequests()
                .requestMatchers(EndpointRequest.to(InfoEndpoint.class, HealthEndpoint.class)).permitAll()
                .requestMatchers(EndpointRequest.toAnyEndpoint()).hasAuthority(SecurityConstants.ACCESS_ACTUATORS)
                .anyRequest().denyAll();

        http.oauth2Login();
        http.oauth2Client();

        // This line is only needed if you want to enable Bearer token authentication
        http.oauth2ResourceServer().jwt();

        return http.build();
    }
}
We can now start the application and head to http://localhost:8080.
We will be redirected to the Okta SSO login.
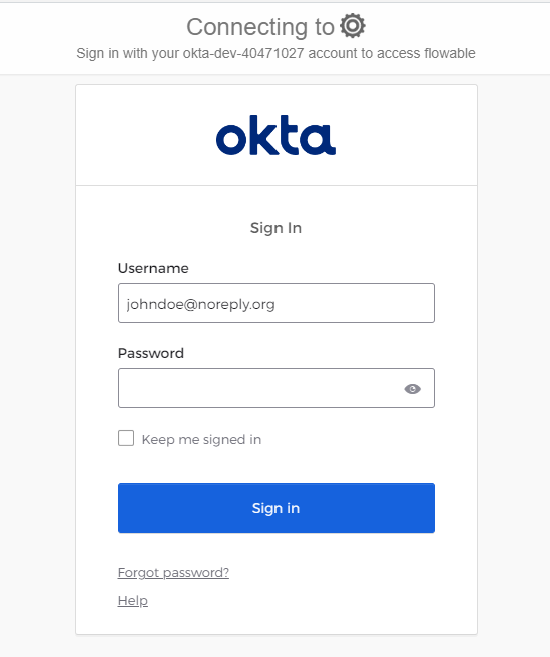
Once you have signed in you will be redirected to the Flowable Work User Interface.
Conclusion
Using external services such as Okta are easily enabled from Flowable as it uses the Spring Security modules. A similar approach to what is documented above could be taken for any OAuth2 compatible directory server.