Java Programming Extensions
Create a Custom Project
Flowable Work and Engage applications are based on Spring Boot and therefore require it as a base for any development environment.
 tip
tipCheck-out the setup page in case you haven't setup your environment yet.
Spring Boot Skeleton
The easiest way to set up a project is to generate a Flowable Project by using the Flowable Initializr.
Generate a project with the Flowable Work, Frontend, Inspect, actuator, and DB of your choice as dependencies. If you want to manually create a project or a project using the Spring Initializr then also read the following sections:
- Dependency Management
- Flowable Work Dependencies
- Flowable Engage Dependencies
- Embedded Front End
- Demo Dependencies
- Java Configuration
Otherwise, you can skip directly to the User Definitions section
Dependency Management
With the help of Maven dependency management, you can delegate the specifying of the correct versions of all the dependencies to a BOM (Bill of Materials). The BOM defines and provides all the specific version information for all direct and transient dependencies. You need to define the to-be-used Flowable version one by to use the correct BOM.
Add the following section to the pom.xml file of the project you just
created as a child tag of the <project> tag:
 <dependencyManagement>
    <dependencies>
        <!-- Imports the bill-of-materials POM. -->
        <dependency>
            <groupId>com.flowable</groupId>
            <artifactId>flowable-platform-bom</artifactId>
            <version>${com.flowable.platform.version}</version>
            <type>pom</type>
            <scope>import</scope>
        </dependency>
    </dependencies>
</dependencyManagement>
Choose the Flowable version either by replacing the
${com.flowable.platform.version} part with a Flowable version
number or by defining an appropriate Maven parameter
specifying the version you require.
Flowable Work Dependencies
Flowable Work utilizes multiple maven dependencies to access the required Flowable services.
Depending on the project needs add the following dependencies to set up a Flowable Work project.
<!-- Flowable Work Mandatory -->
<!-- =============== -->
<!-- REST and Java APIs to run headless Flowable Work -->
<dependency>
    <groupId>com.flowable.platform</groupId>
    <artifactId>flowable-spring-boot-starter-platform-rest</artifactId>
</dependency>

<!-- Flowable Work Recommended -->
<!-- =============== -->
<!-- Contains all Flowable Actuator and Spring Boot Actuator configuration -->
<dependency>
    <groupId>com.flowable.platform</groupId>
    <artifactId>flowable-spring-boot-starter-platform-actuator</artifactId>
</dependency>

<!-- Flowable Work Optional -->
<!-- =============== -->
<!-- Support loading users from a tenant json file -->
<dependency>
    <groupId>com.flowable.platform</groupId>
    <artifactId>flowable-tenant-setup</artifactId>
</dependency>
<!-- Default models provided by the product for Flowable Work -->
<dependency>
    <groupId>com.flowable.platform</groupId>
    <artifactId>flowable-platform-default-models</artifactId>
</dependency>
Flowable Engage Dependencies
Flowable Engage utilizes multiple maven dependencies to access the required Flowable services.
Depending on the project needs, add the following dependencies to set up a Flowable Engage project:
<!-- Flowable Engage Mandatory -->
<!-- =============== -->
<!-- REST and Java APIs to run headless Flowable Engage -->
<dependency>
    <groupId>com.flowable.engage</groupId>
    <artifactId>flowable-spring-boot-starter-engage-rest</artifactId>
</dependency>

<!-- Flowable Engage Recommended -->
<!-- =============== -->
<!-- Contains all Flowable Actuator and Spring Boot Actuator configuration -->
<dependency>
    <groupId>com.flowable.platform</groupId>
    <artifactId>flowable-spring-boot-starter-platform-actuator</artifactId>
</dependency>

<!-- Flowable Engage Optional -->
<!-- =============== -->
<!-- Support loading users from a tenant json file -->
<dependency>
    <groupId>com.flowable.platform</groupId>
    <artifactId>flowable-tenant-setup</artifactId>
</dependency>
<!-- Default models provided by the product for Flowable Work -->
<dependency>
    <groupId>com.flowable.platform</groupId>
    <artifactId>flowable-platform-default-models</artifactId>
</dependency>
<!-- Default models provided by the product for Flowable Engage -->
<dependency>
    <groupId>com.flowable.engage</groupId>
    <artifactId>flowable-engage-default-models</artifactId>
</dependency>
If you are using Flowable Engage with a third party messaging services then add the appropriate dependency matching your provider from the example below:
<!-- Flowable Engage 3rd Party Messaging -->
<!-- =============== -->
<dependency>
    <groupId>com.flowable.engage</groupId>
    <artifactId>flowable-spring-boot-starter-engage-external-whatsapp</artifactId>
</dependency>
<dependency>
    <groupId>com.flowable.engage</groupId>
    <artifactId>flowable-spring-boot-starter-engage-external-wechat</artifactId>
</dependency>

<!-- ActiveMQ JMS implementation -->
<!-- =============== -->
<dependency>
    <groupId>org.springframework.boot</groupId>
    <artifactId>spring-boot-starter-activemq</artifactId>
</dependency>
Flowable Inspect Dependencies
To add Flowable Inspect to your application, add the following dependency:
<dependency>
    <groupId>com.flowable.inspect</groupId>
    <artifactId>flowable-spring-boot-starter-inspect-rest</artifactId>
</dependency>
Then enable it with the following property:
flowable.inspect.enabled=true
Note that you need an appropriate license to enable Flowable Inspect. In addition to that it is not recommended to enable Flowable Inspect in your production environment.
Embedded Front End
Flowable provides a dedicated JavaScript front end that can either be deployed to any HTML capable server or run embedded directly within the Flowable Server.
To run the front end embedded within the Flowable Server, add the following
dependency to the pom.xml file of the project:
<dependency>
    <groupId>com.flowable.work</groupId>
    <artifactId>flowable-work-frontend</artifactId>
</dependency>
 note
noteThe front end provides user interfaces for both Flowable Work and Flowable Engage. The Engage user interface is deactivated if only Work features are available.
Demo Dependencies
In case you want to set up a demo project with some default users and default user definitions, you can add the following dependencies:
Flowable Work Demo Dependencies.
<dependency>
    <groupId>com.flowable.platform</groupId>
    <artifactId>flowable-platform-default-idm-models</artifactId>
</dependency>
<dependency>
    <groupId>com.flowable.platform</groupId>
    <artifactId>flowable-platform-example-apps</artifactId>
</dependency>
Flowable Engage Demo Dependencies.
<dependency>
    <groupId>com.flowable.engage</groupId>
    <artifactId>flowable-engage-default-idm-models</artifactId>
</dependency>
<dependency>
    <groupId>com.flowable.engage</groupId>
    <artifactId>flowable-engage-example-apps</artifactId>
</dependency>
Without the flowable-platform-default-idm-models or flowable-engage-default-idm-models dependency your system won't have any user definitions and users.
This means that you can't sign in to Flowable.
In this case, please remember to configure the User Definitions and Tenant Configuration.
Java Configuration
Before starting the application you need to add some Java configuration classes.
Main Class Configuration
noteIf you are creating a Flowable Engage application, then annotate the main class
with @EnableWebSocketMessageBroker as well.
Application Security Configuration
Next, to the main application, add the following Security configuration for the main application.
import org.springframework.beans.factory.ObjectProvider;
import org.springframework.context.annotation.Bean;
import org.springframework.context.annotation.Configuration;
import org.springframework.core.annotation.Order;
import org.springframework.http.HttpStatus;
import org.springframework.security.config.Customizer;
import org.springframework.security.config.annotation.web.builders.HttpSecurity;
import org.springframework.security.config.annotation.web.configuration.EnableWebSecurity;
import org.springframework.security.web.SecurityFilterChain;
import org.springframework.security.web.authentication.HttpStatusEntryPoint;
import org.springframework.security.web.util.matcher.AnyRequestMatcher;

import com.flowable.autoconfigure.security.FlowableHttpSecurityCustomizer;
import com.flowable.autoconfigure.security.servlet.PlatformPathRequest;
import com.flowable.core.spring.security.web.authentication.AjaxAuthenticationFailureHandler;
import com.flowable.core.spring.security.web.authentication.AjaxAuthenticationSuccessHandler;
import com.flowable.platform.common.security.SecurityConstants;

@Configuration(proxyBeanMethods = false)
@EnableWebSecurity
public class SecurityConfiguration {

    @Bean
    @Order(10)
    public SecurityFilterChain basicDefaultSecurity(HttpSecurity http, ObjectProvider<FlowableHttpSecurityCustomizer> httpSecurityCustomizers) throws Exception {
        for (FlowableHttpSecurityCustomizer customizer : httpSecurityCustomizers.orderedStream().toList()) {
            customizer.customize(http);
        }

        http
                .logout(logout -> logout.logoutUrl("/auth/logout").logoutSuccessUrl("/"))
                // Non authenticated exception handling. The formLogin and httpBasic configure the exceptionHandling
                // We have to initialize the exception handling with a default authentication entry point in order to return 401 each time and not have a
                // forward due to the formLogin or the http basic popup due to the httpBasic
                .exceptionHandling(exceptionHandling -> exceptionHandling.defaultAuthenticationEntryPointFor(new HttpStatusEntryPoint(HttpStatus.UNAUTHORIZED),
                        AnyRequestMatcher.INSTANCE))
                .formLogin(formLogin -> formLogin
                        .loginProcessingUrl("/auth/login")
                        .successHandler(new AjaxAuthenticationSuccessHandler())
                        .failureHandler(new AjaxAuthenticationFailureHandler()))
                .authorizeHttpRequests(configurer -> configurer
                        .requestMatchers(PlatformPathRequest.toStaticResources().atCommonLocations()).permitAll()
                        .anyRequest().authenticated()
                )
                .httpBasic(Customizer.withDefaults());

        return http.build();
    }
}
By default, a remember-me cookie is used and no session context stored. If you wish to disable the remember-me cookie feature, you will need to provide a session security context repository.
Actuator Security Configuration
Next, to the main application, add the following Security configuration for the actuator endpoints.
import org.springframework.boot.actuate.autoconfigure.security.servlet.EndpointRequest;
import org.springframework.boot.actuate.health.HealthEndpoint;
import org.springframework.boot.actuate.info.InfoEndpoint;
import org.springframework.context.annotation.Bean;
import org.springframework.context.annotation.Configuration;
import org.springframework.core.annotation.Order;
import org.springframework.security.config.Customizer;
import org.springframework.security.config.annotation.web.builders.HttpSecurity;
import org.springframework.security.config.annotation.web.configurers.AbstractHttpConfigurer;
import org.springframework.security.config.http.SessionCreationPolicy;
import org.springframework.security.web.SecurityFilterChain;

import com.flowable.actuate.autoconfigure.security.servlet.ActuatorRequestMatcher;
import com.flowable.platform.common.security.SecurityConstants;

@Configuration
public class SecurityActuatorConfiguration {

    @Bean
    @Order(6) // Actuator configuration should kick in before the Form Login there should always be HTTP basic for the endpoints
    public SecurityFilterChain basicActuatorSecurity(HttpSecurity http) throws Exception {

        http
                .sessionManagement(sessionManagement -> sessionManagement.sessionCreationPolicy(SessionCreationPolicy.STATELESS))
                .csrf(AbstractHttpConfigurer::disable);

        http
                .securityMatcher(new ActuatorRequestMatcher())
                .authorizeHttpRequests(configurer -> configurer
                        .requestMatchers(EndpointRequest.to(InfoEndpoint.class, HealthEndpoint.class)).permitAll()
                        .requestMatchers(EndpointRequest.toAnyEndpoint()).hasAuthority(SecurityConstants.ACCESS_ACTUATORS)
                        .anyRequest().denyAll())
                .httpBasic(Customizer.withDefaults());

        return http.build();
    }
}
Flowable Engage WebSocket Security Configuration
If you are creating a Flowable Engage application, then you need to add the following security configuration for the application.
import org.springframework.context.annotation.Bean;
import org.springframework.context.annotation.Configuration;
import org.springframework.messaging.Message;
import org.springframework.messaging.support.ChannelInterceptor;
import org.springframework.security.authorization.AuthorizationManager;
import org.springframework.security.config.annotation.web.socket.EnableWebSocketSecurity;
import org.springframework.security.messaging.access.intercept.MessageMatcherDelegatingAuthorizationManager;
import org.springframework.security.messaging.web.csrf.CsrfChannelInterceptor;

import com.flowable.autoconfigure.security.FlowablePlatformSecurityProperties;
import com.flowable.engage.autoconfigure.websocket.WebSocketMessageBrokerProperties;

@Configuration(proxyBeanMethods = false)
@EnableWebSocketSecurity
public class WebSocketSecurityConfiguration {

    @Bean
    public AuthorizationManager<Message<?>> webSocketAuthorizationManager(MessageMatcherDelegatingAuthorizationManager.Builder messages,
            WebSocketMessageBrokerProperties brokerProperties) {
        // In case there are destination prefixes deny all of them as they are forwarded to the broker
        String[] destinationPrefixes = brokerProperties.getDestinationPrefixes();
        if (destinationPrefixes != null) {
            for (String destinationPrefix : destinationPrefixes) {
                messages.simpMessageDestMatchers(destinationPrefix + "/**").denyAll();
            }
        }
        messages.anyMessage().authenticated();
        return messages.build();
    }

    @Bean
    public ChannelInterceptor csrfChannelInterceptor(FlowablePlatformSecurityProperties flowableSecurityProperties) {
        if (flowableSecurityProperties.getRest().getCsrf().isEnabled()) {
            return new CsrfChannelInterceptor();
        }
        return new ChannelInterceptor() {

        };
    }
}
User Definitions
Flowable applications can manage the features and permissions of an application used by definition user definitions.
User definitions follow a template pattern for each different type of user using the system. There are different patterns for administrators, operators, clients, etc. The user types also have different feature sets available: member groups, permissions, etc.
To define user definitions for a Flowable application, you need to create a file under:
src/main/resources/com/flowable/users/custom/<user-definitions>.user.json
Where <user-definitions> is a meaningful name for the set of user definitions.
The complete list of allowedFeatures are detailed in the following examples.
Example of Flowable Work User Definitions.
[
  {
    "key": "admin",
    "name": "Flowable Administration User",
    "allowedFeatures": [
        "cases",
        "changeContactPassword",
        "changeOwnPassword",
        "contacts",
        "createUser",
        "createWork",
        "editContactAvatar",
        "editOwnAvatar",
        "processes",
        "reports",
        "reportsMetrics",
        "tasks",
        "templateManagement",
        "work",
        "actuators",
        "user-mgmt"
    ]
  }
]
Example of Flowable Engage User Definitions.
[
  {
    "key": "admin",
    "name": "Flowable Administration User",
    "allowedFeatures": [
        "audioMessage",
        "bubbles",
        "cases",
        "changeContactPassword",
        "changeOwnPassword",
        "clearMessage",
        "contacts",
        "createConversation",
        "createUser",
        "createWork",
        "editContactAvatar",
        "editConversationAvatar",
        "editMessage",
        "editOwnAvatar",
        "emojiPicker",
        "fileUpload",
        "inputValidation",
        "markdownInput",
        "processes",
        "reports",
        "reportsMetrics",
        "sendMessageFromProfile",
        "slashActions",
        "tasks",
        "templateManagement",
        "videoMessage",
        "websockets",
        "work",
        "actuators",
        "user-mgmt"
    ]
  }
]
This table details which feature is available in each product and is associated with a short description of the use of that feature.
| allowedFeature | Work | Engage | Description |
|---|---|---|---|
| accessLicense | x | x | Allows the user to access the License tab in user settings |
| actuators | x | x | Grant access to Spring Boot actuators endpoints |
| audioMessage | x | Show icon to send an audio message | |
| bubbles | x | Enable message area view as bubbles | |
| changeContactPassword | x | x | Show a tab to change the user password |
| changeOwnPassword | x | x | Allows the user to change their own password from user settings |
| changeOwnTheme | x | x | Allows the user to change their own theme from user settings |
| clearMessage | x | Enables message toolbar with delete button to delete a sent message | |
| compliance | x | Enables the Compliance app | |
| confirmOnSave | x | x | Show confirmation alter when saving contact info in the contact details view |
| contacts | x | x | Enables the Contacts app |
| conversations | x | Enables the Conversations | |
| conversationSearch | x | Enable searching in a single conversation | |
| copyText | x | x | Allows copying the infos from the contact and license details view. In Engage it lets you to also copy info from slash actions in the conversation input |
| createConversation | x | Creating conversations allowed | |
| createUser | x | x | Creating users allowed |
| createWork | x | x | Starting workflows (cases / processes) allowed |
| deferPlatformUIBoot | x | x | Used to defer the Flowable UI boot, mostly used in custom.js where the developer can then manually boot the UI using wnd.flowable.boot() |
| deleteMessage | x | Allows the user to delete a message in a conversation | |
| deliveryStatus | x | Show message delivery status | |
| dashboards | x | x | Enables the Dashboards app |
| deployDesign | x | x | Allows the user to deploy applications from Design in Work through Work |
| disableDatatableFavorites | x | x | Disables favorites management in forms Datatable component |
| disableDefaultMarkdownListNumbering | x | Disables Markdown’s default behavior of sequential numbering in ordered lists, allowing custom numbering with gaps. v3.17.9+2025.1.02+ | |
| disableFormsDebug | x | x | Disables forms debugger, preventing the forms debugger to be shown programmatically |
| disableGeneralNewContactButton | x | x | Removes the create new contact button from the UI |
| disableGeneralNewConversationButton | x | x | Removes the create new conversation button from the UI |
| disableGeneralNewTaskButton | x | x | Removes the create new task button from the UI |
| disableGeneralNewWorkButton | x | x | Removes the create new instance button from the UI |
| disableGlobalNavigationBar | x | x | Removes the global navigation bar from the UI. 2025.1.01+ |
| disableGlobalNavigationSearch | x | x | Removes the global navigation search from the UI. 2025.1.01+ |
| disableGoToNextTask | x | x | Disables the navigation to the next task after completing a task |
| disableLockFocus | x | x | Allows the user to navigating outside the platform UI using keyboard |
| disableMessageMultiSelect | x | Disables multi selection of messages in a conversation | |
| disableTaskClaimConfirmation | x | x | Disables the confirmation dialog when claiming a task |
| displayMessageToolbar | x | Show the message toolbar | |
| documents | x | x | Enables the Documents app |
| editContactAvatar | x | x | Show a tab to modify the user avatar |
| editConversationAvatar | x | Allows changing the conversation image | |
| editConversationTitle | x | Allows the user to change the title of a conversation | |
| editCollapsibleSwitcher | x | x | Allows the user to change the title of a conversation |
| editMessage | x | Enables message toolbar with an edit button to modify a sent message | |
| editOwnAvatar | x | Allows the user to modify their own avatar from user settings | |
| emojiPicker | x | Show an icon to display an emoji panel | |
| enableCollapsibleSwitcher | x | x | Allows collapsing the left hand section of Work / Engage |
| enableCompleteOutcome | x | x | The complete button should always be enabled, even if the form is invalid |
| enableDesignIntegration | x | x | Enables the Design App in Work / Engage |
| enableFormAutoSave | x | x | Enables autosave for task forms |
| fileUpload | x | Show icon to upload a file | |
| forwardMessage | x | Enables the icon to forward a message | |
| hideFormSaveIndicator | x | x | When enableFormAutoSave is set, this can be enabled to hide the saving indicator |
| hideLanguage | x | x | Hides language selection tab from user settings |
| housekeeping | x | x | Allows users to access the housekeeping REST APIs |
| impersonateUser | x | x | Allows the user to impersonate another user (precondition: flowable.security.impersonate.allowed must be set to true) |
| inputValidation | x | Show an error tooltip when sending a message fails | |
| labs | x | x | Makes available a special route /labs in the frontend to toggle locally product features. Note that changing manually some of these features could lead into unexpected results, many of the features listed here are experimental and could change or be removed in subsequent releases |
| lastReadAvatars | x | Shows the avatar of the users that read a message | |
| licenseValidationInfo | x | x | Allows the user to access license validation information via the REST API |
| login | x | x | Enables the Flowable login UI. Note: this if you are using OAuth2 you don't need to change anything for this feature |
| logout | x | x | Disables the logout menu from the user profile |
| markdownInput | x | Allows Markdown in messages | |
| mobileLogin | x | x | Show an extra tab in the user settings to display a QR code for login using the Flowable mobile app |
| opaqueNotifications | x | Do not display message contents in desktop notification, i.e. show "You have received a new message" instead of message preview | |
| personalAccessTokens | x | x | Allows users to creat their own personal access tokens for accessing the applications over REST (precondition: flowable.platform.idm.token-signing-secret must have a value set) |
| plainTextWithLinks | x | Render links in plain text messages, by default links are not displayed in plain text messages | |
| reactToMessage | x | Enables the icon to react to a message | |
| refreshTaskListOnComplete | x | x | Refresh the task list after completing a task |
| registerDevice | x | Allows the user to register a device | |
| replyToMessage | x | Enables the icon to reply to a message | |
| reports | x | x | Enables the Reports app and grants access to the reports-api |
| reportsMetrics | x | x | Enables the Metrics app |
| sendMessageFromProfile | x | Redirect Conversations chat from People tab or from the Contact details header | |
| sequenceValueManagement | x | x | Allows the user to manage sequence values over REST |
| showActualDateInfo | x | x | Display timestamps instead of relative time periods in the UI |
| showPdfWithAuth | x | x | Use regular url in pdf preview instead of using axios to fetch the data |
| slashActions | x | slash actions are allowed from the input message area | |
| snooze | x | Allows the user to mute the browser notification popup on new messages in the webapp | |
| tasks | x | x | Enables the Tasks app |
| templateManagement | x | x | Enables the Templates app |
| tenantDataInQueries | x | x | Allows users accessing all tenant data when using queries in Dashboards |
| themeManagement | x | x | Grant access to theme management |
| topNavigationBar | x | x | Renders a navigation bar at the top |
| useDownloadUrls | x | x | Use regular download links instead of using axios to download files |
| useNavigatorLanguage | x | x | Use browser selected language instead of the current user configured language |
| user-mgmt | x | x | Grant access to identity management |
| videoMessage | x | Show icon to send a video message | |
| websockets | x | x | Enables the use of websockets in the frontend or long polling as fallback if websockets are blocked. |
| work | x | x | Enables the Work app |
| workDesign | x | x | Grants access to Design through Work |
noteChanging manually some of these features could lead into unexpected results, many of the features listed here are experimental and could change or be removed in subsequent releases
Tenant Configuration
Flowable applications support different identity providers and authorization types.
Flowable provides an internal identity management (IDM) component that can manage tenants, users, groups, and privileges. The internal IDM component is populated with tenants, users, and groups defined in a tenant file. This file is read and loaded at the first boot of the application (if there are no existing users defined).
To define a tenant for a Flowable application you need to create a file under:
src/main/resources/com/flowable/tenant-setup/custom/<tenants>.json
where <tenants> is a meaningful name for the set of tenant definitions.
For example, the tenant JSON file for the demo tenant is named demo.json.
A tenantKey is defined in the file that is unique to this group of users for this tenant.
The tenant file looks like:
{
  "name": "Flowable Demo",
  "tenantKey": "demo",
  "groups": [
    {
      "key": "flowableAdministrator",
      "name": "Flowable Administrator"
    },
    {
      "key": "flowableUser",
      "name": "Flowable User"
    }
  ],
  "users": [
    {
      "firstName": "Flowable",
      "lastName": "Admin",
      "login": "admin",
      "email": "admin@demo.flowable.io",
      "language": "en",
      "theme": "flowable",
      "userDefinitionKey": "admin"
    }
  ]
}
A tenant setup without tenantKey has all the users and groups created in the default tenant.
Database configuration
The project also requires the addition of properties for the database in the application properties file. The appropriate values for the following properties are required:
spring.datasource.url=
spring.datasource.username=
spring.datasource.password=
Infrastructure and Initial Startup
You now have a minimal setup with which you can run the application. However, before running the application, you need to set up the appropriate infrastructure for the Flowable Application.
License
A Flowable application also requires that you have
a valid license for the Product you are trying to access.
The license is either stored on the file system or in the database.
If the license is provided as a file, then it is
typically located in the .flowable folder of your home directory.
On Unix or macOS the file is ~/.flowable/flowable.license.
The location of the license file can be changed in the application.properties
file.
flowable.license.location=file:/myCustomLocation/flowable.license
To store the license in the database, then the following property must be set in
the applications.properties file:
flowable.license.db-store-enabled=true
With the license database store mode enabled a license is uploaded using any Flowable application.
Elasticsearch
Next, download Elasticsearch (any version in the 7.x line). You can download 7.10.0 from here.
Once the package is downloaded, you should expand it and then run it by executing bin/elasticsearch (bin\elasticsearch.bat on Windows).
By default, Elasticsearch runs in the foreground and prints the logs
in the console.
You can stop Elasticsearch by pressing Ctrl-C.
You can test that your Elasticsearch is running by sending an HTTP GET request to port 9200 on localhost (by going to http://localhost:9200/ in your browser).
More information about the Elasticsearch installation procedure is found at the official ElasticSearch setup guide.
Database
This depends on the database that you are using in your project.
ActiveMQ (Engage)
You only need this step if you are using Flowable Engage. If you are using Flowable Work you can skip this step.
You can download ActiveMQ 5.15.9 from here.
Once the package is downloaded, you can expand it and then run it by executing bin/activemq start (bin\activemq start on Windows).
ActiveMQ starts in the background.
You can stop the broker by executing bin/activemq stop (bin\activemq stop in Windows).
noteAlternatively, you can run bin/activemq console to have ActiveMQ run in the foreground (and stop it by doing a CTRL-C).
More information about the ActiveMQ 5.15.9 (latest stable version of the 5.15.x line at the time of writing this guide) installation procedure can be found in the office ActiveMQ setup guide.
Application Startup
Once you have the required infrastructure started you can start the main application in your favorite IDE.
If you have not changed the defaults in the application.properties you can
access the application by going to http://localhost:8080/ in your browser.
Test a Custom Project
Create a Custom Project described how to create a custom project. This section describes how to write tests for a Flowable Project using Spring Boot auto-configuration.
Dependency Management
The Flowable team recommends using JUnit 5 for testing. Junit 5 requires adding the following dependencies:
<dependency>
    <groupId>org.springframework.boot</groupId>
    <artifactId>spring-boot-starter-test</artifactId>
    <scope>test</scope>
    <exclusions>
        <exclusion>
            <groupId>org.junit.vintage</groupId>
            <artifactId>junit-vintage-engine</artifactId>
        </exclusion>
    </exclusions>
</dependency>
<dependency>
    <groupId>org.junit.jupiter</groupId>
    <artifactId>junit-jupiter-engine</artifactId>
    <scope>test</scope>
</dependency>
<dependency>
    <groupId>org.junit.jupiter</groupId>
    <artifactId>junit-jupiter-params</artifactId>
    <scope>test</scope>
</dependency>
In the spring-boot-starter-test dependency we exclude the JUnit 4 dependency
and add junit-jupiter-engine and the junit-jupiter-params.
This configuration provides all the required dependencies to write tests.
Testing Infrastructure
Before we start writing our tests, we are going to create a meta-annotation that has all the needed components for the test.
@Target(ElementType.TYPE)
@Retention(RetentionPolicy.RUNTIME)
@Documented
@Inherited
@ExtendWith(SpringExtension.class)
@ExtendWith(ActionExtension.class)
@ExtendWith(DataObjectExtension.class)
@ExtendWith(EngageExtension.class)
@ExtendWith(FlowableAppExtension.class)
@ExtendWith(FlowableSpringExtension.class)
@ExtendWith(FlowableCmmnSpringExtension.class)
@ExtendWith(FlowableFormSpringExtension.class)
@ExtendWith(FlowableDmnSpringExtension.class)
@ExtendWith(PlatformIdmExtension.class)
@ExtendWith(PolicyExtension.class)
@ExtendWith(ServiceRegistryExtension.class)
@ExtendWith(TemplateExtension.class)
@ExtendWith(TenantSetupExtension.class)
@SpringBootTest
@ActiveProfiles("test")
public @interface CustomAppSpringBootTest {

    @AliasFor(annotation = SpringBootTest.class, attribute = "webEnvironment")
    SpringBootTest.WebEnvironment webEnvironment() default SpringBootTest.WebEnvironment.MOCK;
}
Let us go over what we just did.
-
The
@ActiveProfiles("test")annotation activates the test profile and the properties fromapplication-test.propertiesare used in your test. -
The
@SpringBootTestis an annotation from Spring Boot for marking the test as a Spring Boot test. This annotation takes care of finding your main Application and allows you to customize the Spring Context. -
The
SpringExtensionis the JUnit 5 extension for integrating with the Spring TestContext Framework. -
The
ActionExtensionextension allows for the use of @ActionDefinitionDeployment in your tests. -
The
DataObjectExtensionextension allows for the use of @DataObjectDefinitionDeployment in your tests. -
The
EngageExtensionextension allows for the use of @ConversationDefinitionDeployment in your tests. -
The
FlowableAppExtensionextension allows for the use of @AppDeployment in your tests. -
The
FlowableSpringExtensionextension allows for the use of @Deployment in your tests. -
The
FlowableCmmnSpringExtensionextension allows for the use of @CmmnDeployment in your tests. -
The
FlowableFormSpringExtensionextension allows for the use of @FormDeploymentAnnotation in your tests. -
The
FlowableDmnSpringExtensionextension allows for the use of@DmnDeploymentAnnotationin your tests. -
The
PolicyExtensionextension allows for the use of @PolicyDefinitionDeployment in your tests. -
The
PlatformIdmExtensionextension allows for the use of @UserDefinitionDeployment and @UserAccountDefinitionDeployment in your tests. -
The
ServiceRegistryExtensionextension allows for the use of @ServiceDefinitionDeployment in your tests. -
The
TemplateExtensionextension allows for the use of @TemplateDefinitionDeployment in your tests. -
The
TenantSetupExtensionextension allows for the use of@TenantDeploymentin your tests.
With @AliasFor you can add the options from the @SpringBootTest into your own annotation.
We are also going to add an application-test.properties file in our test resources.
This file allows us to override some properties in our test and set some
properties that would make it easier to write tests.
# Add a custom prefix for the indices in the tests.
# This would make sure that we can run tests and run the application at the same time
flowable.indexing.index-name-prefix=test-custom-app-

# To make our life easier in tests we are are disabling the async executor
flowable.async-executor-activate=false
flowable.async-history-executor-activate=false
flowable.content.async-executor-activate=false
Once the async executors and async history executors are deactivated all timers, async jobs and history jobs do not run automatically. If you need to test process or cases with timers with async tasks, then you need to execute those jobs manually. If you need to tests with indexing or the history services, then you need to execute the history jobs manually.
Writing a Test
We now have all the components for writing a Flowable Test. The following code provides an example of the testing infrastructure. These lines are of particular importance:
-
Line 3: Use the custom meta-annotation we built earlier.
-
Line 22: Deploy the process located in the classpath resource
com/example/app/complexProcess.bpmn. -
Line 23: Deploy the case located in the classpath resource
com/example/app/complexCase.cmmn.
import static org.assertj.core.api.Assertions.assertThat;

@CustomAppSpringBootTest
class CustomTest {

    @Autowired
    protected ManagementService managementService;

    @Autowired
    protected RuntimeService runtimeService;

    @Autowired
    protected CmmnRuntimeService cmmnRuntimeService;

    @Autowired
    protected CmmnTaskService cmmnTaskService;

    @Autowired
    protected CmmnHistoryService cmmnHistoryService;

    @Test
    @Deployment(resources = "com/example/app/complexProcess.bpmn")
    @CmmnDeployment(resources = "com/example/app/complexCase.cmmn")
    void testMyComplexCase() {
        CaseInstance caseInstance = cmmnRuntimeService.createCaseInstanceBuilder()
            .caseDefinitionKey("complexCase")
            .start();

        Task task = cmmnTaskService.createTaskQuery()
            .caseInstanceId(caseInstance.getId())
            .singleResult();

        assertThat(task).isNotNull();

        HistoricTaskInstance historicTask = cmmnHistoryService.createHistoricTaskInstanceQuery()
            .caseInstanceId(caseInstance.getId())
            .singleResult();
        assertThat(historicTask).isNotNull();
    }
}
Writing a REST Test
To write proper REST tests, we need to change the webEnvironment of our
tests to RANDOM_PORT (see line 3):
import static org.assertj.core.api.Assertions.assertThat;

@CustomAppSpringBootTest(webEnvironment = SpringBootTest.WebEnvironment.RANDOM_PORT)
class CustomRestTest {

    @Autowired
    protected TestRestTemplate restTemplate;

    @Autowired
    protected ObjectMapper objectMapper;

    @Autowired
    protected ManagementService managementService;

    @Autowired
    protected CmmnRepositoryService cmmnRepositoryService;

    @Test
    @Deployment(resources = "com/example/app/complexProcess.bpmn")
    @CmmnDeployment(resources = "com/example/app/complexCase.cmmn")
    void testMyComplexCase() {
        CaseDefinition caseDefinition = cmmnRepositoryService.createCaseDefinitionQuery()
            .caseDefinitionKey("complexCase")
            .singleResult();
        ObjectNode request = objectMapper.createObjectNode();
        request.put("name", "Test Case");
        request.put("customerName", "Homer Simpson");
        request.put("accountNumber", "X");
        request.put("caseDefinitionId", caseDefinition.getId());

        ResponseEntity<JsonNode> response = restTemplate.withBasicAuth("myTestUser", "myTestUserPass")
            .postForEntity("/platform-api/case-instances", request, JsonNode.class);

        assertThat(response.getStatusCode()).as(response.toString()).isEqualTo(HttpStatus.OK);

        JsonNode bodyNode = response.getBody();

        assertThat(bodyNode).isNotNull();

        String caseInstanceId = bodyNode.get("id").textValue();

        response = restTemplate.withBasicAuth("myTestUser", "myTestUserPass")
            .getForEntity("/cmmn-api/cmmn-runtime/tasks?caseInstanceIdWithChildren={caseInstanceId}", JsonNode.class, caseInstanceId);

        assertThat(response.getStatusCode()).as(response.toString()).isEqualTo(HttpStatus.OK);
    }
}
Testing a Flowable Engine
Testing in a Project described how to test a Flowable custom project. This section outlines how to write tests with a single Flowable Work Engine.
noteThe Spring Boot and Flowable Orchestrate auto-configuration for creating the basic configuration are still used.
Dependency Management
The Flowable team recommends using JUnit 5 for testing. To use JUnit 5, we need to add some dependencies to the pom.xml file. In addition, we are going to take the testing of the Action Engine as our example.
<dependency>
    <groupId>com.flowable.core</groupId>
    <artifactId>flowable-spring-boot-starter-process</artifactId>
    <scope>test</scope>
</dependency>
<dependency>
    <groupId>com.flowable.core</groupId>
    <artifactId>flowable-form-spring-configurator</artifactId>
    <scope>test</scope>
</dependency>

<dependency>
    <groupId>org.springframework.boot</groupId>
    <artifactId>spring-boot-starter-test</artifactId>
    <scope>test</scope>
    <exclusions>
        <exclusion>
            <groupId>org.junit.vintage</groupId>
            <artifactId>junit-vintage-engine</artifactId>
        </exclusion>
    </exclusions>
</dependency>
<dependency>
    <groupId>org.junit.jupiter</groupId>
    <artifactId>junit-jupiter-engine</artifactId>
    <scope>test</scope>
</dependency>
<dependency>
    <groupId>org.junit.jupiter</groupId>
    <artifactId>junit-jupiter-params</artifactId>
    <scope>test</scope>
</dependency>
In the example pom.xml we add the flowable-spring-boot-starter-process,
as this contains all the dependencies for booting the Process Engine.
In the spring-boot-starter-test dependency we exclude the JUnit 4 dependency
and add junit-jupiter-engine and the junit-jupiter-params.
This configuration provides all the required dependencies to write tests.
Testing Infrastructure
Before we start writing our tests, we need to define a custom
Spring Boot Application and the basic configuration for our engine.
The base package for our engine is com.flowable.action.engine.
In src/test/java we add a package com.flowable.action.engine.application
that contains our TestApplication and TestConfiguration.
@SpringBootApplication
public class TestApplication {

    public static void main(String[] args) {
        SpringApplication.run(TestApplication.class, args);
    }

}

@Configuration
public class ActionEngineTestConfiguration {

    @Autowired(required = false)
    private Collection<EngineConfigurationConfigurer<ActionEngineConfiguration>> configurers = new ArrayList<>();

    @Bean
    public ActionEngineConfiguration actionEngineConfiguration(DataSource dataSource, PlatformTransactionManager platformTransactionManager, ObjectMapper objectMapper) {
        ActionEngineConfiguration engineConfiguration = new ActionEngineConfiguration();

        engineConfiguration.setTransactionManager(platformTransactionManager);
        engineConfiguration.setDataSource(dataSource);
        engineConfiguration.setObjectMapper(objectMapper);

        configurers.forEach(configurer -> configurer.configure(engineConfiguration));

        return engineConfiguration;
    }

    @Bean
    public EngineConfigurationConfigurer<SpringProcessEngineConfiguration> actionProcessEngineConfigurationConfigurer(
            ActionEngineConfigurator actionEngineConfigurator,
            FormEngineConfigurator formEngineConfigurator) {

        return processEngineConfiguration -> {
            processEngineConfiguration.setDisableIdmEngine(true);
            processEngineConfiguration
                .addConfigurator(actionEngineConfigurator)
                .addConfigurator(formEngineConfigurator);
        };
    }

    @Bean
    public ActionEngineConfigurator actionEngineConfigurator(ActionEngineConfiguration actionEngineConfiguration, ObjectMapper objectMapper) {
        ActionEngineConfigurator actionEngineConfigurator = new ActionEngineConfigurator();
        actionEngineConfigurator.setEngineConfiguration(actionEngineConfiguration);
        actionEngineConfigurator.setObjectMapper(objectMapper);
        return actionEngineConfigurator;
    }

    @Bean
    public SpringFormEngineConfiguration formEngineConfiguration(DataSource dataSource, PlatformTransactionManager transactionManager) {
        SpringFormEngineConfiguration configuration = new SpringFormEngineConfiguration();
        configuration.setTransactionManager(transactionManager);
        configuration.setDataSource(dataSource);

        configuration.setSubmittedVariablesExtractor(new SubmittedHierarchyVariablesExtractor());

        return configuration;
    }

    @Bean
    public FormEngineConfigurator formEngineConfigurator(FormEngineConfiguration formEngineConfiguration) {
        SpringFormEngineConfigurator configurator = new SpringFormEngineConfigurator();
        configurator.setFormEngineConfiguration(formEngineConfiguration);

        return configurator;
    }

    @Bean
    public ActionEngine actionEngine(@SuppressWarnings("unused") ProcessEngine processEngine) {
        // The process engine needs to be injected, as otherwise it won't be initialized, which means that the ActionEngine is not initialized yet
        return ActionEngines.getDefaultActionEngine();
    }

    @Bean
    public ActionRepositoryService actionRepositoryService(ActionEngine actionEngine) {
        return actionEngine.getActionRepositoryService();
    }

    @Bean
    public ActionRuntimeService actionRuntimeService(ActionEngine actionEngine) {
        return actionEngine.getActionRuntimeService();
    }

    @Bean
    public ActionHistoryService actionHistoryService(ActionEngine actionEngine) {
        return actionEngine.getActionHistoryService();
    }
}
We then create a meta-annotation that makes it easier to define a test.
@Target(ElementType.TYPE)
@Retention(RetentionPolicy.RUNTIME)
@Documented
@Inherited
@ExtendWith(ActionExtension.class)
@ExtendWith(SpringExtension.class)
@SpringBootTest(classes = TestActionApplication.class)
public @interface ActionSpringBootTest {

}
Writing a Test
We now have all the components for writing a test.
import static org.assertj.core.api.Assertions.assertThat;

 @ActionSpringBootTest
 class ActionDefinitionRepositoryTest {

     @Autowired
     private ActionRepositoryService repositoryService;

     @Test
     @ActionDefinitionDeployment(resources = {
         "com/flowable/action/engine/action/repository/action-def-channels.action",
         "com/flowable/action/engine/action/repository/action-def-no-channels.action"
     })
     void getActionDefinitionById() {
         String noChannelsActionDefinitionId = repositoryService.createActionDefinitionQuery().key("no-channel-id").singleResult().getId();
         ActionDefinition noChannelsActionDefinition = repositoryService.getActionDefinition(noChannelsActionDefinitionId);

         assertThat(noChannelsActionDefinition).isNotNull();
         assertThatThrownBy(noChannelsActionDefinition::getActionDefinitionLinks)
             .isInstanceOf(IllegalStateException.class)
             .hasMessage("Action definition links have not been initialized."
                 + " You need to either includeActionDefinitionLinks in the ActionDefinitionQuery or"
                 + " use ActionRepositoryService#getActionDefinitionLinks(actionDefinitionId).");

         assertThat(repositoryService.getActionDefinitionLinks(noChannelsActionDefinitionId))
             .as("no channel action definition links")
             .isEmpty();

         String channelsActionDefinitionId = repositoryService.createActionDefinitionQuery().key("channel-id").singleResult().getId();

         ActionDefinition channelsActionDefinition = repositoryService.getActionDefinition(channelsActionDefinitionId);

         assertThat(channelsActionDefinition).isNotNull();
         assertThatThrownBy(channelsActionDefinition::getActionDefinitionLinks)
             .isInstanceOf(IllegalStateException.class)
             .hasMessage("Action definition links have not been initialized."
                 + " You need to either includeActionDefinitionLinks in the ActionDefinitionQuery or"
                 + " use ActionRepositoryService#getActionDefinitionLinks(actionDefinitionId).");

         assertThat(repositoryService.getActionDefinitionLinks(channelsActionDefinitionId))
             .extracting(ActionDefinitionLink::getType, ActionDefinitionLink::getLinkValue)
             .as("type, linkValue")
             .containsExactlyInAnyOrder(
                 tuple("channel", "menu"),
                 tuple("channel", "slashAction")
             );
     }
 }
Extend Flowable with REST Controllers
This guide provides an example of how to extend a Flowable product by adding your own REST controllers to execute custom actions.
As Flowable products are built as a regular Spring Boot application, it can be extended using common Spring patterns.
Create the Directory Structure
First, we need to create an application that uses Engage/Work packages. See Create a Custom Project on how to create the necessary application structure.
Include Your Own Custom REST Controller
Create a REST controller in the main package:
src/main/java/sample/GreetingResource.java.
package sample;

import org.springframework.web.bind.annotation.GetMapping;
import org.springframework.web.bind.annotation.RestController;

@RestController
public class GreetingResource {

    @GetMapping(value = "/hello", produces = "application/json")
    public String getGreeting() {
        return "Greetings from Flowable!";
    }
}
By default, the controller is part of the default Spring Boot dispatcher servlet.
Include the Controller in a Custom Dispatcher
If there is a requirement that the controller is created under a different dispatcher’s servlet (similar to how it is done in the Flowable Engines) you can do the following:
import com.flowable.spring.boot.DispatcherServletConfiguration;

@Import(DispatcherServletConfiguration.class)
@Configuration
@ComponentScan("com.example.custom.rest")
public class ExampleCustomRestConfiguration {

}

import com.flowable.spring.boot.rest.BaseRestApiConfiguration;

@Configuration
public class ExampleCustomMainRestApiConfiguration extends BaseRestApiConfiguration {

    @Bean
    public ServletRegistrationBean customExampleRestServlet() {
        FlowableServlet servlet = new FlowableServlet("/example-custom-api", "Custom Example Rest API");
        return registerServlet(servlet, ExampleCustomRestConfiguration.class);
    }
}
The ExampleCustomRestConfiguration is not be automatically picked up by the main
application component scan. It is used to create a child Spring context as part of the
ExampleCustomMainRestApiConfiguration.
The ExampleCustomMainRestApiConfiguration should be a configuration that is picked up
by your main component scan.
It is also possible to register the ExampleCustomMainRestApiConfiguration as part of the
Spring Boot auto-configuration.
Doing what we described here results in creating a child Spring context with a
custom DispatcherServlet which puts all the rest controller endpoints
under /example-custom-api.
Following on with the example from above, the GreetingResource is
accessible under /example-custom-api/hello.
Run the Application
Flowable requires that you have a valid license for the Product.
The license is either stored on the file system or in the database.
If the license is provided as a file, then it is
typically located in the .flowable folder of your home directory.
On Unix or macOS the file is ~/.flowable/flowable.license.
The location of the license file can be changed in the application.properties
file.
flowable.license.location=file:/myCustomLocation/flowable.license
To store the license in the database, then the following property must be set in
the applications.properties file:
flowable.license.db-store-enabled=true
With the license database store mode enabled a license is uploaded using any Flowable application.
Start the application and check out the controller response using curl. The
default user is admin and the password is test. It should look like:
$ curl -u admin:test localhost:8080/hello/ Greetings from Flowable!
Getting Access to Engines and Services
The Java API’s of Flowable Work and Flowable Engage follow the same principles as the Flowable Orchestrate engines: there is an Engine, which is a thread-safe instance, that exposes its functionality through a set of services.
These services and the engine instance are exposed as Spring beans and can thus be injected by auto-wiring in other Spring beans.
For example, here is an example using a custom (Auto)Configuration to get access to the ProcessEngine and the RuntimeService:
@Bean
public MyBean myBean(ProcessEngine processEngine) {
  return new MyBean(processEngine);
}

@Bean
public OtherBean otherBean(RuntimeService runtimeService) {
  return new OtherBean(runtimeService)
}
The same access pattern is available for all engines and services.
Overview
The following engines and services noted here with their fully qualified names
The Process (BPMN) Engine
The BPMN engine, exposing services to deploy process definitions, start process instances, etc.
-
org.flowable.engine.ProcessEngine
- org.flowable.engine. RepositoryService | RuntimeService | TaskService | HistoryService | ManagementService | FormService | DynamicBpmService
noteIt is recommended not to use org.flowable.engine.ProcessEngine.IdentityService, but instead use com.flowable.core.idm.api.PlatformIdentityService.
The Case (CMMN) Engine
The CMMN engine, exposing services to deploy case definition, start case instances, etc.
-
org.flowable.cmmn.engine.CmmnEngine
- org.flowable.cmmn.api. CmmnRepositoryService | CmmnRuntimeService | CmmnTaskService | CmmnHistoryService | CmmnManagementService
The Decision (DMN) Engine
The DMN engine, exposing services to deploy rule definitions, execute and query them.
-
org.flowable.dmn.engine.DmnEngine
- org.flowable.dmn.api. DmnRepositoryService | DmnRuleService | DmnHistoryService | DmnManagementService
App Engine
The app engine allows one to deploy apps, which contain various model definitions that are deployed on the other engines.
-
com.flowable.app.engine.AppEngine
- org.flowable.app.api.AppRepositoryService | AppManagementService
noteThe services are in a different package than the engines (org. vs. com.). This difference is because the app engine in Flowable Work or Engage is an enhanced version that allows for more definition types. The services have remained compatible with the Core engines.
Identity Management Engine
The identity management (IDM) engine, allows to create and maintain users and groups. It also contains the API’s around user definitions and tenant setup.
-
com.flowable.idm.engine.CoreIdmEngine
- com.flowable.core.idm.api. PlatformIdentityService | UserDefinitionService | ContactFilterService | IdmManagementService | UserAccountService | UserAccountDefinitionService
noteThe Work or Engage IDM engine is an enhanced version of the one in Flowable Orchestrate. Thus, the APIs are found in a different package; com. vs. org.
Content Engine
The content engine exposes services to save and manage content, to create renditions of them, deploy document definitions, and manage metadata.
-
com.flowable.content.engine.ContentEngine
- com.flowable.core.content.api. DocumentRepositoryService | CoreContentService | MetadataService | RenditionService
Form Engine
The form engine exposes services to deploy, manage, and query form models and instances.
-
com.flowable.form.engine.FormEngine
- org.flowable.form.api. FormRepositoryService | FormService | FormManagementService
noteThe Work or Engage form engine service is an enhanced version of the one in Flowable Orchestrate. The service API is the same in both, but the package names are different; com. vs. org.
Action Engine
The action engine is used to deploy action definitions, create instances from them, and query them.
-
com.flowable.action.engine.ActionEngine
-
com.flowable.action.api. ActionRepositoryService | ActionRuntimeService | ActionHistoryService
Template Engine
The template engine exposes services to deploy, manage, and query template definitions. From such definitions, instances are created that use the template to create content in various forms.
-
com.flowable.template.engine.TemplateEngine
- com.flowable.template.api. TemplateRepositoryService | TemplateService
Audit Engine
The audit engine is used to store business audit events and query them later.
-
com.flowable.audit.engine.AuditEngine
-
com.flowable.audit.api.AuditService
Engage Engine (Flowable Engage only)
The Engage engine exposes API’s to use and manage conversations and messages. As with other engines, it is used to deploy definition models and query all related data.
-
com.flowable.engage.engine. EngageEngine
- com.flowable.engage. ConversationService | MessageService | ConversationDefinitionService
noteThe Engage engine has many more services in various subpackages (e.g., notification, indexing) that expose more dedicated APIs around those topics.
A Note on Permissions
All engines and services, when accessed through the Java APIs, do not enforce permission checks and thus full access to all data is given. This behavior is different than the REST APIs where permission checks are applied. This difference is very powerful and flexible, but the developer using the engine or services does need to be aware of this and apply any permission checks in the logic calling the engine or services as needed.
Custom Action Definitions
Concept
Actions are a concept of Flowable Work or Engage that allows one to create and query 'actionable' items for a user. Instead of querying various potential sources of things that a user 'can do,' the Action Engine allows managing these centrally.
Actions are handled in the typical Flowable way: there is an action definition, from which action instances are created. Such action definitions or instances are associated with any other engine instance: a process instance, a case instance, a task, a conversation, etc. Permissions for action definitions and instances are handled in the same way as for other Flowable objects.
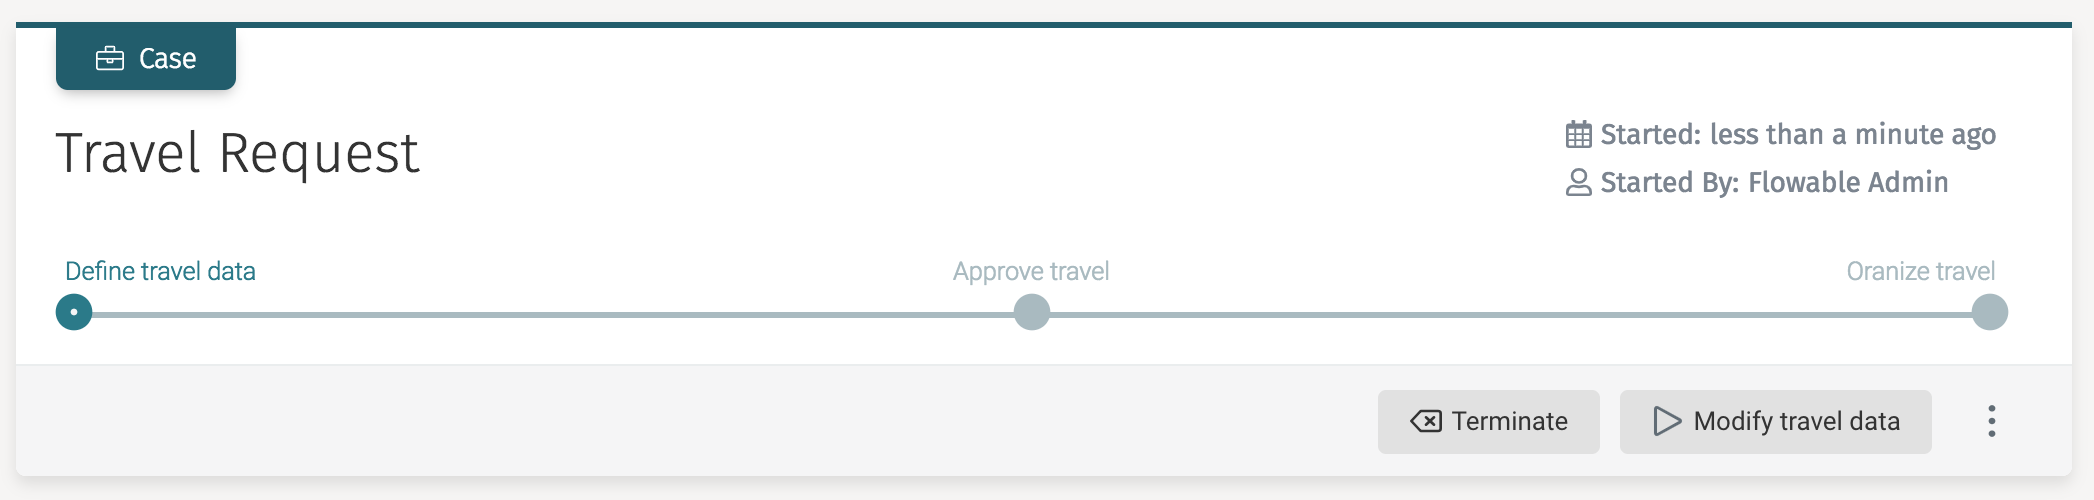
In the Flowable Work and Engage user interface, action instances are shown in the grey toolbar in the header or the 'three dots' button menu on the right:
Action Definitions and Instances
To understand actions better, let us look at one of the default action definitions before diving into building a new one.
Action definitions are defined in JSON files with the .action suffix and are put on the classpath of the server, in the following packages:
-
com/flowable/action/default/ for default action definitions
-
com/flowable/action/custom/ for custom action definitions
noteWhether or not these locations are inspected are controlled by the flowable.action.deploy-default-resources and flowable.action.deploy-custom-resources Boolean properties defined in the application.properties file. Both are true by default, and thus both directories are inspected for content.
One of the out-of-the-box action definitions is the 'manual activated plan item' action. In a CMMN model, it is possible to mark a plan item as 'manually activated.' This means that a task for a user is not activated by default but requires an explicit choice by the user to do so (which is very useful for optional tasks).
As this is an actionable thing for a user to do, whenever the CMMN engine encounters such a manually activated plan item, it creates an action instance based on the following action definition:
{
  "key": "cmmn-manual-activated-planitem",
  "name": "Start plan item",
  "botKey": "cmmn-manual-activated-planitem-bot",
  "description": "Starts a manual activated plan item instance",
  "ignoreConfirmationMessage": true,
  "icon": "play",
  "scopeType": "cmmn",
  "mappedStates": [ ],
  "mappedSubTypes": [ ],
  "permissionGroups": [ "flowableUser" ],
  "channels": [
    "menu", "quick-actions"
  ]
}
These definitions are deployed (behind the scenes) to the Action Engine through the ActionRepositoryService, which also exposes API’s to query the definitions.
From such a definition, analogous to all other definitions of Flowable, instances are created in the following manner:
ActionInstanceBuilder actionInstanceBuilder = actionRuntimeService.createActionInstanceBuilder()
    .actionDefinitionKey("cmmn-manual-activated-planitem")
    .name(planItemInstance.getName())
    .scopeType(ScopeTypes.CMMN)
    .scopeId(planItemInstance.getCaseInstanceId())
    .subScopeId(planItemInstance.getId());

ActionInstance actionInstance = actionInstanceBuilder.start();
This code is what gets executed by the CMMN engine the moment it encounters such a manually activated plan item. It uses the key from the action definition above to determine which definition to use.
Inspecting the definition, we can say the following:
-
The default name of the definition is used unless set on the instance.
-
The icon property defines which icon is rendered if used in the Flowable Work or Engage user interface (the name references an icon from https://fontawesomecom/icons?d=gallery).
-
With ignoreConfirmationMessage is set to true, no confirmation popup is shown.
-
The scopeType property defines the default scope type unless overridden (as above). The possible scope types are task, cmmn, conversation, etc.
-
The mappedStates and mappedSubTypes (and mappedSubStates and mappedTypes) can be used to filter whether the definition is applicable. The state and subtypes are evaluated in the context of the referenced scope element (like a CMMN case instance).
-
The channels property defines where the action is shown. In this case, the action is shown in the 'quick-actions' as a button in the grey header and in the menu behind the three dots button (see screenshot above).
There are additional properties, not used above, which can be set on an action definition:
-
formKey: A default form (referenced by key) that should be shown when executing an instance of this definition.
-
confirmationMessage and confirmationTitle can be used to define what is shown in the confirmation dialog, which is shown when the action instance is executed.
-
help: an optional property that contains help text. It is displayed by default for 'slash actions' (actions that are reachable in the chat window of Flowable Engage).
-
global: A Boolean flag that makes an action definition globally available (within the optional filtering currently set, e.g., scope type). A global action definition does not need an instance and can be shown when the filter matches.
From an action definition, many instances can be created. They are queried as follows (using the CMMN case instance example from above):
actionRuntimeService.createActionInstanceQuery()
    .scopeId(caseInstance.getId())
    .scopeType(ScopeTypes.CMMN)
    .list()
Action Bots
One property not yet discussed is the botKey property. Whenever an action gets executed, the botKey is used to look up which piece of logic is executed. As actions are often used in a conversational context, these 'services' have been dubbed 'bots'.
To execute an action instance (and thus invoking the referenced bot), the following API is used:
HistoricActionInstance actionInstance = actionRuntimeService.createExecuteActionInstanceBuilder()
    .actionInstanceId(actionInstance.id)
    .execute()
Note that this method returns a HistoricActionInstance. When an action instance gets executed it is deleted from the runtime database tables and a historic counterpart is created (similar to other engines).
noteThis API has many more methods that allow for flexible management and execution of these actions.
Such a 'bot implementation' needs to implement the com.flowable.action.api.bot.BotService interface. The invoke method is the one that gets called, and the action instance, definition, and optional payload are passed into the method.
Custom Example
In this simple example, we build an action definition that appears in all user tasks. The action performed is to send a reminder email to all the people involved when the action instance is executed. The actual implementation of sending the mail is not included.
JSON File
Create a JSON file send-email.action and place it in the com/flowable/action/custom/ package. It looks as follows:
{
  "key": "send-email",
  "name": "Send reminder to all involved",
  "botKey": "send-email-bot-service",
  "ignoreConfirmationMessage": true,
  "icon": "envelope-square",
  "scopeType": "task",
  "mappedStates": [ ],
  "mappedSubTypes": [  ],
  "permissionGroups": [ "flowableUser" ],
  "channels": [
    "menu", "quick-actions"
  ],
  "global": true
}
Note that we are defining the action definition to be global, as we are not creating an action instance and want always to show the action whenever we have a task.
The example in the section above was not global. There, only when there is a manually activated plan item instance, the case instance gets an action instance. We do not want the 'start plan item' button to be there, only when the case instance is in that particular state.
Bot Service
Create the bot service, making sure to use the key as defined in the JSON botKey property:
public class SendEmailBot implements BotService {

    @Override
    public String getKey() {
        return "send-email-bot-service";
    }

    @Override
    public String getName() {
        return "Send Email";
    }

    @Override
    public String getDescription() {
        return "Some description";
    }

    @Override
    public BotActionResult invokeBot(HistoricActionInstance actionInstance,
           ActionDefinition actionDefinition, Map<String, Object> payload) {
        // send the email
        return new BaseBotActionResult(Collections.emptyMap());
    }
}
Note that an instance of this class needs to be exposed as a Spring bean in your custom (Auto)Configuration:
@Bean
public SendEmailBot sendEmailBot() {
    return new SendEmailBot();
}
Result
On a reboot of the server, the following log message is displayed:
[ main] c.f.a.e.i.d.ActionDefinitionDeployer : Processing action resource send-email.action
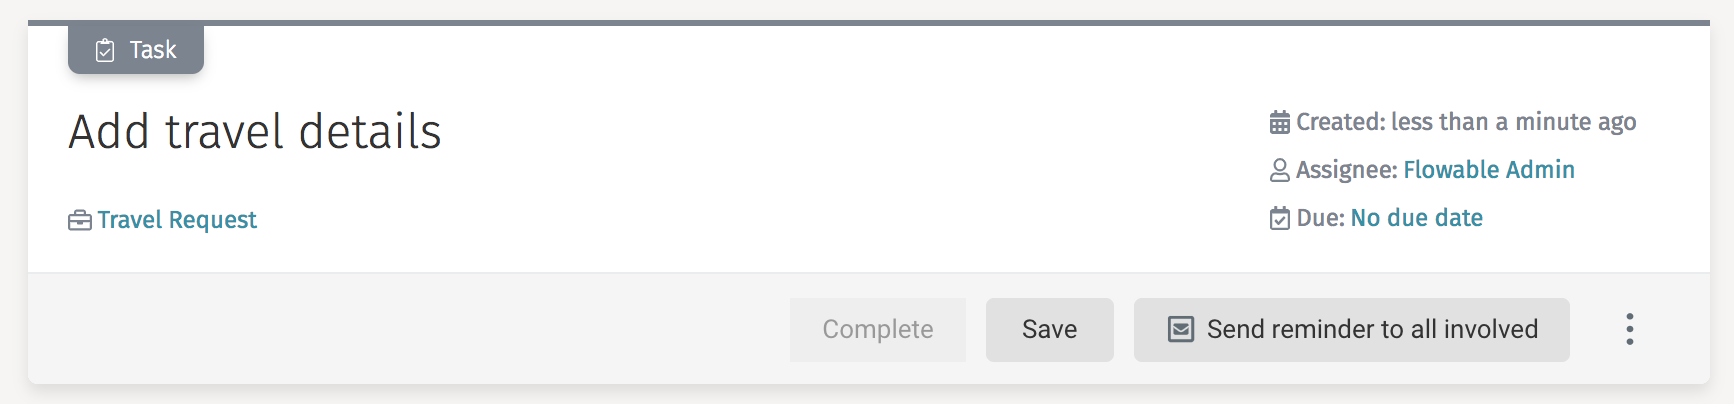
Whenever a task is now created, it automatically gets the new action:
Custom Function Delegates
Expressions are versatile and powerful. By default, services are invoked like:
${myCustomService.someMethod(someVariable)}
A custom function delegate is a powerful way of adding custom logic to a process or case definition model.
Alternatively, a function delegate can be created that allows for more user-friendly expressions.
Let us have a look at such an example that exposes a function delegate for finding a user:
public class FindUserFunctionDelegate implements FlowableFunctionDelegate {

    @Override
    public String prefix() {
        return "";
    }

    @Override
    public String localName() {
        return "findUser";
    }

    @Override
    public Method functionMethod() {
        try {
            return UserUtil.class.getDeclaredMethod("findPlatformUserById", String.class);
        } catch (NoSuchMethodException e) {
            throw new FlowableException("error getting method", e);
        }
    }
}
The class implements the org.flowable.common.engine.api.delegate.FlowableFunctionDelegate interface.
-
The prefix is an optional namespace for the function (e.g., my-namespace:my-function()).
-
The localName is the name used in the expression.
-
The functionMethod exposes the actual logic by returning a java.lang.reflect.Method.
The function can now be used in expressions and assuming userId is a variable:
${findUser(userId).getLastName() == 'Doe'}
To register a custom function delegate, it needs to be exposed by a com.flowable.spring.boot.FlowableFunctionDelegatesProvider (in a custom (Auto)Configuration) as follows:
@Bean
public FlowableFunctionDelegatesProvider myFunctionDelegateProvider() {
  return new BaseFlowableFunctionDelegatesProvider() {
    @Override
    public Collection<FlowableFunctionDelegate> getFunctionDelegates() {
      return Arrays.asList(
        new FindUserFunctionDelegate(),
        //...
      );
    }
  };
}
When not using BaseFlowableFunctionDelegatesProvider but the interface directly, make sure to expose either ScopeTypes.BPMN or ScopeTypes.CMMN as this ensures the engine finds and loads them.
Implement a Custom Service Task
When custom logic needs to be executed as part of a case or process model this is implemented with a custom service task. The service task element is available in Flowable Design in the CMMN and BPMN editor and can be configured with a Java class name or expression referencing a Spring bean. This document explains how to use the convenience classes provided with Flowable Work and Engage when implementing a custom service task.
Often, there is a need to use a custom service task in both the BPMN as
well as the CMMN editor.
As these models are executed in separate Engines, there is also a
different Java interface that needs to be implemented with
each custom service task.
To prevent having to implement two classes, one for the BPMN and one for
the CMMN engine, the com.flowable.platform.tasks.AbstractPlatformTask
is provided as part of the flowable-platform-tasks module.
When extending the AbstractPlatformTask class, only the executeTask method
needs to be implemented with the custom logic.
@Override public void executeTask(VariableContainer variableContainer, ExtensionElementsContainer extensionElementsContainer)
Two parameters are passed into the executeTask method; the first one is the
VariableContainer instance. This is an interface that is implemented in the
BPMN and CMMN engine and provides access to the current variable context
(e.g., process or case instance variable scope). The interface also
provides a setVariable method to change an existing variable value
or add a new variable. The second parameter is the ExtensionElementsContainer
instance, which provides easy access to get extension element values
that are defined as part
of the custom service task. This is very useful to provide configuration
options when using the custom service task in a case or process model.
In the generate document task that is provided as part of Flowable Work and
Engage the same AbstractPlatformTask is used, and it is a good example
of how to use both the VariableContainer
and the ExtensionElementsContainer interfaces.
This is the XML representation of the generate document task:
<serviceTask id="generatedocumenttask1" name="Generate document" flowable:delegateExpression="${generateDocumentService}">
    <extensionElements>
        <design:outputvariablename xmlns:design="http://flowable.org/design"><![CDATA[myVar]]></design:outputvariablename>
        <design:name xmlns:design="http://flowable.org/design"><![CDATA[Generate document]]></design:name>
        <design:outputdocumentname xmlns:design="http://flowable.org/design"><![CDATA[test word doc ${customerId}]]></design:outputdocumentname>
        <design:templatekey xmlns:design="http://flowable.org/design"><![CDATA[myDocumentTemplate]]></design:templatekey>
    </extensionElements>
</serviceTask>
In order to generate the document, the values for the outputdocumentname
and templatekey extension elements are needed.
This can be done with the following logic taken from the executeTask
method of the GenerateDocumentService.
@Override
public void executeTask(VariableContainer variableContainer, ExtensionElementsContainer extensionElementsContainer) {
    // The name of the document. This is the human-readable name, not the variable name.
    String outputDocumentName = getStringExtensionElementValue(TemplateProcessingConstants.OUTPUT_DOCUMENT_NAME, extensionElements, variableContainer, null);

    // An expression resolving to the key which is used to retrieve the Word template in the template engine.
    String templateKey = getStringExtensionElementValue(TemplateProcessingConstants.TEMPLATE_KEY, extensionElements, variableContainer, null);
}
The getStringExtensionElementValue is provided by the AbstractPlatformTask
class and can be used to retrieve the value of an extension element.
In the example of the outputdocumentname this also resolves the
${customerId} using the VariableContainer instance as well.
At the end of the generate document task logic, the generated document (which is a content item), is made available as a case or process variable.
This is done with the following logic:
@Override
public void executeTask(VariableContainer variableContainer, ExtensionElementsContainer extensionElementsContainer) {
    String variableName = getStringExtensionElementValue(TemplateProcessingConstants.OUTPUT_VARIABLE_NAME, extensionElements, variableContainer, null);
    variableContainer.setVariable(variableName, contentItems);
}
Because the variable name for the generated document is configurable,
the configured name is first retrieved from the extension element
outputvariablename and then
the setVariable method of the VariableContainer is used to
set the variable value.
When the custom service task is implemented, the next step is to make the class available as a Spring bean. This can be done with a Spring Boot auto-configuration.
The following auto-configuration is an example of how to expose the generate document task:
@Configuration
public class TasksAutoConfiguration {

    @Bean
    @ConditionalOnMissingBean(GenerateDocumentService.class)
    public GenerateDocumentService generateDocumentService() {
        return new GenerateDocumentService();
    }

}
The last step is to ensure that the TasksAutoConfiguration Spring Boot
auto-configuration class is picked up when starting Flowable Work or Engage.
This can be done with a spring.factories file in the META-INF folder
(src/main/resources/META-INF for an Apache Maven based project).
org.springframework.boot.autoconfigure.EnableAutoConfiguration=\
  com.flowable.autoconfigure.tasks.TasksAutoConfiguration
When the module containing the TasksAutoConfiguration class and the
spring.factories file is made available on the classpath of Flowable
Work or Engage as a JAR file and
then the generate document task is automatically available
as a Spring Bean. In Flowable Design a service task can now be
configured with a delegate expression value
of the exposed Spring bean, in this example, ${generateDocumentService}.
This document is focused on the Java (engine) implementation of the custom service task. The complete customer service task solution is to provide an element in the modeling palette of the BPMN and CMMN editor. Doing so removes the need to define a delegate expression every time the custom service task is needed in the model. It also enables the ability to define extension elements, exposed as configurable properties, in Flowable Design. To add the custom service task to the BPMN process palette see Add a Custom Service Task to the Flowable Design Process Palette and to add it to the CMMN palette see Add a Custom Service Task to the Flowable Design Case Palette.
Configure Engines
Flowable applications are Spring Boot based applications and this means that you can configure them by using Spring Boot properties or defining certain beans that are applied to the Flowable engines.
Some easy ways to configure the engines are through:
-
Spring properties - See Spring Boot Properties.
-
Defining a
BotServicebean - See Custom Action Definitions. -
Defining a
FlowableFunctionDelegatesProviderbean - See Custom Function Delegates.
However, sometimes you want to change some lower-level configuration or
modify something that is not exposed via properties or other convenience beans.
In such cases, you can get access to the specific engine configuration before
it is initialized by defining a bean of type EngineConfigurationConfigurer<T>.
T is the type of the engine you want to configure.
The following classes are the engines that you can configure:
-
OSS Engines
-
org.flowable.cmmn.spring.SpringCmmnEngineConfiguration- For configuring theCmmnEngine -
org.flowable.dmn.spring.SpringDmnEngineConfiguration- For configuring theDmnEngine -
org.flowable.spring.SpringProcessEngineConfiguration- For configuring theProcessEngine
-
-
Flowable Orchestrate Infrastructure Engines
-
com.flowable.app.engine.AppEngineConfiguration- For configuring theAppEngine -
com.flowable.content.spring.SpringContentEngineConfiguration- For configuring theContentEngine -
com.flowable.form.spring.SpringFormEngineConfiguration- For configuring theFormEngine -
com.flowable.idm.engine.CoreIdmEngineConfiguration- For configuring theCoreIdmEngine
-
-
Flowable Work Engines
-
com.flowable.action.engine.ActionEngineConfiguration- For configuring theAppEngine -
com.flowable.audit.engine.AuditEngineConfiguration- For configuring theAuditEngine -
com.flowable.dataobject.engine.DataObjectEngineConfiguration- For configuring theDataObjectEngine -
com.flowable.template.engine.TemplateEngineConfiguration- For configuring theTemplateEngine
-
-
Flowable Engage Engines
com.flowable.engage.engine.EngageEngineConfiguration- For configuring theEngageEngine
As an example, if modifications to the AppEngine are required they can be done
in following fashion:
import org.springframework.context.annotation.Bean;
import org.springframework.context.annotation.Configuration;

import com.flowable.app.engine.AppEngineConfiguration;
import com.flowable.spring.boot.EngineConfigurationConfigurer;

@Configuration
public class MyCustomConfiguration {

    @Bean
    public EngineConfigurationConfigurer<AppEngineConfiguration> customAppEngineConfigurer() {
        return engineConfiguration -> {
            // Customize the engineConfiguration here
        };
    }
}
When using EngineConfigurationConfigurer<T> the configurer is invoked before
the initialization of the engine starts, but after the Spring Boot properties
from the Flowable auto-configurations have been applied.
If you have even more requirements and need to configure the engine
after the configuration is initialized, you can then use a
custom org.flowable.common.engine.impl.EngineConfigurator.
Here is an example:
import org.flowable.common.engine.impl.AbstractEngineConfiguration;
import org.flowable.common.engine.impl.EngineConfigurator;
import org.springframework.context.annotation.Bean;
import org.springframework.context.annotation.Configuration;

import com.flowable.app.engine.AppEngineConfiguration;
import com.flowable.spring.boot.EngineConfigurationConfigurer;

@Configuration
public class MyCustomConfiguration {

    @Bean
    public EngineConfigurationConfigurer<AppEngineConfiguration> customAppEngineConfigurer() {
        return engineConfiguration -> {
            engineConfiguration.addConfigurator(new MyCustomConfiguration.MuCustomAppEngineConfigurator());
        };
    }

    public static class MuCustomAppEngineConfigurator implements EngineConfigurator {

        @Override
        public void beforeInit(AbstractEngineConfiguration engineConfiguration) {
            AppEngineConfiguration appEngineConfiguration = (AppEngineConfiguration) engineConfiguration;
            // Invoked before any initialisation is done to the engine
        }

        @Override
        public void configure(AbstractEngineConfiguration engineConfiguration) {
            AppEngineConfiguration appEngineConfiguration = (AppEngineConfiguration) engineConfiguration;
            // Invoked after the initialisation of the engine. Think afterInit
        }

        @Override
        public int getPriority() {
            // Priority in relation to the other configurators. See EngineConfigurationConstants
            return 0;
        }
    }
}
Using Spring Boot Properties
Flowable applications are Spring Boot applications and they are configured like a typical Spring Boot application. In this guide, we are going to explain a small subset of the possibilities, to understand more please read the Spring Boot Externalized Configuration.
Spring Boot allows a sensible way of overriding properties. The following is a subset of the ordering:
-
Command line arguments (if running with
java -jar application.jar). -
JNDI attributes from
java:comp/env. -
Java System properties (
System.getProperties()). -
OS environment variables.
-
Profile-specific application properties outside of your packaged jar (
application-{profile}.propertiesand YAML variants). -
Profile-specific application properties packaged inside your jar (
application-{profile}.propertiesand YAML variants). -
Application properties outside of your packaged jar (
application.propertiesand YAML variants). -
Application properties packaged inside your jar (
application.propertiesand YAML variants).
Application Property Files
A Spring Boot application loads properties from application.properties
files from the following locations:
-
A
/configsubdirectory of the current directory (if running withjava -jar application.jar). -
The current directory (if running with
java -jar application.jar). -
A classpath
/configpackage. -
The classpath root.
Properties defined in locations higher in the list have a higher priority.
It is also possible to define additional locations for the configuration
files by defining the spring.config.additional-location property.
The locations specified are used in addition to the default locations
and have a higher priority.
This priority of the configuration lets you specify default values in one
configuration file and then selectively override those values in another.
You can provide default values for your application in application.properties
in one of the default locations.
These default values can then be overridden at runtime with a different file
located in one of the custom locations.
Relaxed Binding
Spring Boot uses some relaxed rules for binding Environment properties to
@ConfigurationProperties beans, so there does not need to be an exact match
between the Environment property name and the bean property name.
Typical examples where this is useful include dash-separated environment
properties (for example, context-path binds to contextPath),
and capitalized environment properties (for example, PORT binds to port).
Defining Properties for a Prebuilt Flowable WAR
If you are using a prebuilt Flowable WAR application (i.e., not building your own WAR) then you have different options to provide custom properties to the application.
Deploying into Tomcat
If you are deploying the Flowable WAR Application into Tomcat,
then the only thing you need to do is to define your own application.properties
file in to the Tomcat lib directory.
Running an Executable Jar
If you are running the application as an executable jar
(by using java -jar flowable-work.war),
then you need to define your own application.properties in the same folder
where your flowable-work.war file is located.