Create Dynamic Forms with Expression Buttons
Target audience: Modelers
Introduction
Expression buttons are great way to add dynamic elements to a Flowable form or page. In general, expression buttons are executed when they are clicked on. However, they can also be configured to execute:
- Automatically on page load.
- Executed periodically
- Bound to a variable
But first, let's look at what expression buttons are and how they are configured.
What are Expression Buttons?
Expression buttons are configured to execute a front-end expression and save the result of that expression into the configured result field/variable.
For example, if we are entering text into a form and we need to parse the text, then we can do this with an expression button. We can trigger this parsing either manually, periodically or on change of another form element/variable.
Shopping List Scenario
To better demonstrate this, let's create a simple grocery shopping list. The list will allow us to select items, define the quantity or each item, display the sub total of each item as well as the grand total of our shopping list.
Grocery Item Form Configuration
First, we need to create the form (grocery item) that will represent each item in our grocery list. This will be embedded into another form as a multi instance embedded panel.

This sub form has 5 elements.
Grocery Item:
This is a simple static single select bound to the {{item}} variable.
Other configuration options are Storage : "Full value"
Quantity:
This is a number field bound to {{quantity}} with a default value of 0
Item Total:
This is a Text field and will be the total cost of this item. That is, item value * quantity.
We will bind this to the value {{itemTotal}} and we will disable the field as we will be calculating the value using an "Expression Button".
Reset Quantity:
This is an Expression Button that we will bind to the {{item}} selector using the Auto execute expression option.
We will set the Value of the expression button to {{quantity}} and set the Expression to {{1}}.
Effectively this means as soon as we select a new item from the select list, the item quantity will be reset to 1.
Totalizer:
This is a second Expression Button which will calculate the total for the item selected.
This Expression Button will also be "bound" to the {{quantity}} field using the Auto execute expression option with the "Value" set to {{itemTotal}}.
The expression we will use will multiply the quantity by the item value and format it to US Dollars using the flw.numberFormat() front end function.
Check the Front End Functions to see the available functions.
{{flw.numberFormat(item.value*quantity,"en_US", currency, "2", "USD")}}
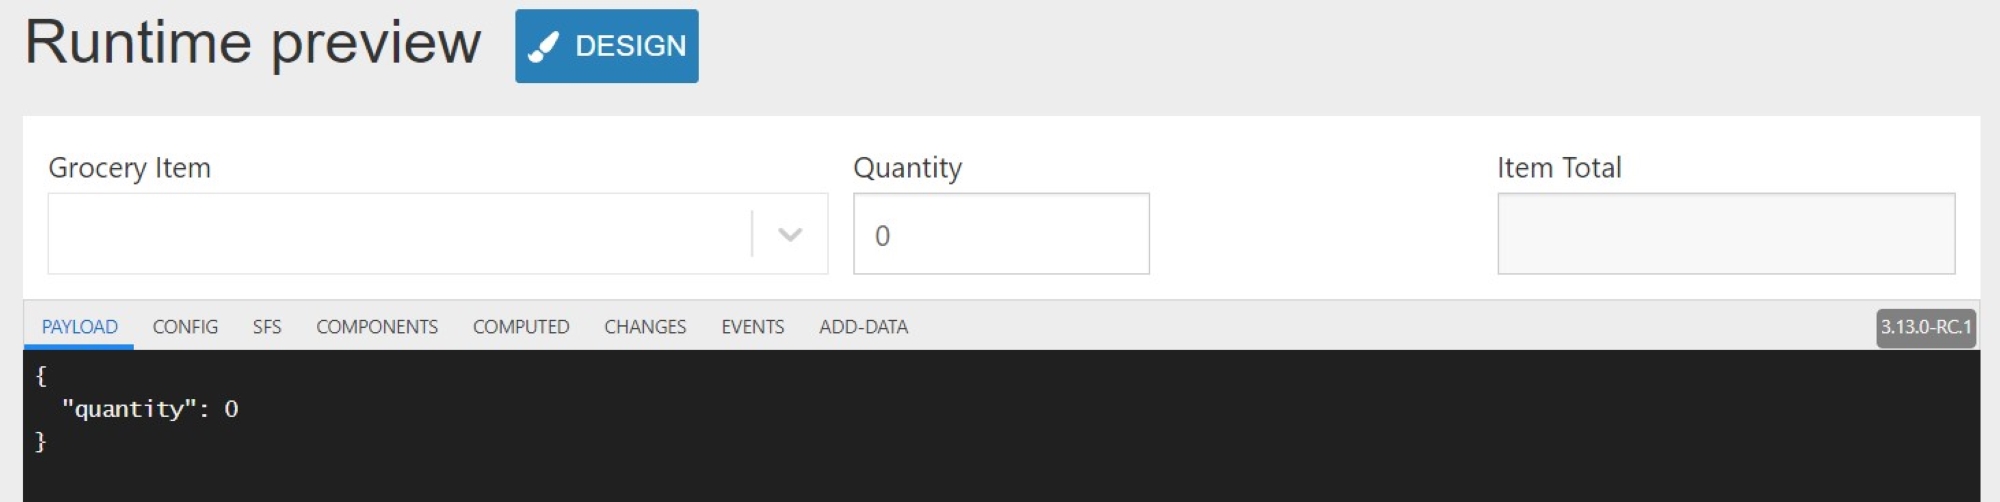
We are now done with the item form, we can test it's operation in the Form Designer's runtime preview mode:
Grocery List Form Configuration
Now that the sub form is complete, we need to create a main form that embeds it. Create a new Form (grocery list) which embeds the form we just created.
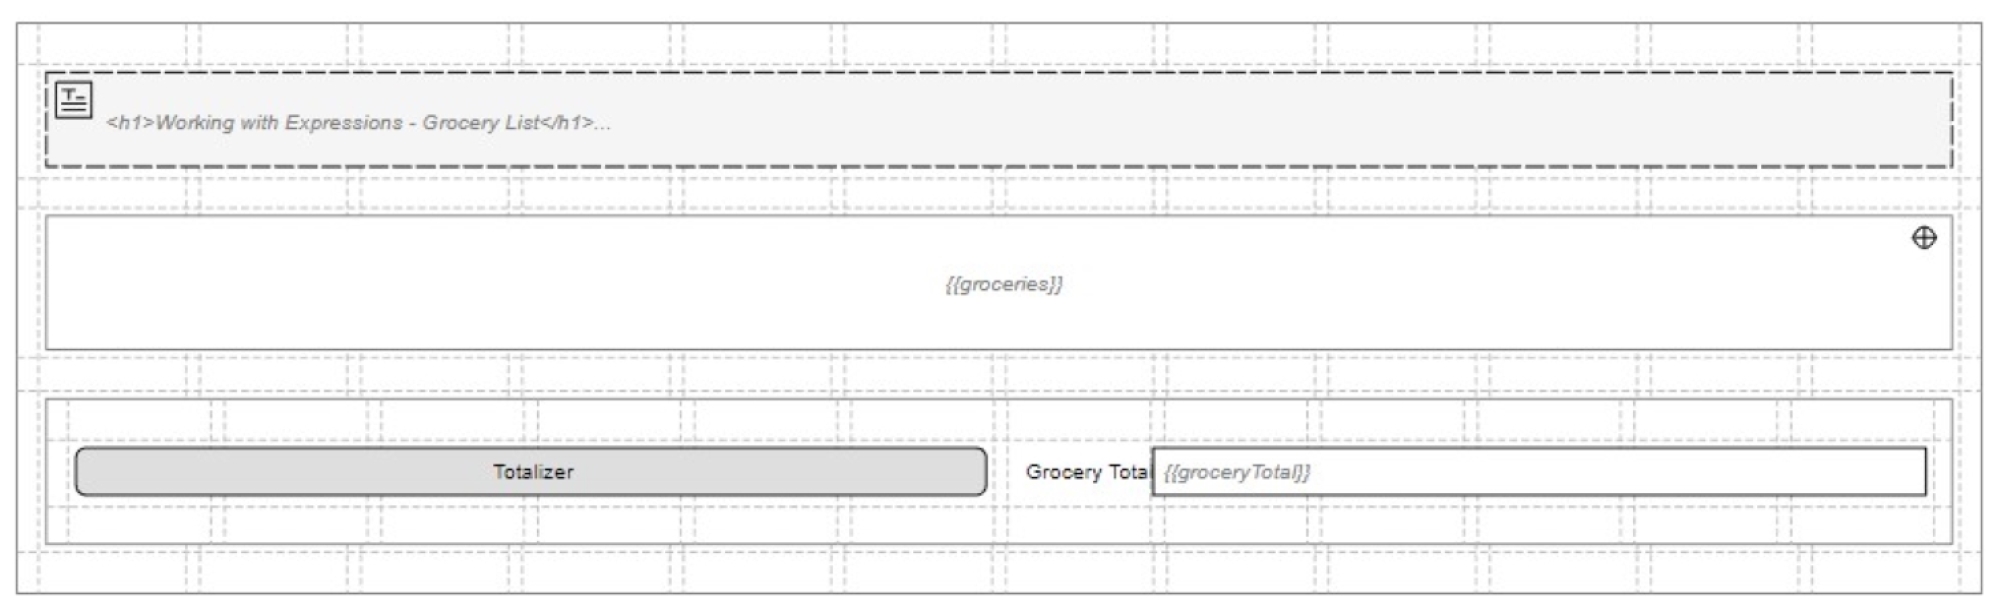
This form has 4 components.
Sub Form:
The Sub Form is the main element which points to the item for we just created.
This is configured as follows:
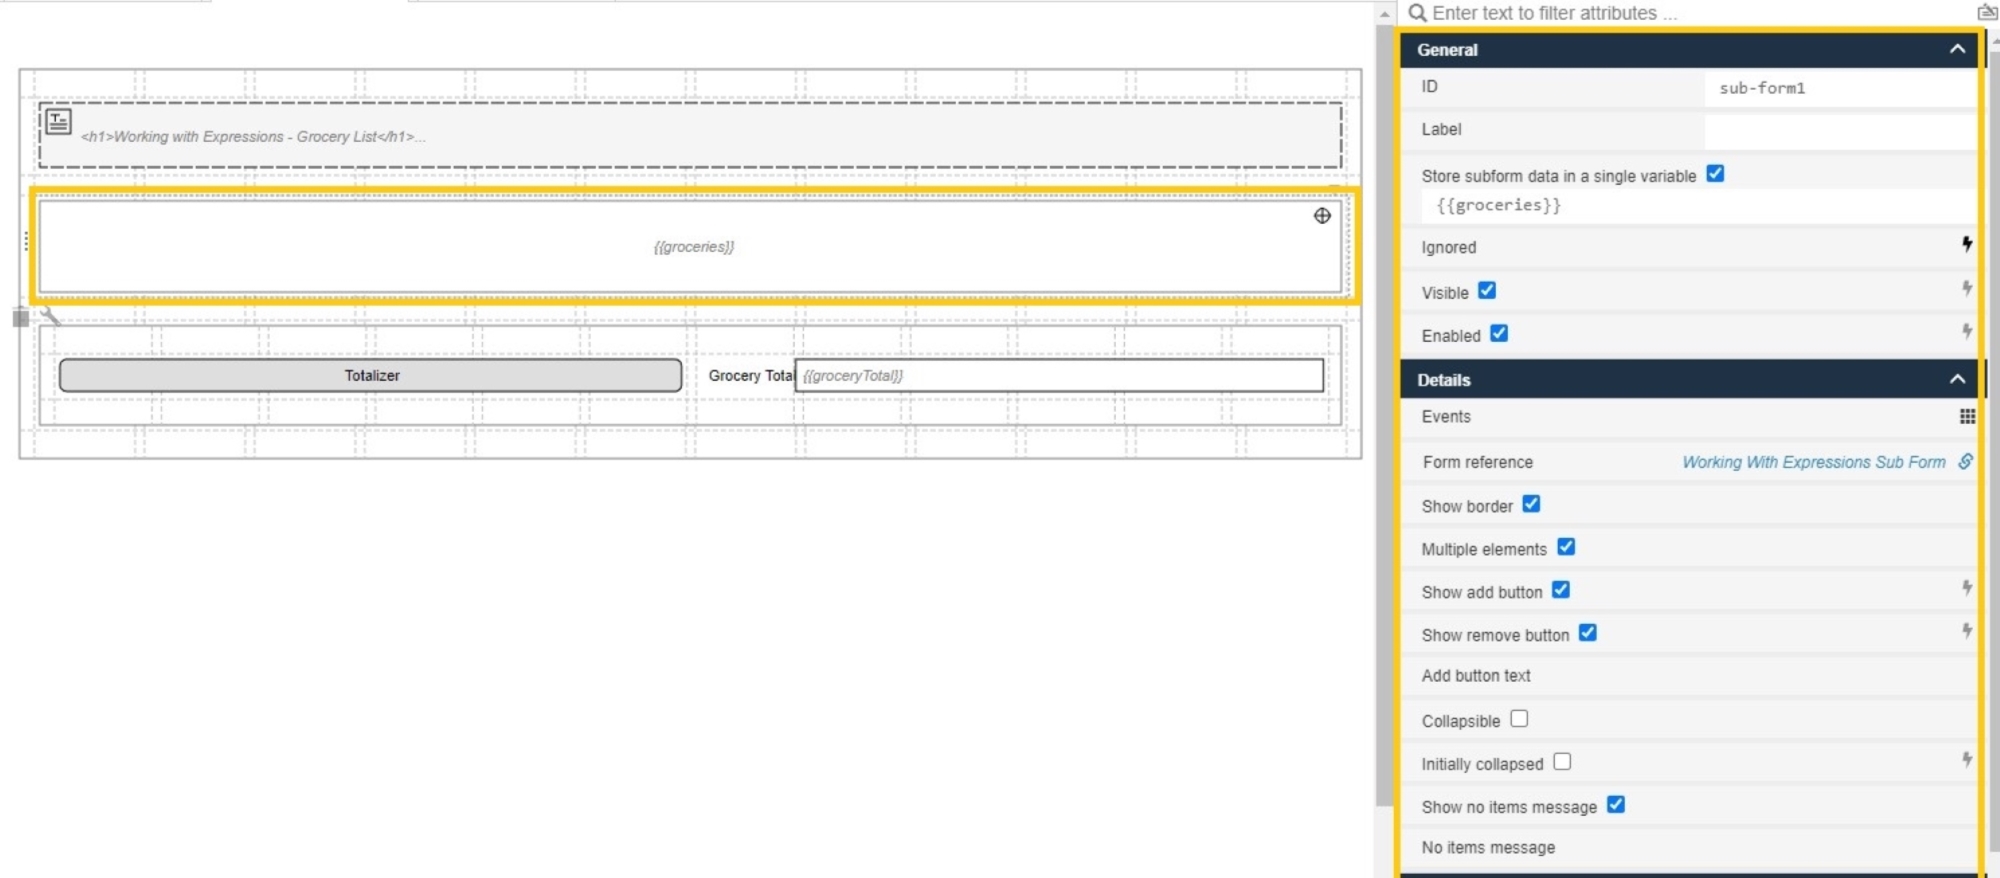
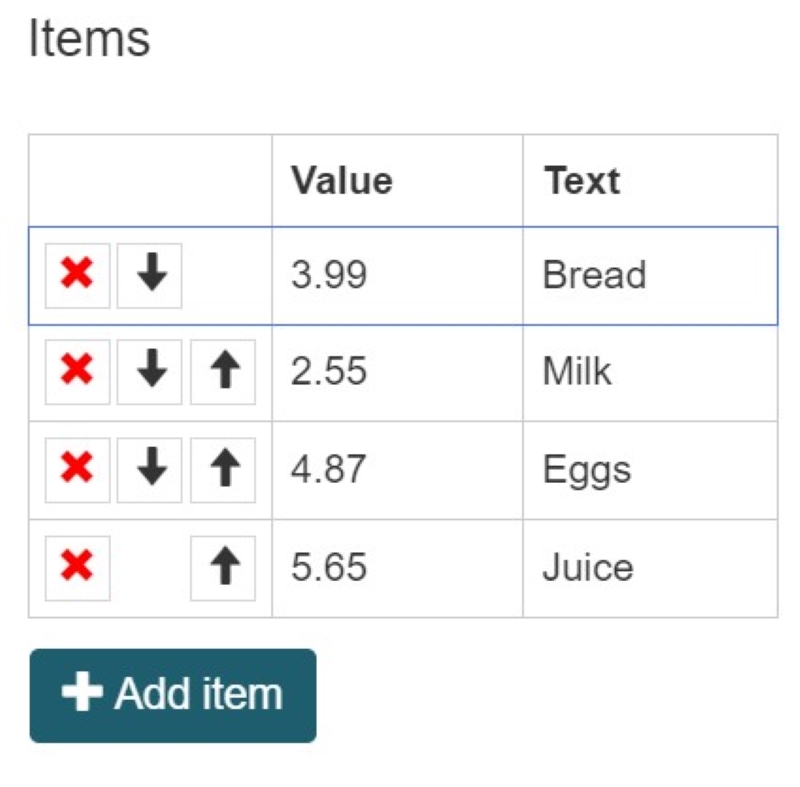
The main items here are that we set subform data to a single variable {{groceries}} and enable multiple elements with an add and delete button.
Totals Panel:
A panel to hold the Grocery total fields and the Totalizer expression button.
Both grocery total and totalizer are placed inside this panel which is configured to only be visible when the groceries variable is not null:
{{flw.exists(groceries)}}
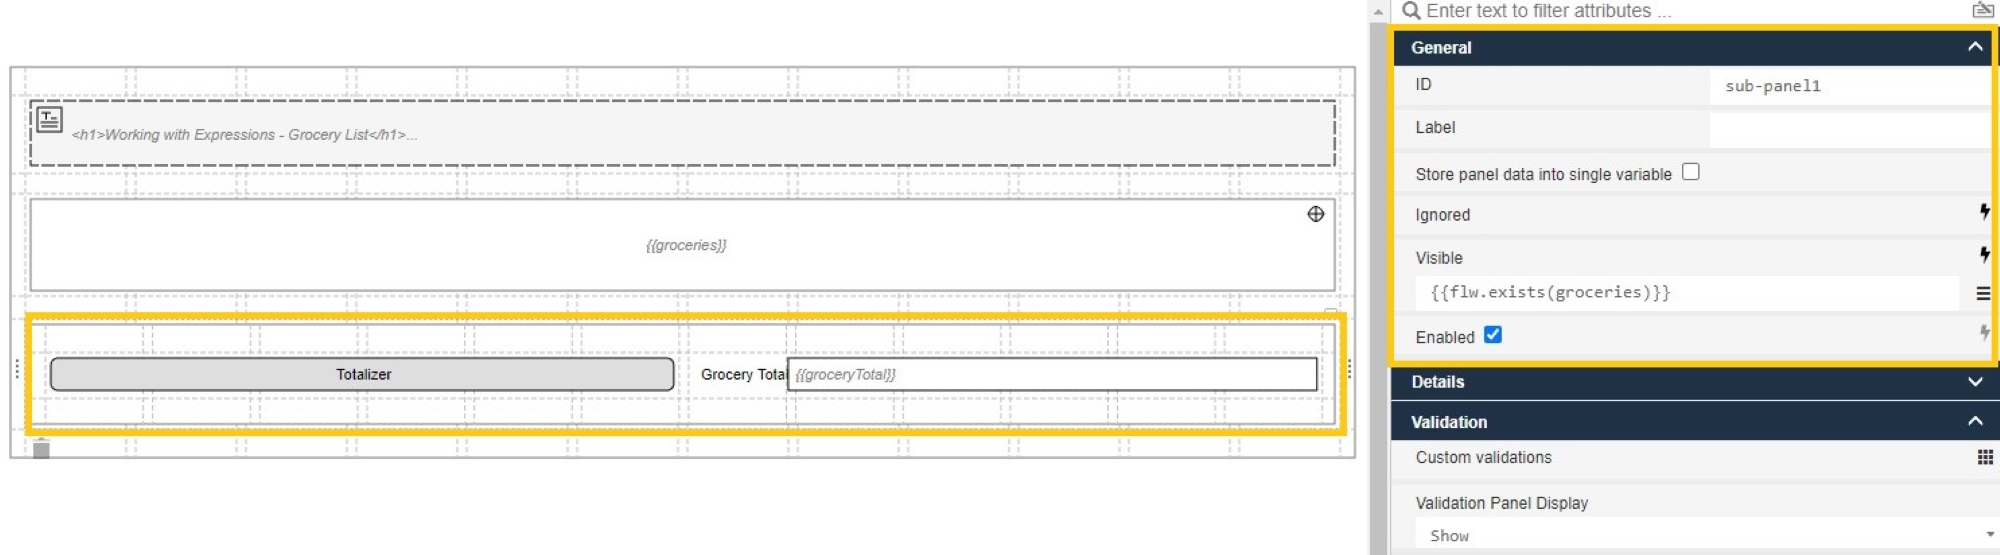
Total Cost Field:
A text field that will hold the value of the total grocery bill {{groceryTotal}}.
This field will be calculated by another Expression Button so we will disable it as it should not be editable.
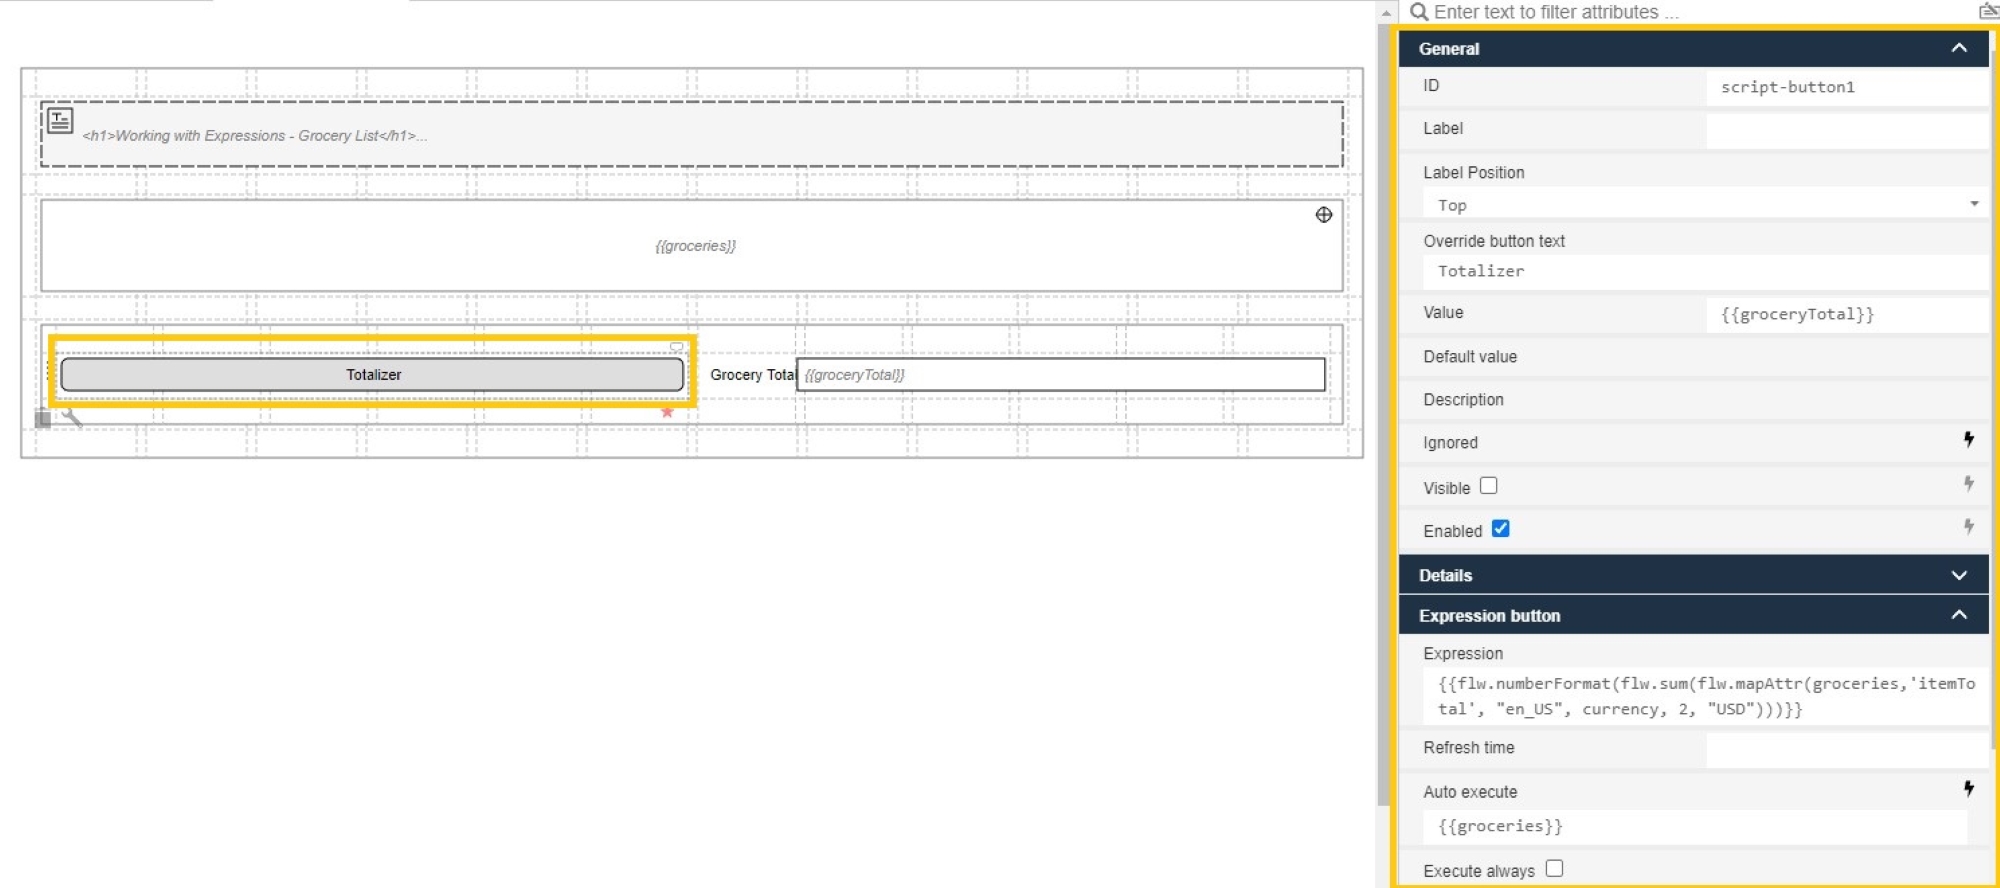
Totalizer Expression Button:
The final element is the totalizer expression button that will calculate the total bill and save it to the {{groceryTotal}} field.
We will bind triggering of this button to the {{groceries}}, which is the variable that is bound to the sub panel. This means, every time an item is added, deleted or updated, the grand total will be recalculated.
Finally, the expression we use will take advantage of more Flowable front end functions, specifically, the flw.sum() and flw.mapAttr() functions to allow us to sum together the itemTotal elements of the groceries array. And, once again we will format as US Dollars.
{{flw.numberFormat(flw.sum(flw.mapAttr(groceries,'itemTotal', "en_US", currency, 2, "USD")))}}
This completes the grocery list form and we can test in once again in the form designer runtime preview.
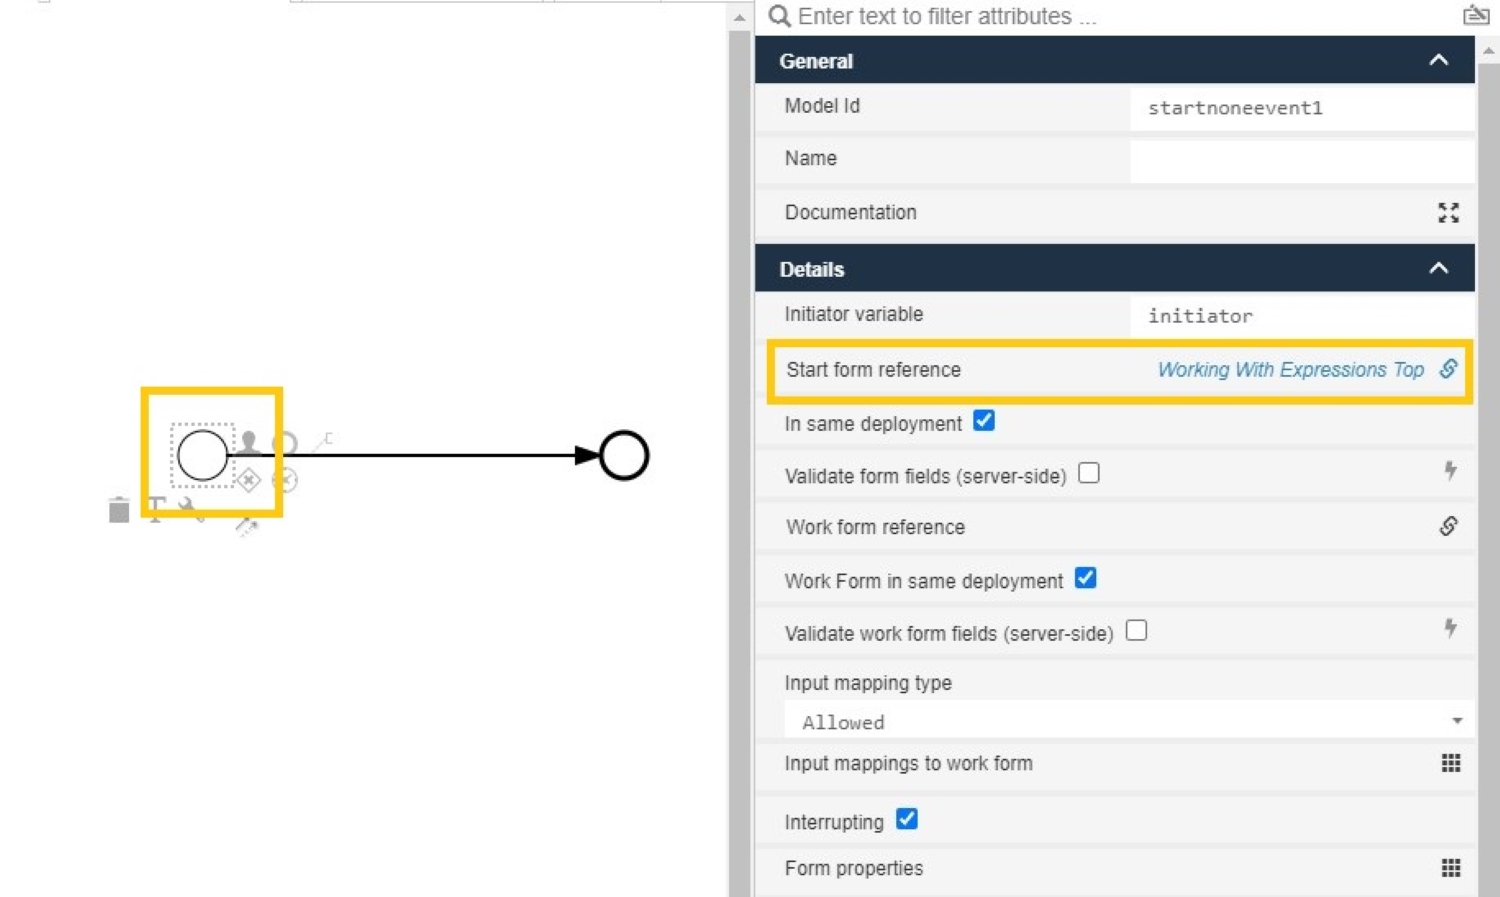
Process Configuration
Finally, we need to set up a simple process, we will set the start form to be our grocery shopping list.
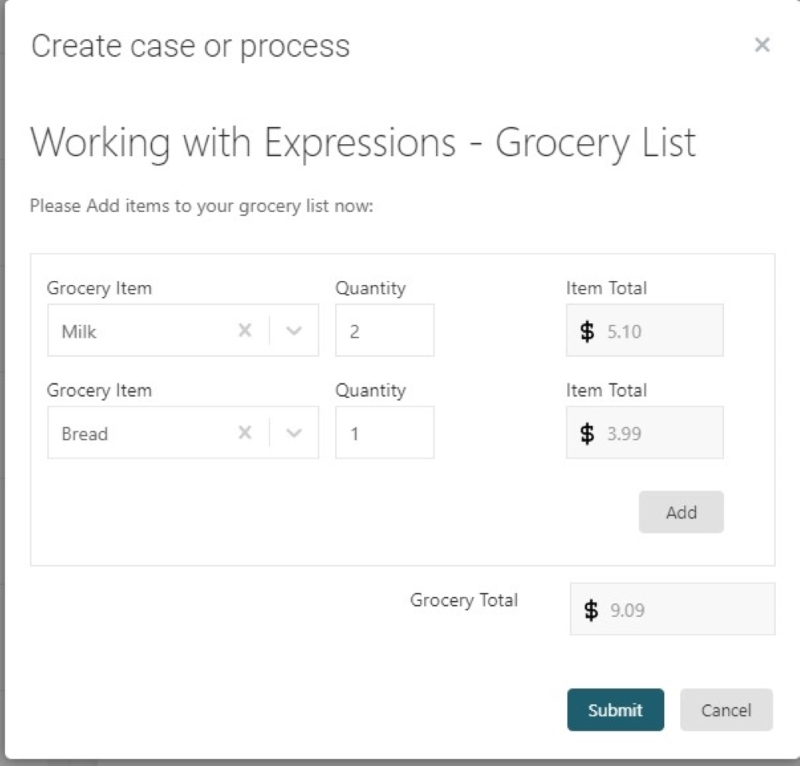
Publish and Run
Save and publish the app and then switch to Flowable Work. Now start an instance of the new process and you will be presented with the start form we just created.
Hopefully this has given some insight into how powerful the Expression button can be to enable truly dynamic forms.