Generate Document Task
Target audience: Modelers
Configuring and Using the 'Generate Document' Activity
This guide describes the 'Generate Document' activity that is available both for BPMN and CMMN models. With this activity, it is possible to generate PDF or Word documents based on data gathered during instance execution or from external sources.
The features and capabilities of this activity are described below by working through a real example.
The Template Model
The Flowable Work Activities > Generate Document activity uses a
Word document as a template that at runtime is used to generate a final PDF or Word document. This template is referenced by a Template Model.
Open Flowable Design and create a new app model. Afterwards, click the Create button and select Template for the Model type drop
Give the template a name and a key. For demo purposes, we'll use My template and myTemplate.
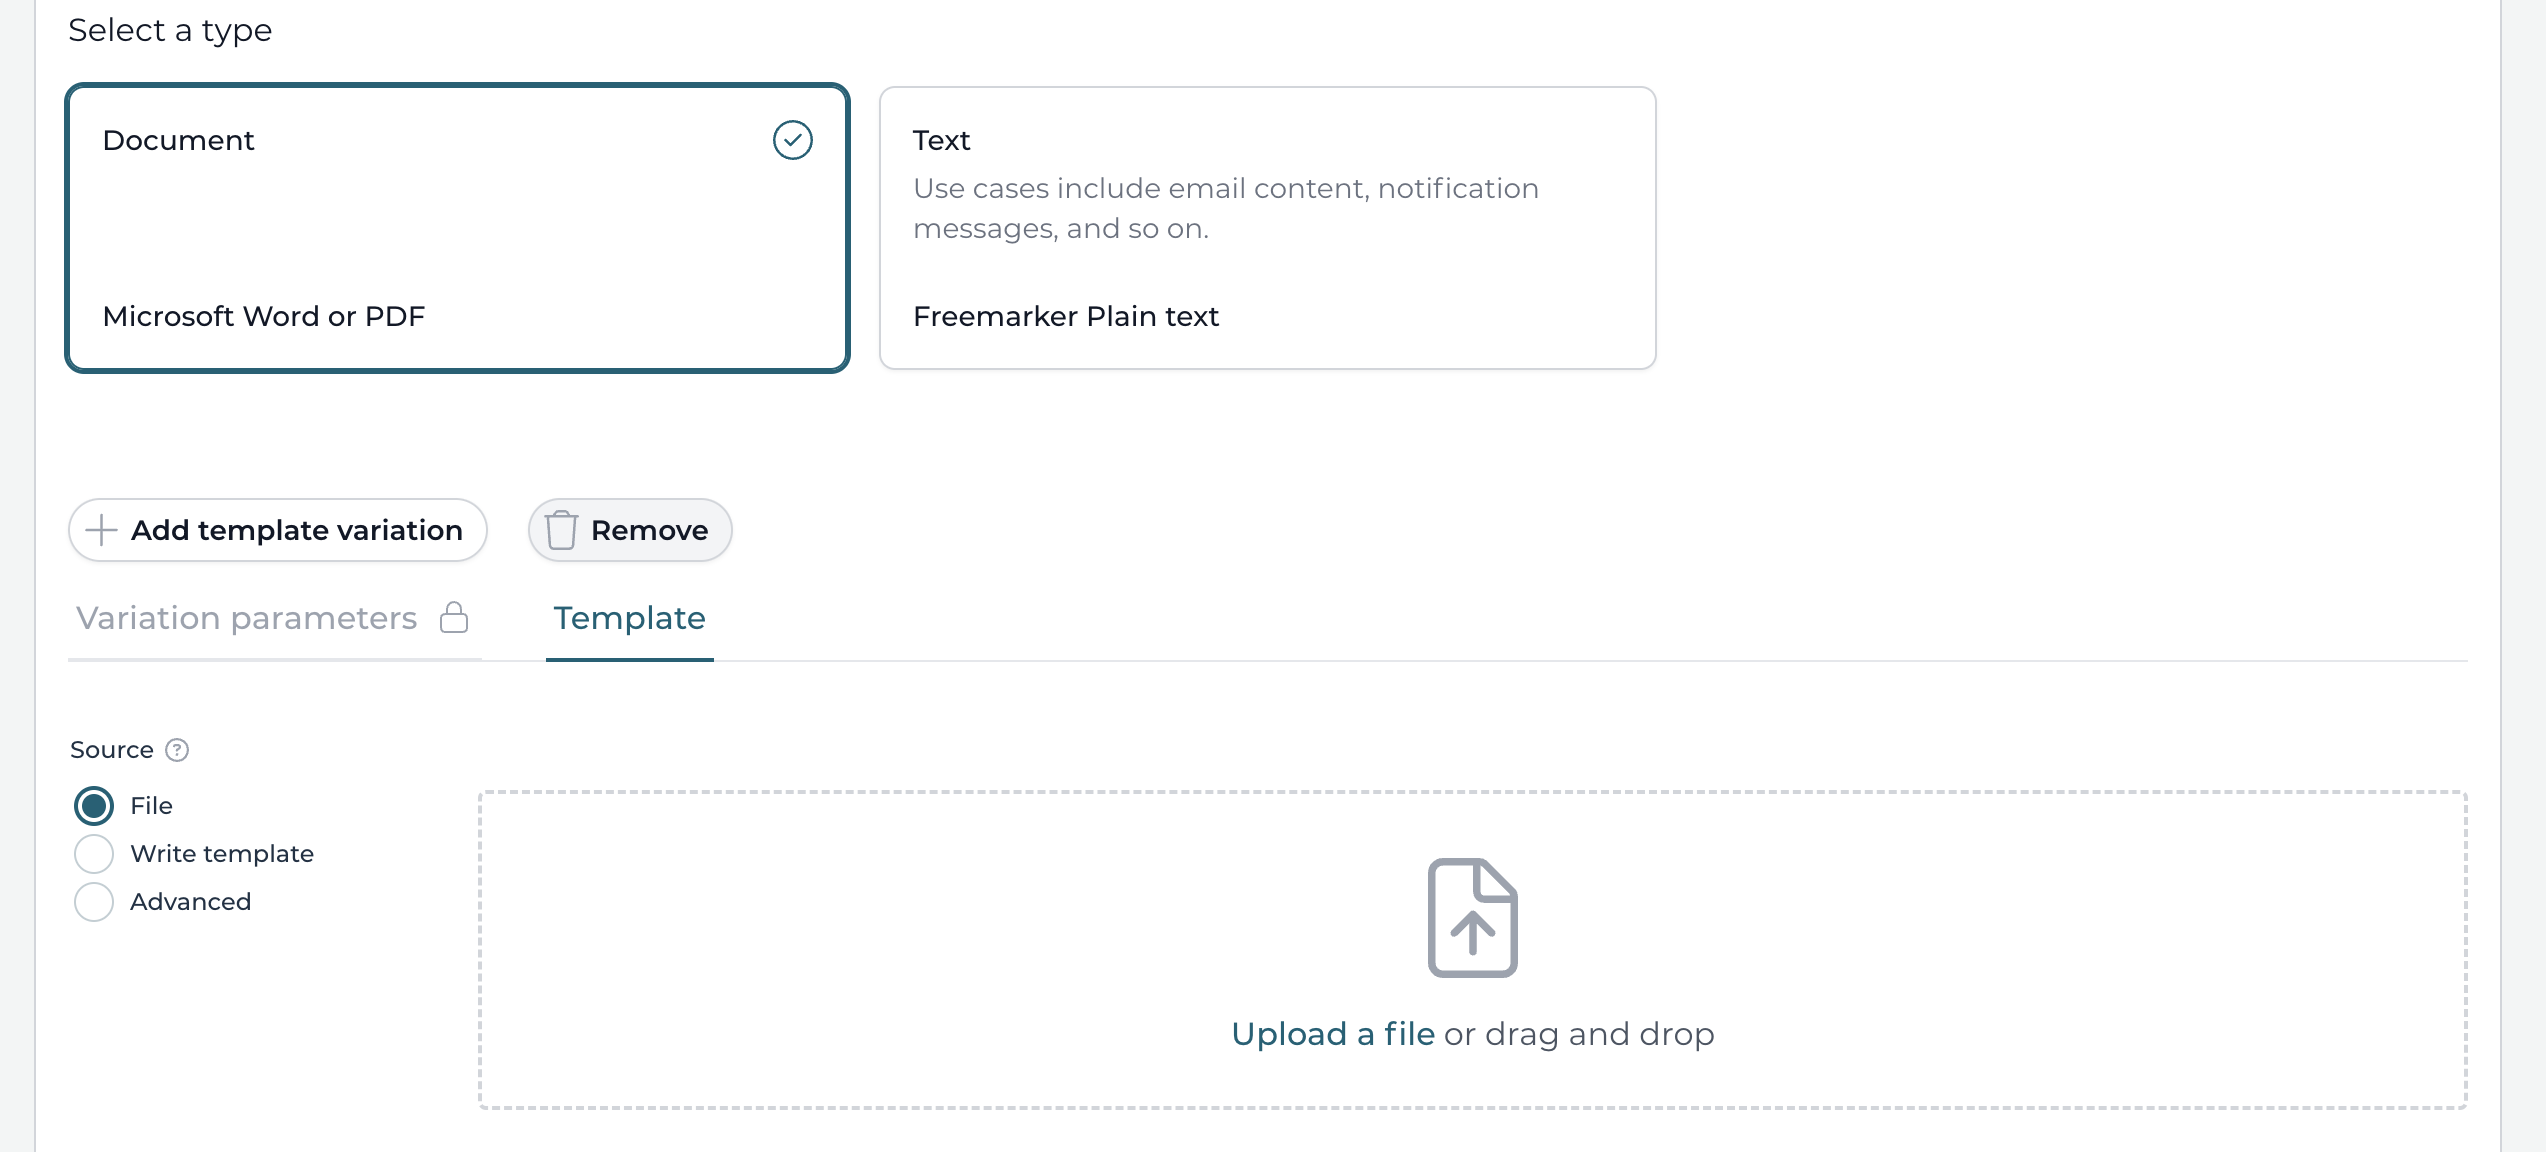
This will open up the template model editor. We'll use a Word document here, so the type can be kept on Document, which is the default. The alternative there, Text is for textual templates like for email bodies.
Click the Upload a file icon and upload or drop a Word template there.
The Word document template looks like this:
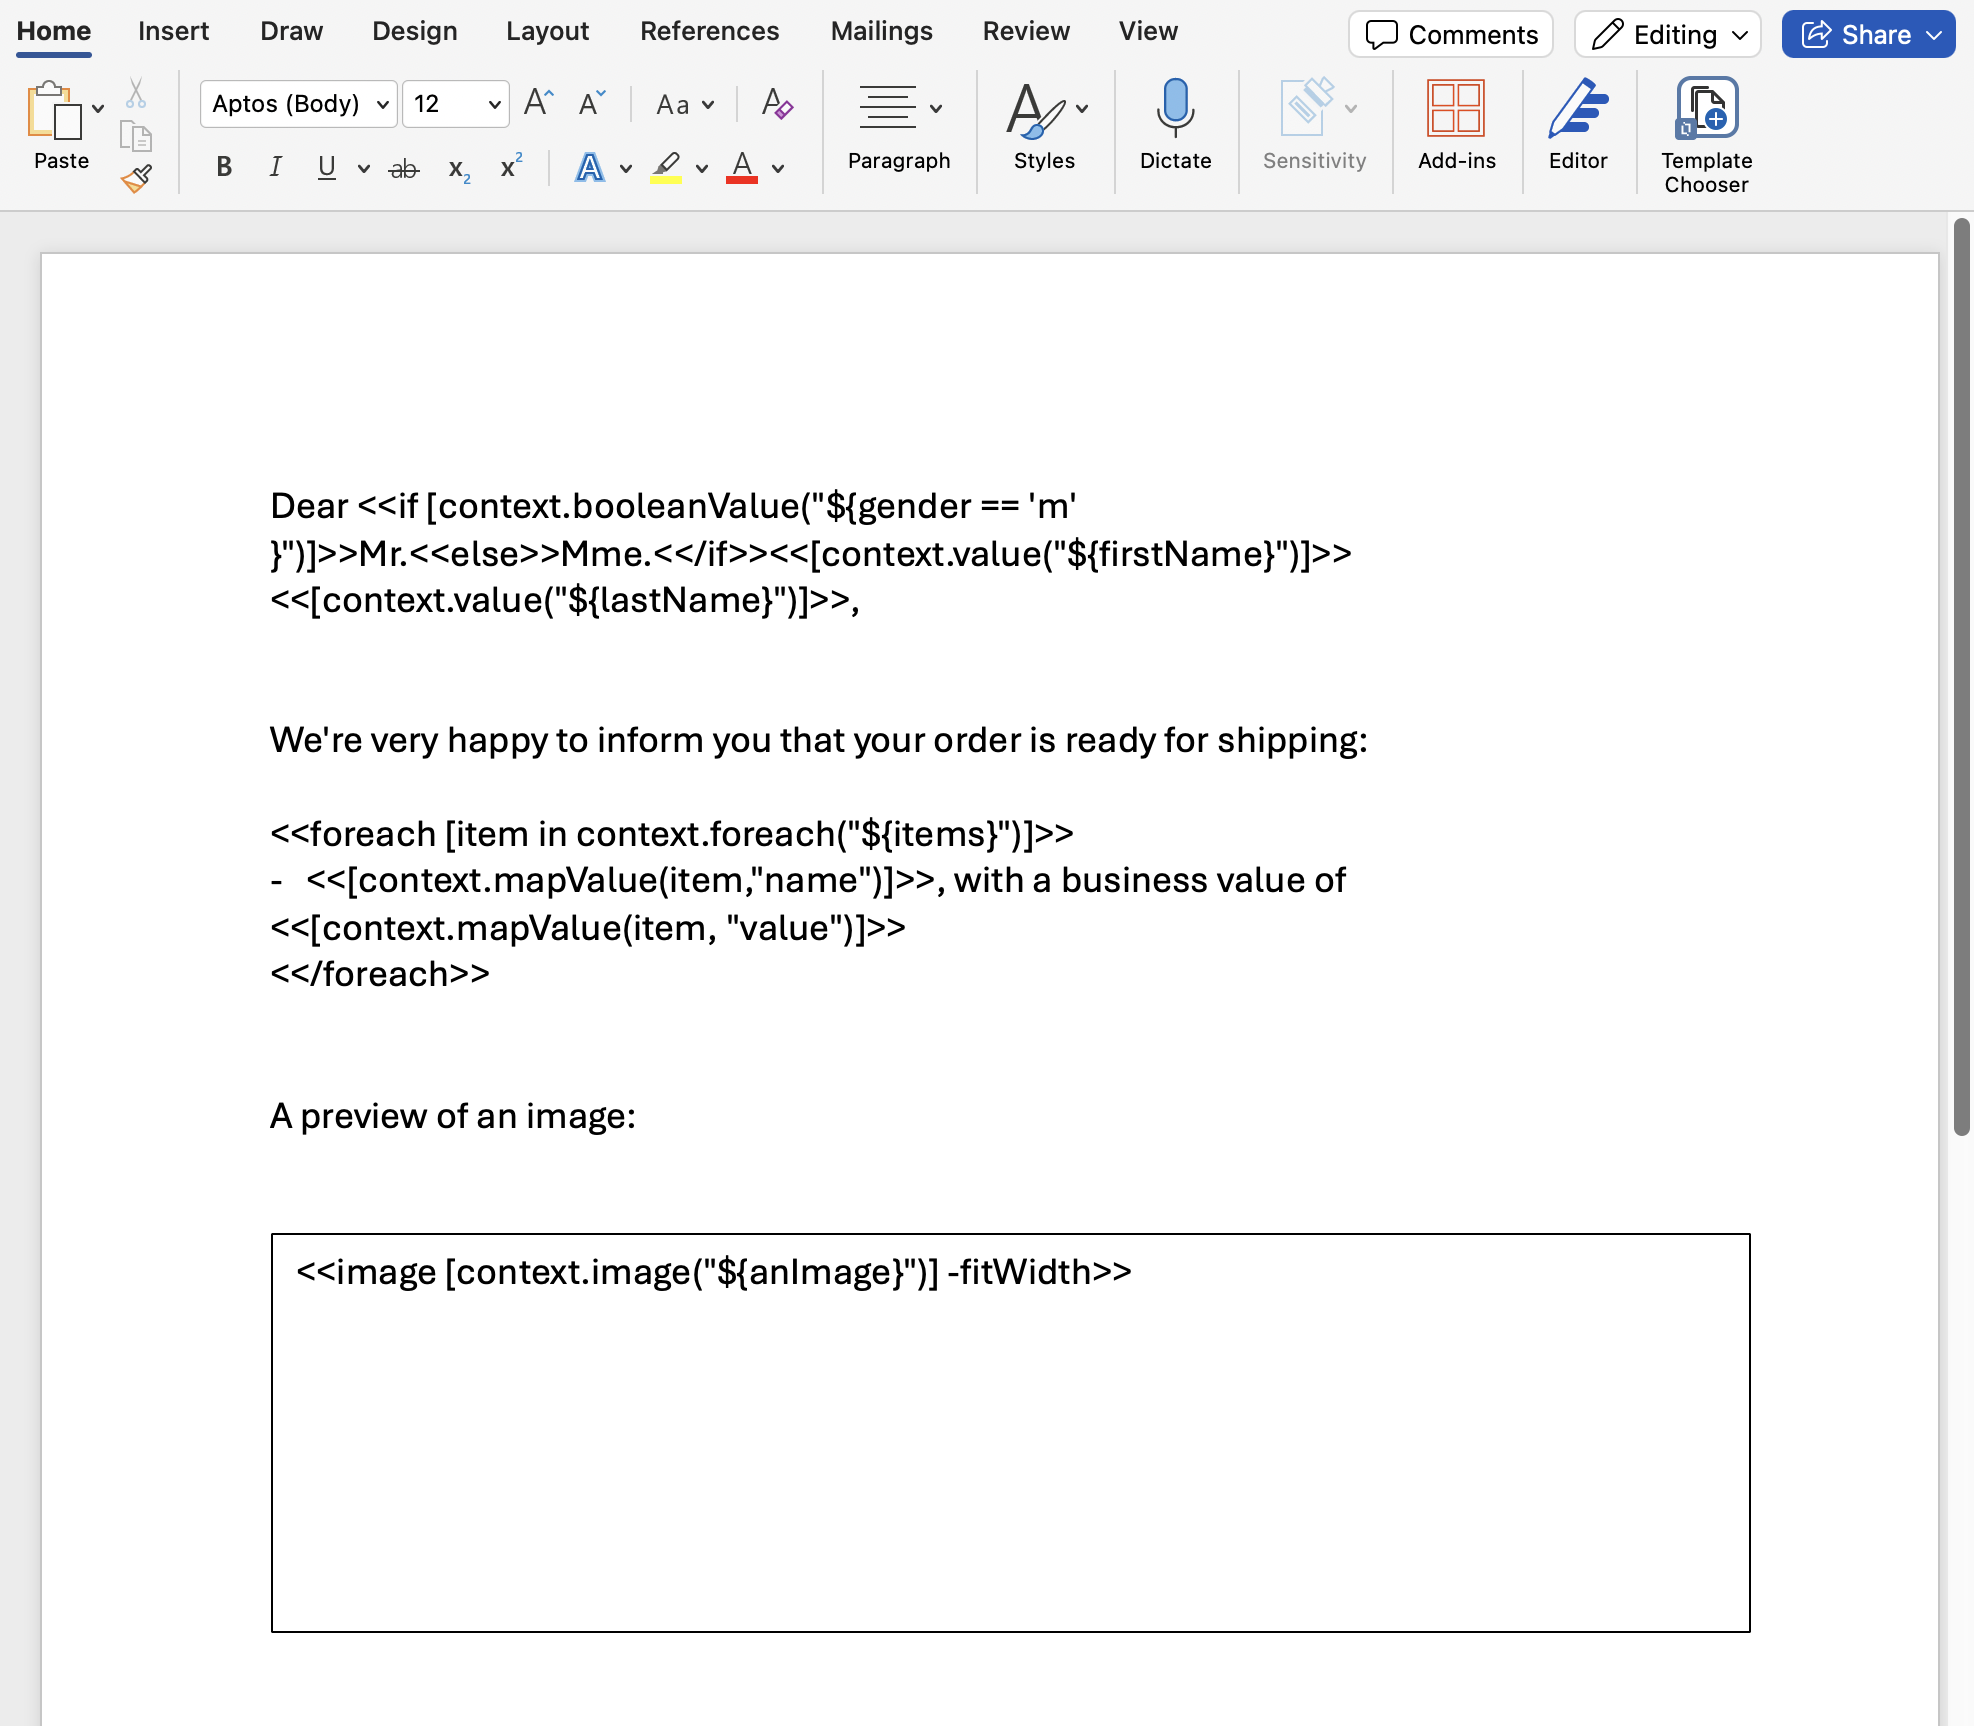
Dear <<if [context.booleanValue("${gender == 'm' }")]>>Mr.<<else>>Mme.<</if>><<[context.value("${firstName}")]>> <<[context.value("${lastName}")]>>,


We're very happy to inform you that your order is ready for shipping:

<<foreach [item in context.foreach("${items}")]>>
-   <<[context.mapValue(item,"name")]>>, with a business value of <<[context.mapValue(item, "value")]>>
<</foreach>>


A preview:


<<image [context.image("${anImage}")] -fitWidth>>
More information about the language and syntax used here can be found at https://docs.aspose.com/words/java/linq-reporting-engine-api/.
Finally, save the model and go back to the app model.
The Process Model
We can now use this template in a process or case model. Using Flowable Design, let us create the following simple process model:

This process also has a start form that looks as follows:
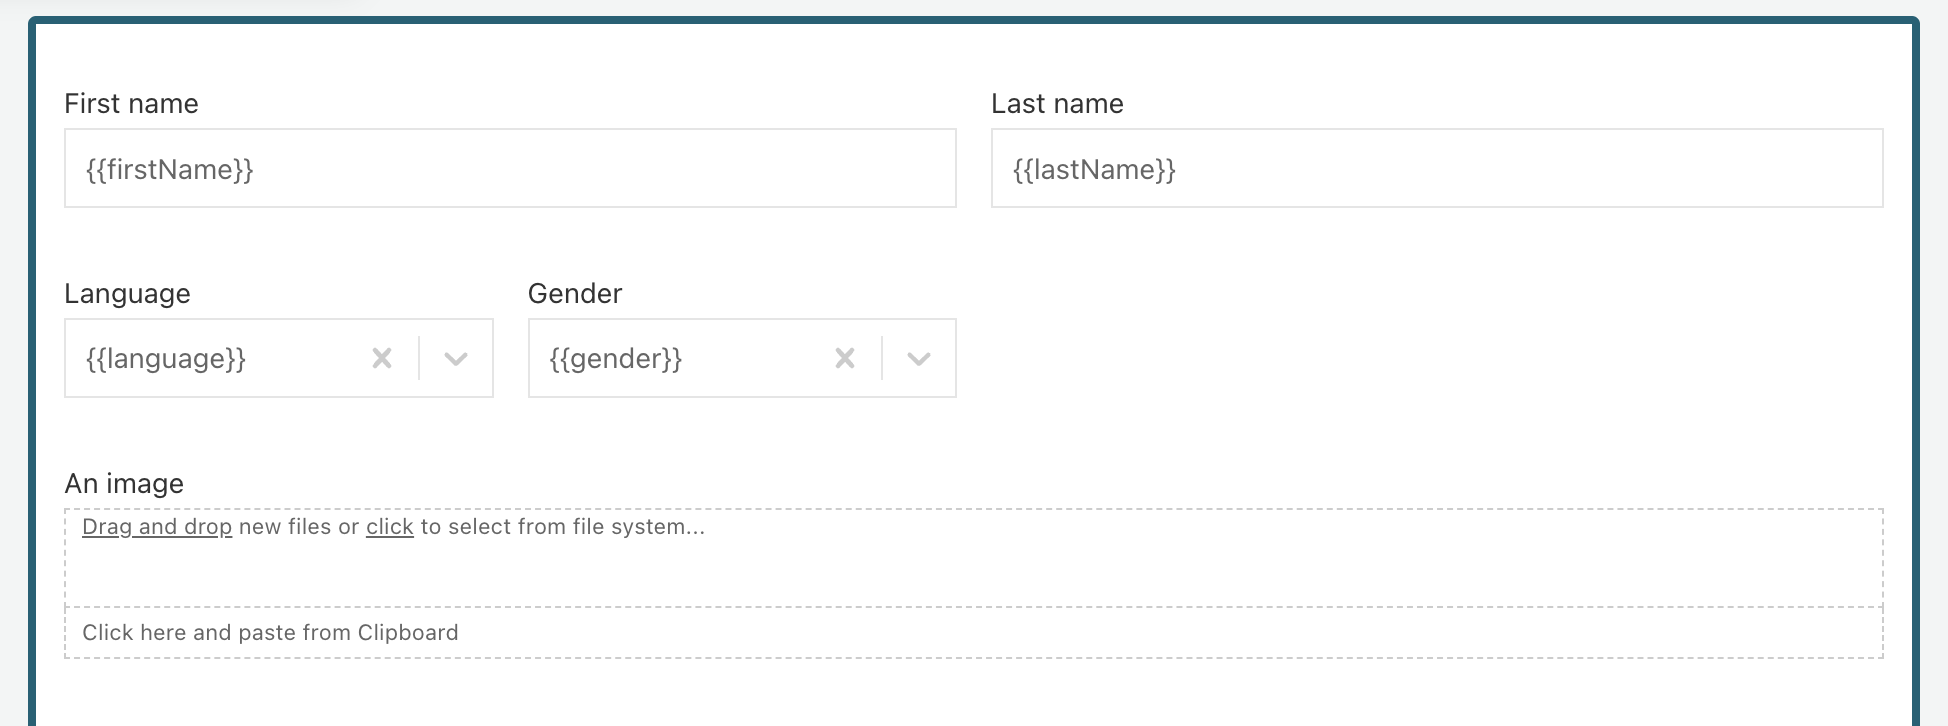
Note that the start form has fields called firstName, lastName, gender, anImage. When executing an instance of this process definition, the form values are stored as process variables.
Such variables can be used in templates. Note that transient variables also work in case you do not want to store variables that are only useful for document generation.
Data for documents can also come from automatic service tasks. In this example, we are using a Groovy script task to emulate this:
def items = new java.util.ArrayList();

HashMap map1 = new java.util.HashMap();
map1.put("name", "laptop");
map1.put("value", 1234);
items.add(map1);

HashMap map2 = new java.util.HashMap();
map2.put("name", "desk");
map2.put("value", 987654321);
items.add(map2);

execution.setTransientVariable("items", items);
Now on to the configuration of the Generate Document step:
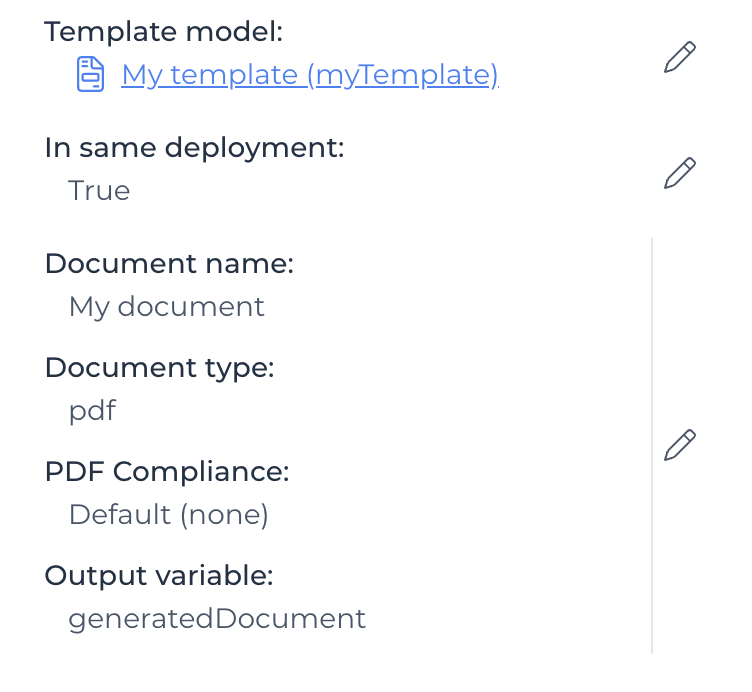
-
The template model is the model we've created above. It's also possible to create a new model directly from this property.
-
The Document name is used to determine the filename of the generated document and this can be an expression (e.g., based on a customer name variable, a timestamp, etc.).
-
The Document type is either
pdfofwordand this determines the output format. -
v3.16.0+ The PDF Compliance can be changed if there's a need for PDF/A compliance (e.g. for archival purposes). This option is only used if the
document typeis set toPDF. -
The Output variable is filled in when the generated document needs to be referenced later (this is shown in the next step).
Finally, in the task at the end, we want to display the document.
To do this, we attach a task form to the user task and use
the document gallery form component with a value set to
{{generatedDocument}} (i.e., the name of the Output variable above).
Running the Example
Deploy the process model by creating an app and publishing it in
Flowable Design.
Go to Flowable Work or Engage, click the Create new button in the
Work menu, and select the deployed process.
The start form is now shown:
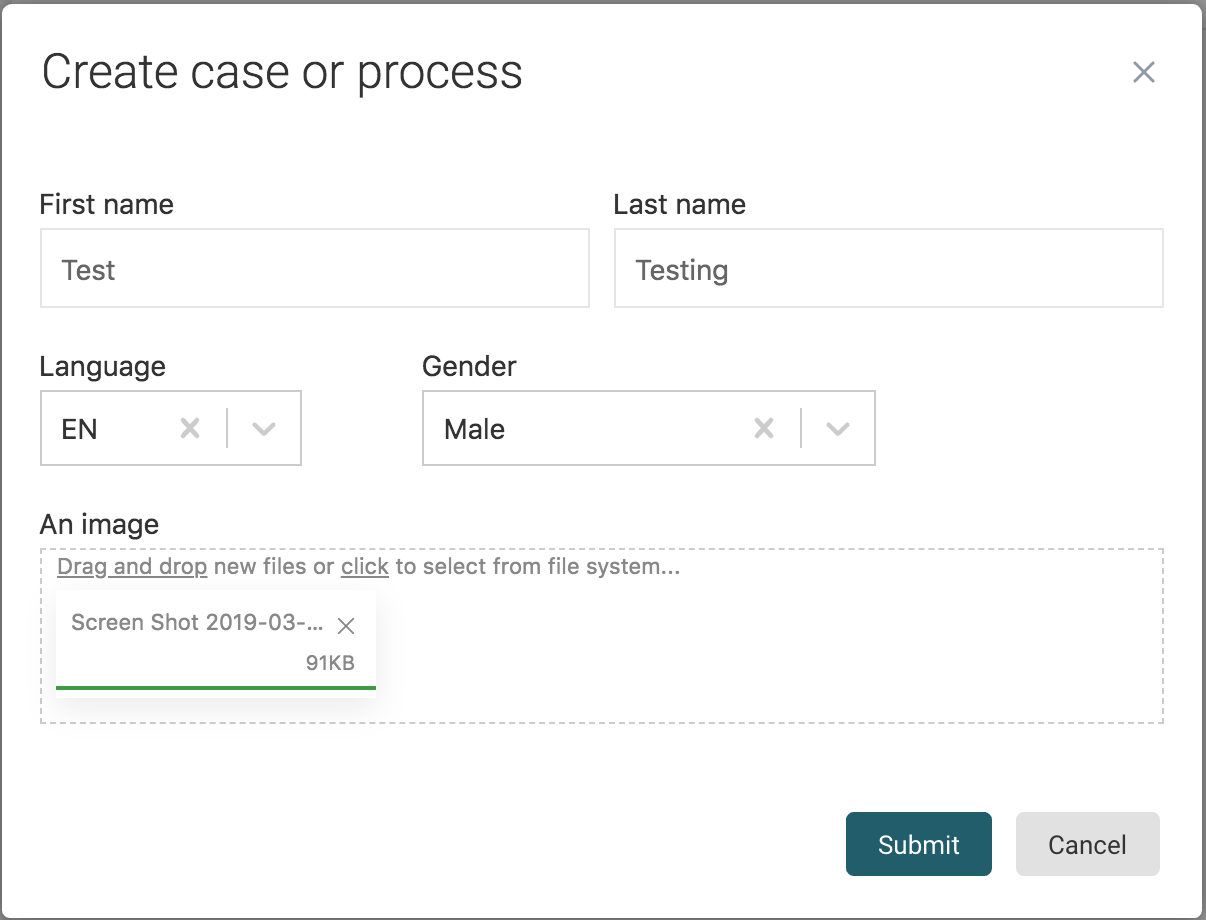
After clicking Submit, the process instance is started, and the
document is generated.
The process instance now waits at the user task before the
end event. When clicking on the task, we see the generated document:
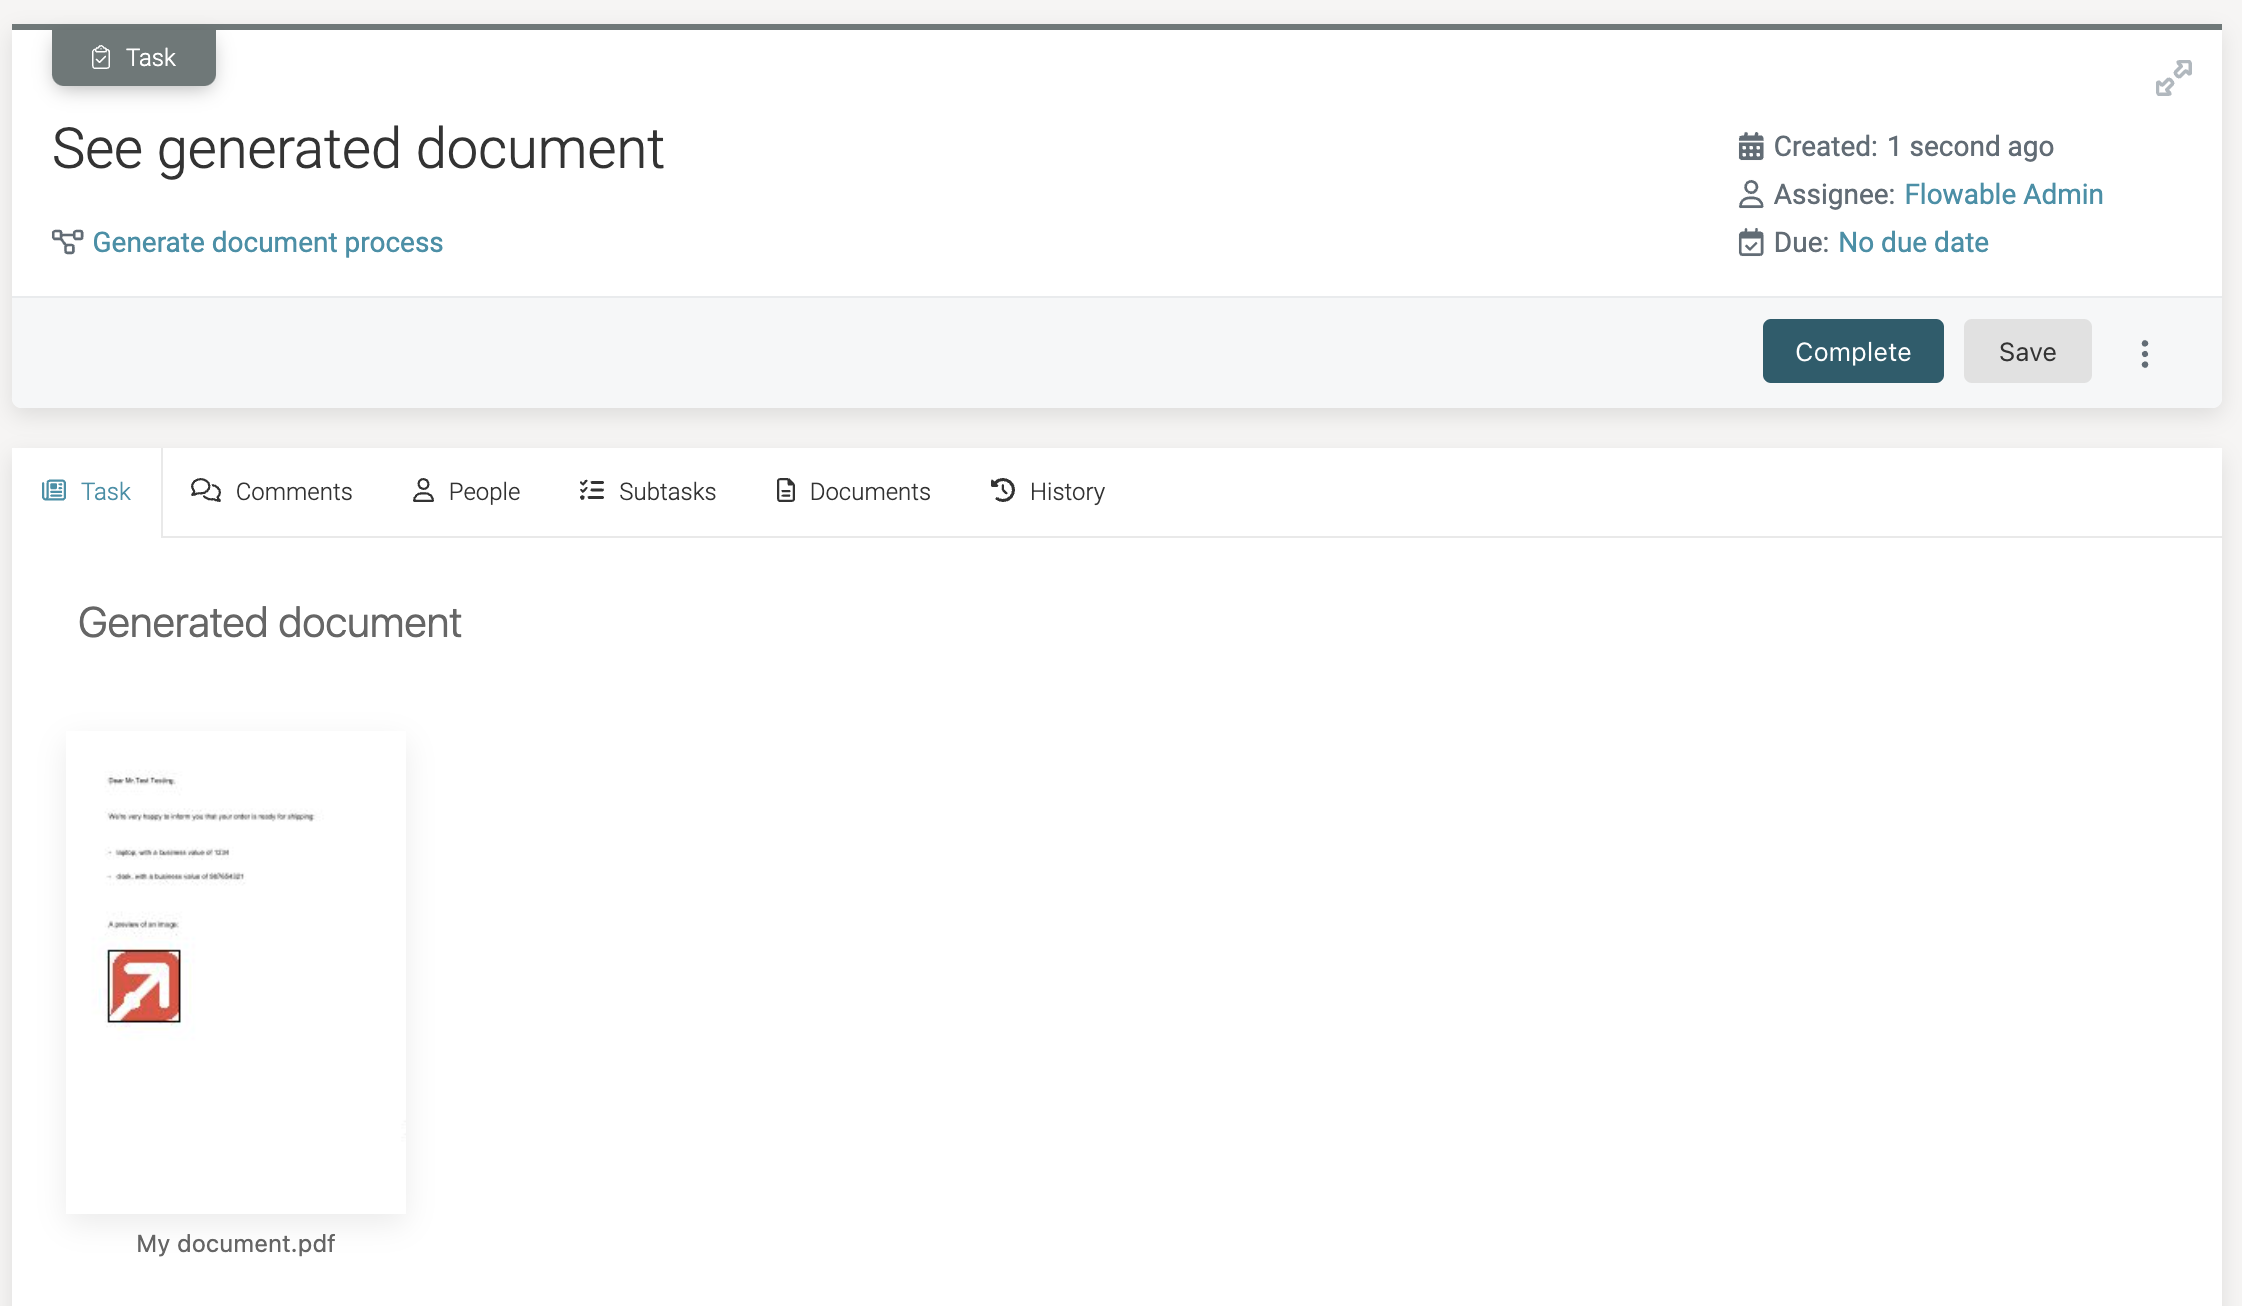
When clicking the document thumbnail, the document is seen full screen and downloaded.
Template Variations
In the previous example, we used one variation definition for the template. Let us now look at adding variations.
Variations allow a different template, depending on the context (more specifically based on instance variables), for the same template definition.
A prime example is the multi-language support for the same document. That is the reason why the start form above had a language field.
Let us build such a multi-language document generation now.
Open the template model create before.
Click the Enable variations checkbox. This now shows a UI that allows filling in variation parameters. Add one parameter with name language and Default value en.
Upload two documents: one English template and one other language template:
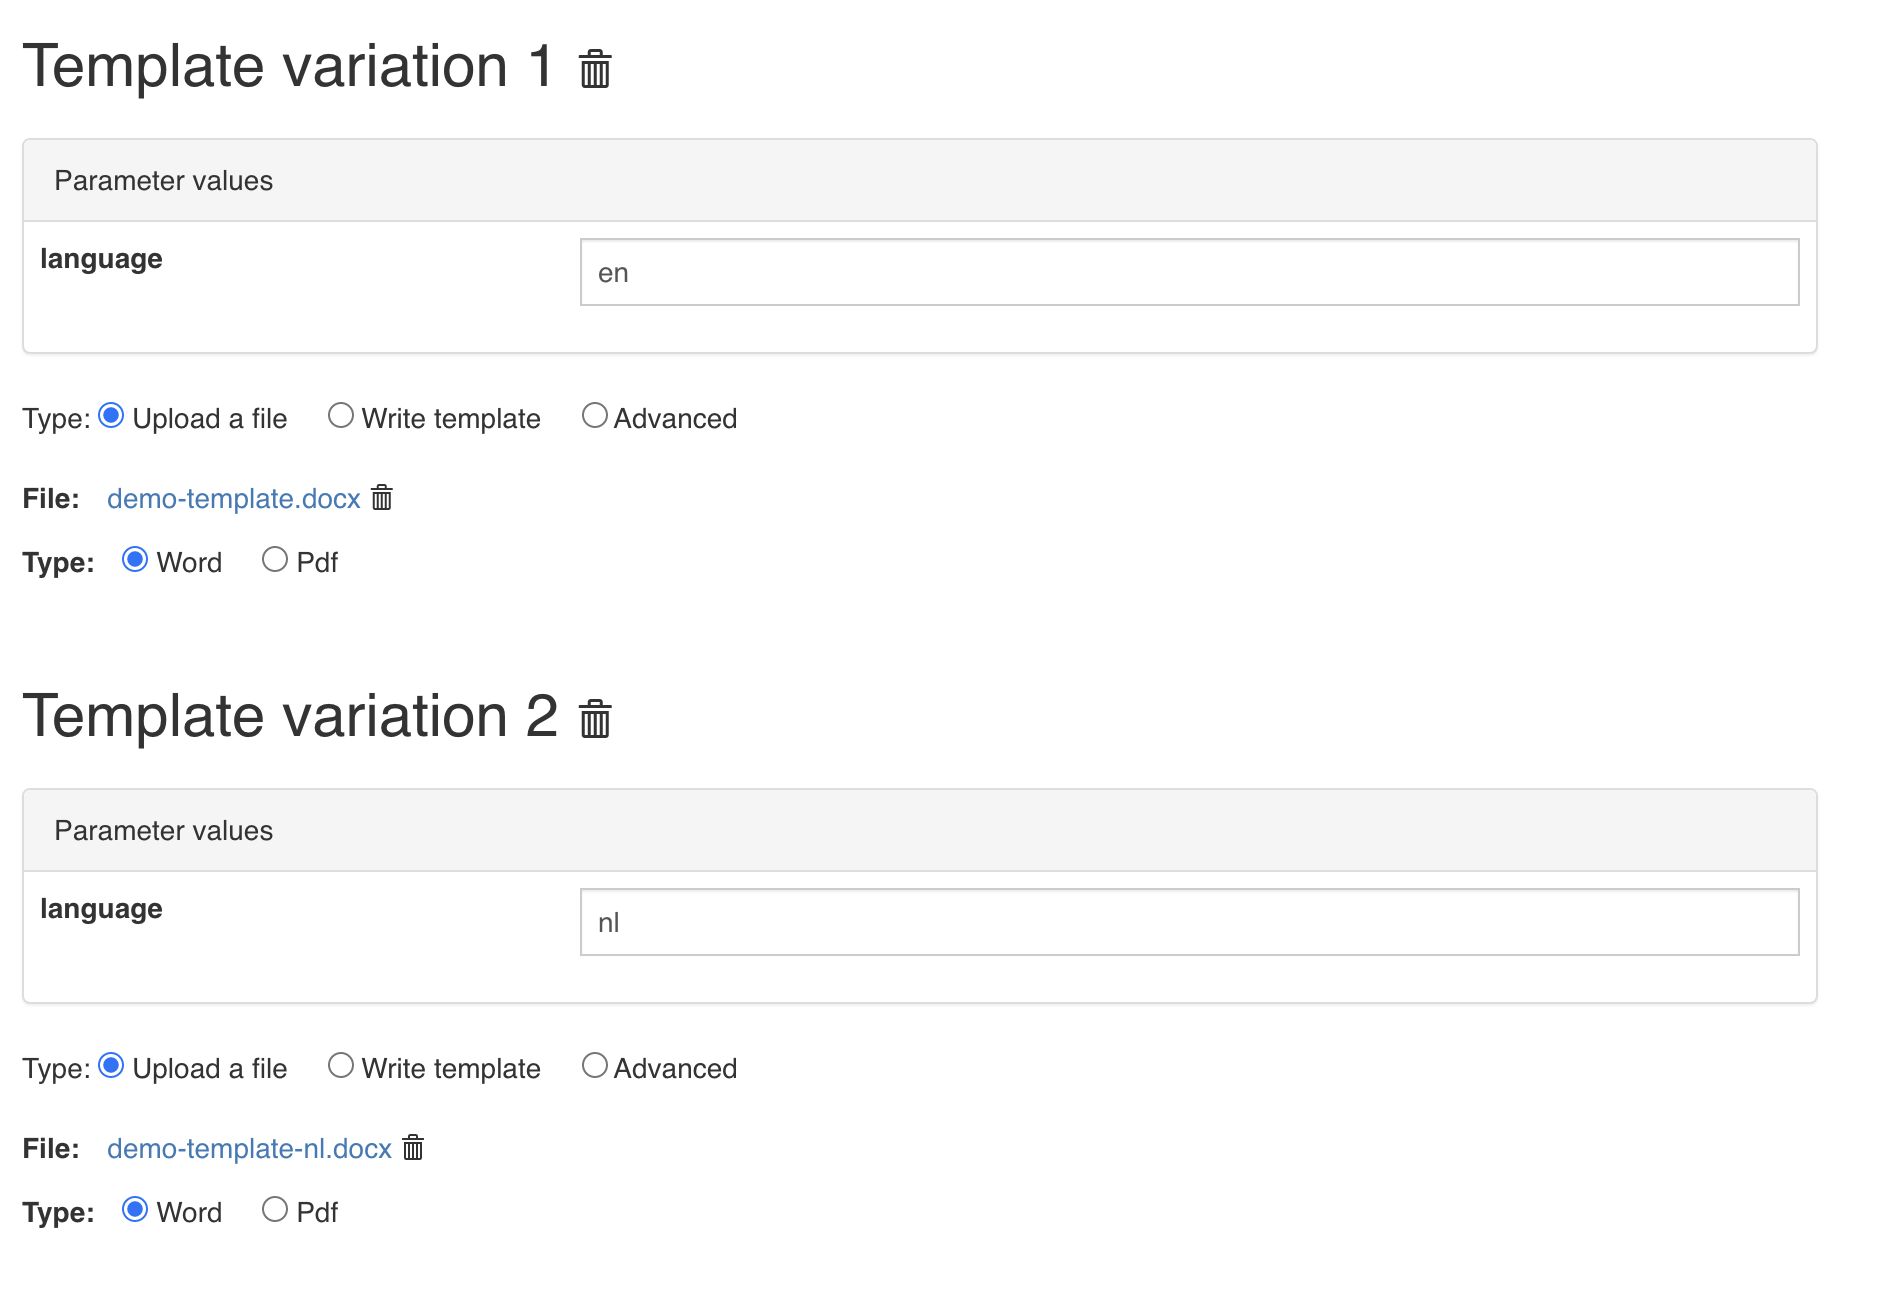
The en version is the same as above and the nl version is a version that is translated into Dutch.
What we're configuring here: when the language parameter is 'en', pick the first template and when the parameter value is 'nl', pick the other. The parameter will be a process variable at runtime in this case. The default is set to 'en' when the parameter is not matching.
Multiple variation parameters can be used and they are logically AND-ed together
The process definition is the same as the above. However, when now another language is selected, the translated version will now be used.
Advanced
In the Word template a context variable exists with which to generate advanced output. This variable can be used in the template (as shown above).
The name of the context object can be changed by the Context object property in Flowable Design. The default value is context.
For a list of available methods within the context object checkout the context reference
Configuring and Using the 'Generate Document' Activity with a PDF Template
This guide describes the 'Generate Document' activity to generate pre-filled PDF documents from PDF forms. PDF document generation is similar to Using the 'Generate Document' Activity.
With this activity, it is possible to generate a pre-filled PDF form, based on data gathered during process/case instance execution or from external sources.

The Template Model
Creating a template model is done the same way as above. The difference is that now a PDF template is uploaded. Such a PDF needs to be created using a specialized PDF tool that allows to create editable PDF's.
An example PDF document template looks like this:
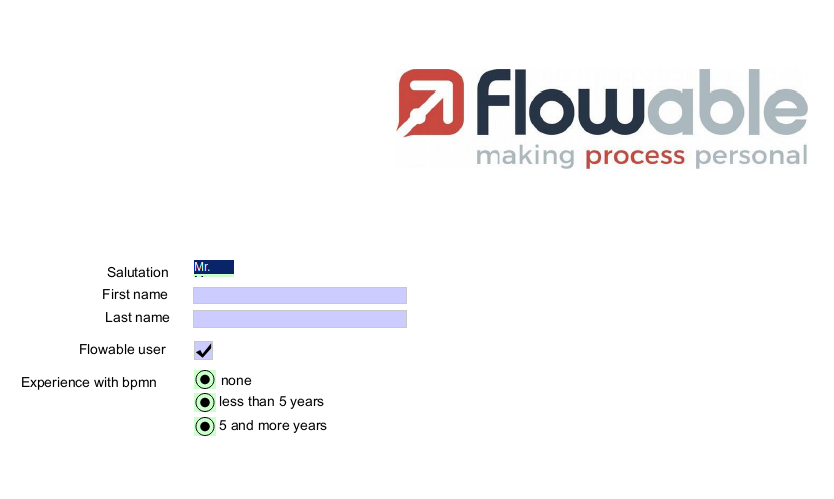
To pre-fill a form field value with data, the form field name must be an expression.
In the example above,
the First name text field name is a ${firstName} expression.
When the text field name is an expression,
the Generate document activity sets the text field value to the value of
the evaluated expression. Supported form fields are:
-
text field.
-
check box: when the name expression value is of a
Booleantype, the check box is set or unset if the value istrueorfalse. -
radio button: the radio button option with the same name as the name expression value is set.
-
list box: the choice with the same name as the name expression value is set.
The Combo box form field is not supported.
Process Model Example
We can now use this template in a process or case model. Using Flowable Design, let us create the following simple process model:

This process also has a start form that looks as follows:
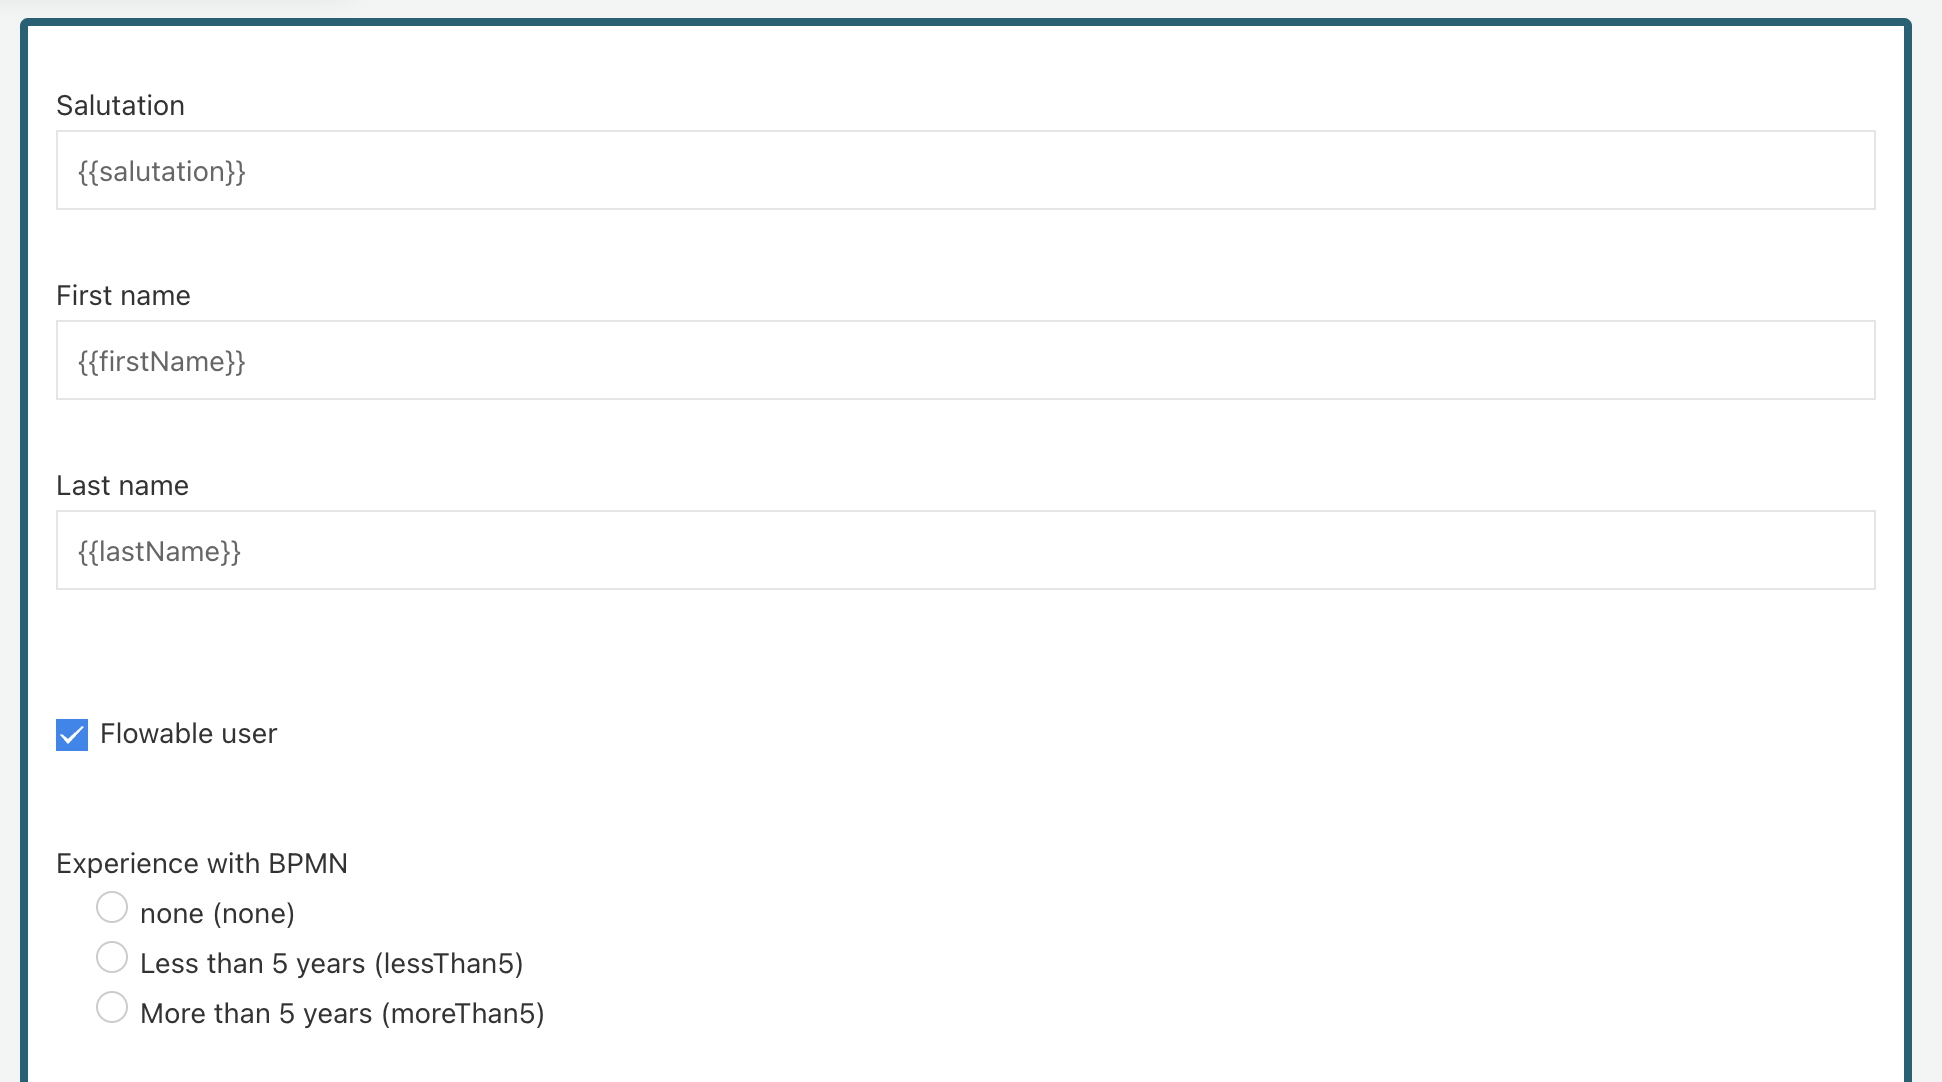
Note that the start form has fields called salutation, firstName, lastName, flowableUser, bpmnExperience. When executing an instance of this process definition, the form values are stored as process variables. Such variables can be used in templates. Note that transient variables also work if you do not want to store variables that are only useful for document generation.
The only supported document type is pdf.
Finally, in the task at the end, we want to display the document.
To do this, we attach a task form to the user task and use
the document gallery form widget with a value set to
{{generatedDocument}} (i.e., the name of the Output variable above).
Running the Example
Deploy the process model by creating an app and publishing it in
Flowable Design. Next, go to Flowable Work or Engage, click the
Create new button in the Work menu, and select the deployed process.
The start form is now shown:
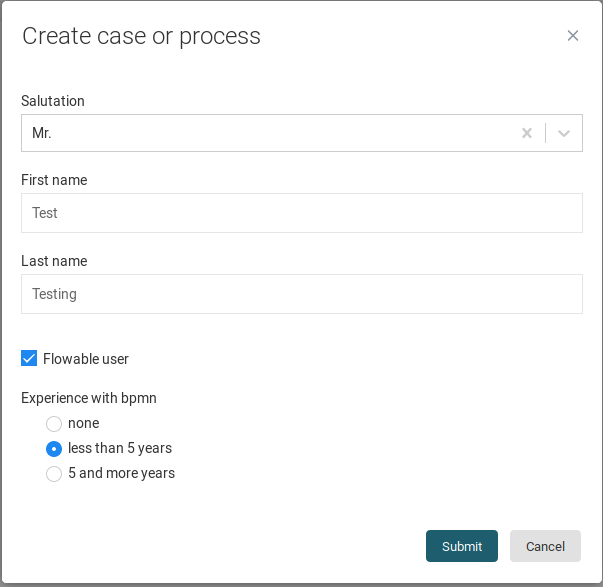
After clicking Submit, the process instance is started, and the
document is generated.
The process instance now waits at the user task before the
end event. When clicking on the task, we see the generated document:
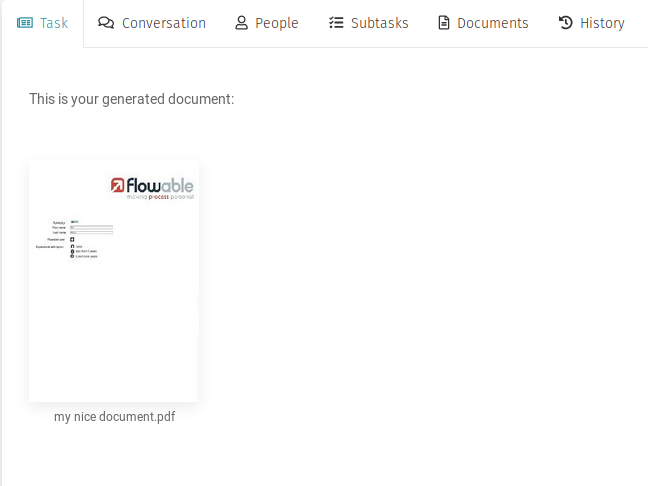
By clicking the document thumbnail, the document is seen in full screen and downloaded.
Advanced settings
There are a few advanced settings possible to tweak the Aspose templating engine. These need to be set in your Flowable Work installation:
flowable.template.aspose.allow-missing-members(default true): By default, missing members in expressions (e.g.<<[name.something]>>) will throw an exception. When this property is set to true, no exception is thrown, but the expression will resolve to null (i.e. no value is written).flowable.template.aspose.inline-errors(default false): By default, syntax errors in the template will lead to an exception being thrown. When this property is set to true, no exception is thrown, and the place where the error is happening is shown in the generated template. Note that will show syntax errors only, not expression evaluations problems.flowable.template.aspose.remove-empty-paragraphs(default false): By default, expressions resolving to empty paragraphs are not removed. When this property is set to true, empty paragraphs will be removed from the final document.
Example of enabling the inline errors property:
