Establishing a Connection to Salesforce
Target audience: Developers & Modelers & Administrators
v3.15.0+Introduction
This how-to covers how to establish a connection to Salesforce as client app.
Flowable offers two methods to connect to Salesforce as client:
- OAuth2 Client Credentials
- Using a URL and Token
For enhanced security and streamlined connectivity, the preferred method is through OAuth2 Client authentication. This approach aligns with the new generator feature in Flowable Design, enabling interactions with Salesforce to access and manipulate sObjects within your business apps.
Create your Salesforce Playground
To ensure safe and effective testing without impacting any production applications, it is highly advisable to set up a non-production playground organization in Salesforce. This environment allows you to experiment and familiarize yourself with various settings risk-free. If you don't already have such an environment, follow these steps to create one on Trailhead, Salesforce's dedicated learning platform:
- If not already done, signup for a Salesforce Trailhead Account: trailhead.salesforce.com
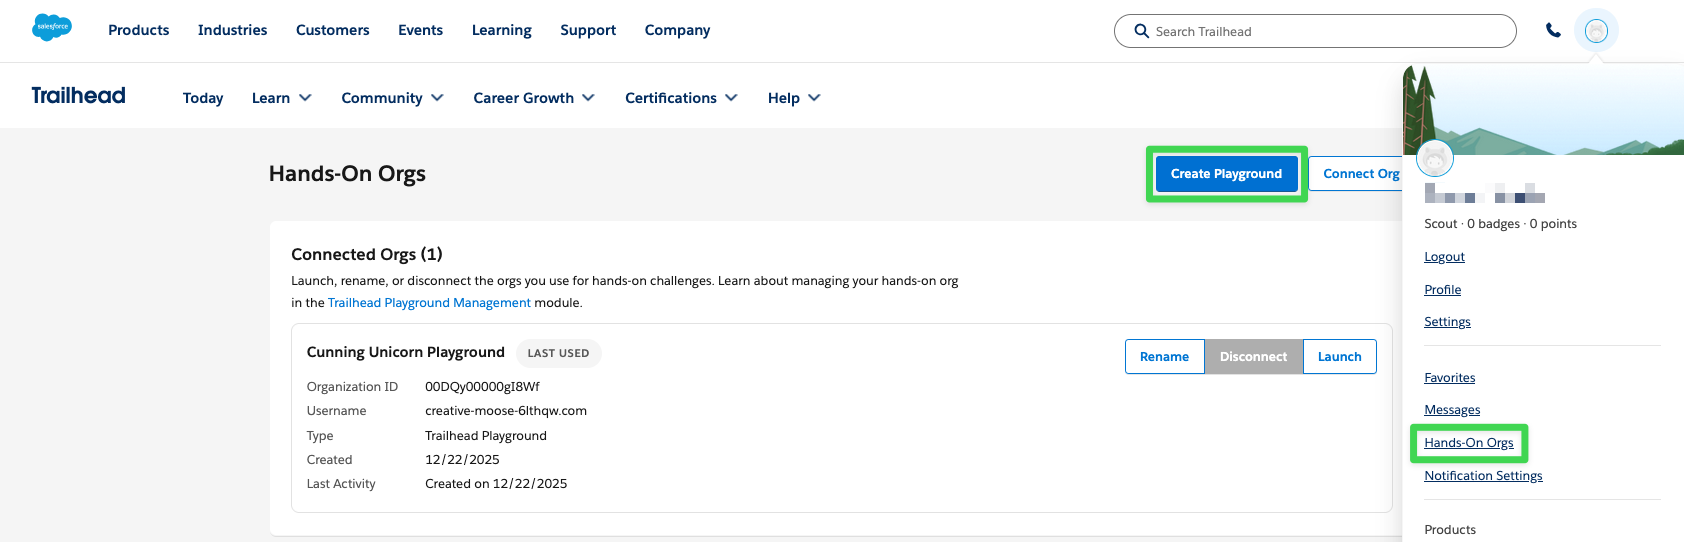
- Login and click on your profile image
- Select Hands-on Orgs
- Create a new Hands-On Playground Org
Using this Playground the following steps can be executed and tested in a safe, dedicated environment and later adapted to a production org.
Authentication
You first need to authenticate Flowable to Salesforce. There are different possibilities how this can be done. Let's start with an easy one to get started quickly, followed by the way which automatically renews the tokens.
Option 1: URL and Token based authentication
This method is recommended only, for testing purposes and quickly get started.
In order to obtain an access token, you can follow the Salesforce Guide to access sObjects using a Postman Collection: Click here.
Once setup, you can obtain access tokens from Postman to be used for the Salesforce Generator:
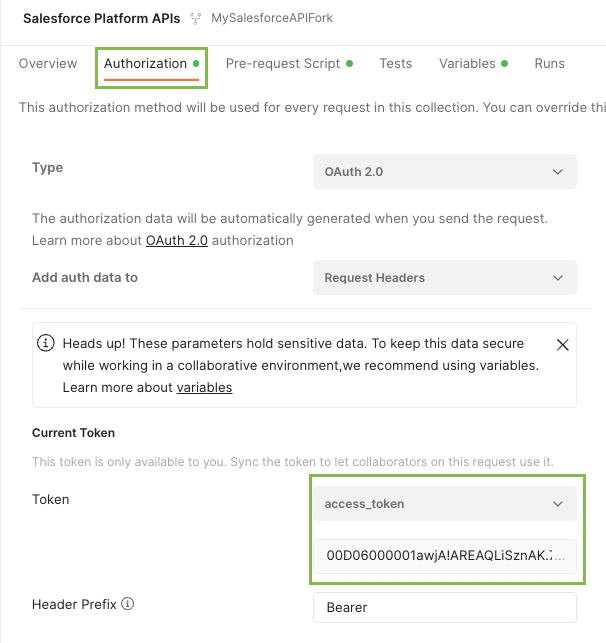
Since you now have a token, you can skip the next section and go directly to Authenticate with Flowable
Option 2: Configure OAuth2 Client Credentials Authentication
This is the preferred way to connect to Salesforce for Flowable Design and Flowable Work.
 note
noteThis method is currently available for Flowable Work and Flowable Design on premise only.
Prepare your Salesforce App for OAuth2 Client access
 caution
The steps below are a step-by-step guide to get started. A production setup requires a good understanding of security implications for the steps. Using this guide is not a replacement for reading and understanding the Salesforce official user documentation for Connected Apps linked here.
Steps to create a Connected App using OAuth Client Credentials
Step 1: Log In to Your Salesforce Org
Log in to your Salesforce account. Ensure you have administrative privileges to create and manage connected apps.
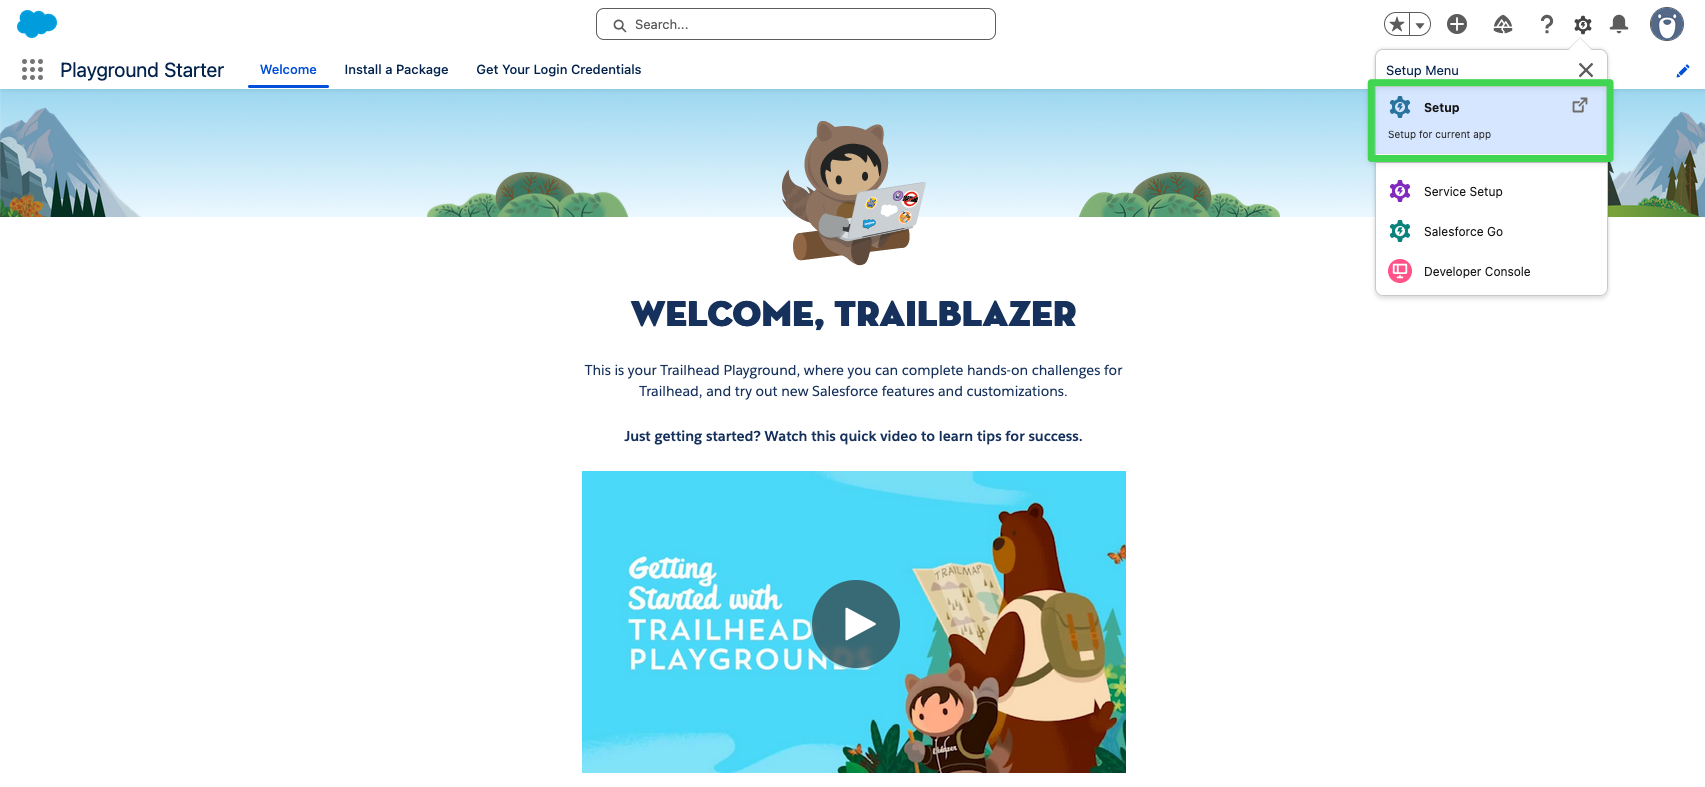
Step 2: Access Setup
Action: Click on the gear icon in the upper right corner and select 'Setup'.
Step 3: Navigate to App Manager
Action: In the Setup menu, find the Platform Tools section. Under Apps, click on App Manager
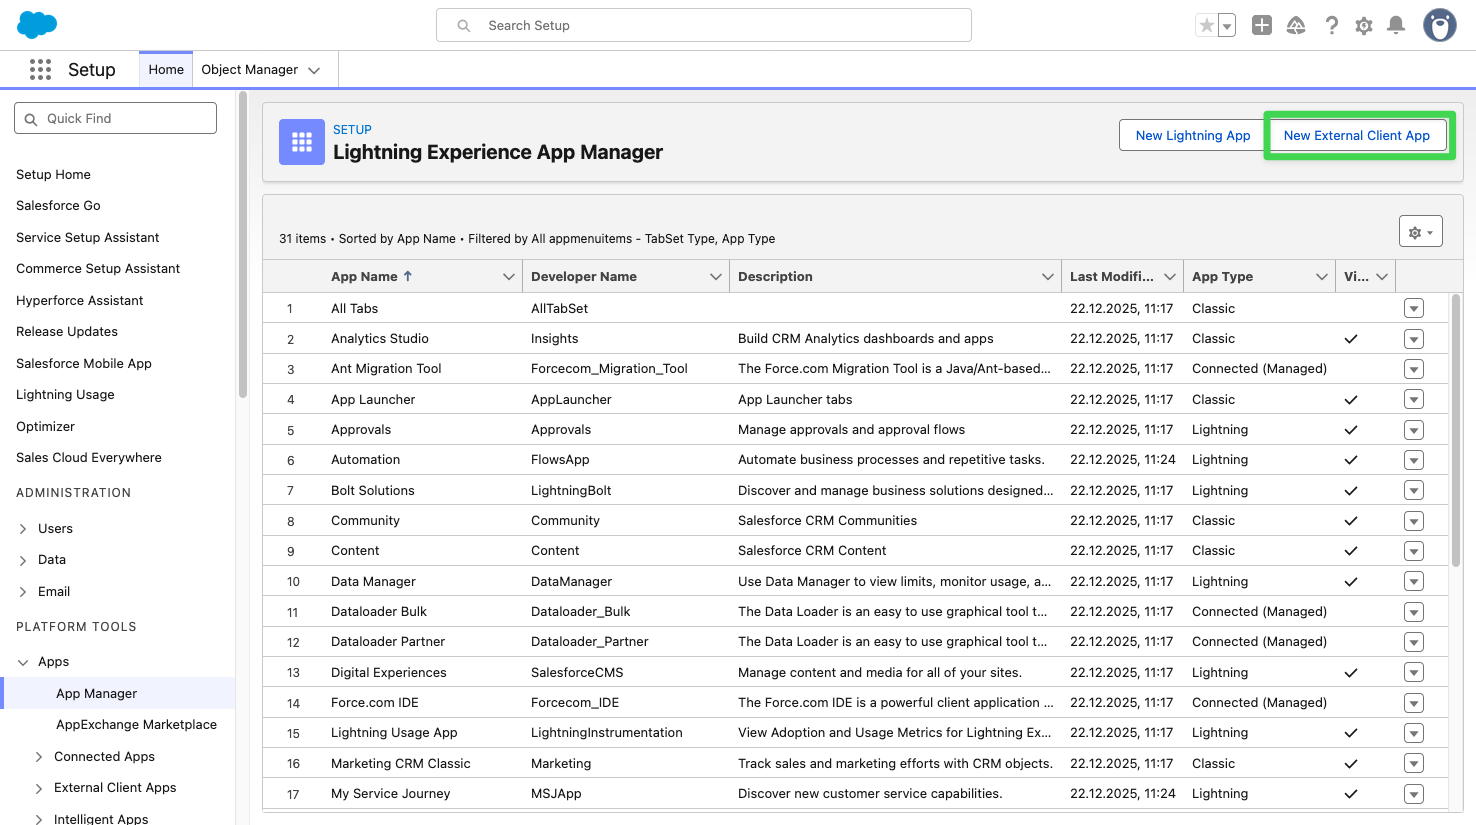
Step 4: Create New Connected App
Action: Click on the 'New External Client App' button. Note: This starts the process of creating your app.
Step 5: Enter Basic App Information
Fill in the basic information like the name of the app, API name, and contact email. Tip: Choose a descriptive name that clearly identifies the app's purpose.
Step 6: Enable OAuth Settings
In the API section, check Enable OAuth Settings.
Note: This is crucial for setting up OAuth2 authentication.
Step 7: Enable for Device Flow and Set Callback URL
Tick Enable for Device Flow and enter the callback URL.
For OAuth2 Client Credentials authentication, this can be a dummy URL as it isn't used (e.g. https://localhost/).
The callback URL is where Salesforce sends responses during the authentication process for interactive authentication schemes.
Step 8: Select OAuth Scopes and Enable Client Credentials Flow
Choose the appropriate OAuth scopes for your app under Selected OAuth Scopes. These determine what data your app can access.
Example: The important scope to access sObjects is Manage user data via APIs (api).

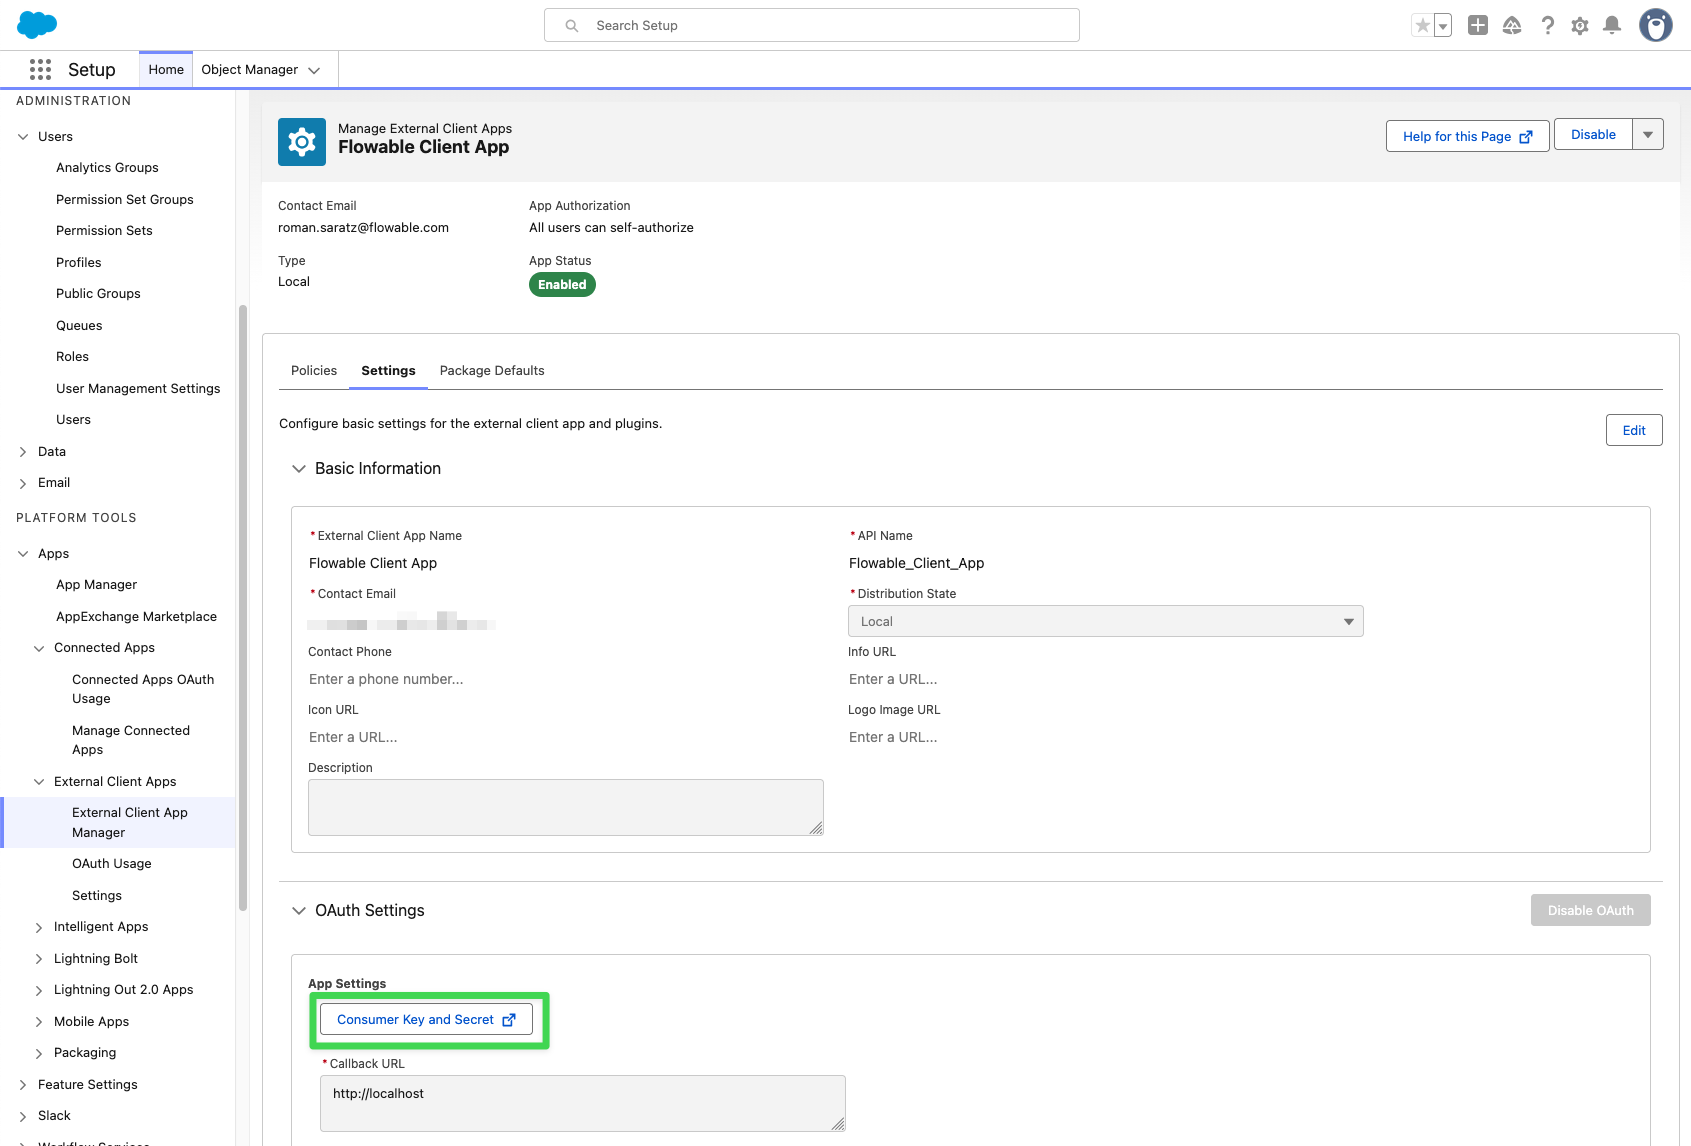
Step 9: Get Consumer Key and Consumer Secret (Client ID and Client Secret)
Once the connected app is created in Salesforce, the Consumer Key (Client ID) and Consumer Secret (Client Secret) can be obtained:
Within the app, click on Manage Consumer Details in the app overview to get the keys.
Important: Store these credentials securely as they are essential for OAuth2 authentication.
Step 10: Configure Additional Settings (Optional)
You may also configure additional security settings like Trusted IP Range or Permitted Users.
Tip: These settings provide further control over how the app is accessed.
Step 11: Save and Wait for Activation
Save your new connected app. Note: It may take a few minutes for Salesforce to activate the app.
Step 12: Configure Client Credentials Flow 'Run As' User
Step: Open your connected app via Manage Connected App and click on the Edit Policy button:
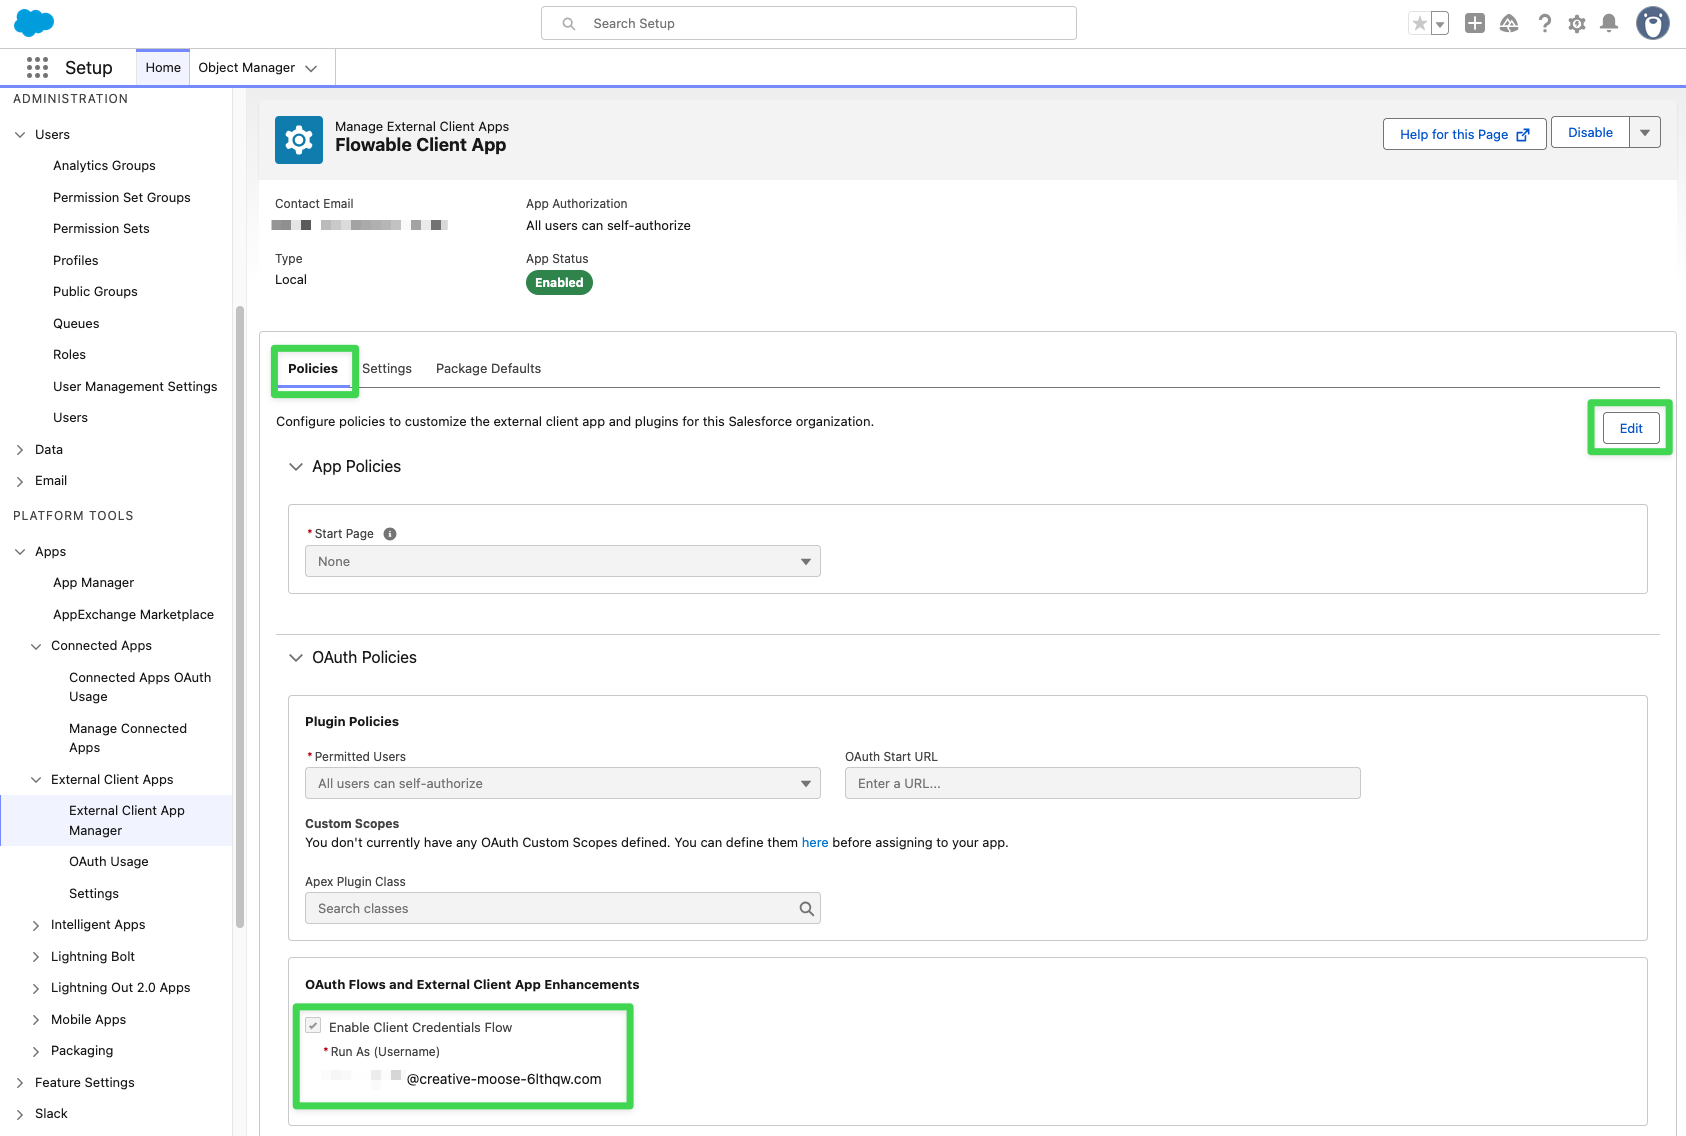
In the Client Credentials Flow section, you will have the option to select a technical user. This is the Salesforce user account on whose behalf the connected app will execute requests. You'll find the relevant email address to enter in Salesforce under Administration -> Users -> Users
cautionBe aware that the selected technical user's permissions and roles within Salesforce will dictate what your connected app can access and do. It's essential to ensure that this user has the correct level of access for your app's needs.
If you miss this step, the following error is returned from Salesforce: [invalid_grant] no client credentials user enabled.
Step 13: Use Credentials in Flowable Step: Use the Consumer Key and Secret to configure your OAuth2 client settings in Flowable Design and Flowable Work, like described below.
Configure your OAuth2 Client in Flowable (On Premise)
When you have a Connected App in Salesforce with OAuth2-based Client Credentials enabled,
you can then configure the client credentials in your Flowable application by editing the application.properties file:
 info
infoNote, that the salesforce part in the property names below can be changed to something custom. This is the OAuth2
client reference name to refer to this OAuth2 client configuration to obtain access tokens.
OAuth2 Client properties for Flowable Design and Flowable Work
spring.security.oauth2.client.registration.salesforce.client-id=<salesforce consumer key>
spring.security.oauth2.client.registration.salesforce.client-secret=<salesforce consumer secret>
spring.security.oauth2.client.registration.salesforce.authorization-grant-type=client_credentials
spring.security.oauth2.client.provider.salesforce.issuer-uri=https://<my salesforce org base url>.salesforce.com
Replace the placeholders with the actual values from Step 9 in the section above.
This is currently supported in Flowable Work and Flowable Design.
Authenticate with Flowable
First, you need to obtain a token. There are two different ways, either using the connector or creating the models manually.
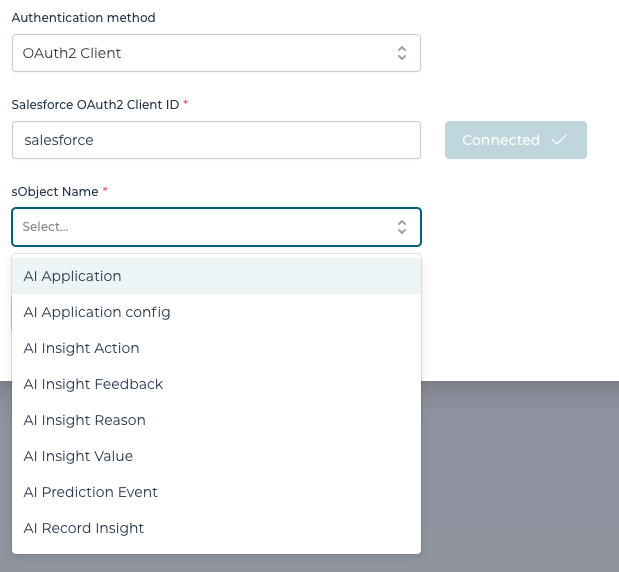
Option 1: Using the Salesforce Connector
The OAuth2 Client configuration can also be used in the Salesforce Connector Generator of Flowable to connect to your sObject(s):

After you are connected, you can select the sObject from the list:
Option 2: Using the Service Registry directly
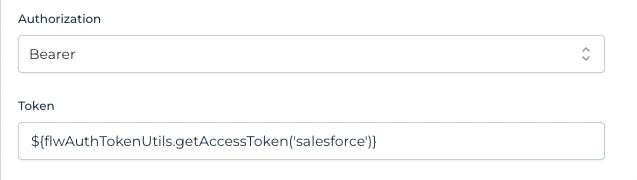
Having the OAuth2 client configured, the runtime can now obtain access tokens using the following expression:
${flwAuthTokenUtils.getAccessToken('salesforce')}
For example, this can be used in Service Models to configure Bearer authentication: