Integrate Flowable Forms into an Angular App
Target audience: Developers
Overview
Flowable Work has an out-of-the-box user interface for working with cases, processes, tasks, etc, which enables building and deploying solutions for business requirements in a fast time to market.
Sometimes however, it is required to integrate for example the start of a workflow in your company website. This is why Flowable provides a component you can use to embed a Form you modelled in any website.
This How-To will explain how you can embed Flowable Forms in a custom Angular frontend application. The example we'll be using is that of starting a BPMN process through a form.
The code for this how to can be found at GitHub.
Requirements
To do this tutorial it's required to have a running Flowable Work installation (Flowable Orchestrate will work as well, you will need to use core-api instead of platform-api).
Also, you are also required to have access to the Flowable Forms NPM packages available through the Flowable Artifactory.
Additionally, this tutorial uses @angular/cli which you should have installed globally on your machine.
This is only required since this tutorial shows how to do it based on an Angular app, your final setup will not require this dependency in case you are not going to use Angular.
Project Setup
The @angular/cli utility provides a tool called ng.
For this how-to we used the Angular CLI version 20.0.4, which generated an Angular 20.0.5 project.
However, since the Angular API doesn't have too many changes in the recent versions, it probably also works with older and newer versions of Angular.
This tool can be used to create a new project without any existing source code: it will download all dependencies and prepare a dev setup.
Simply run ng new integrate-forms to create a new project.
It will go and ask you a few simple questions what you would like to configure, like routing and style format and will then create the project.
The output (no routing, SCSS stylesheet) will look as the following:
$ ng new integrate-forms
✔ Do you want to create a 'zoneless' application without zone.js (Developer Preview)? No
✔ Which stylesheet format would you like to use? Sass (SCSS)     [ https://sass-lang.com/documentation/syntax#scss                ]
✔ Do you want to enable Server-Side Rendering (SSR) and Static Site Generation (SSG/Prerendering)? No
CREATE integrate-forms/README.md (1477 bytes)
CREATE integrate-forms/.editorconfig (314 bytes)
CREATE integrate-forms/.gitignore (587 bytes)
CREATE integrate-forms/angular.json (2597 bytes)
CREATE integrate-forms/package.json (1091 bytes)
CREATE integrate-forms/tsconfig.json (992 bytes)
CREATE integrate-forms/tsconfig.app.json (429 bytes)
CREATE integrate-forms/tsconfig.spec.json (408 bytes)
CREATE integrate-forms/.vscode/extensions.json (130 bytes)
CREATE integrate-forms/.vscode/launch.json (470 bytes)
CREATE integrate-forms/.vscode/tasks.json (938 bytes)
CREATE integrate-forms/src/main.ts (222 bytes)
CREATE integrate-forms/src/index.html (300 bytes)
CREATE integrate-forms/src/styles.scss (80 bytes)
CREATE integrate-forms/src/app/app.scss (0 bytes)
CREATE integrate-forms/src/app/app.spec.ts (673 bytes)
CREATE integrate-forms/src/app/app.ts (273 bytes)
CREATE integrate-forms/src/app/app.html (20095 bytes)
CREATE integrate-forms/src/app/app.config.ts (400 bytes)
CREATE integrate-forms/src/app/app.routes.ts (77 bytes)
CREATE integrate-forms/public/favicon.ico (15086 bytes)
✔ Packages installed successfully.
    Successfully initialized git.
It will automatically create a new integrate-forms directory, since that is the name of our module.
When we go into this directory we have a package.json which offers us a few NPM commands like start and build.
Running the npm start command will then start the application with the port 4200.
Once we go to http://localhost:4200/ we will see our basic application screen:
Integrating Flowable Forms
The first step with our application is to install the @flowable/forms package.
This tutorial assumes that you are already authenticated against the Artifactory.
In your project directory you can simply execute:
npm install --save @flowable/forms react react-dom
As a next step we can generate a component to have a generic Angular entry point for Forms. Lets create the component with:
ng generate component flwform
It will generate a new folder flwform and add a TypeScript, HTML and Stylesheet file inside.
In addition, it will be hooked up to the main application ready to use in other components.
We can replace the flwform.ts with the following source code, which is based out of the Flowable Forms Documentation:
import {AfterViewInit, Component, ElementRef, EventEmitter, Input, OnDestroy, Output, ViewChild} from '@angular/core';
import {Model, render} from '@flowable/forms';

@Component({
  selector: 'flwform',
  template: '<div #el></div>'
})
export class Flwform implements AfterViewInit, OnDestroy {
  @Input() props: Model.CommonFormProps | undefined;
  @Input() payload: Model.Payload = {};
  @Output() payloadChange = new EventEmitter<Model.Payload>();
  @ViewChild('el', {read: ElementRef}) el: ElementRef | undefined;
  formWrapper: ReturnType<typeof render> | null = null;

  ngAfterViewInit(): void {
    if (this.el && this.props) {
      this.formWrapper = render(this.el.nativeElement, {
        ...this.props,
        payload: this.payload,
        onChange: (p: Model.Payload) => {
          this.payload = p;
          this.payloadChange.emit(p);
        },
      });
    }
  }

  ngOnDestroy(): void {
    if (this.el && this.formWrapper) {
      this.formWrapper.destroy();
    }
  }
}
This is now a ready to use component exposing the Flowable Form functionality to your Angular App.
Usage of Flowable Forms
Based on the previous section we have now a Flowable Forms component. This component can now be used in a static way, before we go then ahead in the next section and make it dynamic based on a Flowable Forms configuration.
The entry endpoint is our app.ts with the template app.html.
The file app.component.html is just a basic template file, which we can replace in our simple example with the component we would like to have.
For example a basic usage of flwform would be:
@if (props) {
<flwform [props]="props"></flwform>
}
We can provide the parameters to Flowable Forms as they are specified in the Flowable Forms documentation.
There is only one mandatory parameter which is the config, providing our form configuration.
A simple sample which we can add to our app.ts would be:
// ...

@Component({
  selector: 'app-root',
  imports: [ RouterOutlet, Flwform ],
  templateUrl: './app.html',
  styleUrl: './app.scss'
})
export class App {
    props = {
        config: {
            "rows": [
                {
                    "cols": [
                        {
                            "type": "text",
                            "value": "{{hello}}",
                            "label": "Hello",
                            "defaultValue": "World"
                        }
                    ]
                }
            ]
        }
    }
}
Loading this might result into an error in the console:

As a resolution you simply need to define global in your index.html.
Therefore, you can add in the header section the following HTML:
  <script>
    const global = globalThis;
  </script>
(This is caused by an incompatibility between a used React library and our Angular App.)
Once this is done we should see our Flowable Forms rendered ready to use:

The theme looks basic as of now since there are no stylesheets at all.
We can simply add the Flowable stylesheets to make it look nice.
The easiest way to do this is to integrate them into the global stylesheet, since otherwise Angular will automatically component scope them and the React component won't be able to see them anymore.
There is a global stylesheet available called styles.scss and you can import the Flowable Stylesheets in there:
@import "@flowable/forms/flwforms.min.css";
This however, will also give you the default colors. You can overwrite them by adding CSS variables:
body {
  --flw-forms-color: #6a2828;
  --flw-forms-color-hover: #a80d0d;
}
Integration with Flowable APIs
Based on the previous section we have now a form rendered. The only thing which is now missing is the interaction with the Flowable APIs.
First, we don't want to hardcode our form configuration (also called a form definition, similar to process or case definitions) inside the source code, since this takes us the flexibility away which we are having with Flowable.
Secondly, we then would like to do something when the form is submitted. Therefore, we need to ensure that the form contains custom outcomes and handle what is happening on the click of those outcomes.
In particular, we now want to use our app component to start and execute a workflow composed of a process instance with a single user task.
Let's assume we have a simple process model with the process definition key integrateForms:

First, we will need to render the start form for the corresponding process definition and trigger the creation of a process instance upon submission of the form. Then we will need to retrieve the task id, and render its form, and handle the form submission in the end.
Reading the Form Definition
To read a form definition from the Flowable API we first need to know which form we would like to read. For the Flowable Work offering the platform-api gives us a few endpoints to get definitions and forms. For Flowable Orchestrate you might want to check out the core-api which provides similar APIs in a limited way.
The endpoints to get a start form require a case or process definition id. The reason why they are requiring an ID is that the definition should be fixed once you render the form. Otherwise, a deployment could change the form, and you would start a new instance with an old form definition.
There is an API to get all available work definitions which is platform-api/work-definitions.
With the response of that call, you could get the definition id dynamically.
Since we are only interested in one process definition, we'll call the process-api directly.
In our process model, the start event has a start form, while the user task then contains the same form again. We are using this form to capture some data (e.g. First Name and Last Name) and complete the form afterwards. This could be an example form content:
Once we saved the process model and form model and published them, we will be able to get the process definition info through the REST API:
$ curl --user admin:test "http://localhost:8080/process-api/repository/process-definitions?key=integrateForms&latest=true" | python3 -m json.tool
  % Total    % Received % Xferd  Average Speed   Time    Time     Time  Current
                                 Dload  Upload   Total   Spent    Left  Speed
100   808    0   808    0     0   6905      0 --:--:-- --:--:-- --:--:--  6905
{
    "data": [
        {
            "category": "http://flowable.org/test",
            "deploymentId": "PRC-440cb059-a106-11eb-b8f7-e28eefb9e540",
            "deploymentUrl": "http://localhost:8080/process-api/repository/deployments/PRC-440cb059-a106-11eb-b8f7-e28eefb9e540",
            "description": null,
            "diagramResource": null,
            "graphicalNotationDefined": true,
            "id": "PRC-integrateForms:2:440eac2b-a106-11eb-b8f7-e28eefb9e540",
            "key": "integrateForms",
            "name": "Integrate Forms",
            "resource": "http://localhost:8080/process-api/repository/deployments/PRC-440cb059-a106-11eb-b8f7-e28eefb9e540/resources/integrateForms.bpmn",
            "startFormDefined": true,
            "suspended": false,
            "tenantId": "",
            "url": "http://localhost:8080/process-api/repository/process-definitions/PRC-integrateForms:2:440eac2b-a106-11eb-b8f7-e28eefb9e540",
            "version": 2
        }
    ],
    "order": "asc",
    "size": 1,
    "sort": "name",
    "start": 0,
    "total": 1
}
There are two parameters specified for the API, the key is restricting it to our process definition key we have specified during modelling, while latest specifies that we would like to have only the most recent version.
The definition was published twice ("version": 2), which would cause multiple results in case we omit latest=true.
Out of this result we are interested in PRC-integrateForms:2:440eac2b-a106-11eb-b8f7-e28eefb9e540 to get our actual form we have specified.
We can use curl again to query for this form:
$ curl --user admin:test "http://localhost:8080/platform-api/process-definitions/PRC-integrateForms:2:440eac2b-a106-11eb-b8f7-e28eefb9e540/start-form" | python -m json.tool
  % Total    % Received % Xferd  Average Speed   Time    Time     Time  Current
                                 Dload  Upload   Total   Spent    Left  Speed
100  1101    0  1101    0     0   8738      0 --:--:-- --:--:-- --:--:--  8738
{
    "id": "FRM-44100bbf-a106-11eb-b8f7-e28eefb9e540",
    "key": "integrateFormsStartForm",
    "metadata": {
        "description": "",
        "flowableDesignVersion": 3090,
        "key": "integrateFormsStartForm",
        "name": "Integrate Forms Start Form",
        "type": "2",
        "version": "2"
    },
    "name": "Integrate Forms Start Form",
    "rows": [
        ....
    ]
}
The rows are omitted in the response above, but at the end that is exactly the content we need to provide to Flowable Forms.
To avoid cross-origin issues (also known as CORS) we can use a proxy to tunnel all the APIs to our Flowable Application through the Angular webserver.
Therefore, we need to provide in the angular.json the path to a proxy.conf.json and create the file with the following config:
{
  "/process-api": {
    "target": "http://localhost:8080",
    "secure": false
  },
  "/platform-api": {
    "target": "http://localhost:8080",
    "secure": false
  }
}
To ensure that we are authenticated, we did that before with --user admin:test in the CURL, we also need to send the Authorization header to our backend service.
This can be done using admin:test as well, however, it needs to be converted to base64, the value is then YWRtaW46dGVzdA==.
With the following code we can call those two REST APIs in our Angular app:
import { Component } from '@angular/core';
import { RouterOutlet } from '@angular/router';
import { Flwform } from './flwform/flwform';
import { HttpClient } from '@angular/common/http';
import { map, mergeMap } from 'rxjs/operators';
import { Model } from '@flowable/forms';

@Component({
  selector: 'app-root',
  imports: [ RouterOutlet, Flwform ],
  templateUrl: './app.html',
  styleUrl: './app.scss'
})
export class App {

  public props: Model.CommonFormProps | null = null;

  constructor(
    private httpClient: HttpClient
  ) {
  }

  ngOnInit(): void {
    const processDefinitionKey = 'integrateForms';
    const httpOptionsWithUserCredentials = {
      headers: {
        Authorization: 'Basic YWRtaW46dGVzdA=='
      }
    };
    this.httpClient.get<any>(`/process-api/repository/process-definitions?key=${processDefinitionKey}&latest=true`, httpOptionsWithUserCredentials)
      .pipe(
        map(result => result.data[0].id),
        mergeMap(processDefinitionId => this.httpClient.get<Model.FormLayout>(
          `/platform-api/process-definitions/${processDefinitionId}/start-form`,
          httpOptionsWithUserCredentials
        ))
      )
      .subscribe(formLayout => {
        this.props = {
          config: formLayout
        }
      });
  }
}
We also need to setup the http client module, therefore the provider provideHttpClient(withInterceptorsFromDi()) can be added to the app.config.ts.
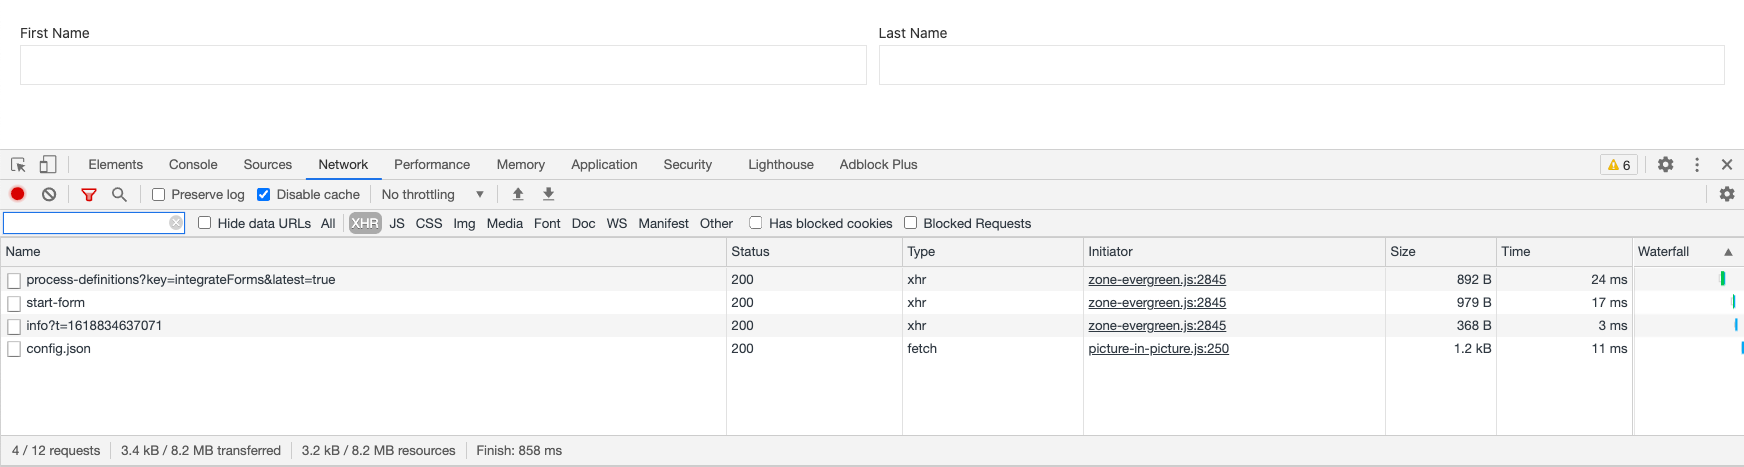
Refreshing our application shows us now our new form which is based on the two REST API calls:
Adding Default Form Outcomes
By default, Flowable provides you in Design the possibility to add outcome buttons to your form. They can be modelled into the form using outcome button groups, or as a form property.
In case you don't provide outcome buttons, some are automatically added by the Flowable UI to your form based on the UI current context. But since we are not using the default UI to render forms, there are no outcome buttons as long as we don't define them at modelling time.
For our use case of creating a new process instance using a start form, we can ensure there is always a "create" outcome available in case
none was defined. This is done by overwriting field outcomes in our FormLayout:
// ...
      .subscribe(formLayout => {
        formLayout.outcomes = formLayout.outcomes || [{
          label: 'Create new process',
          value: '__CREATE'
        }];
        this.props = {
            config: formLayout
        }
      });
Of course, the default outcomes you should add depend on your execution context and the needs of your application, since the handling of those outcomes is also part of the implementation.
Handle the Start Form Outcome
There are a few different properties besides the config which we can pass into our Flowable Forms library.
Besides a way to customize for example HTTP requests which are done by the form, we are also able to handle the callback for an outcome was pressed.
Therefore, we need to provide the onOutcomePressed property to the props:
      .subscribe(formLayout => {
        formLayout.outcomes = formLayout.outcomes || [{
          label: 'Create new process',
          value: '__CREATE'
        }];
        this.props = {
          config: formLayout,
          onOutcomePressed: (payload: Model.Payload, result: any, navigationUrl?: string, outcomeConfig?: Model.ResolvedColumn) => {
              // ... create process instance using processDefinitionId
          }
        }
      });
The fact that we now need the processDefinitionId again in the subscribe method to create the actual process instance, makes the code more complex, since we need to remember the id in the first place.
Let's use a separate observable for the processDefinitionId:
    const processDefinitionIdObservable = this.httpClient.get<any>(`/process-api/repository/process-definitions?key=${processDefinitionKey}&latest=true`, httpOptionsWithUserCredentials)
      .pipe(
        map(result => result.data[0].id)
      );
This can then be used to combine both results together using combineLatest from rxjs:
    combineLatest([
      processDefinitionIdObservable.pipe(
        mergeMap(processDefinitionId => this.httpClient.get<Model.FormLayout>(`/platform-api/process-definitions/${processDefinitionId}/start-form`, httpOptionsWithUserCredentials))
      ),
      processDefinitionIdObservable
    ])
      .subscribe(([formLayout, processDefinitionId]) => {
          // handle form rendering here and outcome reaction
      });
And the onOutcomePressed method could then POST against the Flowable REST API to create the new instance:
            this.httpClient.post(`/platform-api/process-instances`, {
              ...payload,
              outcome: result,
              processDefinitionId
            }, httpOptionsWithUserCredentials)
              .subscribe(creationResult => {
                // handle successful creation and store creationResult.id to have the id of the created process
              });
As a result, the entire App could for example look like this:
import { Component } from '@angular/core';
import { RouterOutlet } from '@angular/router';
import { Flwform } from './flwform/flwform';
import { HttpClient } from '@angular/common/http';
import { map, mergeMap } from 'rxjs/operators';
import { Model } from '@flowable/forms';
import { combineLatest } from 'rxjs';

@Component({
  selector: 'app-root',
  imports: [ RouterOutlet, Flwform ],
  templateUrl: './app.html',
  styleUrl: './app.scss'
})
export class App {

  public props: Model.CommonFormProps | null = null;

  constructor(
    private httpClient: HttpClient
  ) {
  }

  ngOnInit(): void {
    const processDefinitionKey = 'integrateForms';
    const httpOptionsWithUserCredentials = {
      headers: {
        Authorization: 'Basic YWRtaW46dGVzdA=='
      }
    };
    const processDefinitionIdObservable = this.httpClient.get<any>(`/process-api/repository/process-definitions?key=${processDefinitionKey}&latest=true`, httpOptionsWithUserCredentials)
      .pipe(
        map(result => result.data[0].id)
      )

    combineLatest([
      processDefinitionIdObservable.pipe(
        mergeMap(processDefinitionId => this.httpClient.get<Model.FormLayout>(`/platform-api/process-definitions/${processDefinitionId}/start-form`, httpOptionsWithUserCredentials))
      ),
      processDefinitionIdObservable
    ])
      .subscribe(([ formLayout, processDefinitionId ]) => {
        formLayout.outcomes = formLayout.outcomes || [ {
          label: 'Create new process',
          value: '__CREATE'
        } ];
        this.props = {
          config: formLayout,
          onOutcomePressed: (payload: Model.Payload, result: any, navigationUrl?: string, outcomeConfig?: Model.ResolvedColumn) => {
            this.httpClient.post(`/platform-api/process-instances`, {
              ...payload,
              outcome: result,
              processDefinitionId
            }, httpOptionsWithUserCredentials)
              .subscribe(creationResult => {
                // handle successful creation and store creationResult.id to have the id of the created process
              });
          }
        }
      });
  }
}
Conclusion
This how-to gave you an introduction how you can use Flowable Forms in your own project. Of course, there are a lot of things which still need to be adapted to have production ready code. For example, you need to setup permissions and handle the successful or failed creation of your process as well as potential in-app navigation between the process creation and completion of its user task.
However, we hope that this How-To you're well underway to build beautiful integrations with Flowable Forms in your own application!