Using event streams: Going with the flow
Working with Kafka, RabbitMQ and JMS
With Flowable’s Event Registry you have easy integration between event frameworks such as Kafka and Flowable processes and cases. We have a couple of sample apps that show how this can be used with the Trial download - just to give a taste of what's possible. We'll be using ActiveMQ/JMS that's built into the trial version of Flowable Work, although you can easily switch this to be using Kafka or RabbitMQ.
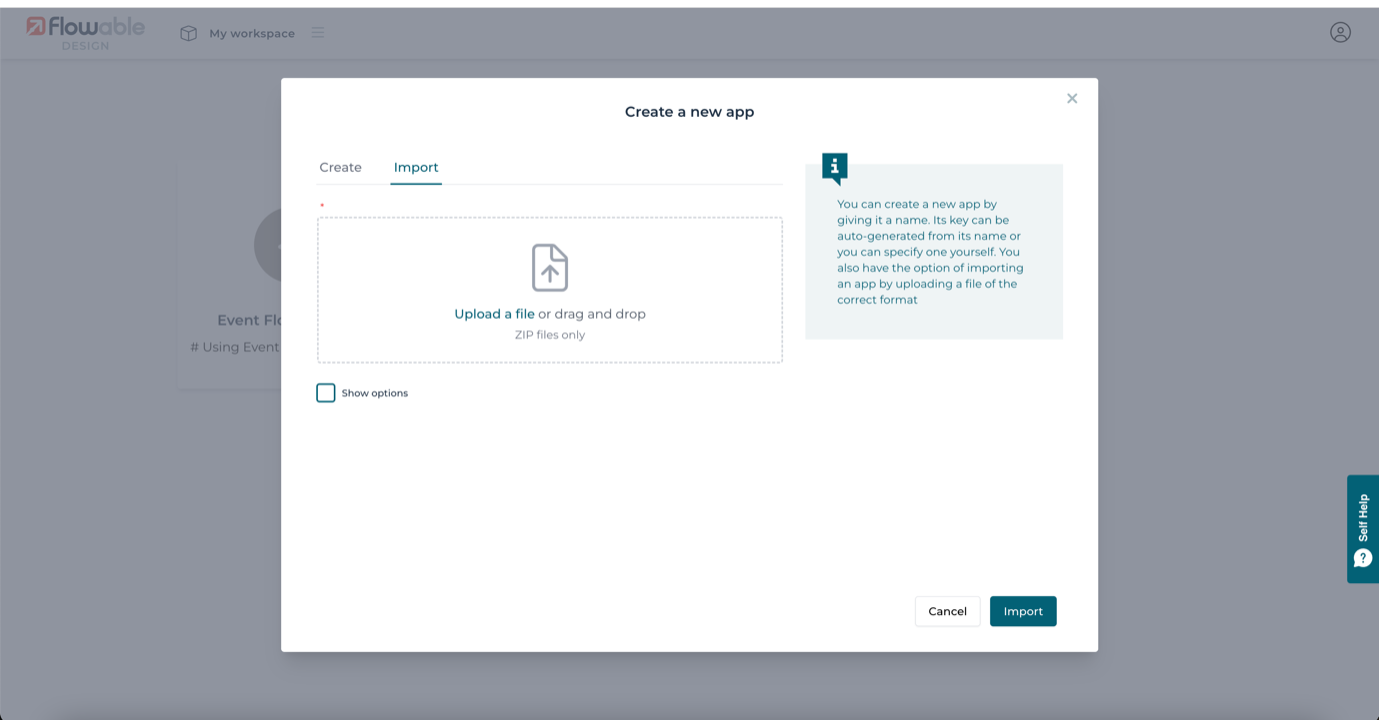
Import the event demo app
In Flowable Design, import the first of the event demo apps, EventFlowExample.zip, which can be downloaded from here.
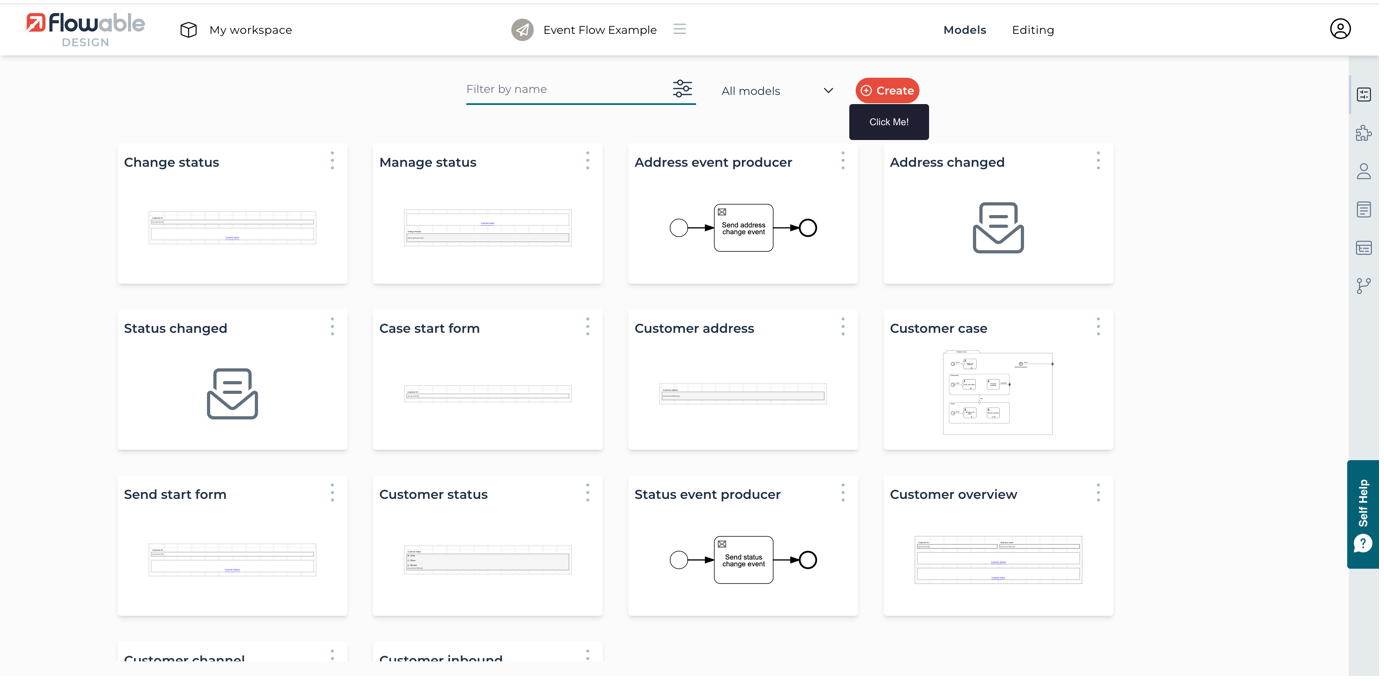
Once imported, you'll see a number of different models. There's a case model, a couple of process models, some forms and event models.
Generating events
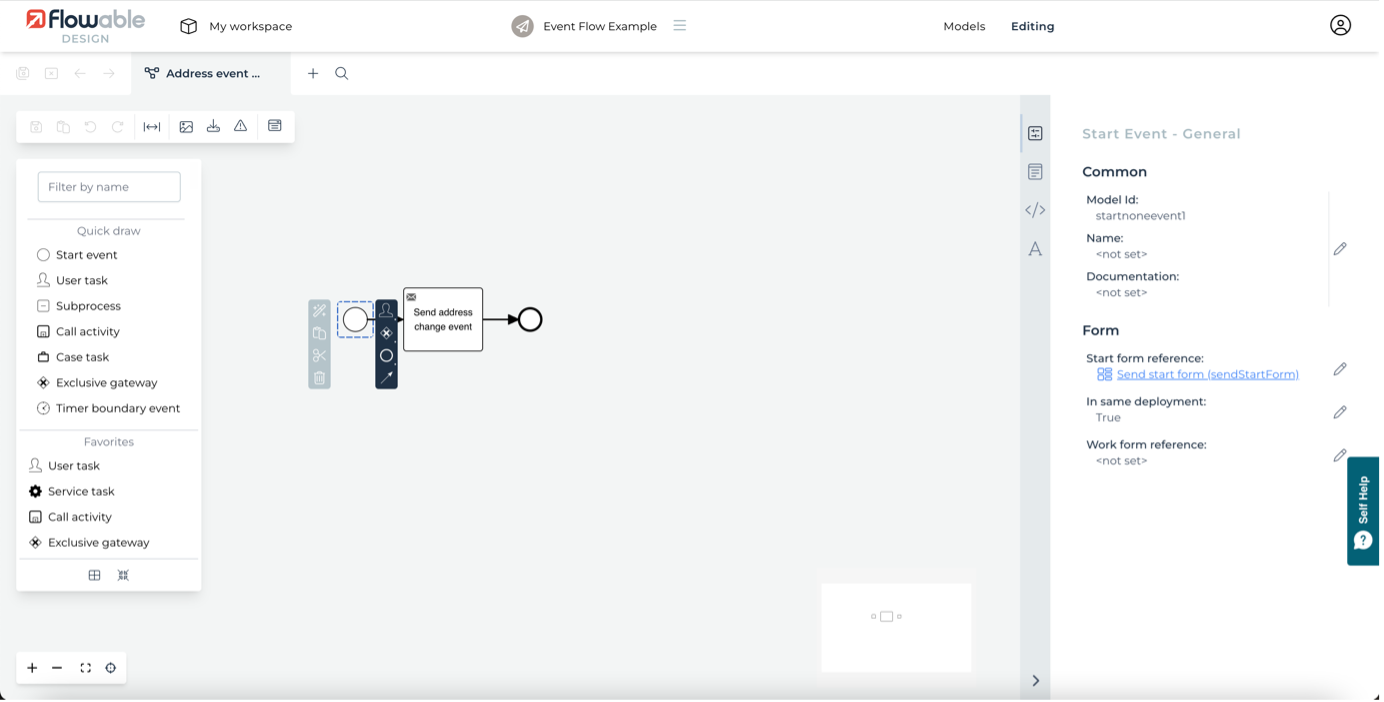
We're going to start by looking at a simple process used to produce events. Open the Address event producer model for editing and select its Start event. You'll see it has a start form associated with it.
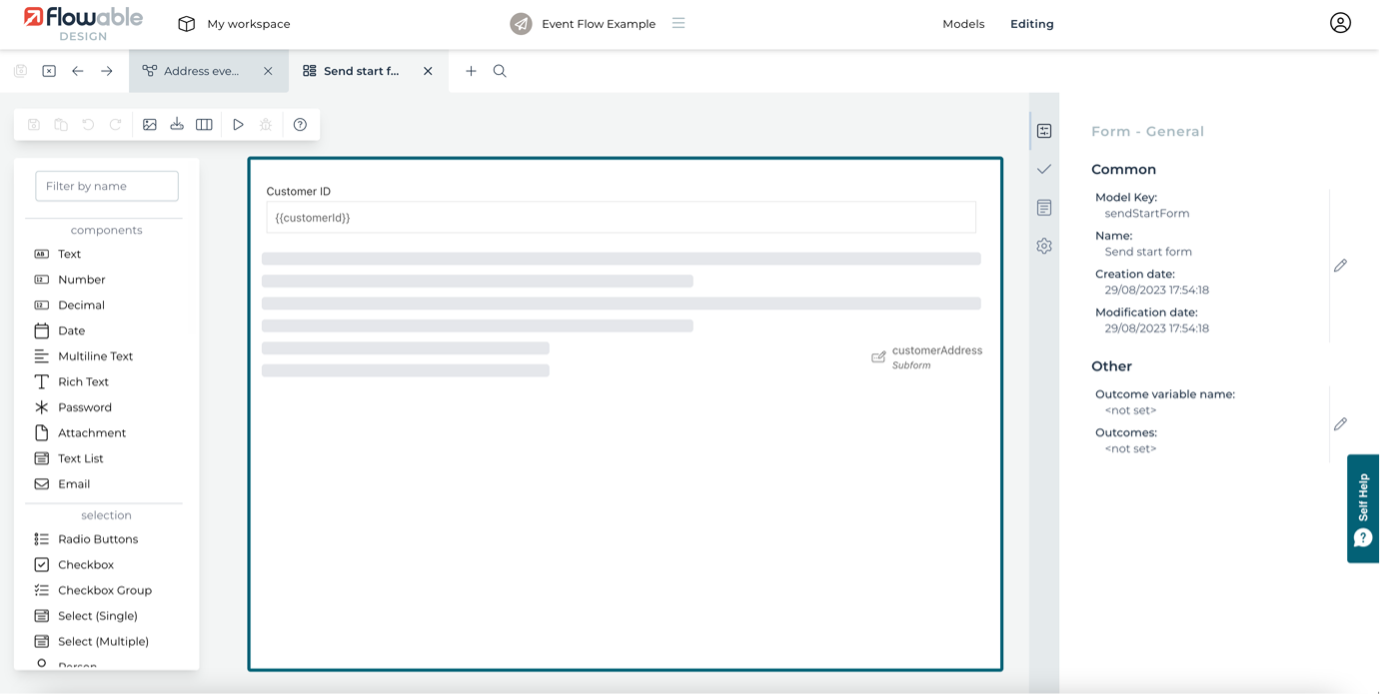
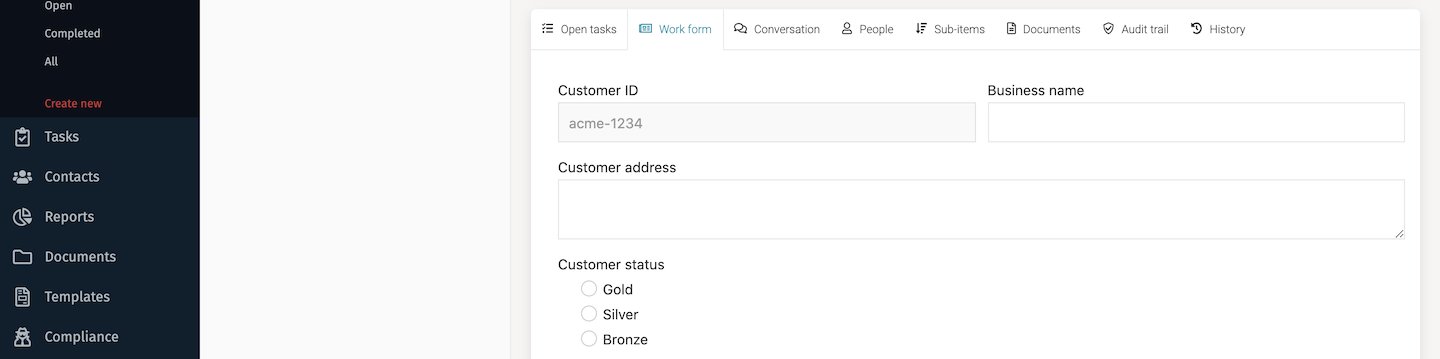
Click on the link to the form to open it: you'll see that there's a text field for a customer identifier, also a subform that re-uses a form that allows a multi-line text field for the customer address.
Go back to the process model and select the Send address change event. There's three main attributes that have been configured that we'll look into next.
The first attribute we'll start with is the outbound channel. If you click on the Customer channel link on the right hand side pane, it will open the model for that channel.
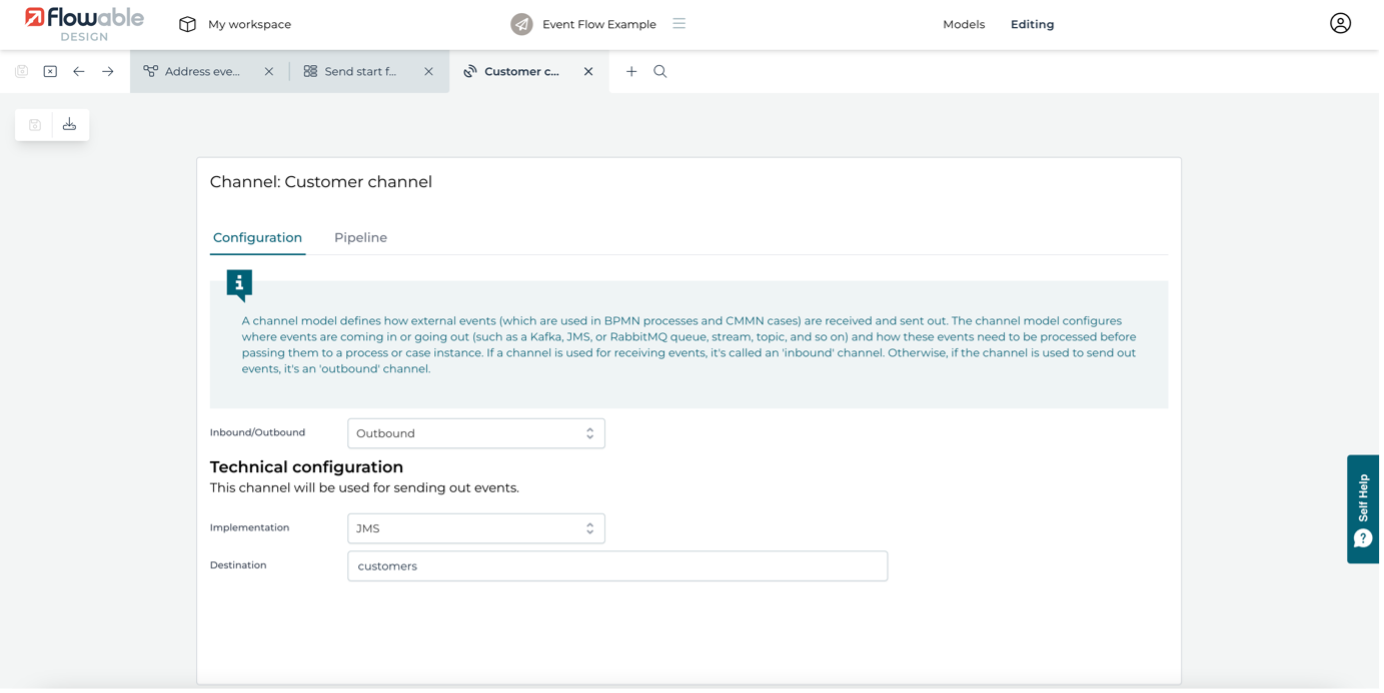
Here you can see the channel is configured as outbound using JMS (through Apache ActiveMQ), but click on the dropdown and you could easily switch to using Kafka or RabbitMQ. The options and terminology will also switch if you change the implementation setting. We're defining it to use an ActiveMQ destination of customers, also that the payload is JSON. It's also possible to define a payload serialized as XML or a custom implementation. This channel model can be used by other models and apps as well, in the same way as all Flowable models.
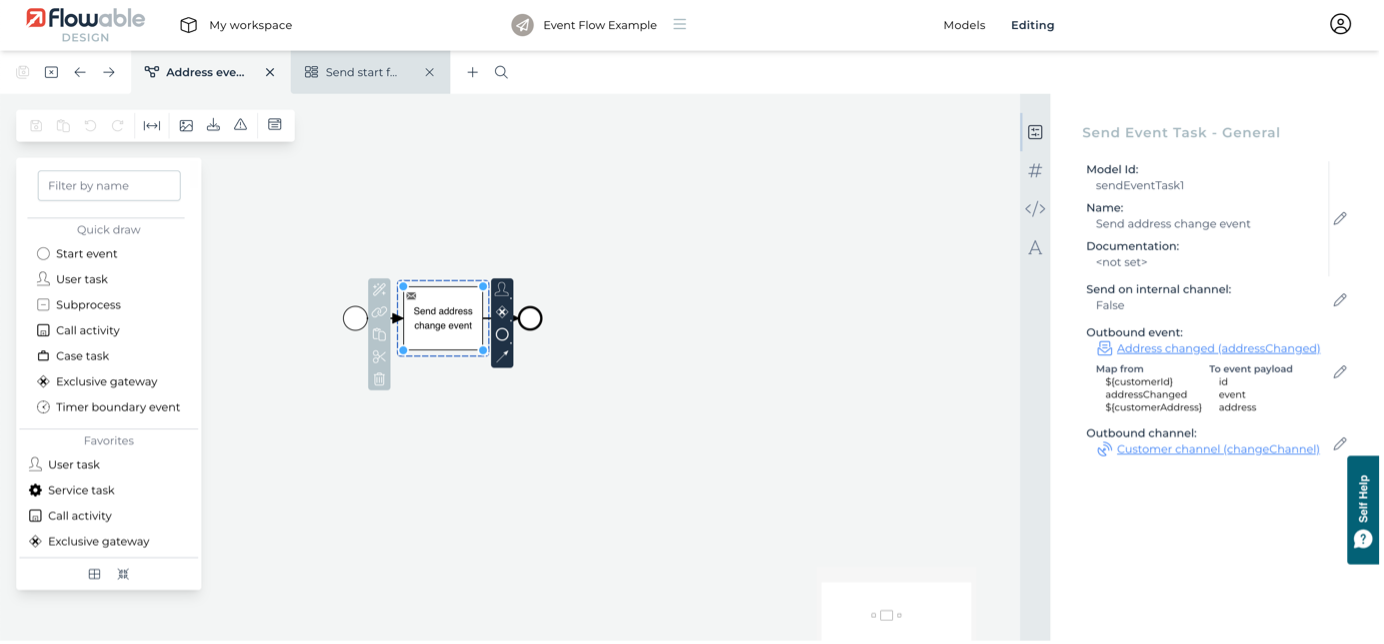
Close that model and go back to the Address event producer process. The other key attribute on the Send event task is the outbound event. Click on the linked model Address changed to open the event model that will be used.
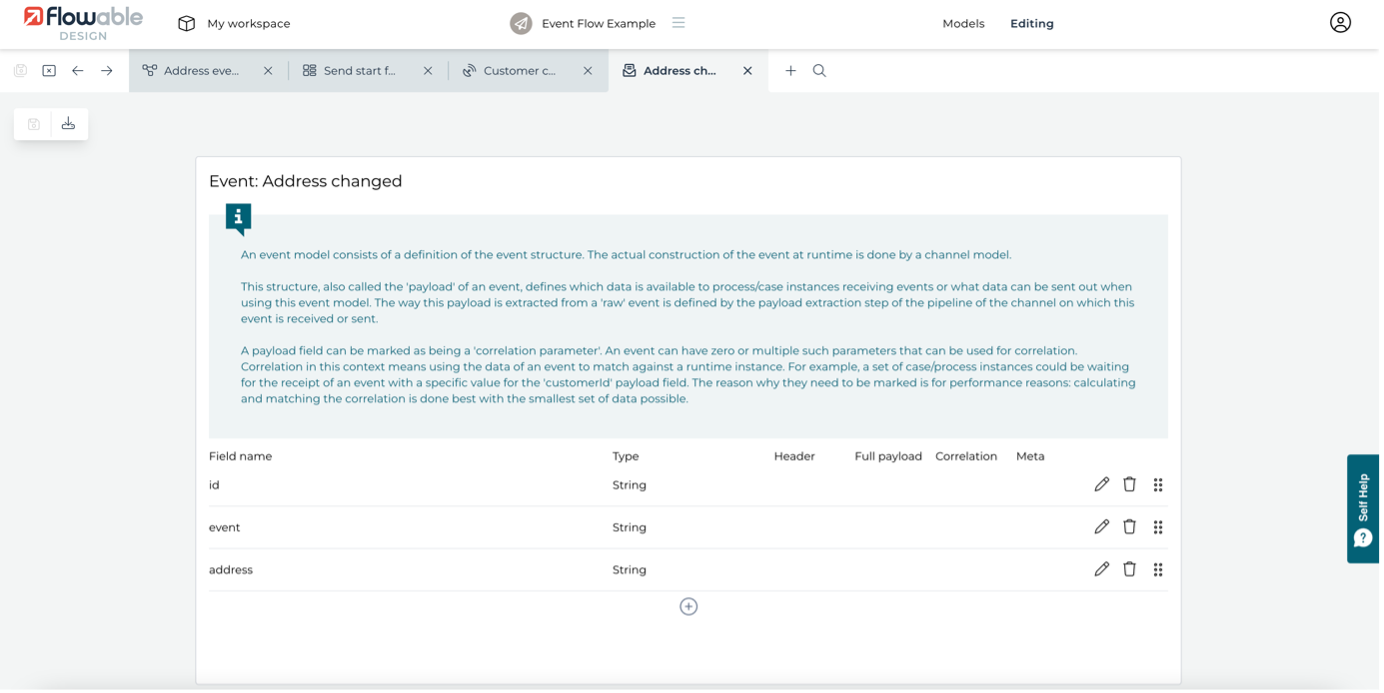
We've defined the event to have three fields. The id field will be used to identify the case or process and is also marked as being one of the correlation parameters - in this case, the only one. Correlation parameters provide a highly efficient and scalable way of knowing how to match individual events to specific processes and cases. There's an event field that we'll be using to pass our app-specific type of event, which we'll show how to use when we get to look at handling inbound events. The final field is the actual value we're most interested in: the address. All of these are text fields, but other types can be used. This event model can be used by other models and apps as well.
The final piece that brings all this together is mapping the data collected at the start of the process to the event model. You can see this by clicking on the Configured... attribute, which brings up a dialog to define or edit the mapping.
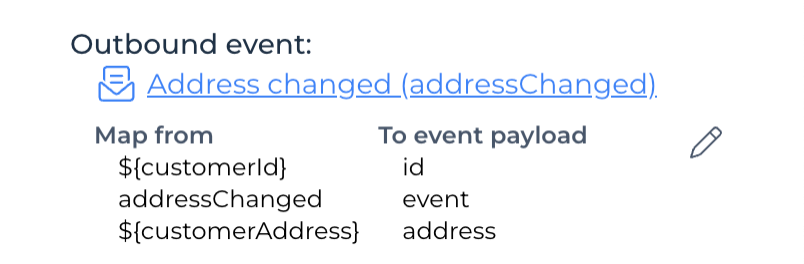
What we're doing here is saying which values from the process should be mapped onto the fields of the event (the three fields we saw earlier). The customerId process variable from the start form is going to be used as the id value, which also means the customerId will be the correlation parameter available for efficient inbound handling. The event field is set to a fixed value of addressChanged, which we're using to identify the key of event model (you can find or edit this from the properties dialog on the event model's detail page). The address field will be set to the value of the customerAddress variable from the start form.
Reacting to events
It's great that it's so easy to generate events for external consumption, but what's also really important is reacting to events posted by other systems or services. To see how you can model a case to react to Kafka, RabbitMQ or JMS events, go to the list of models in the app you imported and click the Customer case model.
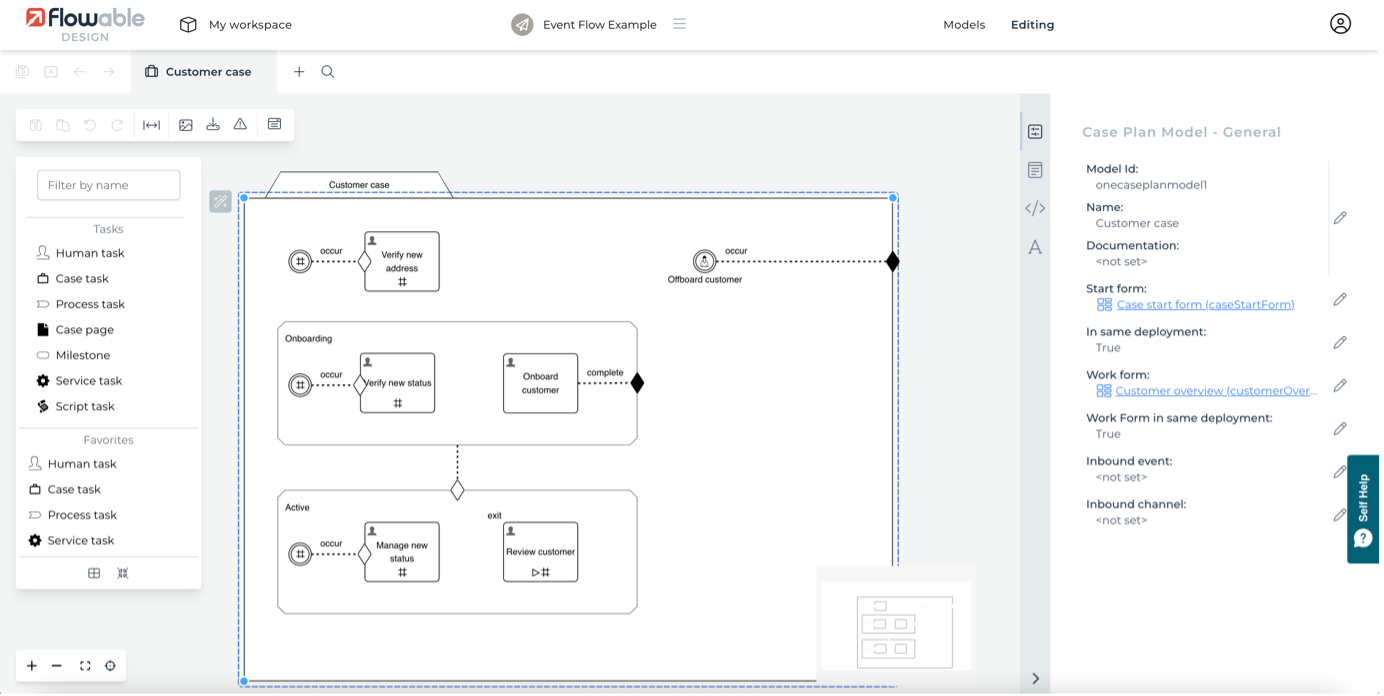
Here you can see a case with two stages, Onboarding and Active containing some human tasks, plus another human task outside the stages. There's also a user event listener that will complete a case if triggered. The Verify new address task can be executed multiple times (see the # symbol) and can be triggered by an event listener. There are also event listeners on a couple of the tasks in the stages that we'll come back to. Click on the event listener connected to the Verify new address task to see how it's configured.

You can see there's the same Address changed event used for the inbound event attribute. You can click on it if you want to be sure of the fields again. There is also a corresponding inbound channel. This is more sophisticated than the outbound configuration, so click on it to see how it's defined.

This time the channel model is defined as Inbound using JMS (again this could just as easily be Kafka or RabbitMQ). Besides Configuration, you will see the Pipeline tab. Click on this, to see the steps taken for handling a received event.
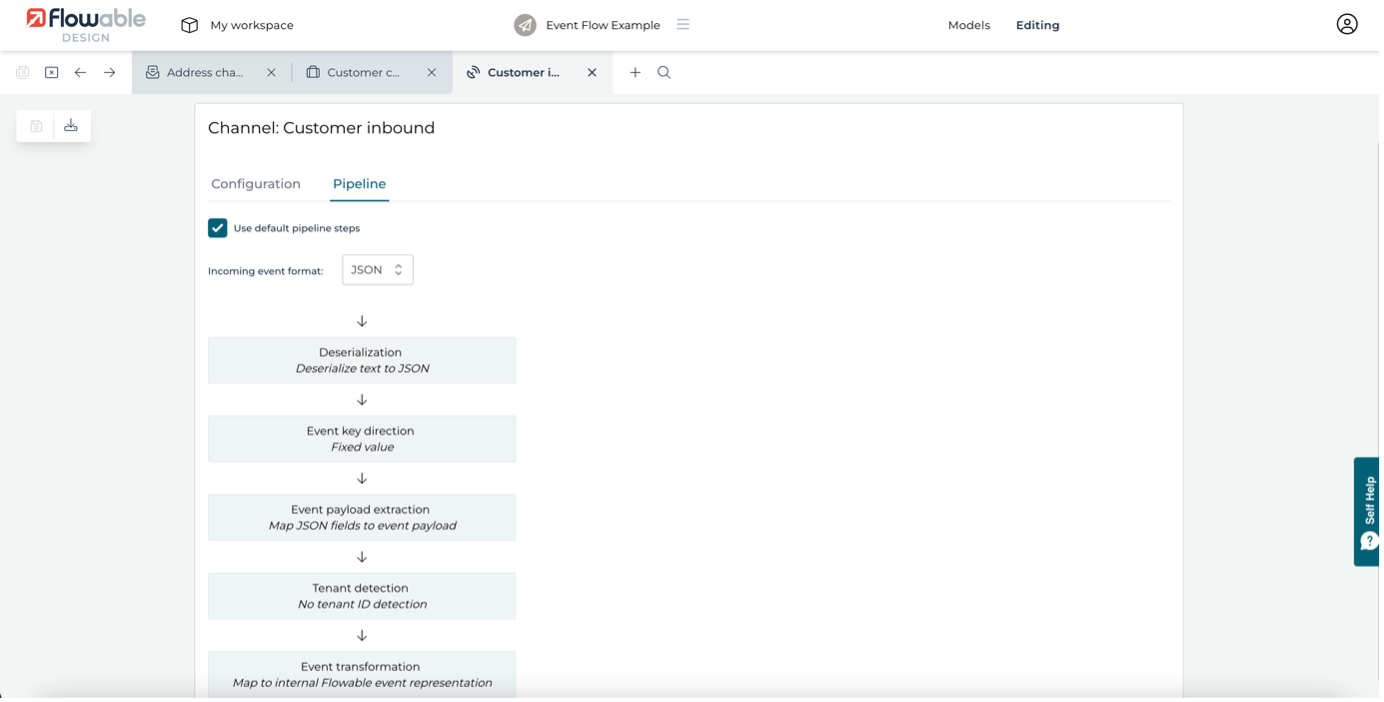
There are all kinds of ways the pipeline can be extended but we'll just use the standard elements. First, we've said event is coming in as JSON, so the first step converts the event payload text to a JSON object. Click on the second step, Event key detection, and you'll see the configuration for this step as above.
The default is a fixed value for single event type channels, however, we're going to be sending a couple of different events down the same channel, so we need to define where to find the event key in the JSON. In our example, we've defined it as the string event, which corresponds to one of the fields defined in the event model we're using. The steps after the key detection map the JSON to the fields as we defined for our event model, including any tenant detection if used in a multi-tenant setup.
The final detail for defining the inbound event is configuring the event data mapping. Click on the Edit icon... under the Inbound event.
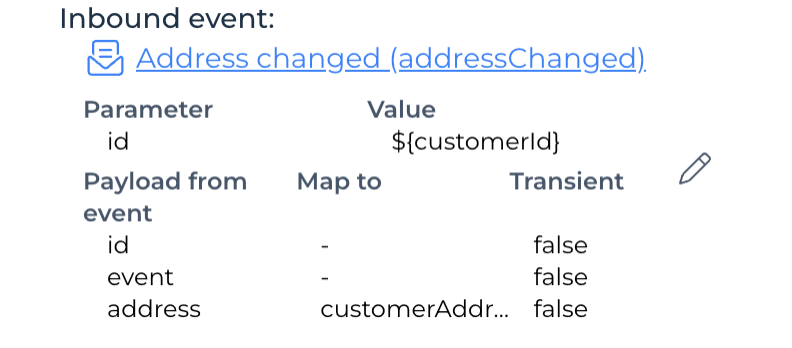
The first section allows you to define which correlation parameters from the event model are mapped to in the case model. We're using the same variable name customerId as in the producer process, but it is actually a different variable as it's part of this case model. The second section allows you to map the other event fields to variables. Here, the address field will be mapped to the customerAddress case variable.
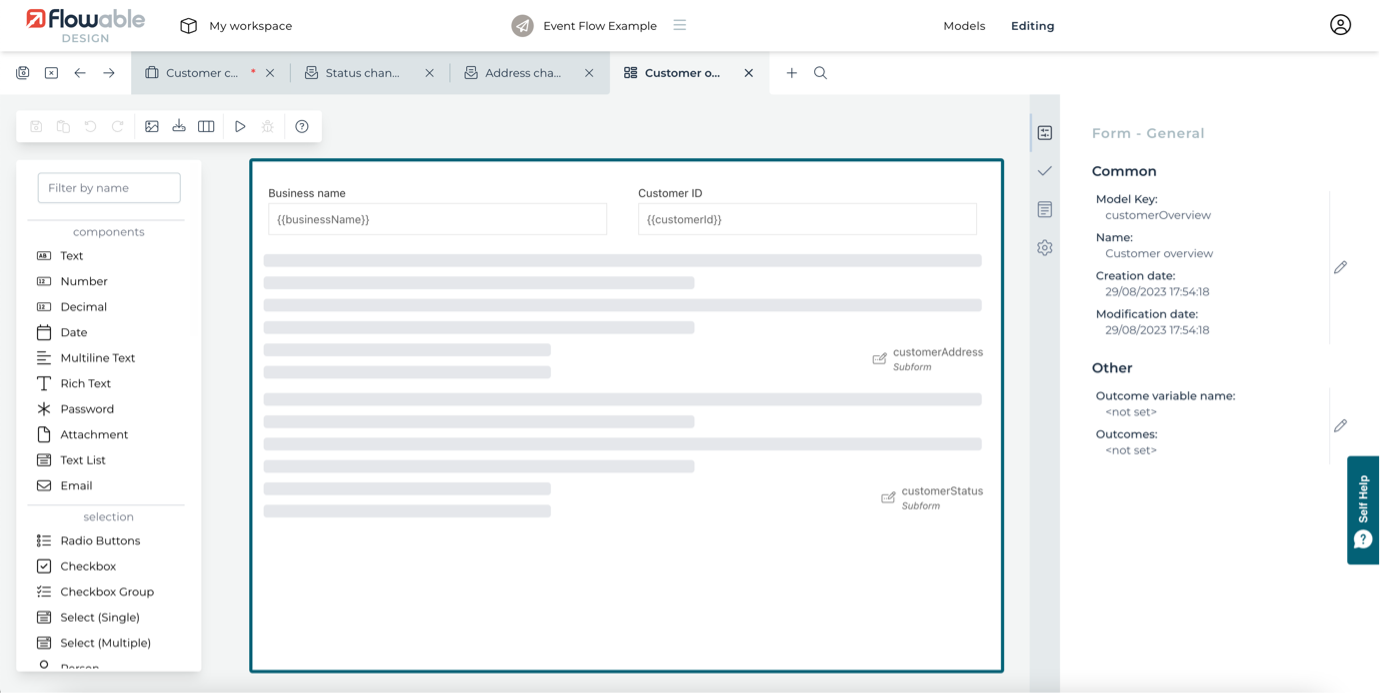
There's a few more elements to quickly explore before we try this all out. Back on the case model, if you click on the case itself you can see links in its attributes to a start form (just containing a single text field for the customerId, and a work form that shows the details of all the case variables we're playing with. Feel free to open these models to check the variables used there.
Finally, there are two event listeners connected to the Verify new status and Manage new status tasks. Look at the inbound definitions for these - both are configured exactly the same way. Most of the configuration is identical to the address event handling, except we're using statusChanged in the inbound mapping for the event key. This means we can use the same channel with two different event types, statusChanged and addressChanged.
We now have two identical listeners in the case, but they're in different stages. What this means is that if a status change event arrives when the case is in the Onboarding stage, then the Verify new status task will be activated. If the case is in the Active stage, then the Manage new status task will be activated. The Active stage is only activated when the Onboarding stage completes, so only one of these tasks will ever be triggered at the same time. Of course, if we had a model where both stages could be activated at the same time, then both tasks would also be activated by a single status change event arriving.
As you may have guessed, we have another mini process that produces statusChanged events. You can take a quick look at Status event producer to see something very similar to the one for producing address change events.
Running the event example
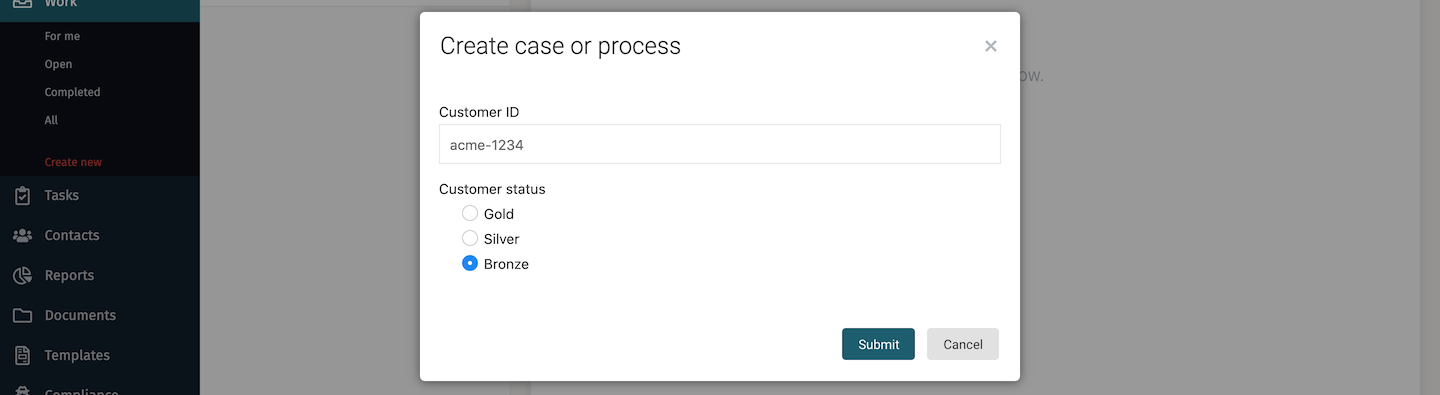
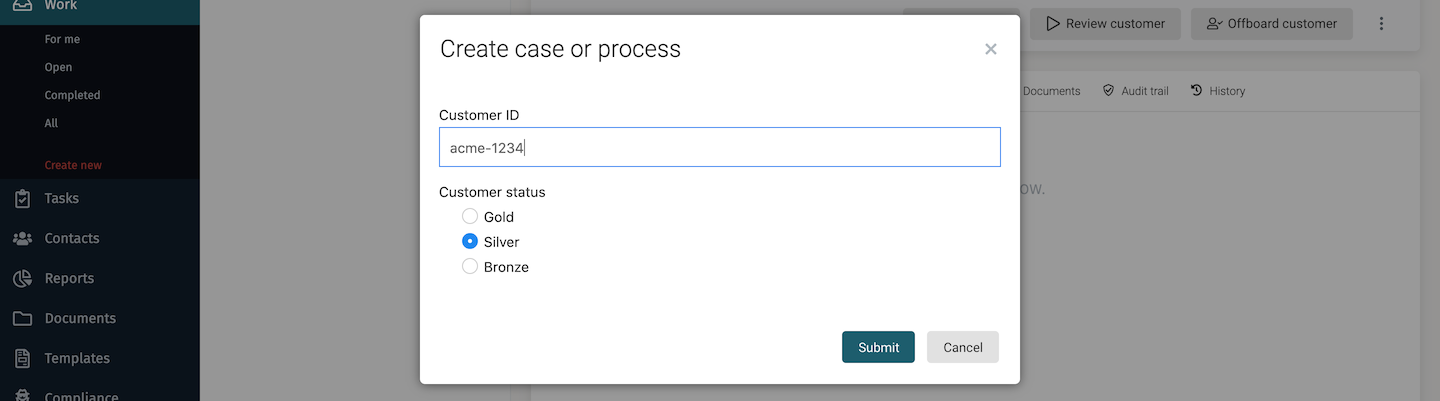
Now you've seen how the app is defined, deploy it by clicking the Publish button in the app view. Open Flowable Work so you can run it. From the Work > Create new or the New menu, first create an instance of the Event Flow Example's Customer case.

Its start form will request a customer ID to use. This will be used as the ID when we want to send events to this particular case instance.

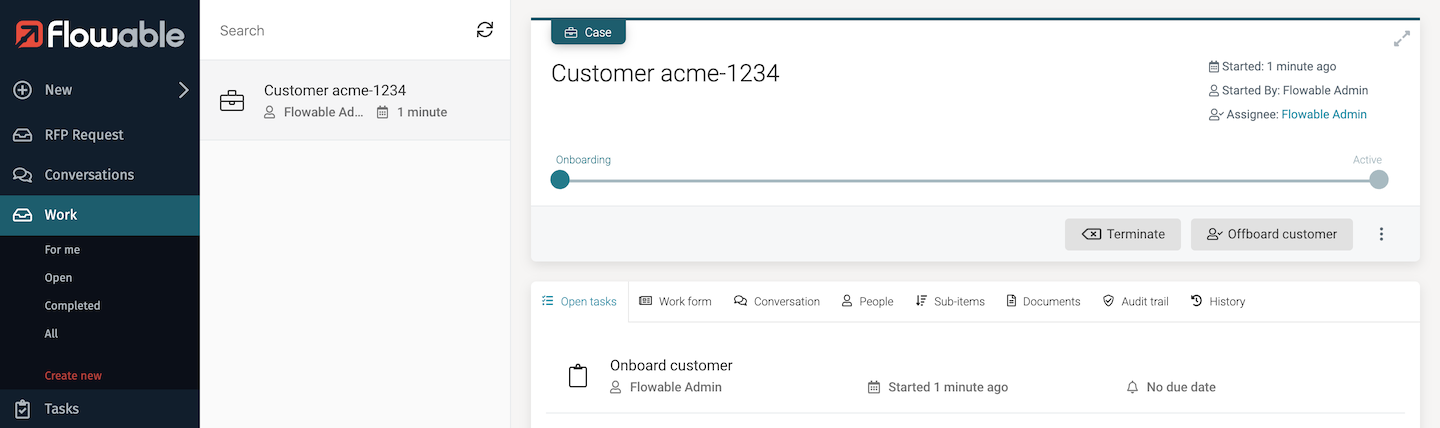
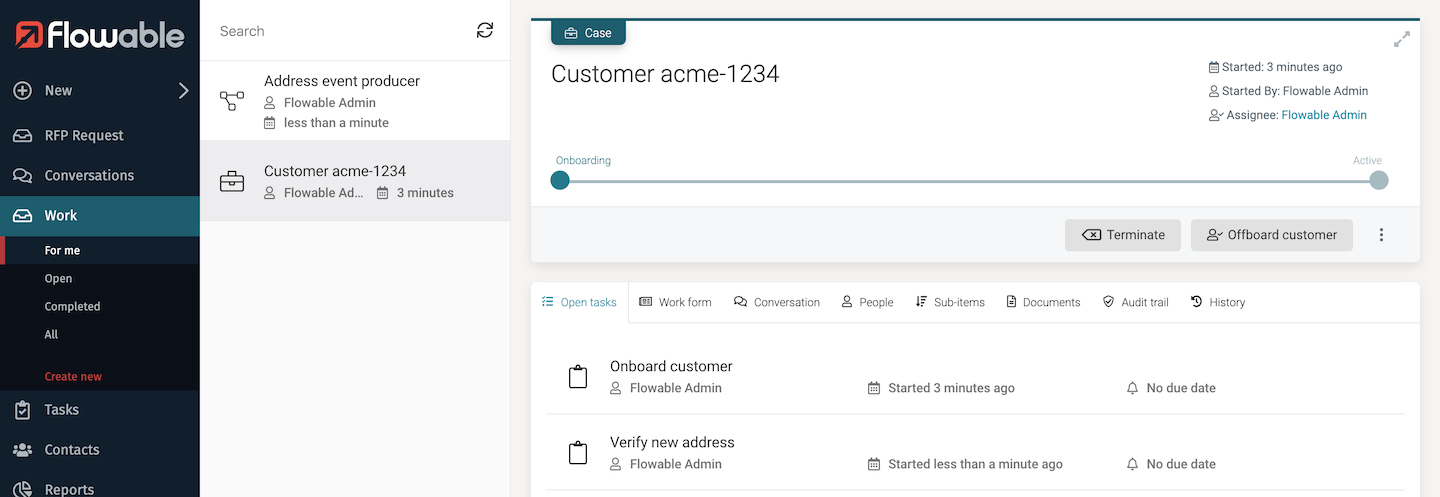
In this example, we're using acme-1234 as the customer ID. Once the case instance is created you will see the stage is showing as Onboarding with the automatically started task Onboard customer, and the action button for the Offboard customer user event listener.
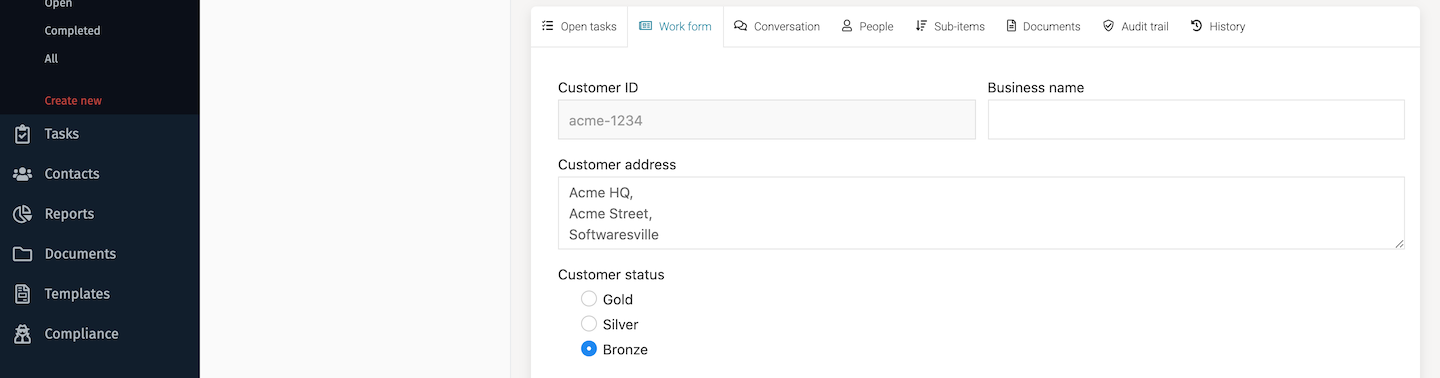
Switch to the Work form tab to see the current values of the case variables. Initially, they all have no value.
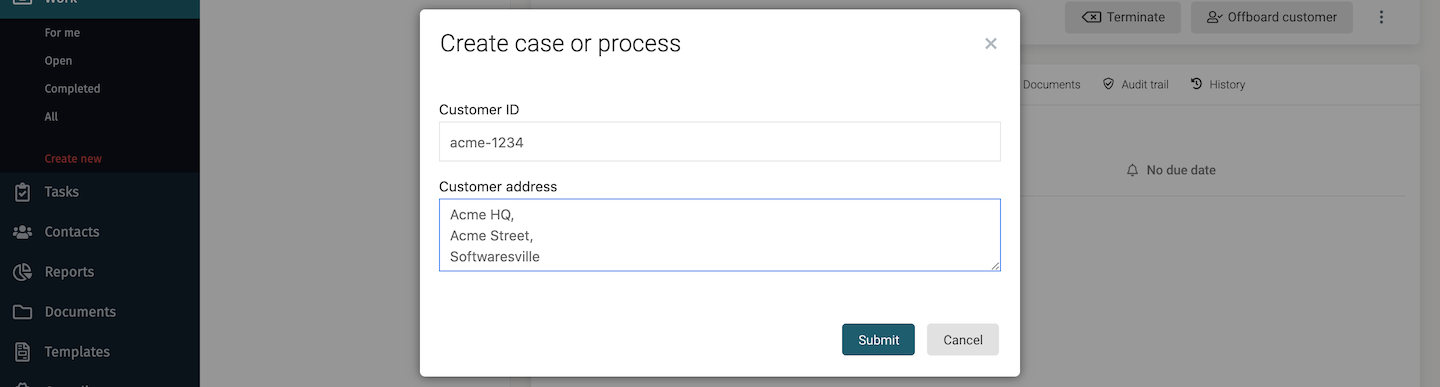
We can now use the Address event producer process to send an address change event onto the event channel. Start the process from the New menu.

This will pop up the start form for the process asking for the customer ID and the new address. Enter the ID used to create the case, acme-1234 and some text for the address.
As soon as you click the Submit button, the send event task will be called and the event sent out on the ActiveMQ channel. Any other system listening on that ActiveMQ channel could receive that event. With this example, we're using the ActiveMQ already integrated into Flowable Work, so it's only Flowable that will be listening. Because we've created a case instance with event listeners, those will potentially receive the event if they match the event correlation parameters.
Because we started the event producer with the same customer ID value that's used as the correlation parameter for the listeners on the case, the event triggers the creation of the Verify new address task. Look at the acme-1234 case and you'll see the new task.
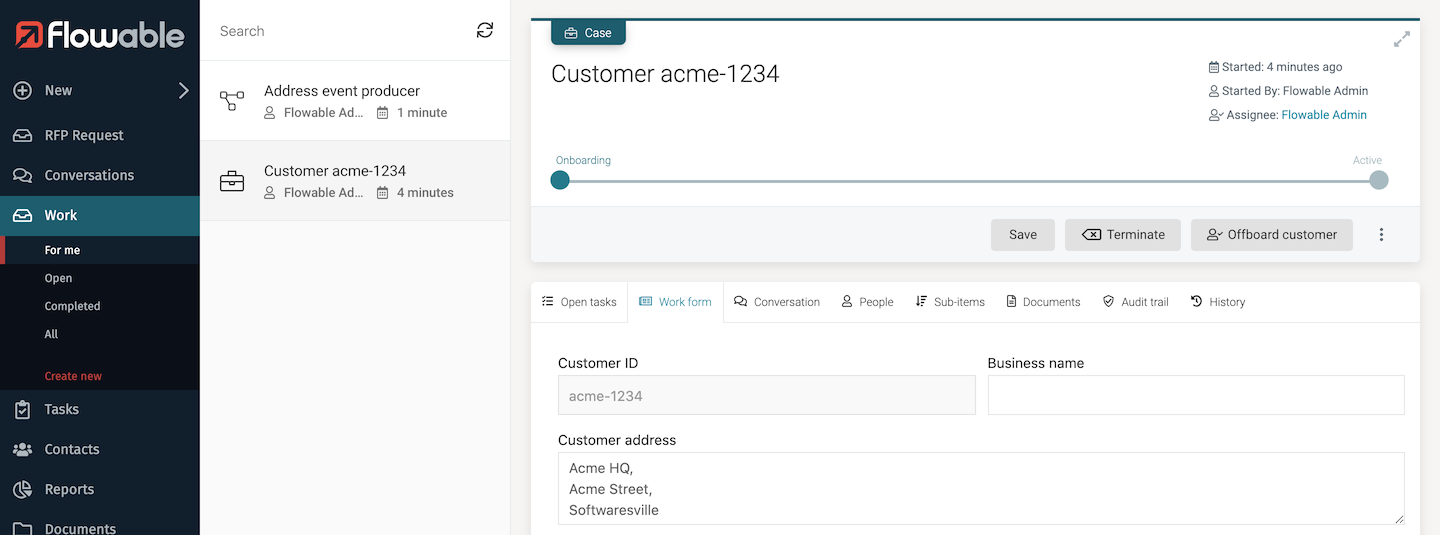
Click on it and complete the verify task. Then switch to the Work form tab to see the current case variable values. You'll see the new values set.
Congratulations, you've just sent an event and reacted to it without a line of code being in sight. The change address event handling will work for this address as many times as you want, as it's repeating and not part of any stage.
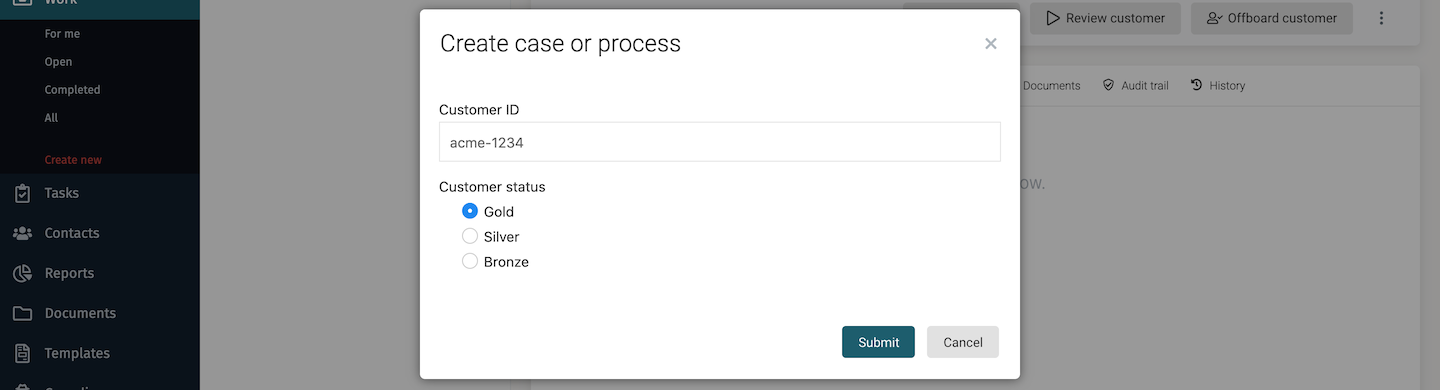
What if we now use the similar Status event producer to send a status change event? Let's try. Start the process from the New menu.

Submit the start form with the same customer ID of acme-1234 and the status to Bronze.
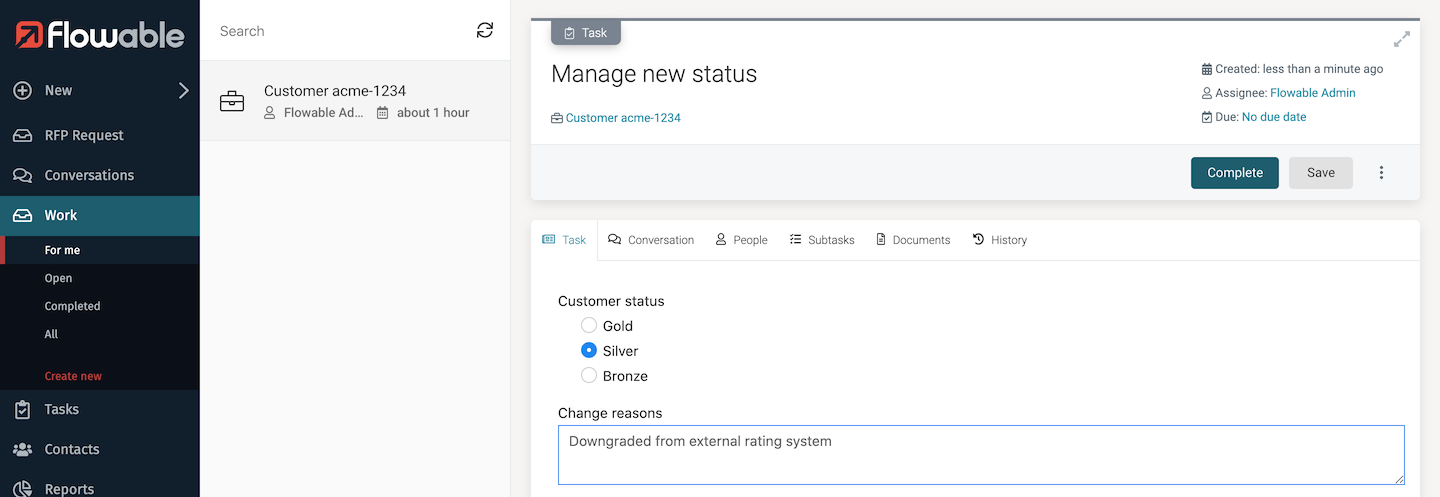
This should have triggered one of the event listeners in the case, waiting for status events. As the case is in the Onboarding stage, the Verify new status task is created. You can see this again on the case tasks tab.

Complete this task and then switch to the Work form tab on the case. You will see the status is now set to Bronze.
If you now complete the Onboard customer task on the case, this will then progress the case to the Active stage. Run the Status event producer process again, this time setting the status to gold.
Instead of the Verify status change task, we have a Manage status change task, because the event listener in the Active stage is active and the one in Onboarding is no longer available.

Select the task, fill its (different) form and complete it.
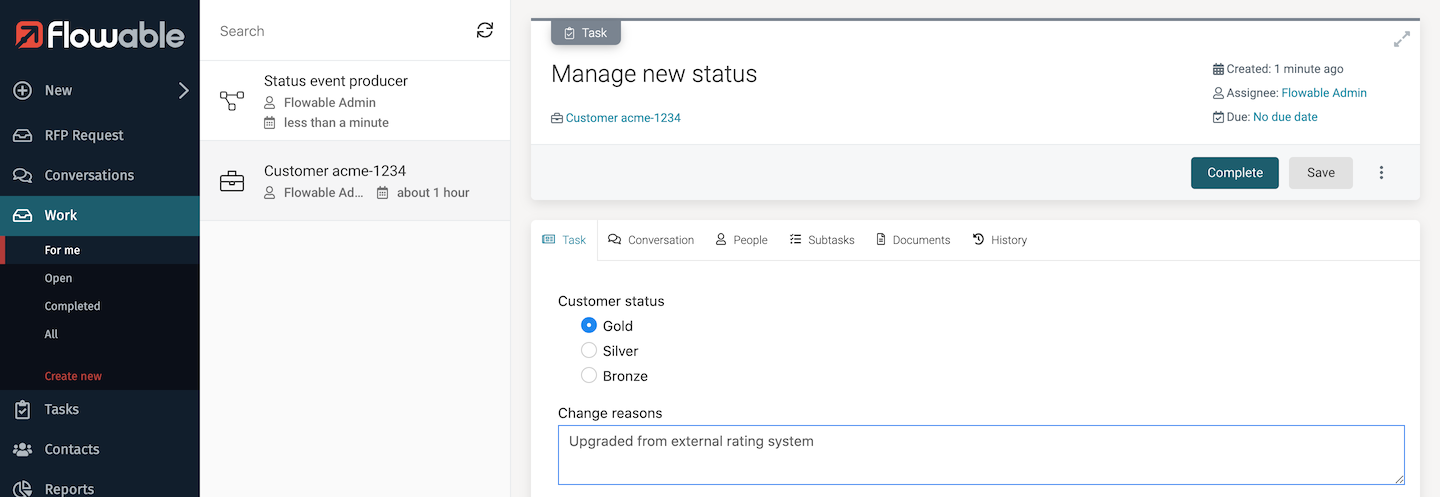
Look at the case's Work form tab and you'll see the status is now gold. This highlights the power of using CMMN case models to describe event-driven solutions, where a case can respond to the same event in completely different ways depending on the context.
Starting a process by receiving an event
We've seen how a case model can react to events, let's now look at a simple example of how we can start process instances by reacting to events. We'll also use this as an example of how events can be picked up by multiple apps at the same time. You can imagine each app as being a microservice responding to events, allowing you to deploy them independently on any Flowable server linked to the same event service (Kafka, ActiveMQ or RabbitMQ).
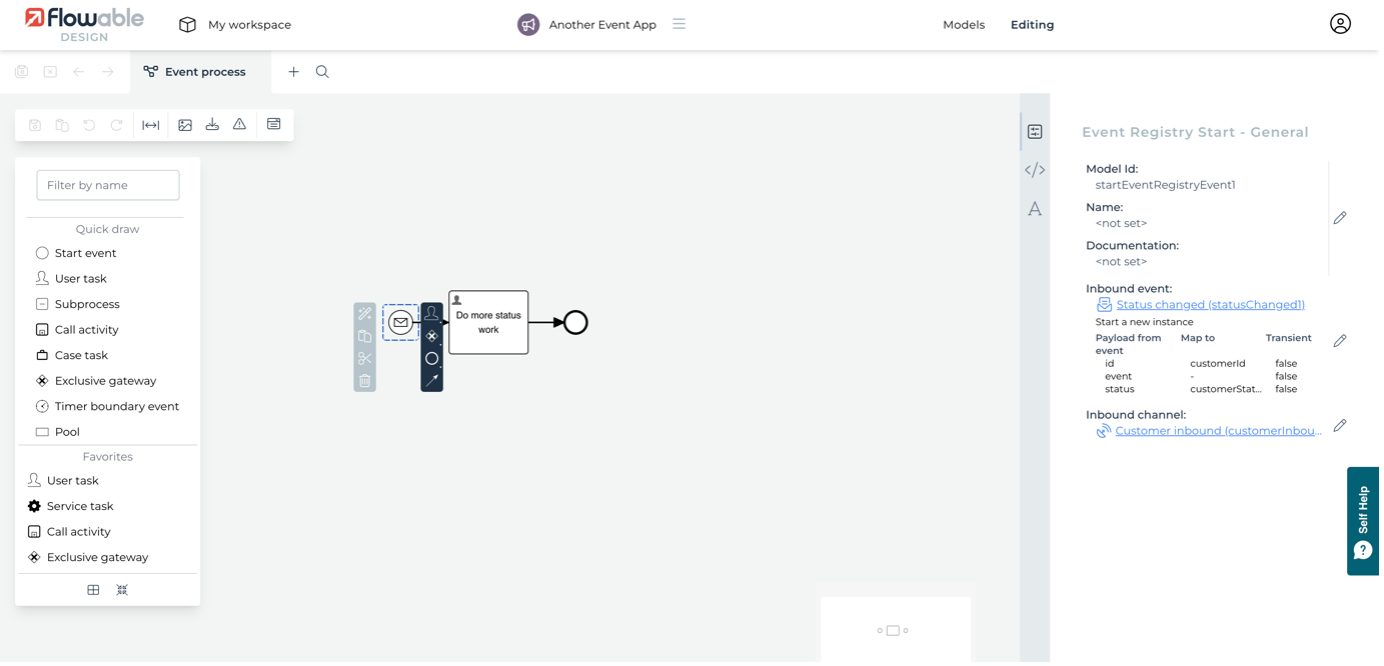
There's another small app, AnotherEventApp that you need to import to see this. The app is downloadable from here.
To import this app into Flowable Design, click the import app. Before selecting the zip file, expand the Advanced options and for the When existing model keys are found dropdown select Update existing model with imported versions.
This way the two example apps will share exactly the same event and channel models. You could also select to create with new keys, but then you will have two separate versions of the event and channel models, which is no problem but means you would need to make changes to both copies if you want them to behave the same.

You'll see a simple process model and also the same event models we used in the other app. Click on the process model to open it up. Now select the event start event and look at its attributes. You can see that it's using the same status changed event and customer inbound channel.
 On Flowable Work, the process definition will be ready to create instances as appropriate events are received. To show this, once again send a status change event to the same case instance using the
 Status event producer, setting the status to silver.
As before, you'll see the task created in the case.
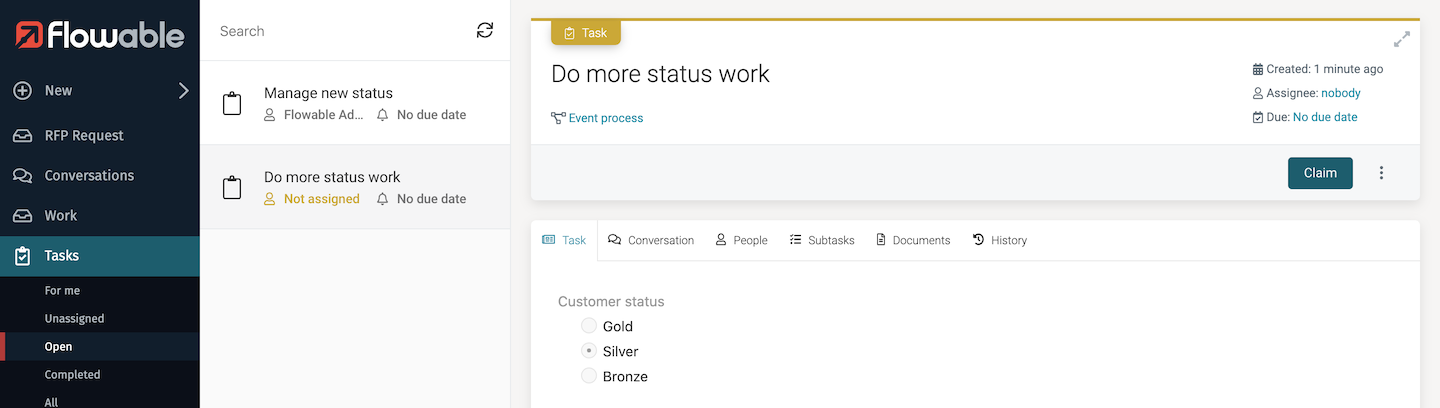
This time, however, navigate to the Tasks list of all user tasks. Click on the Open filter to see all open tasks. You should now see a task assigned to nobody that's the Do more status work user task from the Event process just deployed.
Summary
We have seen how sending one event has triggered two separate apps to consume and react to this event. Of course, the case or process reacting to the event could in turn have responded with another event, or sent out more events to trigger other apps and services.
The examples we have taken you through are very simple, just to show the different elements working together. Hopefully, you've seen the potential for this capability to be used in a wide variety of innovative and dynamic ways. Also, how it can be used to just get the right job done, quickly and easily modified as new requirements need to be met.