Using Database-backed Data Objects
Setting up the tutorial app
We have a sample app that show how the SQL database integration can be used with the Trial download - just to give a taste of what's possible. We'll be using the same database that's used by the trial version of Flowable Work, although you can easily switch this to other databases.
The demo app is an extension of the Loan app used in the introductory tutorial. If you haven't already gone through that tutorial, we suggest you do this first, just to better understand the example scenario here. The example app for Data Objects extends the original by providing a pool with lanes to separate out the human activities from the system ones, then adds in three different uses of database-backed Data Objects (they could just as well be implemented using REST-backed Data Objects).
Import the Data Object DB demo app
As the demo app is an enhanced version of the introductory demo app, it can be imported as a new version of the existing app. If you haven't already imported the original loan demo app, you can just import the Data Object one as a new app. We'll assume you have the original app in the steps below. The updated Loan Data Object demo app, LoanApp-DO-db.zip can be downloaded from here.
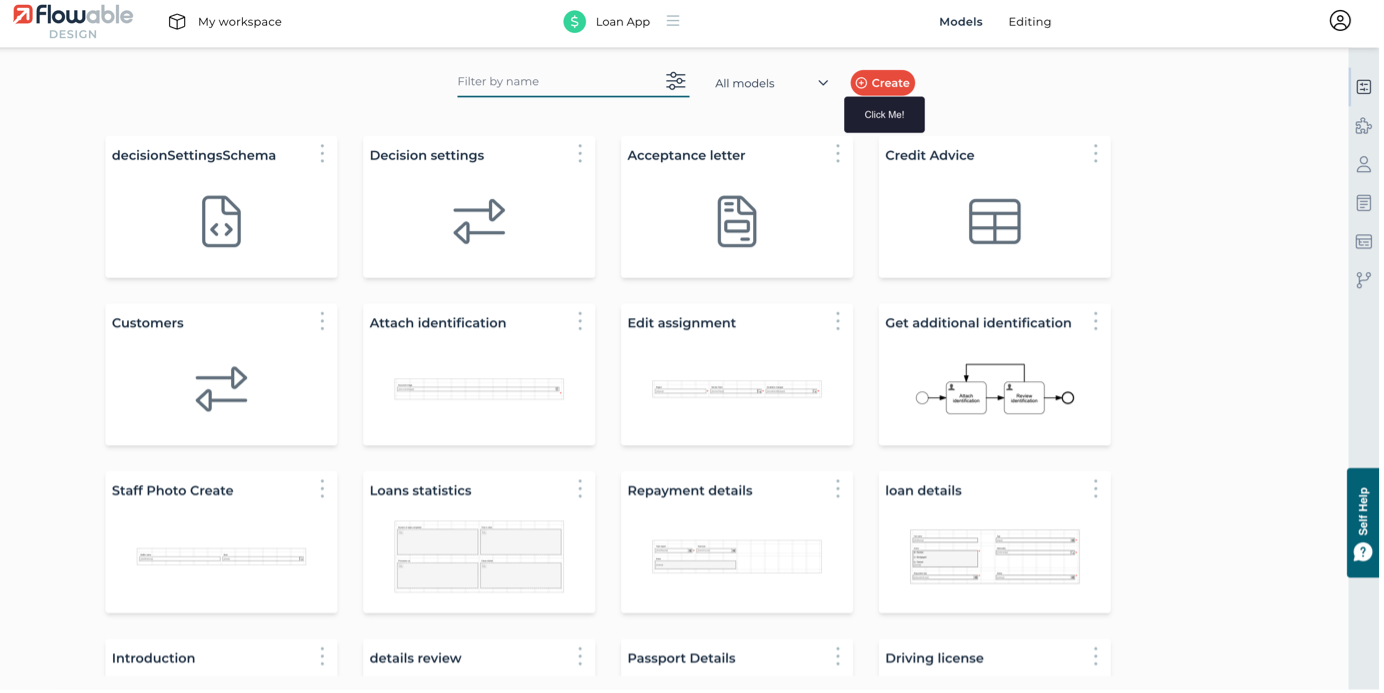
In Flowable Design, navigate to the existing Loan app and click the Import button.
Then upload the LoanApp-DO-db.zip to import it as a new version of the Loan app.

Once imported, you'll see a number of different models. There's a new case model, a couple of extra process models, some forms and Data Object models.
Update the Flowable Work runtime
The updated app definition will need to be published before being used. Click the Publish button to do that now. There is another step that's needed, as the app defines some Data Object database tables that need to be created. For this, we need to use Flowable Control to do it the very first time. This action won't be needed again unless the details of the data sources are changed in future modifications of the app. Start Flowable Control and navigate to the Data Objects section, then select the Schema definitions submenu. This will show all the schema definitions that have been published.
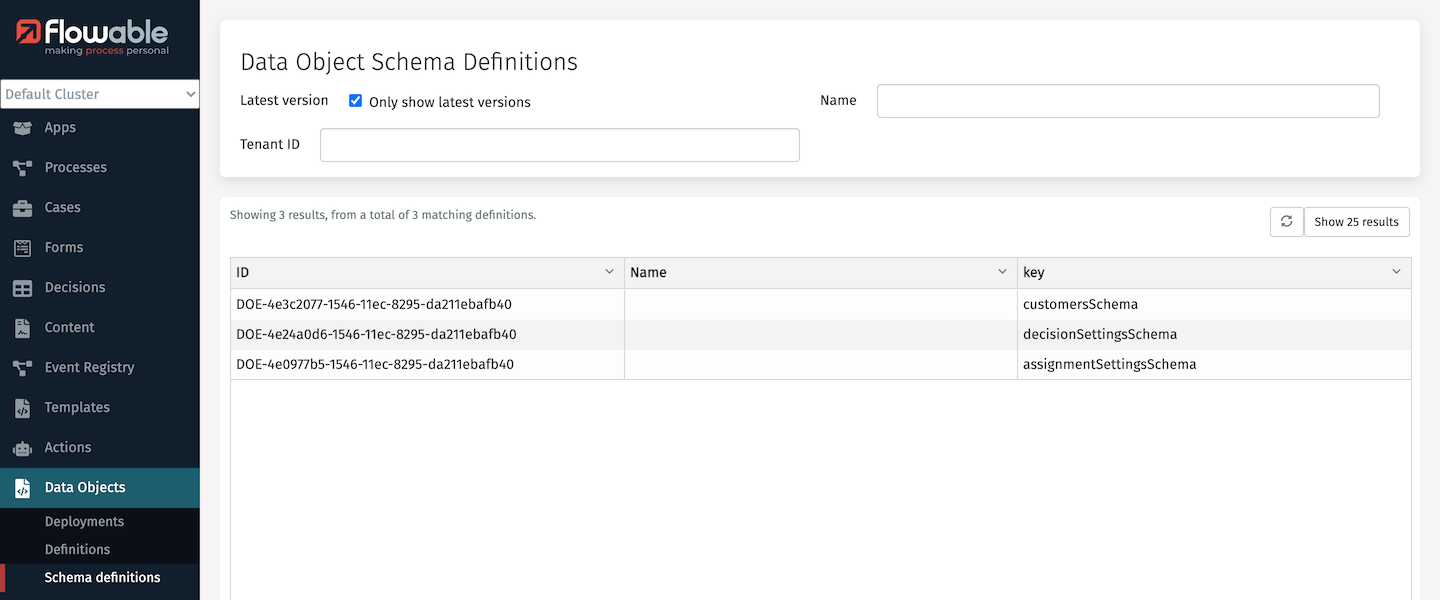
For each of the 3 schemas used in our app, we need to update the database to use the table definitions they contain. Select the customersSchema definition and its details will be displayed.
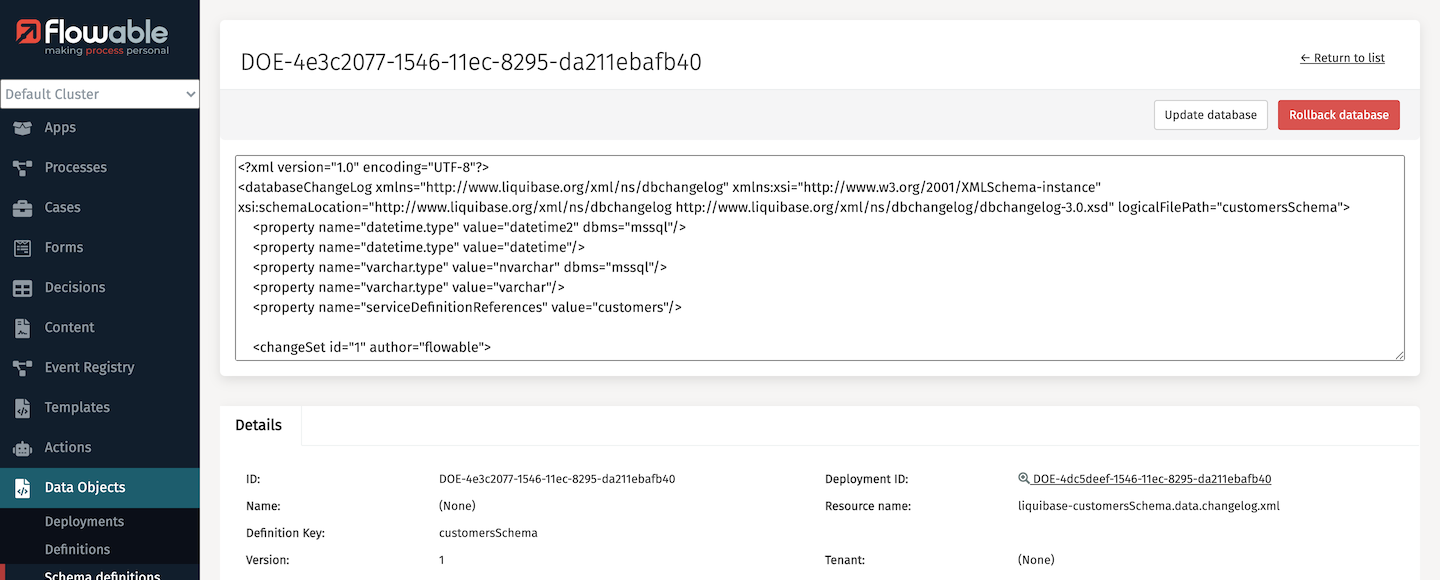
There's a lot of technical detail that we can come back to, but all that's needed is to click the Update database button. This will bring up a confirmation dialog. Once confirmed, the database will be updated with the new tables and you won't have to do this again unless the table definitions are changed.

Confirm the update and then do the same for the decisionSettingsSchema and assignmentSettingsSchema definitions. We now have the updated Loan app published and its specific Data Object database tables created. You can close Flowable Control if you wish.
The new, smarter loan process
The updated loan process has a number of enhancements, all driven by Data Objects. These allow data to be retained and modified outside of the scope of a single process or case instance. This means they can be used in a number of creative ways to enrich many business automation models.
History of applicants
The first use is to keep a record of loan applicants (customers) that can be referenced in any future applications. Knowing that an applicant has applied in the past and what the outcome was of that can help inform the current application.
Configurable task assignment
The next use is to enable the dynamic configuration of assignments for some of the user tasks. By using Data Objects to store who should be assigned a task based on the nationality of the applicant, the assignees can be modified as needed without having to change the actual loan process model. Using Data Objects as a means to configure business automation provides a rich capability for smarter solutions.
Business user configured decision tables
The last example uses Data Objects to allow values in a decision table to be configured, again without needing changes to the decision table model. This is really powerful when the decision configuration can be part of another business process that captures the required changes from a business user through a task form, with additional steps for review and approval to provide stronger change management.
Initialize configuration values
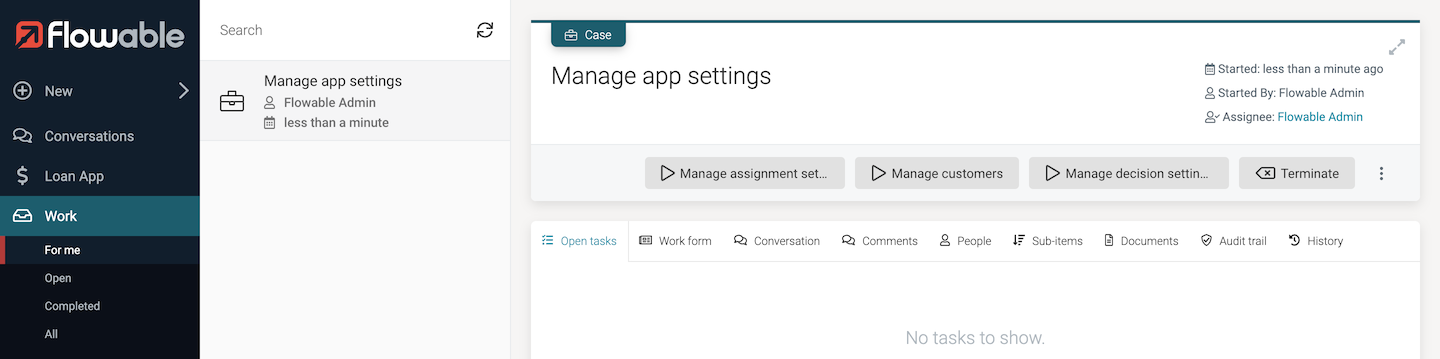
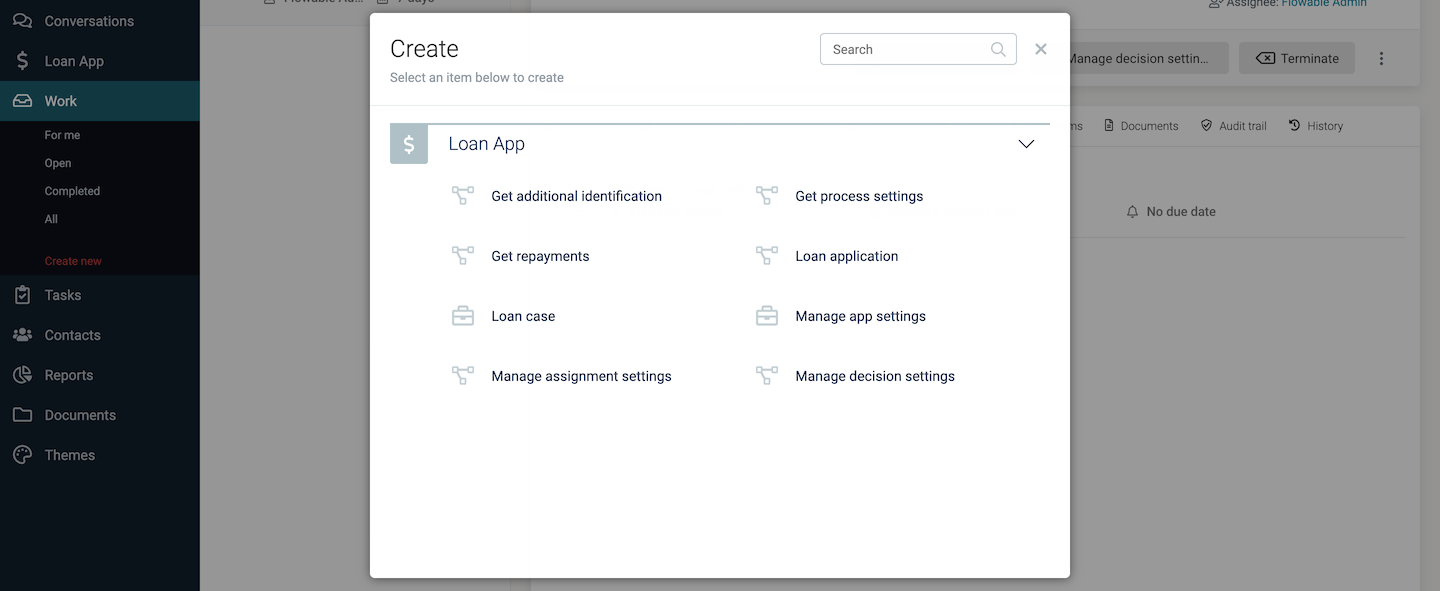
Before we try the updated loan process, we need to set some of the new configuration values that will be used. In our updated example, we've used a case to provide access to the setting of the assignments, decisions and applicant history. To get some initial data in place, start by switching to Flowable Work as admin and creating a new instance of the Manage app settings case.
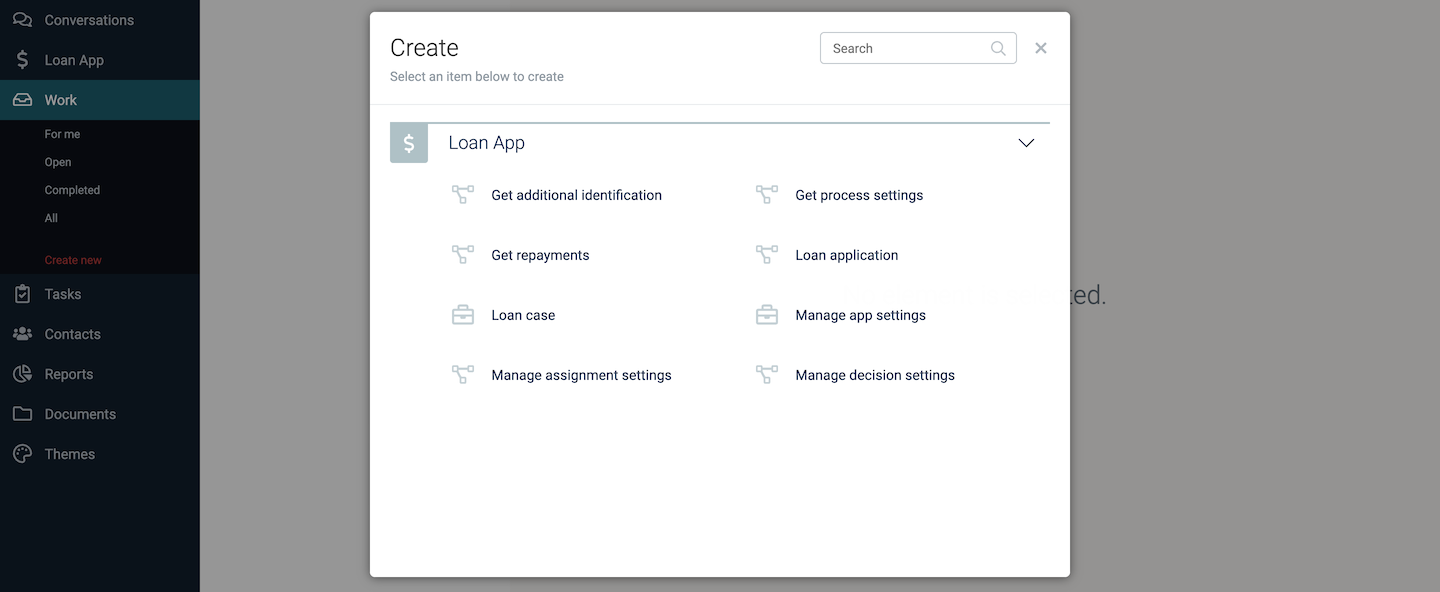
Confirm this and an instance of the case will be created. There's no tasks or processes started automatically, just actions that can trigger the different configuration steps.
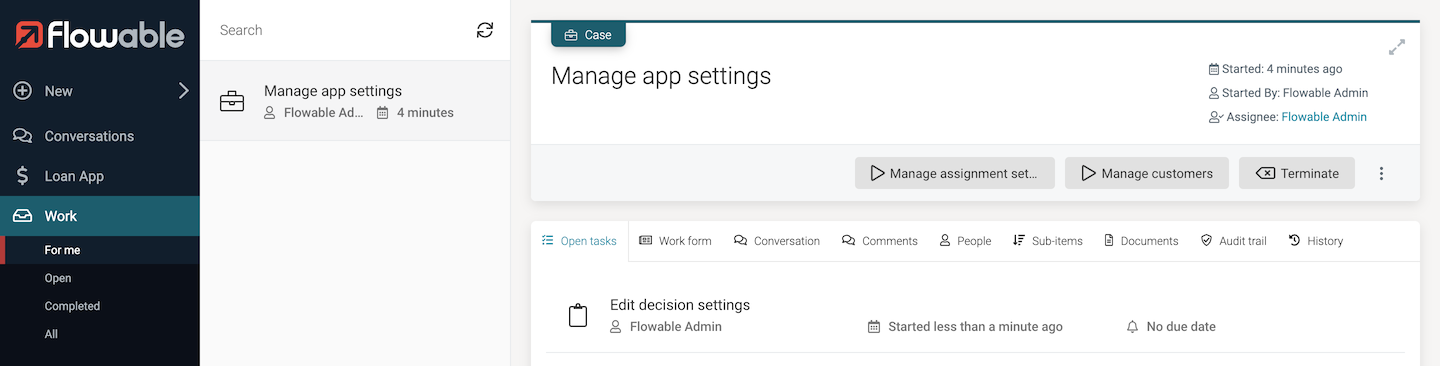
Click the Manage decision settings button to start a process that allows the decision criteria to be defined. This process creates a user task with two fields that can be set.
The form has got some default values already for the minimum and maximum ages used in the credit status decision table. This task could have been assigned to a business user, and the decision setting process could include an approval step, to ensure the correct values have been added.
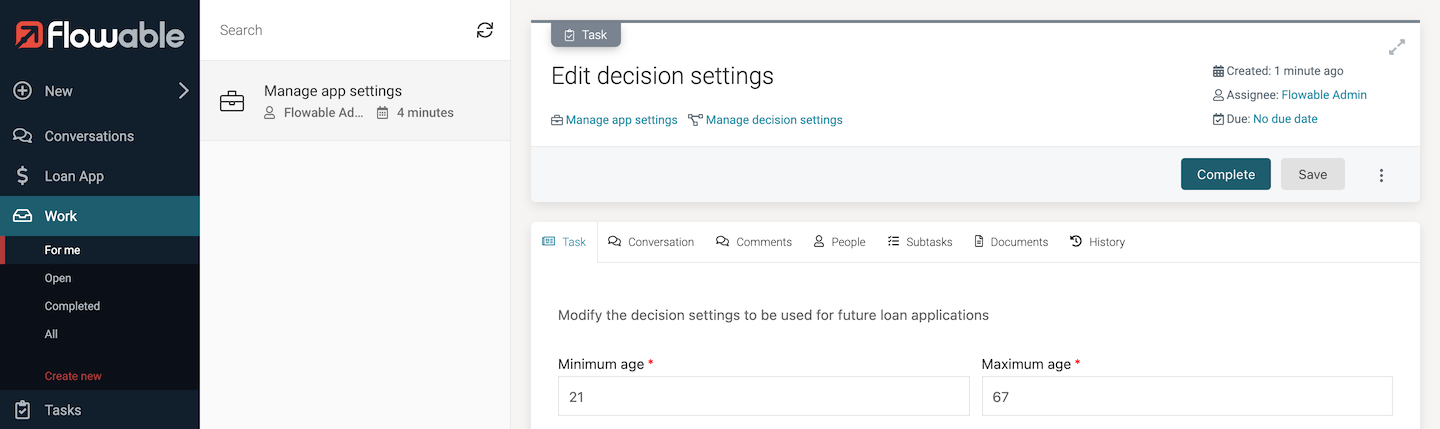
Changing the values and completing the task will set the decision values to be used from now on. Feel free to change the defaults to something else.
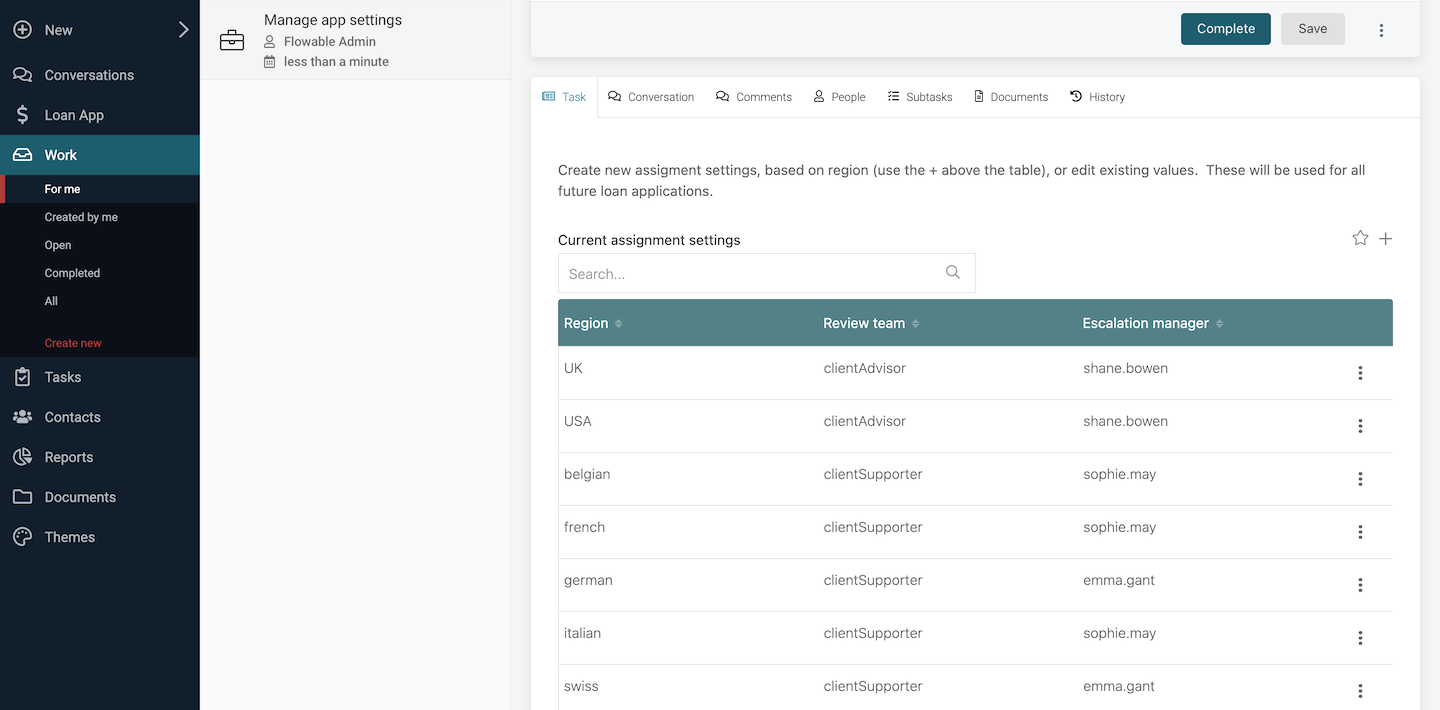
The assignments data is more complex, as there's multiple sets of data needed: one set of assignments for each region in the application process. To get started, click the Manage assignment settings button. This starts a separate task for creating and editing assignments, which could be assigned to a business user if desired.

Initially, the table of assignments will be empty, but new entries can be made by clicking
the + above the table header on the right.
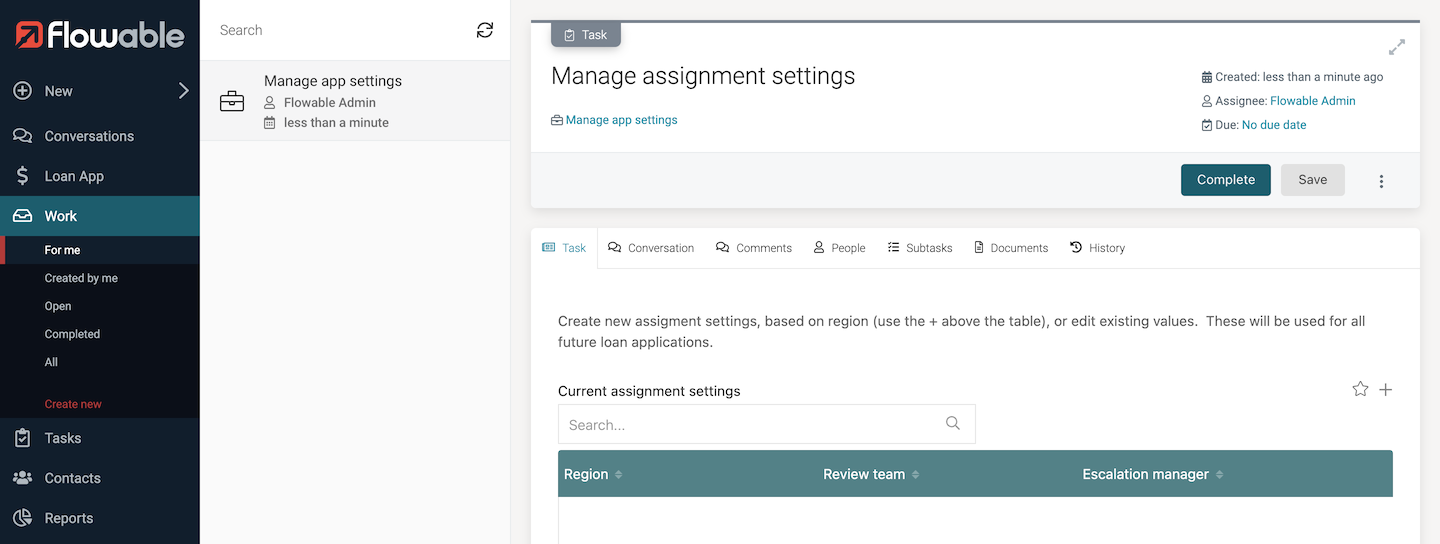
This will popup a dialog with a form to allow 3 values to be entered as the assignment settings for a given region.

Fill in the values UK, Client Advisor and Shane Bowen for the 3 fields, then click the Save button to store the settings. This will add the new entry to the database behind the Data Object and update the table in the UI. Continue to add new assignees for all the regions that the demo is setup for: USA, swiss, german, belgian, french, italian (keep the capitalization as it is here to make sure they match what's in the app). You can configure different assignees for the different regions, but you can also keep some of the same assignees to keep it easy for you!
When you've added all the regions, click the Complete outcome button to finish the assignment editing.
You have now configured the loan app, so we can start new instances of it that will use these settings. At any time you can run the manage settings tasks to change the values, which then will be picked up automatically in cases and processes without any need to involve modelers or admins to update the app.
Run the updated app
Now that we have set the different configuration Data Object values, we can start a case or process to use them. As we covered the use of the Loan case model in the introductory Loan app tutorial, we'll just start the loan application process directly. Select new work and choose the Loan application process.
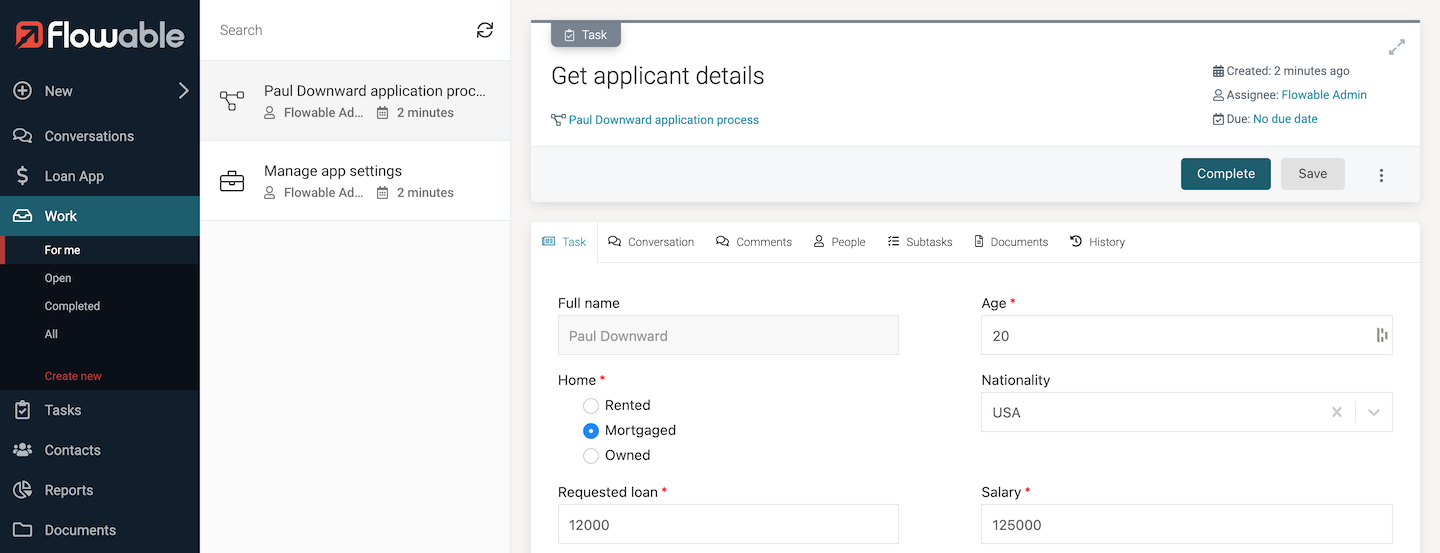
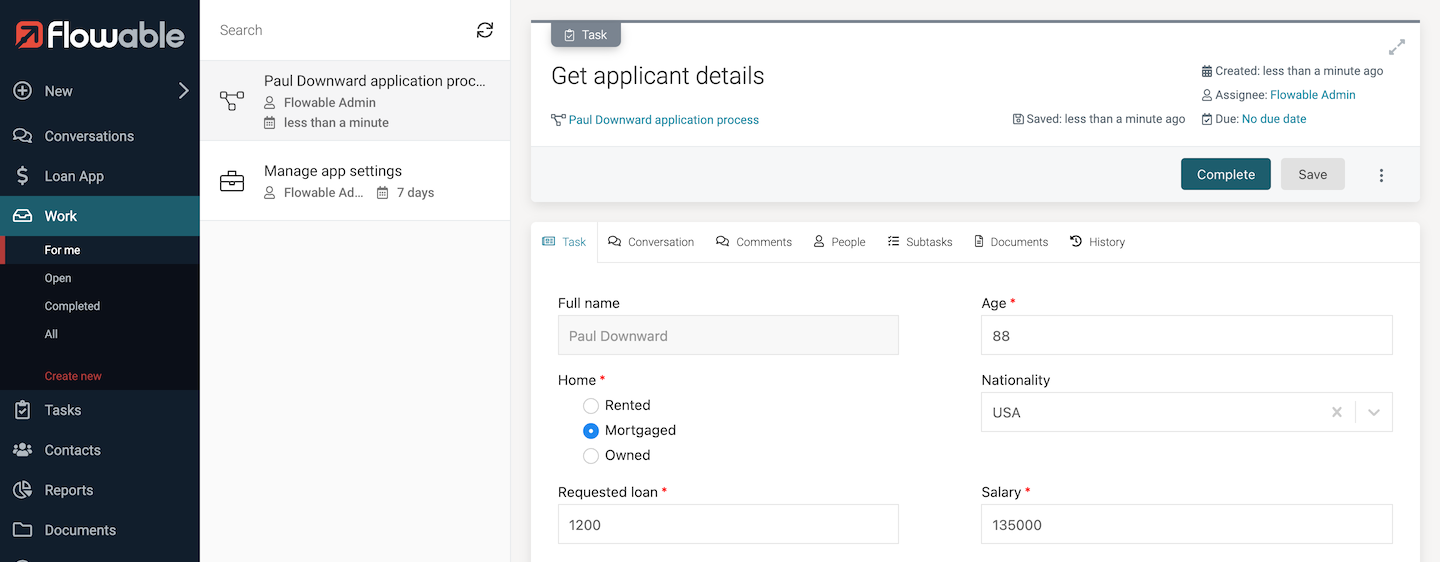
Select the Get applicant details task and fill in the details on the form. Try using an age just below the minimum value you configured above. We set the minimum value as 21, so we'll use 20. Also, set the Nationality to USA, then any other values as you like and Complete the task.
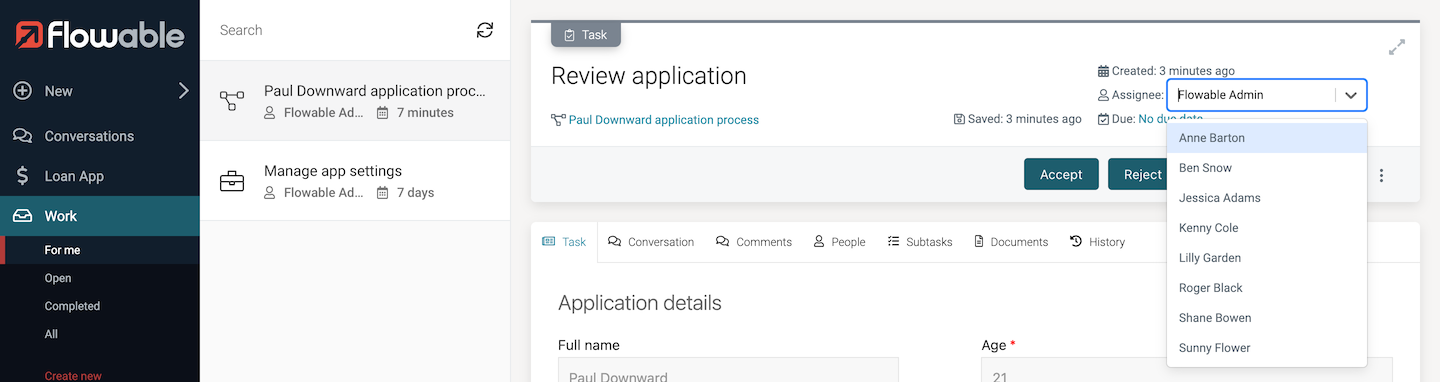
This will then move to the Review application task. Select it and you'll see it is unassigned. Click the Claim button and it will be assigned to you. Notice that the advice at the bottom of the form says Young, so need further checks because the age entered for the loan was below the minimum configured value in the decision table. To see the impact of the dynamic assignment, click on the Assignee link in the header and you'll see only the members of the Client Advisor review team, which is what we defined for the USA region.
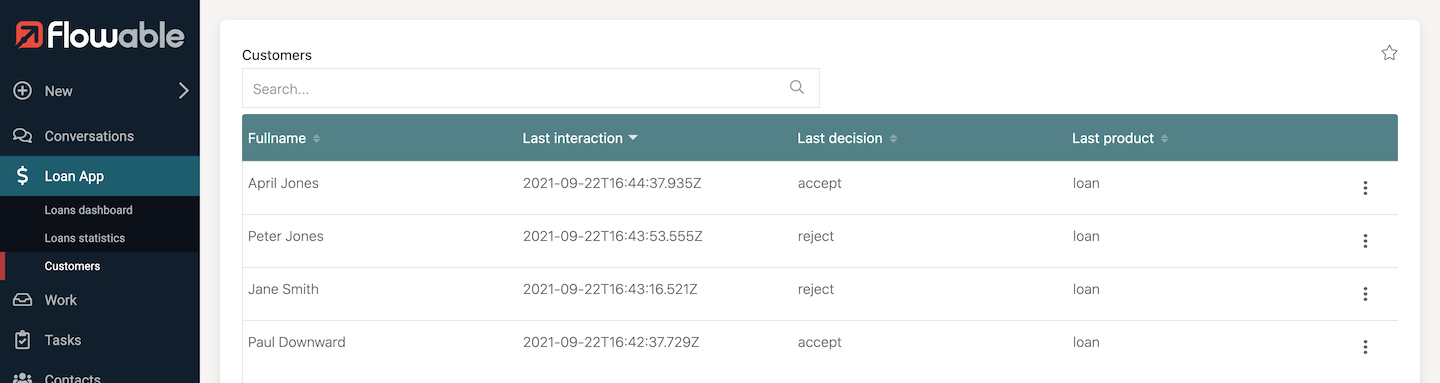
At this point, click the Reject outcome. This will move the process to the Inform rejection task. Complete this task and the whole process will complete. What will have happened behind the scenes is that the information about this application has been saved in a Data Object. To see this, we could go back to the Manage app settings case and start the Manage customers task. However, we also have provided a dashboard that can display the customer Data Objects. Select the Loan App > Customers page.

You can see the name, date, outcome and product of the last application. This list of customer Data Objects exists outside of any specific case or process, so can be accessed by completely independent cases and processes. We'll come back to that in a moment. First, to see some of the possibilities of working with Data Objects, this dashboard allows the data to be edited or deleted.
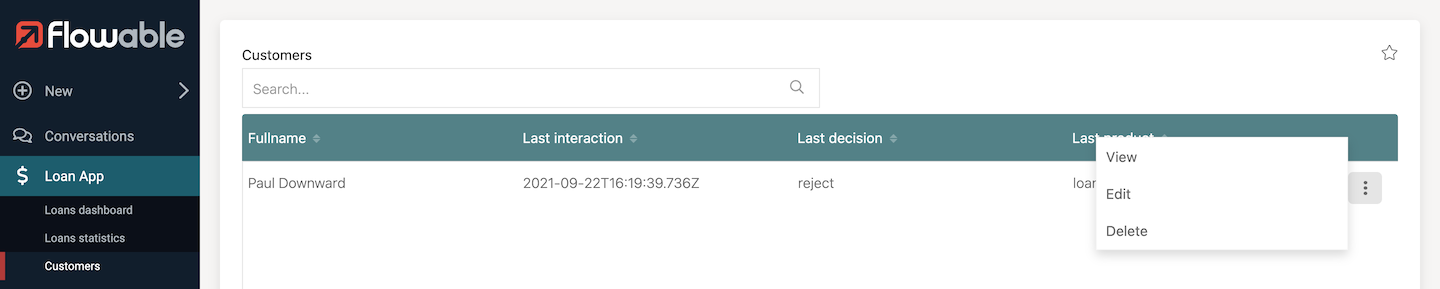
Click the menu icon on the end of the row just added and select Edit.
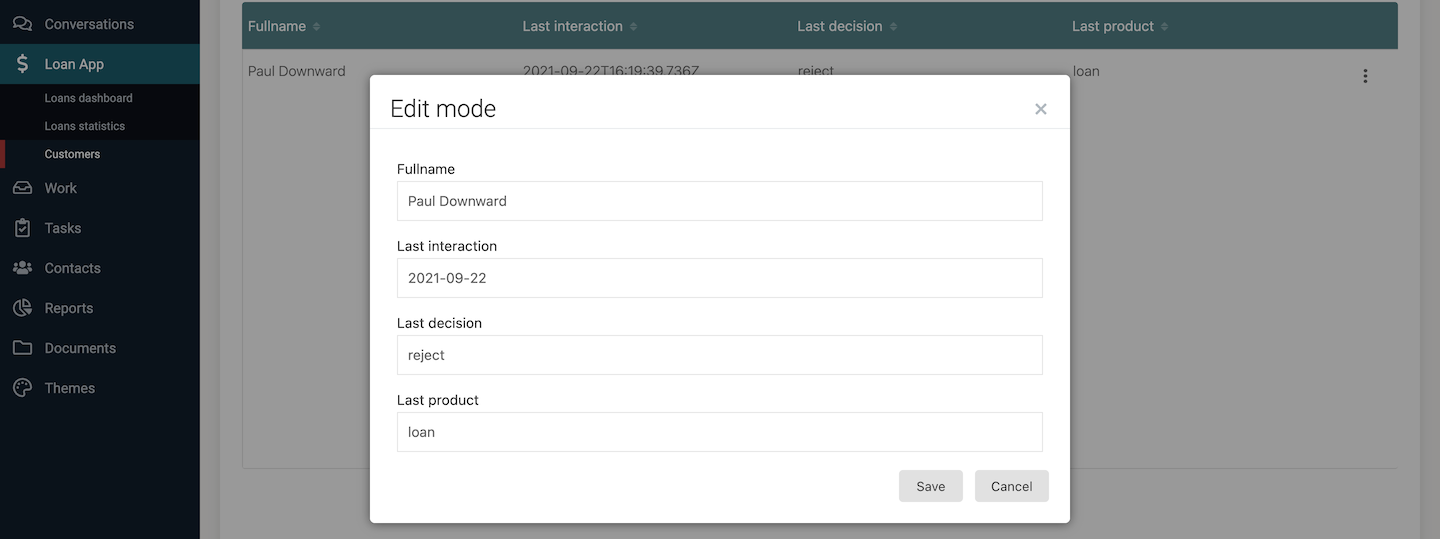
We could change the values if needed, but for now, just cancel the edit to keep the same values. Let's run the process again to see how we can use the information from the previous application, and also the escalation assignment. Start the loan application process again, giving the identical name as you used before. Fill in some details again, remembering to use USA as the nationality.
Claim and view the Review application task. This time, there's additional detail and advice.
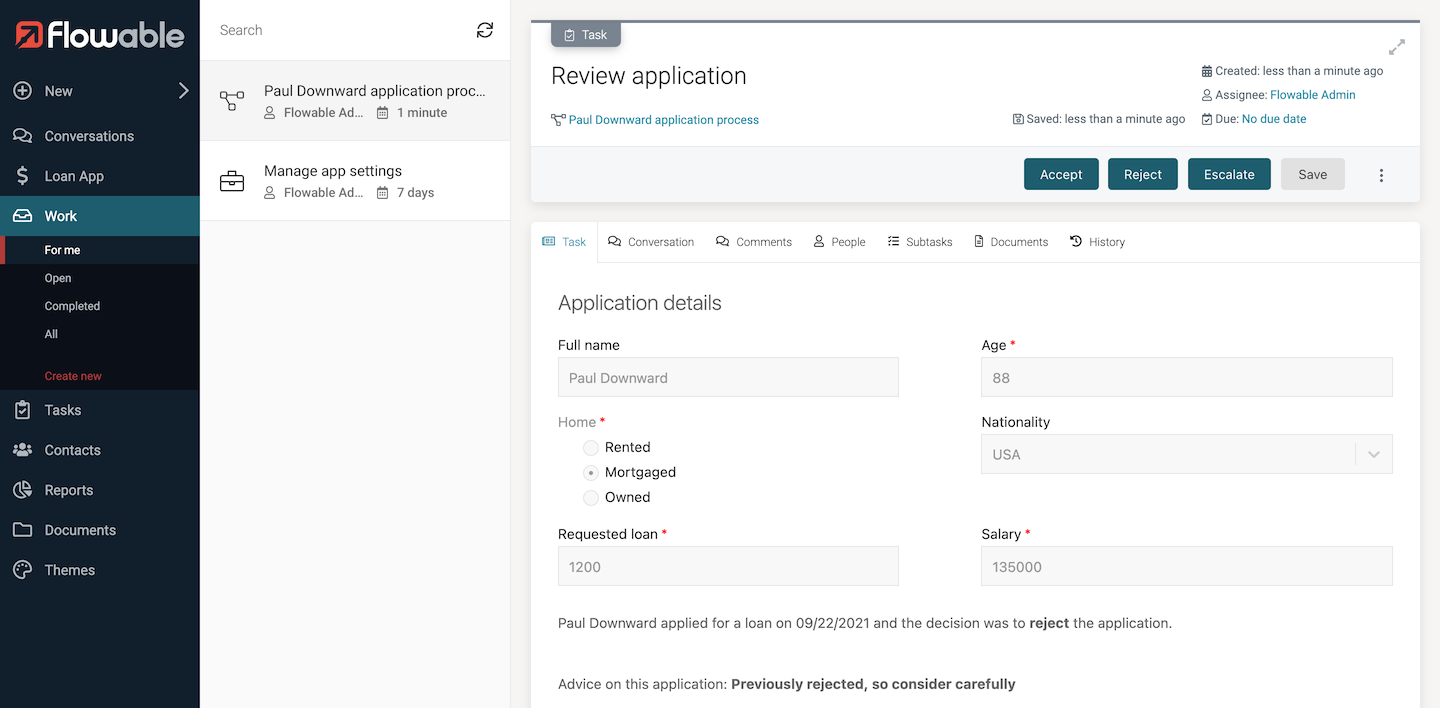
This information tells us about the previous application. Also, because of the previous rejection, the decision rules are advising that the application should be carefully considered. Click on the Accept outcome button regardless, and the loan process will move to the escalation path because we're overriding the default advice.

Here, we can see the assignee for the escalated task is the person we configured as the escalation manager for the USA - for us, it was Jessica Adams. Continue through the process, either accepting or rejecting the loan application. Run the process a number of times with different applicant names, then take a look at the Customers dashboard again.
The list will grow as the applications complete. There are options to sort the table of customers as well as search the list.
Now, go back to the Manage app settings case and change some of the decision settings, then run the process again to see the impact of the changes you've made. No need to change the business rules or processes that make up the app!
Summary
We have seen how we can use SQL database sources in a number of obvious and creative ways. The examples we have taken you through are very simple, just to show the different elements working together. Hopefully, you've seen the potential for this capability to be used in a wide variety of innovative and dynamic ways. Also, how it can be used to get the right job done, then quickly and easily modified as new requirements need to be met.
Now you've seen what's possible, you can explore the details on how this demo app was put together next.