Testing Process Models
Introduction
Flowable Design lets you author and run automated tests for a process (BPMN) model directly inside Design, before the app is published to a runtime environment. A test drives a process instance along a defined path — starting the process, completing tasks, triggering events — and asserts that the resulting state is what you expect. The same scenario can then be replayed whenever the model changes.
To walk a process through without writing assertions — following tokens along the sequence flows and choosing the paths yourself — use token simulation instead.
This page describes how to build and run a test for a process model. The general concepts that are shared across all model types — what a test set is, the app-level Tests overview, import and export, publishing to Inspect and bulk runs — are described on the Model Testing page. The equivalent page for CMMN is Testing Case Models; the two work in the same way.
A process test is organized as a sequence of steps. Each step is linked to an activity in the process (a start event, a user task, a gateway, a service task, and so on) and carries an ordered list of actions that are applied when the test reaches that activity. Actions include starting the process, completing tasks, setting variables, asserting values and expressions, triggering timers and events, switching users, and skipping automated tasks.
Opening the Tests panel
Open the process model in the BPMN editor and click the Tests button in the editor toolbar. This opens the Tests panel — a floating window you can drag out of the way — which lists the model's test sets and tests.
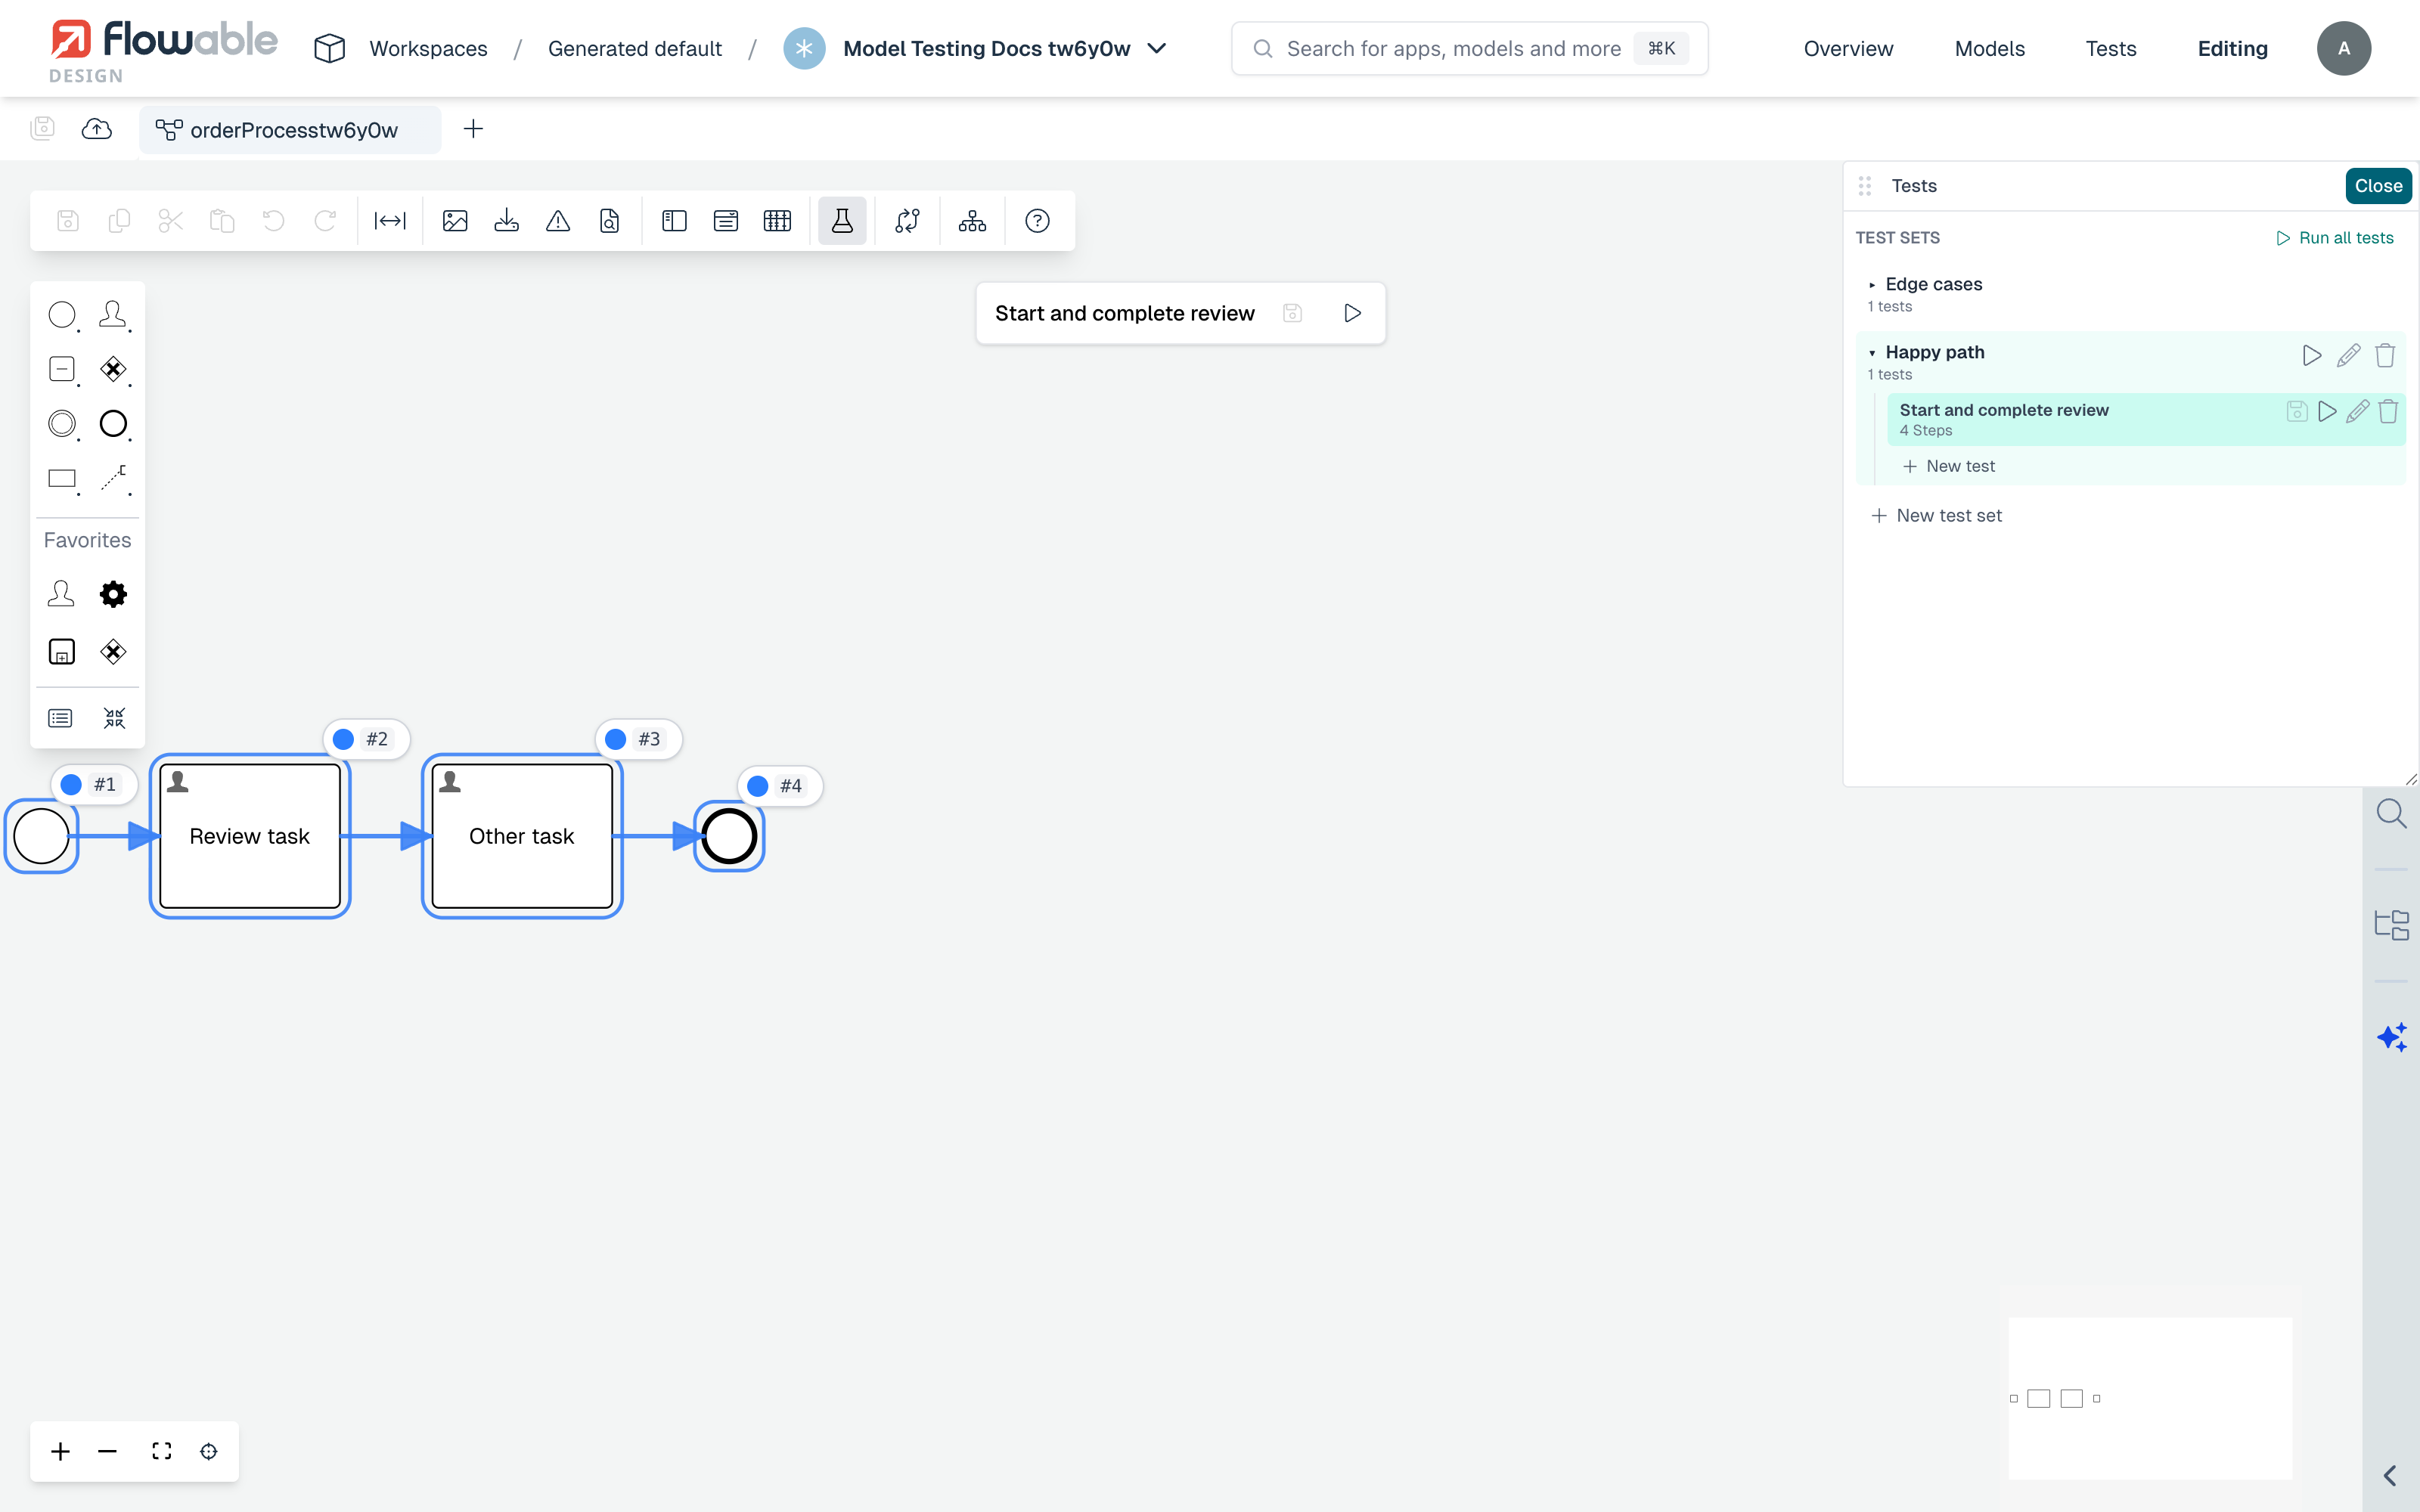
The panel header shows the Test Sets for the model and a Run all tests button. When there are no tests yet, an empty state offers a New test set button.
Creating a test set and a test
- Choose New test set, give it a Name and a Key, and choose Create. The key is a stable identifier used by the test runner; it is generated from the name but you can change it.
- Inside the set, choose New test and give the test a Name and Key. A new test automatically starts with a step for the process's start event, so it is ready to run immediately.
- Add further steps and actions (see below), then Save the test.
A test can be marked with Skip this test when running all tests so that it is kept but excluded from a Run all tests; skipped tests show a Skipped tag in the panel.
Adding steps and actions
There are two equivalent ways to build up a test — both edit the same test definition:
- From the panel — open the test with Edit test and use Add step to pick an activity by its id, then add actions to that step.
- On the diagram — with a test selected (armed), click the add-pin marker on an activity in the diagram to add a step for it. Each pin has a menu for adding actions to that step. Changes made on the diagram are buffered as a draft and are committed when you choose Save in the run dock (see Running a test).
Every step is linked to a diagram activity by its id, so a step always corresponds to a concrete point in the process. When you add a step, Flowable seeds it with the action that is implied by the activity type — for example a complete task action for a user task, or a start process instance action for the start event — which you can then refine.
Each action has a When setting that controls whether it runs Before step or After step, so you can, for example, set a variable before a gateway is evaluated or assert a variable after a service task has run.
Available actions
Selecting a step (or a diagram pin) exposes an action menu. Depending on the activity, the following actions are available:
- Set variable — set the value of an existing variable or add a new one. Use the When option to apply it before or after the step.
- Add test — add an assertion. This opens a dialog with two tabs:
- Variable — assert that a variable has an expected value, using an operator such as equals, contains, greater than or between. Because variables usually determine which path a process takes, asserting them at key steps validates a large part of the model's behaviour.
- Expression — assert a JUEL expression, for example
${customerName == 'Flowable'}. The expression must evaluate totruefor the test to pass.
- Change user — continue the test as a different user, which is useful for validating task assignments and permissions. You can apply the change to this step only, or to this step and all subsequent steps.
- Edit form content — provide the form data submitted when a task with a form is completed, or when the process is started with a start form.
- Edit event payload — provide the payload delivered to an event-registry start or catch event.
- Skip task — skip an automated task (a service, script, HTTP, mail or decision task) so that its logic is not executed during the test. This lets you test a model without the external system being available. It is offered only for tasks that can be skipped, and it replaces the task's normal execution.
- Run child test — for a call activity (a called process) or a case task (a called case), delegate the child instance to a specific test of the called model. The child test can be a process test or a case test (see Testing sub-processes and sub-cases).
Depending on the activity type, steps also carry actions that are added implicitly and rarely need editing, such as complete task, start process instance (optionally with a form or an event), trigger timer, trigger message, trigger signal and trigger event. When a step is on an end event, the runner also verifies that the process instance actually ended.
 info
infoThe Tests feature authors a fixed, repeatable scenario. It is different from the interactive step-through debugging of a running instance (with breakpoints), which is part of Flowable Inspect on Flowable Work.
Testing sub-processes and sub-cases
When a process starts another model through a call activity (a called process) or a case task (a called case), you can drive the child instance from the parent test. On the call-activity or case-task step, choose Run child test and select the Test set and Test of the called model that should run for the sub-instance. The child test then runs as part of the parent test, so an end-to-end scenario across both models can be validated in a single run.
Running a test
Tests always execute against the live engine on Flowable Work, through Flowable Inspect. When you run a test, Design deploys the process model (and everything it references) as a temporary deployment, runs the scenario, and removes the deployment again — you never have to publish the app first.
You can start a run in several ways:
- Run all tests in the panel header runs every (non-skipped) test in every set for the model.
- Run set runs all tests in one set; Run test runs a single test.
- When a test is armed, the run dock near the editor toolbar shows the active test with Save and Run test controls.
As a run progresses, the diagram is annotated with a pin on each activity that shows its status:
- Passed — the activity was reached and its actions and assertions succeeded.
- Failed — an action or assertion on the activity failed.
- Skipped — the activity was skipped.
- In test / Running — the activity is part of the test / is currently executing.
- Not in test — the engine visited this activity, but the authored test does not include a step for it ("off-path").
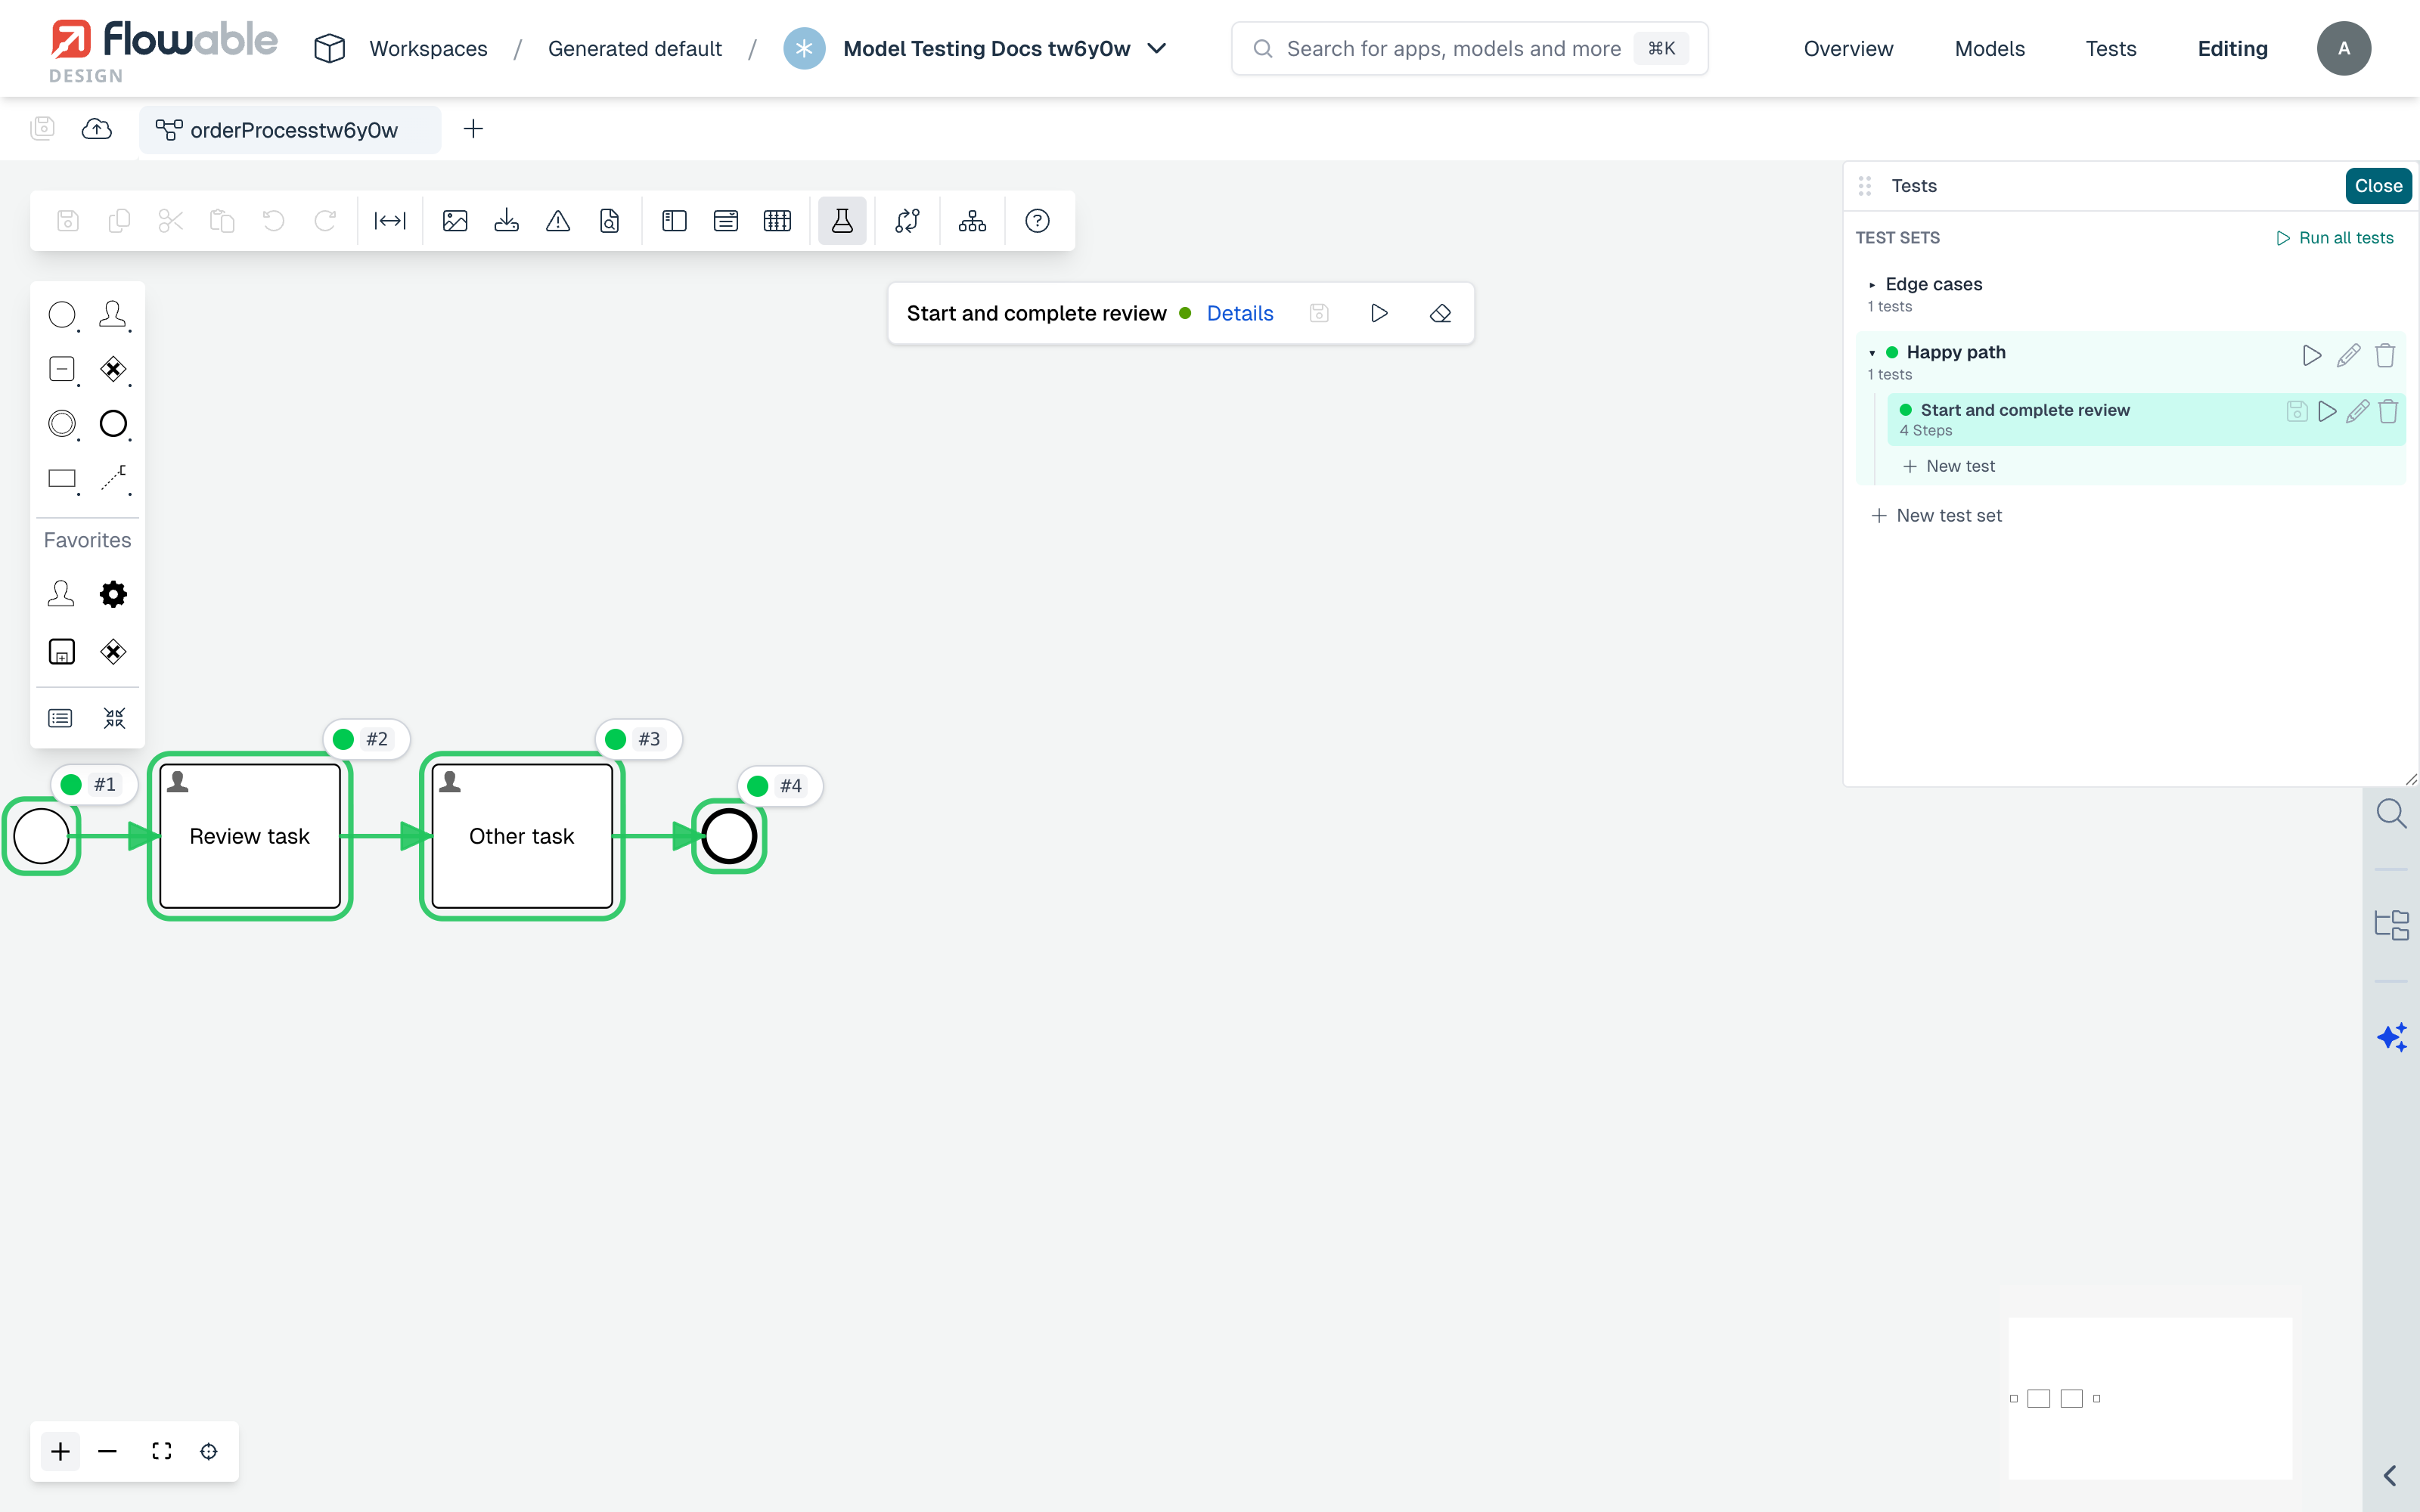
Clicking a failed pin opens a Step failure popover with the Error message, a Run log (filtered into error, warning and info entries) and the Assertions that were evaluated, showing the Expected and Actual values side by side.
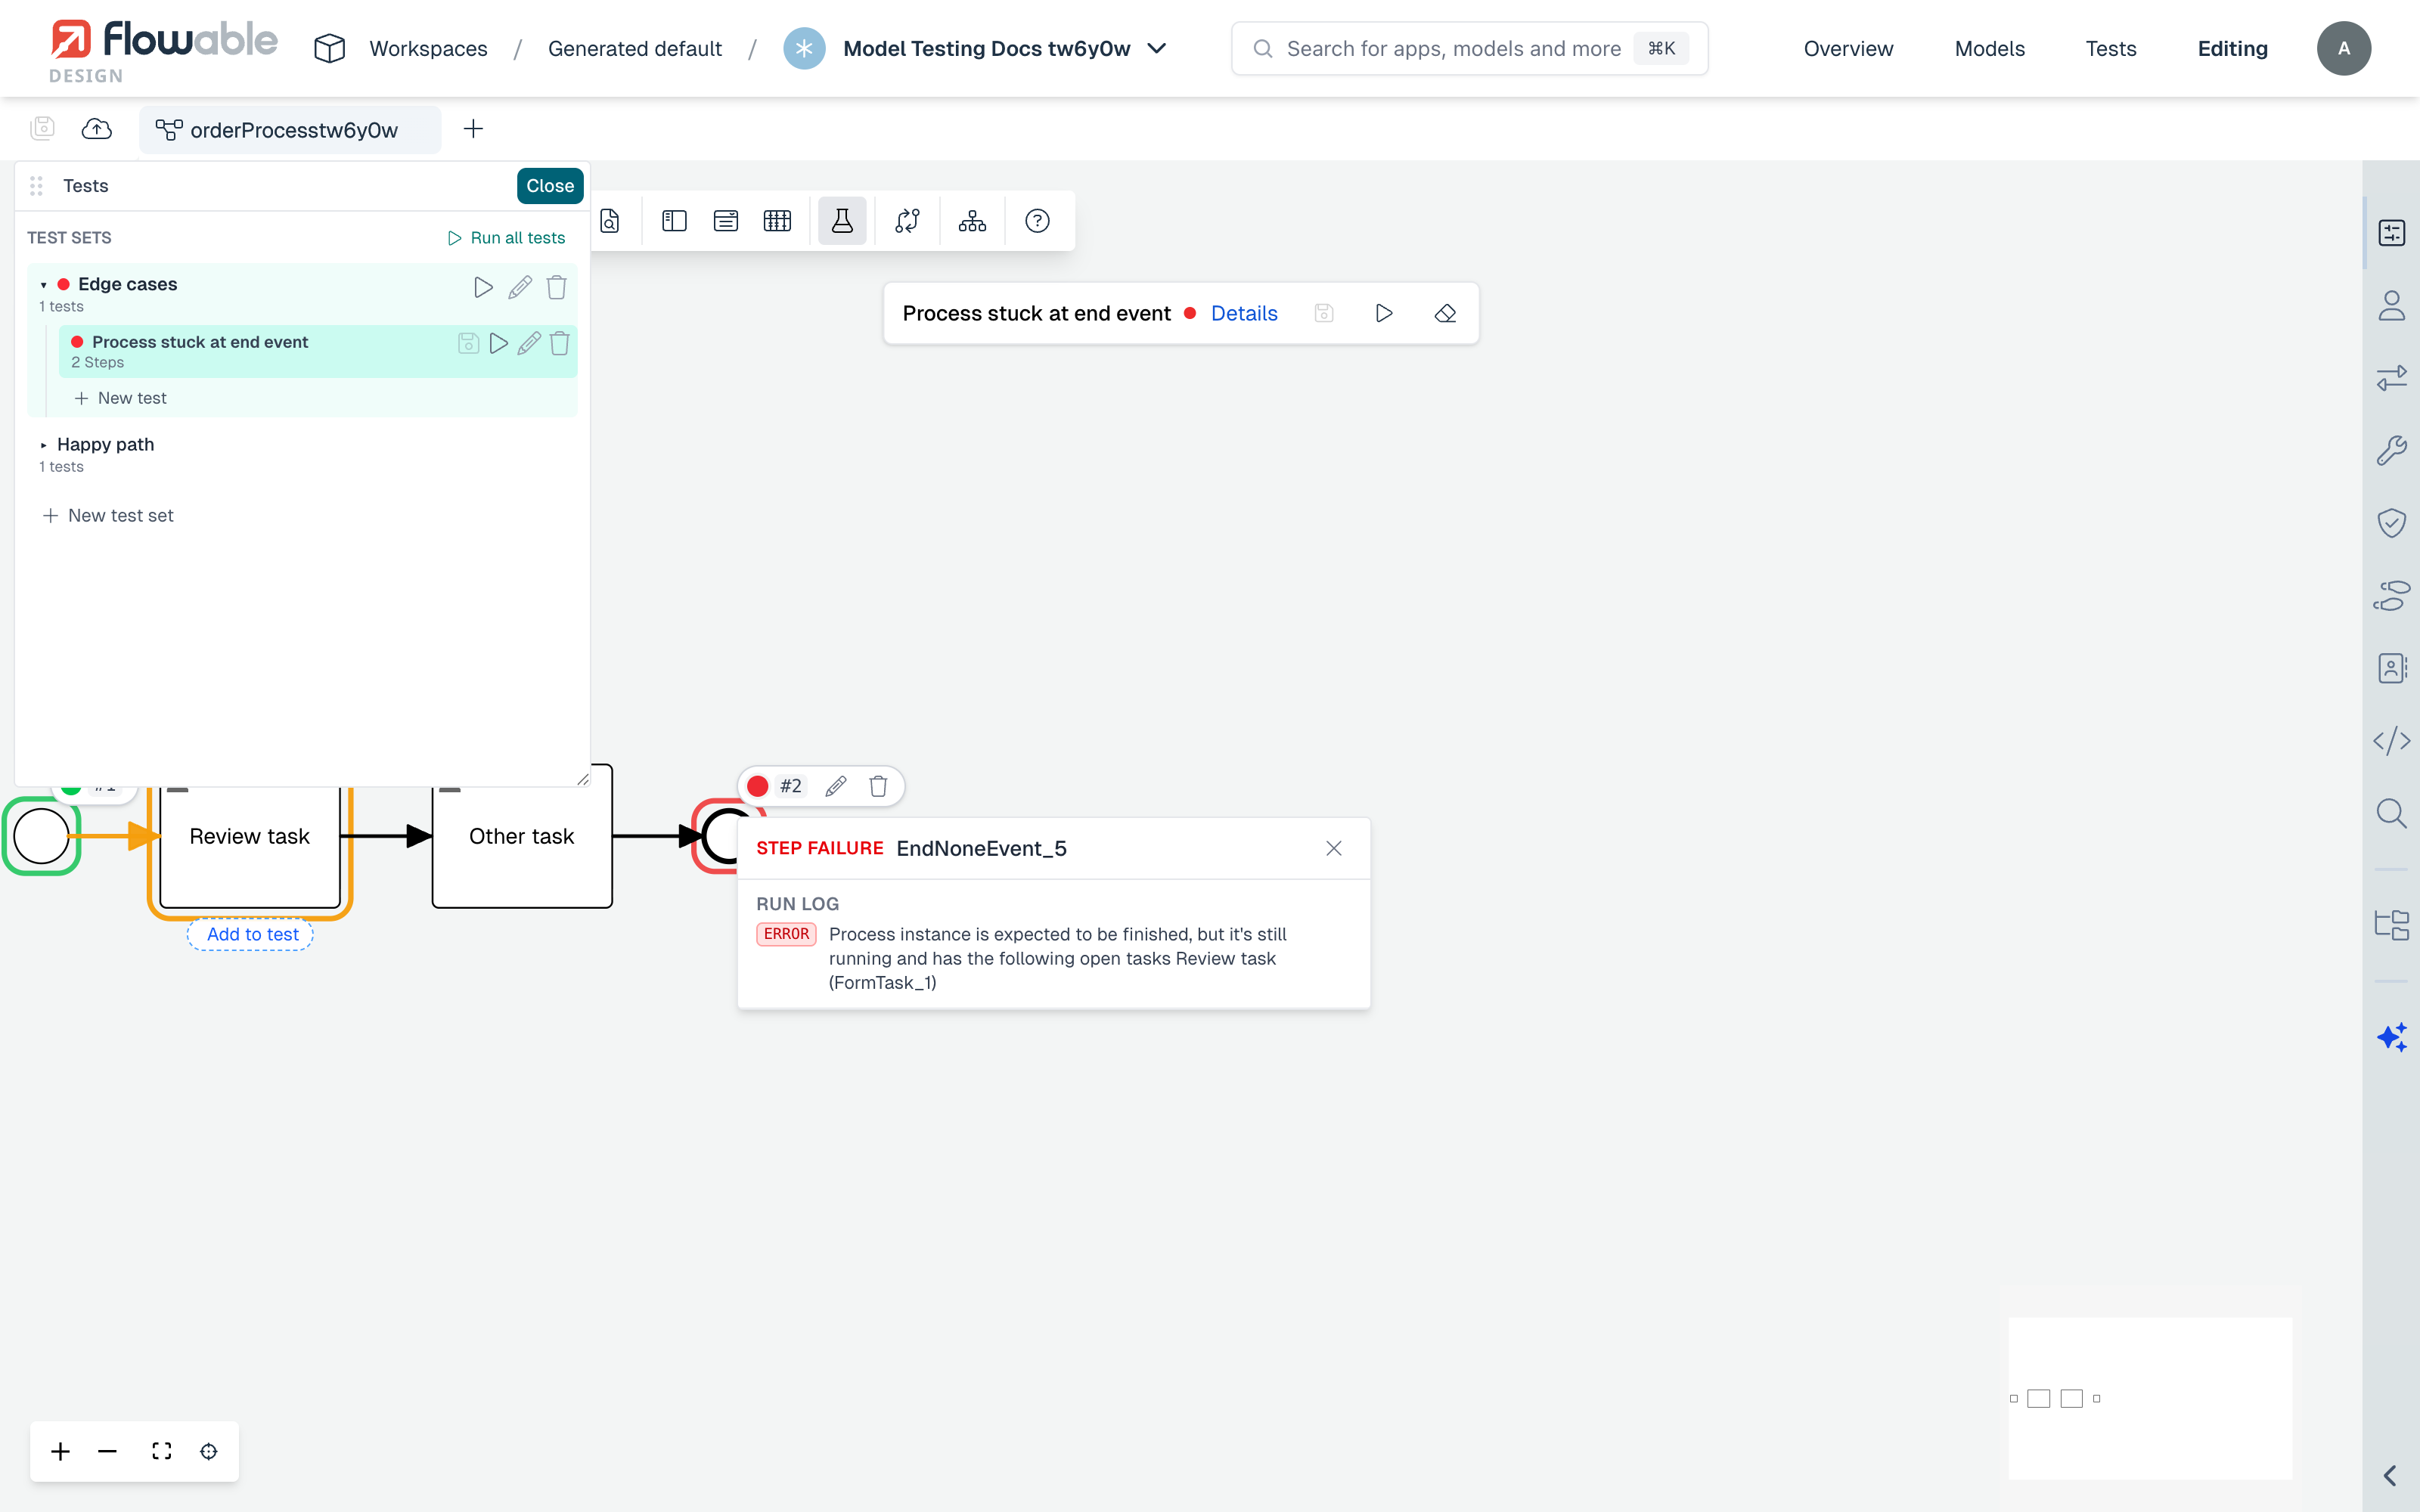
For a full picture of a run, open Run details from a test's status dot or the run dock. It has a Steps tab listing every step in the order it executed and a Log tab with the complete run log; the log can be filtered by level (all, error, warning, info).
In the Tests panel, each test and each set carries a coloured status dot — green for Passed, red for Failed, grey for Skipped — with a set turning red if any of its tests failed. This makes it easy to see, at a glance, whether the current model still satisfies all of its recorded scenarios.
For organizing tests across models, importing and exporting them, publishing them to Inspect and running them in bulk, see Model Testing.