Getting Started
Flowable Engage is available as a web application accessible via your browser. Enter the address in your web browser, and you get redirected to the login screen.
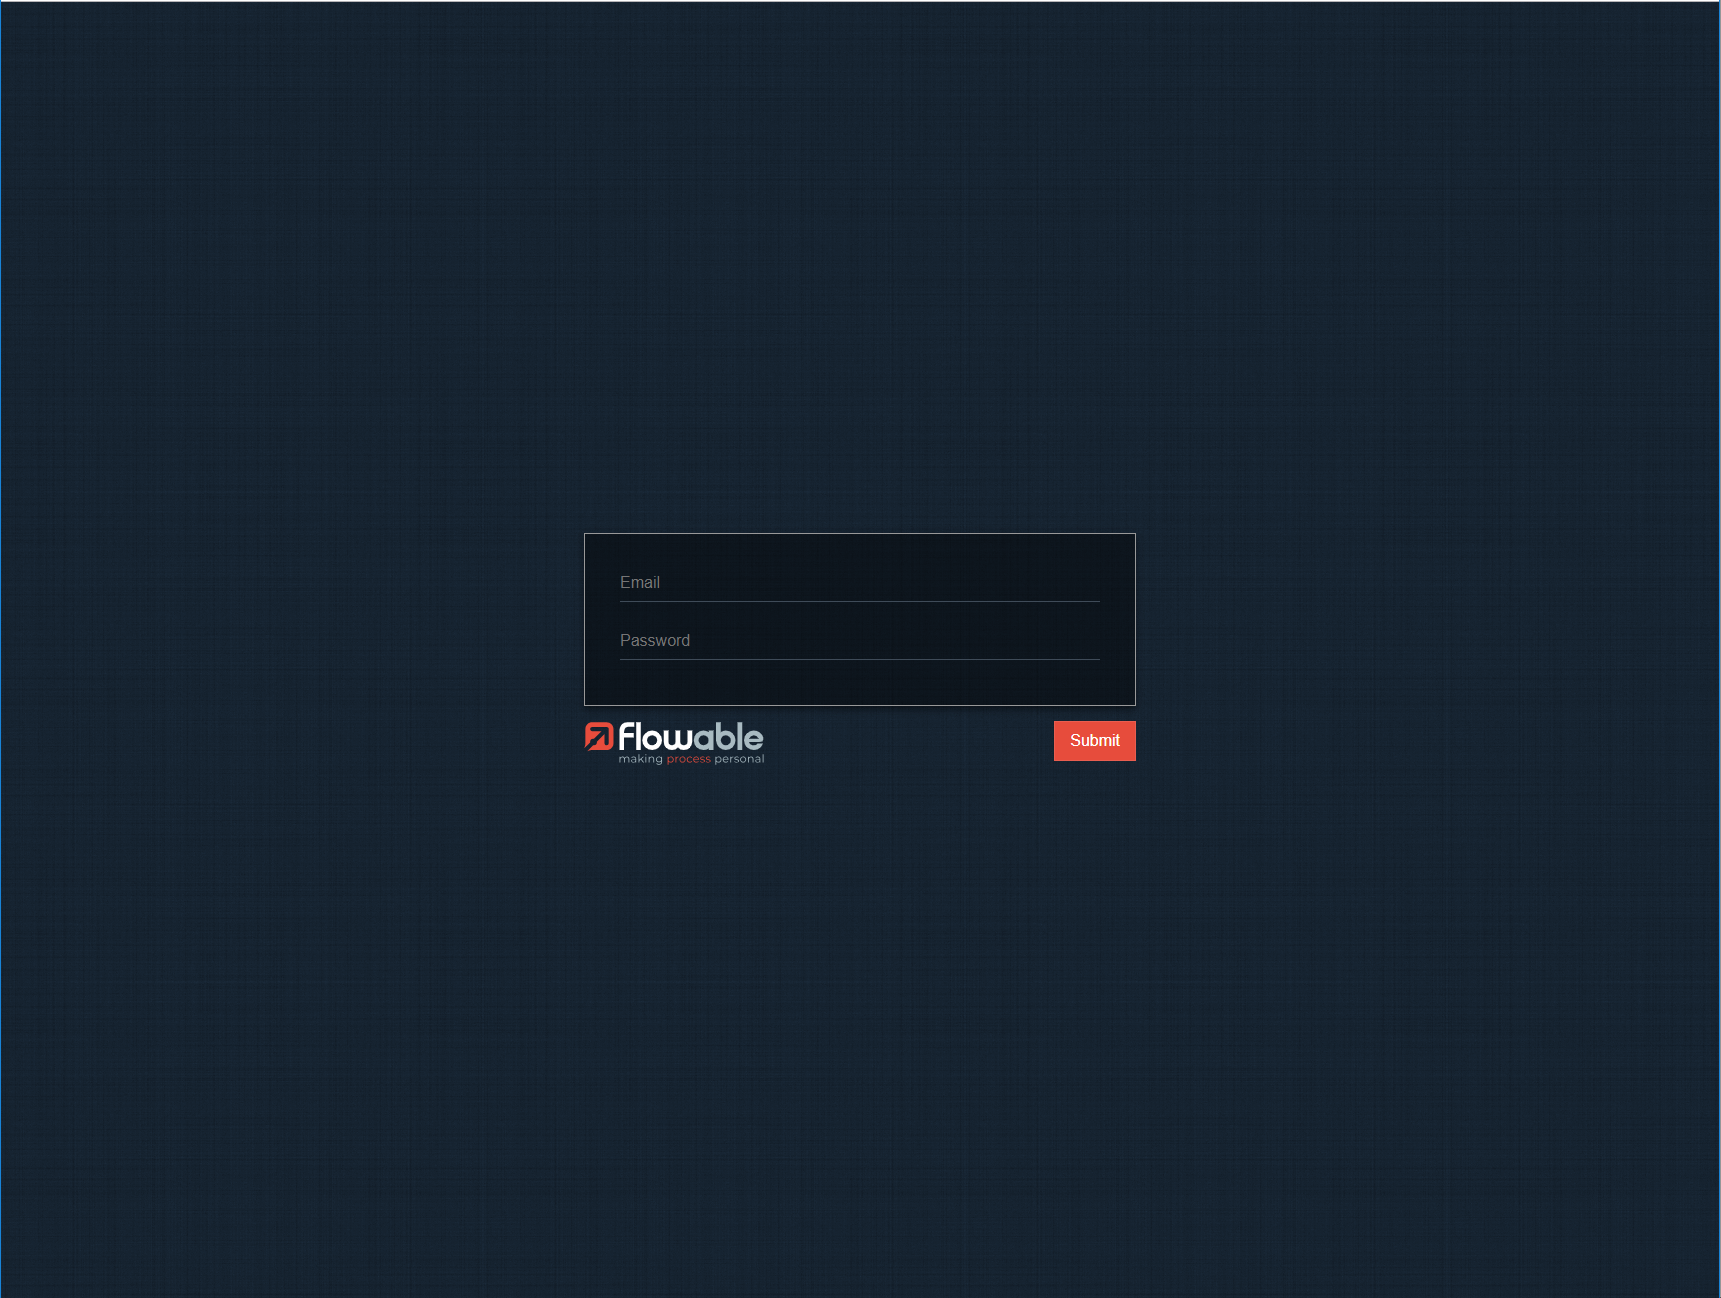
Use your username and password to login to the portal. You can log in from different browsers and devices with your user account at the same time. There is no limitation.
 note
noteAutomatic login is possible when single sign-on is set up for your organization.
Understand the User Interface
After logging in, the main Flowable Engage web interface appears.
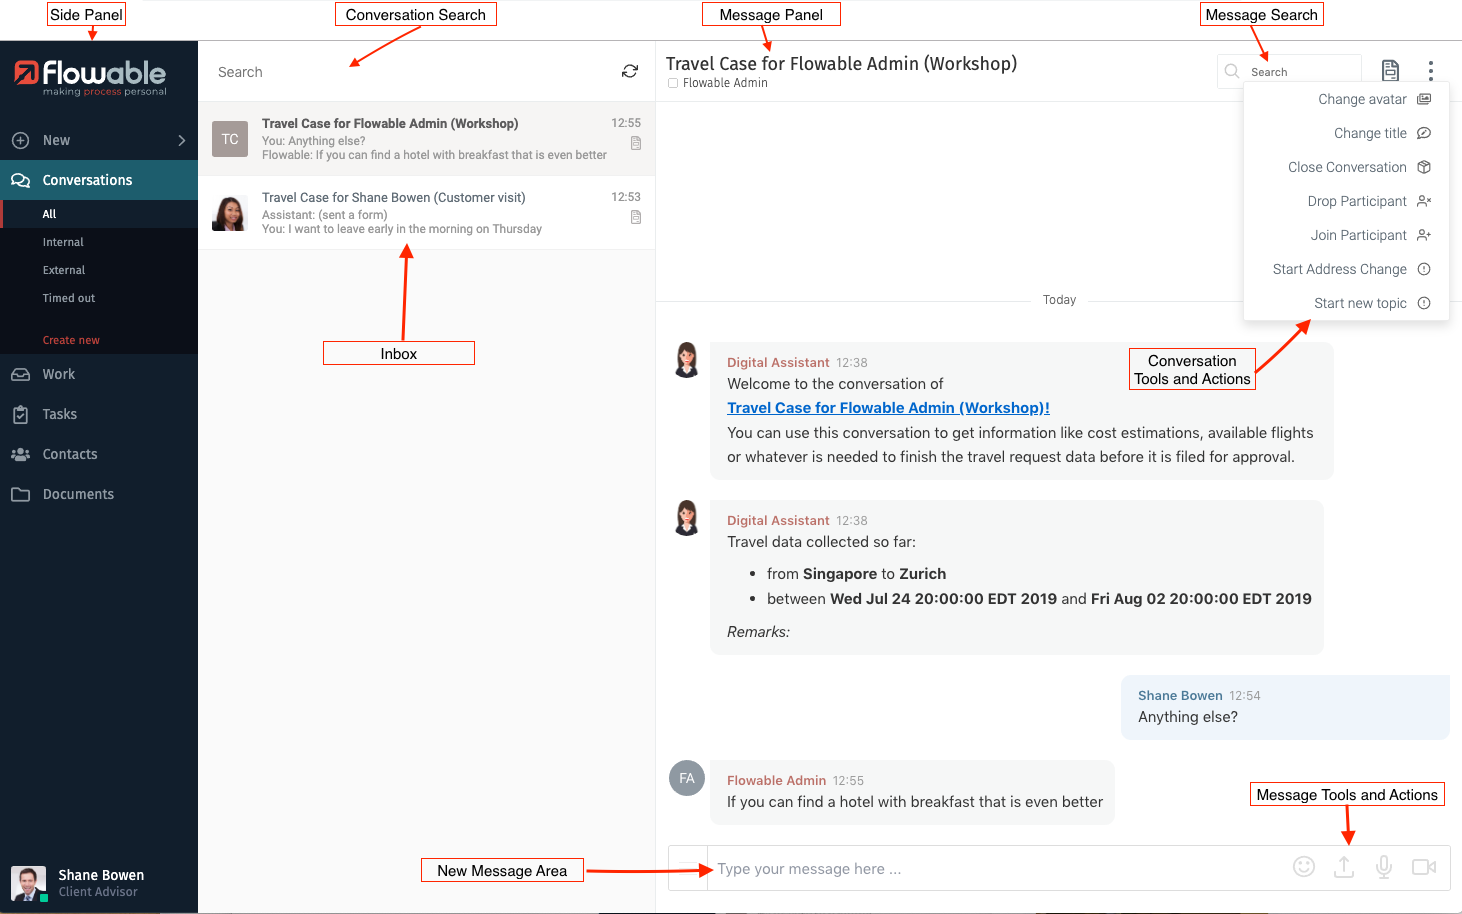
On the left side, you see the side panel where you can find the main navigation. The column beside the side panel is the Inbox, and this is where conversations are listed. The third area on the left is called the message panel and shows the messages and content of the conversation that is selected in the Inbox.
Each area is described in more detail in the following sections.
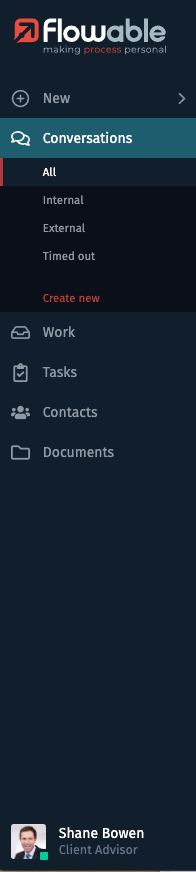
Side Panel
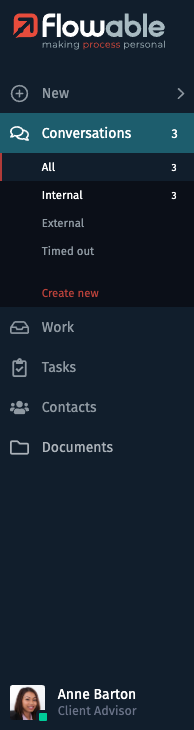
The side panel contains the main navigation of Flowable Engage. It helps you to orient yourself within the application.
On the top, you can find the New button.
It allows you to create new conversations, new work items, new tasks, or new users.
noteDepending on the individual user privileges, you may only see some of the options.
Below the New button you find the Flowable Engage Conversations option.
If you click the heading, you are routed to your Inbox,
which displays all your conversations.
In the Contacts menu, you can manage your conversation contacts, e.g., you can find the details of the users that you chat with. To discover all contact management features have a look at the chapter about Contacts.
Besides the default menu items Conversations and Contacts, other applications of the Flowable Portfolio can be integrated into the navigation. For more information, see the section about App Integration.
noteDepending on the configuration of your web application and the individual user privileges, you may only see some of the menu items in the side panel.
noteThe side panel is collapsible. Double clicking on the side panel collapses the panel. Double click again and the full side panel menu view opens again.
| Normal view | Collapsed |
|---|---|
|
|

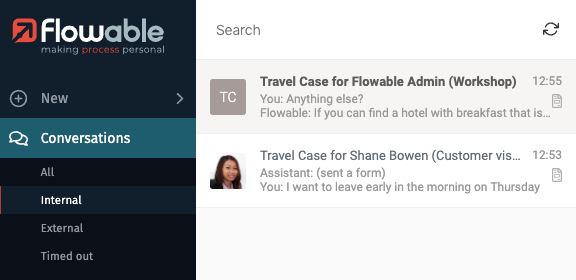
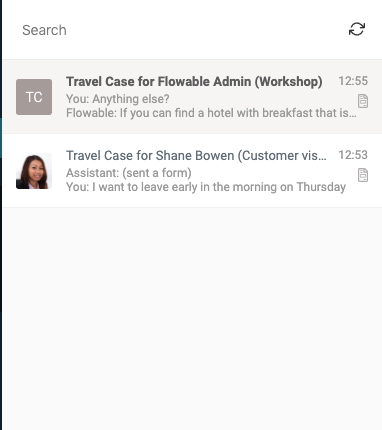
Inbox
The Inbox lists conversations. It is pre-filtered based on the Conversations menu selection in the side panel.
noteBy default, all conversations in the Inbox are ordered by the last message date. The Inbox features the possibility to pin chat conversations. Pinned conversations always appear on top of your Inbox, regardless of sorting.
noteYou can only see conversations in your personal Inbox that you are involved in which means you cannot see a group conversation before you have been added to it.
At the top of the Inbox, you can find a search field to search your conversations.
Message Panel
The message panel shows the conversation that is selected in the Inbox. The complete conversation history is shown, chronologically ordered by date. The latest message is shown on the bottom of the panel.
Depending on the type of conversation, different actions can be started from the conversation context menu at the top right corner (the three vertical dots). For example, add or remove users, close a conversation, create a new ticket, etc. See Conversation Tools and Actions for more information.
Below the message panel, is the new message area with the input field to enter and send new messages. See Write a Message for more information.
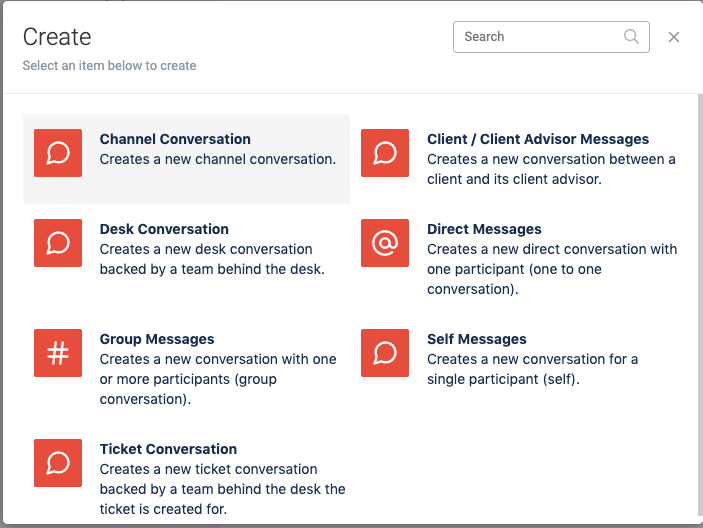
Start a Conversation
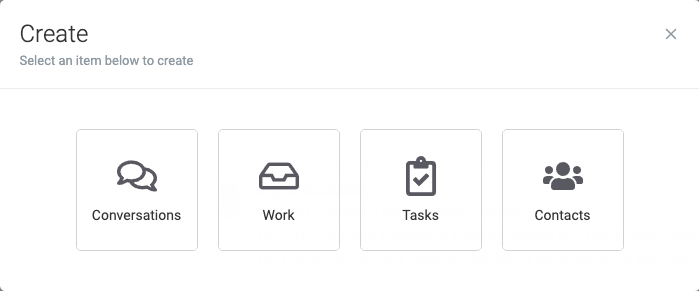
To start a new conversation, you can use the New button in the side panel and
then click on Conversations in the resulting dialog or use the
Create new button in the Conversations item.
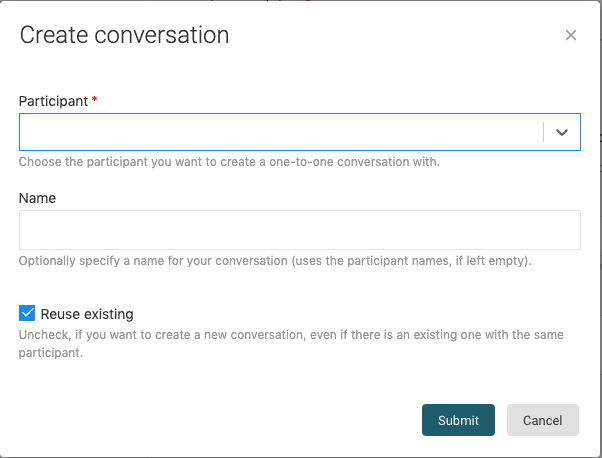
After using either method, choose the type of conversation you want to create. You can then add the participants you want to invite to the conversation and optionally give your conversation a name and description.
In case a conversation with the selected participants already exists, you have the option to reuse the existing conversation rather than opening a new one. Select the checkbox Reuse existing, and Flowable Engage checks if this conversation already exists and opens it, or it creates a new one if needed.
 warning
If you create a direct conversation, you cannot add users to this conversation after it is created. Additional users can only be added if the conversation is created as a group or channel conversation. However, from a direct conversation, you can create a new topic and add other participants there.
You can find more information on all conversation types in Conversations.
Write a Message
To write a text message, you can click in the new message area at the bottom of the
message panel and start typing.
The message is sent by hitting Enter on your keyboard.
In the new message area, you also find the tools to upload an attachment, add audio, or record a video.

noteUse the Shift Enter key combination to create multiline messages.
Manage Availability
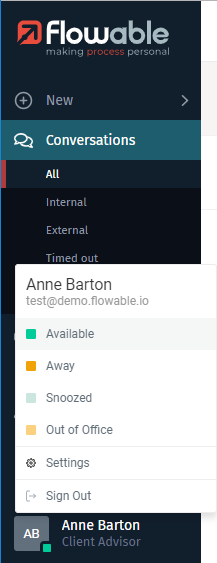
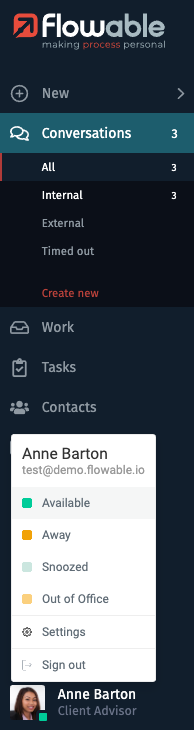
The presence state allows you to indicate your availability to chat with users. When you are logged into the application, there is a small icon with your avatar at the bottom-left of the side panel.
Your availability is displayed by the colored icon next to your avatar. Directly after you have logged in, it shows a green icon for the status Available. This availability status is known as your presence and indicates a status of Available, Offline, Away, Snoozed, or Out of Office.
Your presence indicator can be set manually by clicking on your avatar. You can choose your status from Available, Away, Snoozed, and Out of Office. The status Offline is only displayed when you are logged out from Flowable Engage. Your presence has an impact on the available communication options.
If you select Snoozed, you do not receive desktop notifications or a sound alert. However, you can still receive messages, and they are displayed as unread in your Inbox.
If you select Out of Office, Engage automatically sends a predefined out of office message to conversations with incoming messages.
The following table describes each status.
| Icon | Description |
|---|---|
| Online and available. |
| Logged in but has been away from the computer for a period of time. |
| At work and should not be interrupted. |
| Out of the office. |


How to Log Out
To log out from the Flowable Engage web application, you click on your avatar at the
bottom left of the side panel.
A menu opens, and you can click on Sign out to exit.
You are then routed back to the login page.