Advanced Features
Special Conversation Types
In addition to the Basic Conversation Types, Flowable Engage extends the concept of conversations from pure chatting to context-based collaboration. Each conversation type has its unique characteristics and is designed to support a specific aspect of conversational work management. The following section introduces a range of specialized conversation types:
-
Self Messages Conversation
Read the following chapters to learn more about different conversations and how they could make daily work more efficient.
Channel Conversation
A channel is a conversation with multiple participants, just like a Group Message Conversation. However, channels serve a specific communication purpose and are moderated by one or multiple channel administrators. Channels can, for example, be created to communicate about a specific project, to publish corporate news and announcements or to bundle all talks around a specific business area or event.
Depending on the privacy setting set by the channel administrator, channels are public to all users or are restricted to a specific audience and can only be joined upon invitation. Moreover, not all participants may have the same privileges, e.g., posting messages might only be permitted to channel administrators.
Channels are recognized by their name and can be renamed. There is no system limitation on the number of channels you can create.
A channel is a conversation with multiple participants who can leave the channel at any time. Depending on the settings, it is possible that only the owner or administrator can add new users to the channel.
Start a Channel
Whether you can create a channel conversation is controlled by your role and permissions.
A new channel can be created in multiple ways. One way is to create the conversation is
by using the dialog that opens when
selecting Create new in the Conversations section of the side panel.
A second alternative to creating a new channel is by using the following steps:
-
Click on the
Newbutton in the side panel -
Click on Conversations
-
Select Channel Conversation
-
Set a Channel name
-
Select participants and add a description (optional)
-
Confirm with the
Submitbutton
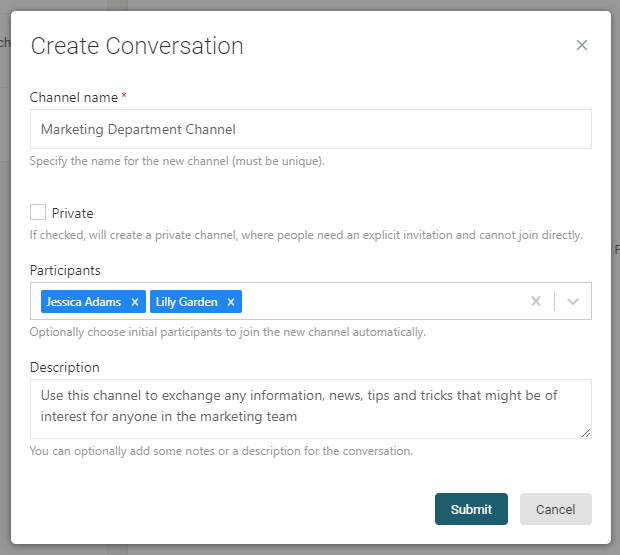
You do not have to select participants for creating a channel. You can add or invite users at any time.
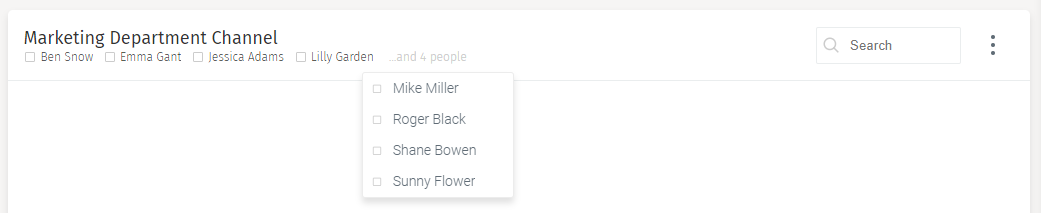
The newly created channel appears at the top of your Inbox. You can see all users in the channel by clicking on the …and x people notice.
Adding and removing participants from a Channel conversation works as described in Join a Participant to a Conversation and Drop a Participant from a Conversation.
Desk and Ticket Conversation
A desk conversation is a powerful way to solve the challenge of efficient work distribution. The best application example is the customer help desk. The desk members require all information needed to manage their work in one place to deliver personalized but effective support efficiently. Within the desk conversation, desk agents are continually being informed about updates on ongoing service requests, can distribute work and respond to escalations immediately. Hence a desk conversation does usually not stand by itself but orchestrates a set of ticket conversations. A ticket conversation represents one service request and is always linked to a responsible desk. While the desk conversation is continual, a ticket conversation usually starts with every new request and closes after resolution. A desk conversation has a fixed set of participants based on the user group representing the desk members.
The fixed set of users for the desk conversation is linked to a user group that is managed within the identity management.
Users with system administrator privileges initiate desk conversations.
To create a new desk conversation, click on the New button in the side panel.
Choose Desk conversation in the resulting dialog,
add the desk name, and select the desk group for the conversation.
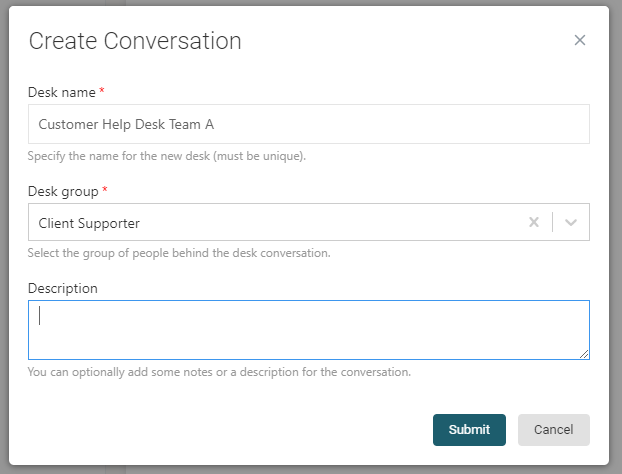
Click on Submit and a new Desk conversation appears at the top of the Inbox
of users belonging to the selected desk group.
When the desk conversation is created, team members are automatically added to the
conversation. Use the conversation search to find your desk conversations.
As mentioned, a desk conversation has a fixed team that is responsible for handling requests. Those users are assigned desk members, and they are active listeners and participants of the conversation, which means that they handle incoming requests and receive notifications accordingly.
The primary tool available to desk conversations are the tickets. Tickets help you handle and solve requests for the desk, e.g., a question from a customer or an IT problem of a user. A ticket conversation can be assigned to a user or a team of the desk. Participants of a ticket conversation are the ticket requester, e.g., a customer, and all participants of the parent desk conversation.
Create a Ticket
A ticket conversation is created within a desk conversation or by a service call, e.g.,
from a business process or external application.
A ticket is always related to a desk conversation, but it has a unique name
and icon and its own lifecycle.
To create a new ticket, open the conversation action menu (the three vertical
dots) on the top right and click on Create new ticket.
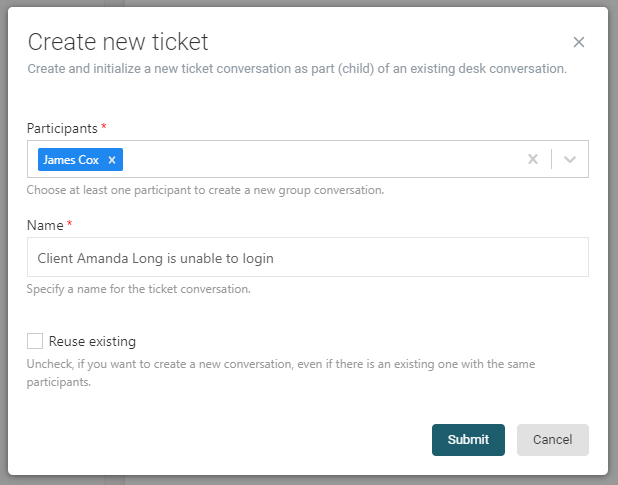
Choose the participants, set the ticket name, and then click on Submit.
The newly created ticket then appears at the top of your Inbox.
Use the conversation search to find tickets.
A new ticket can only be created from a desk conversation.
Assign a Ticket
If you open the newly created ticket, there is a message from the
Digital Assistant that the ticket is unassigned.
At the bottom of the message panel (above the new message area) there appears
a status bar with the buttons Assign to desk and Assign to me.
If the ticket is not assigned to a user, all participants of the desk conversation
receive a notification when a new message arrives.
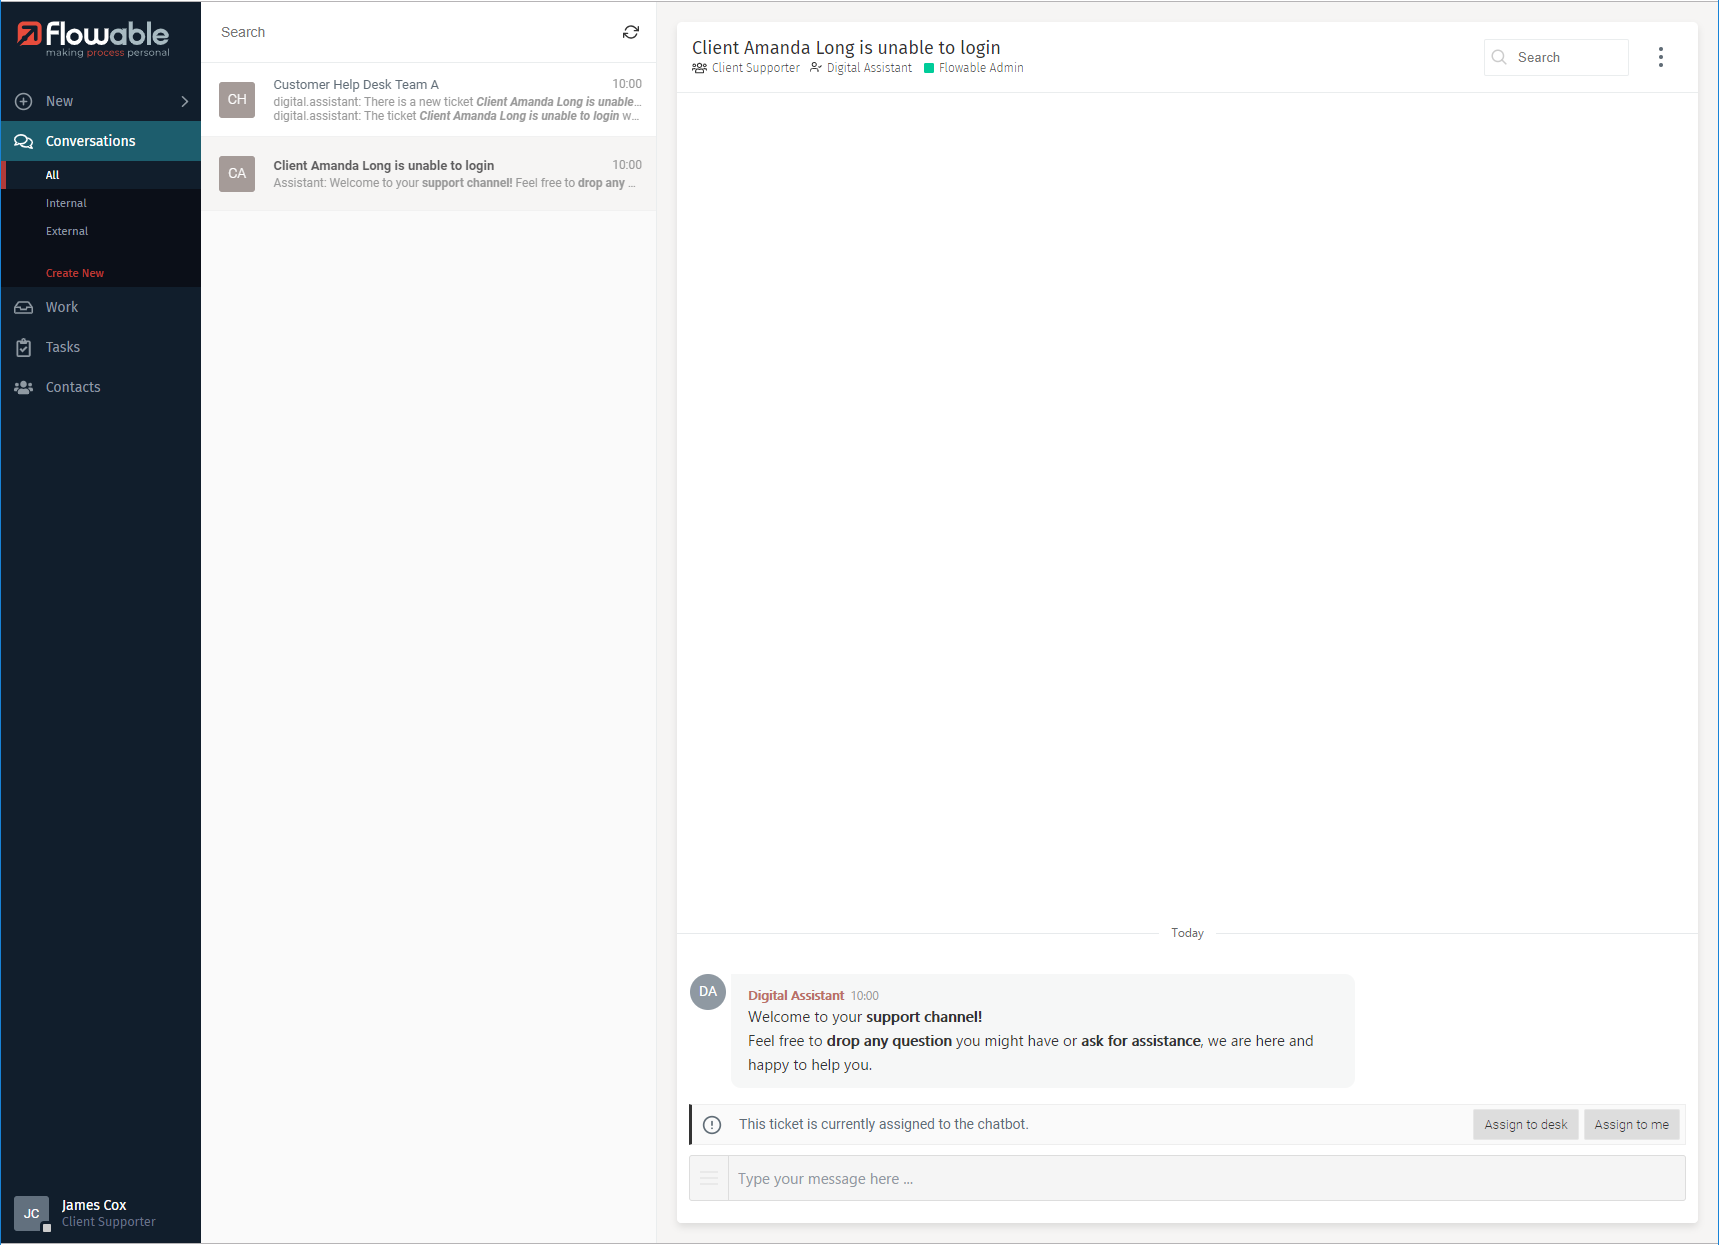
If you click the Assign to me button, the ticket is assigned to you and
all members of the desk conversation are informed that you are taking care
of the ticket now.
If you are unable to solve the ticket, you can assign it back to the team or back to the chatbot by clicking on the next status bar that appears after you have assigned the ticket to yourself. Another team member can now assign the ticket to himself and take care of it.

The process for how a ticket is created, assigned, and completed can be aligned to existing processes in your organization and can also be further automated.
Any ticket that has been marked completed does not appear in the Inbox.
Slash Commands
In Flowable Engage specific actions can be started with slash commands also
referred to as slash actions.
Type a slash (/) in the new message area and the list of
available commands is presented.
For example, you can use a slash command, /drop, to open the drop participants dialog as an alternative to the conversation context menu.
There can be more or less slash commands available depending on the user’s access rights or the application configuration. Customization allows the addition of new commands or removal of default ones.
Digital Assistant
The Flowable Engage "Digital Assistant" is a native built-in chatbot. The bot helps the user to navigate within the application and provides useful tips and tricks.
The "Digital Assistant"…
-
…gives you information after creation and sends a welcome message
-
…is the interface between the user and Flowable Engage
-
…supports basic conversation features like joining, leaving or creating
-
…performs actions based on slash commands
-
…informs you when an error or mistake happened while performing an action
-
…helps to start a new case and to complete tasks
Chatbots are used to augment the conversation in a way that is customizable and extensible.
Besides the default Digital Assistant, you can create additional bots using the Flowable Engage bot framework. Leverage bots to integrate more services or build new functionalities. With Flowable Engage, you can create bots for different business scenarios using familiar Business Process and Case Management technology. You can introduce structured questionnaires and add forms seamlessly into chat, allowing natural, guided data filling with a client.
In future releases, the plan is to extend the rule-based behavior of the built-in Flowable Engage bots by leveraging artificial intelligence features.
User Management
User management can either be handled directly in Flowable Engage or integrated with already existing systems within your company (e.g., LDAP). Engage offers the following management options directly in the user interface:
-
Create new users of different user roles
-
Edit user attributes (e.g., first and last name)
-
Deactivate users
-
Reactivate users
-
Create new accounts for users (e.g., a WhatsApp account)
-
Remove accounts
-
Reactivate accounts
Default Existing User Roles
Flowable Engage comes with the following default user roles:
Engage users, with access to Engage:
-
Front-Working Staff (e.g., Client Advisor)
-
Client Supporter
-
Internal Client
-
Administration user
-
Default, non-specific user
-
Temporary user
-
Bot user
External users, without access to Engage:
- External Client
External Clients, without access to Engage only have access through the respective third-party messenger service. See Third-Party Messenger Integration for more details.
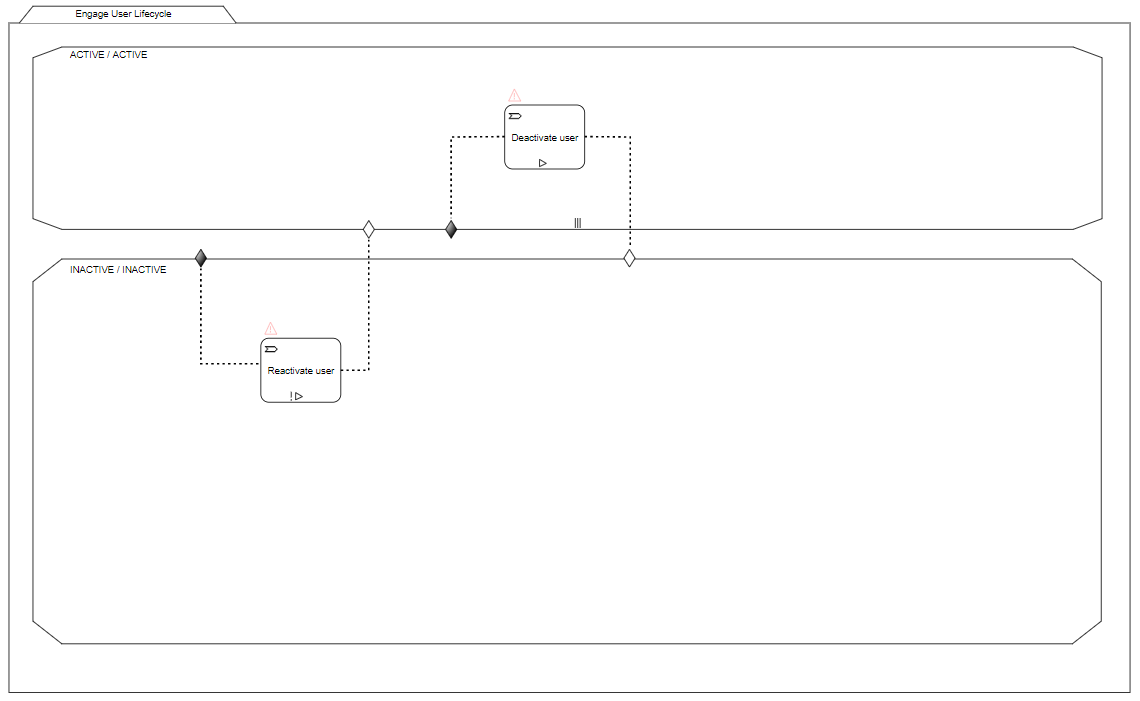
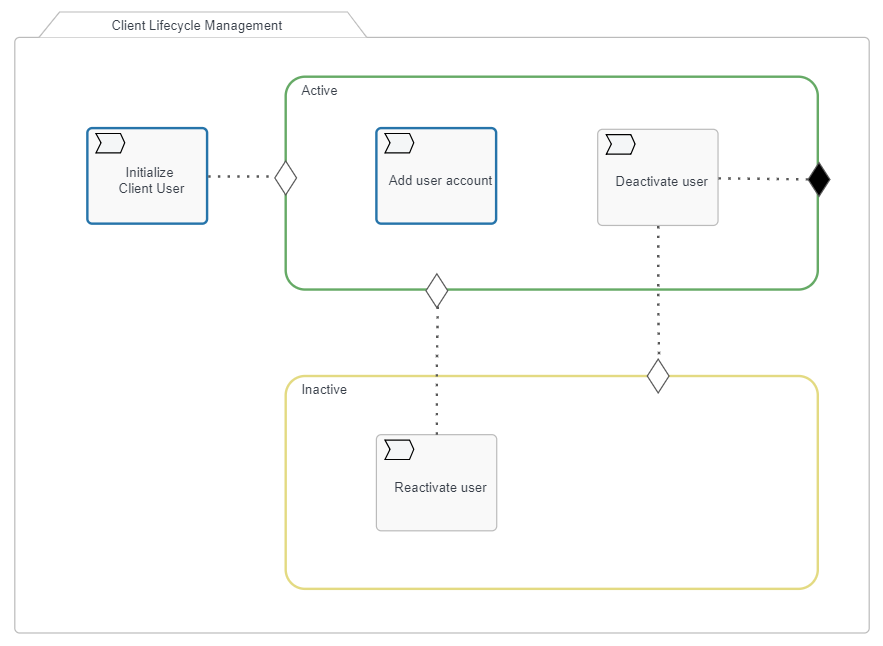
User and Account Lifecycles
The diagram below shows the user lifecycle of the Engage users described in the previous section. Users always have a main state and in some cases also a sub state. Main and sub state combinations are visible in the diagram. The names of the states are mentioned in the left corners. In addition to the states, the diagram also shows the actions and processes that trigger a state change.
User lifecycle for Engage users, with access to Engage
User lifecycle for external users, without access to Engage
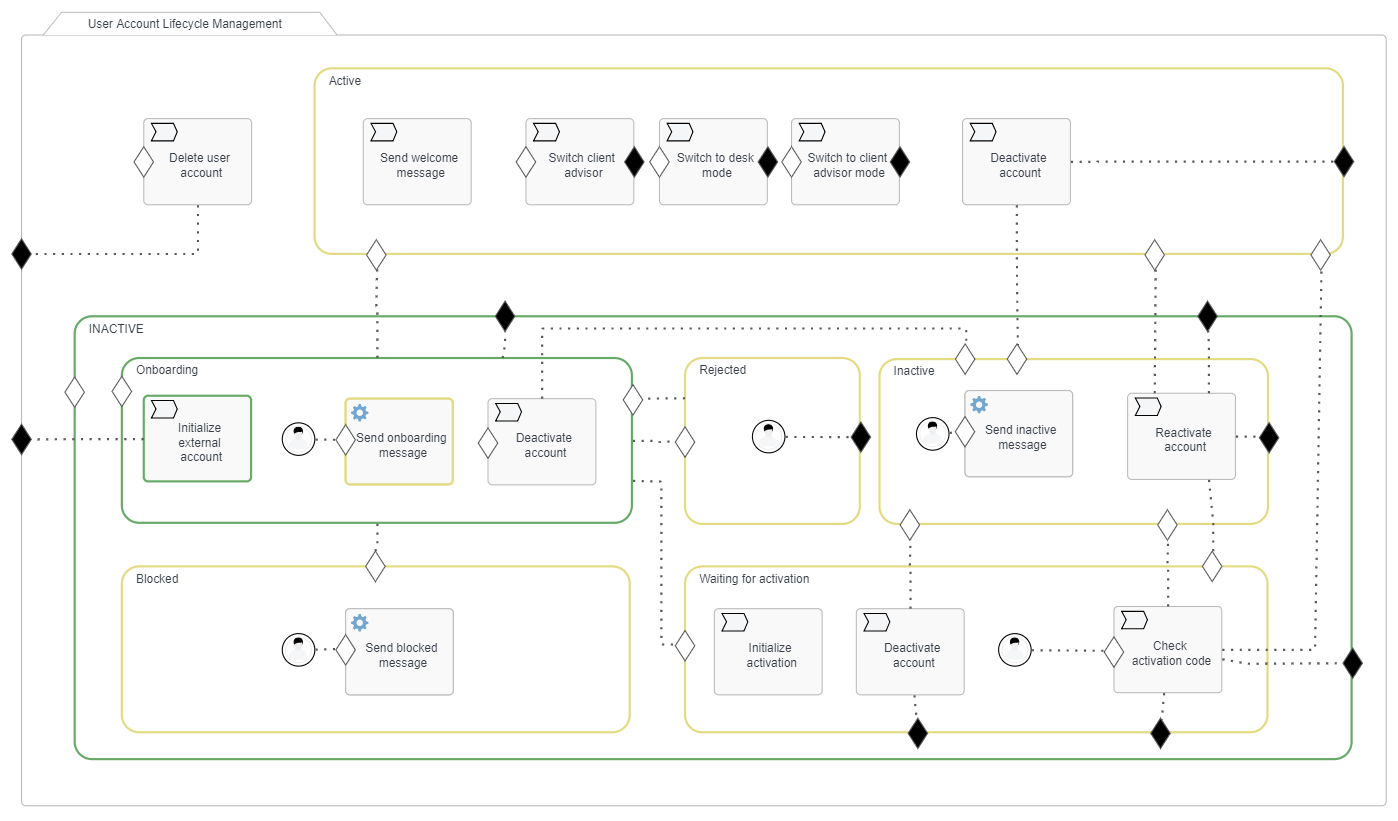
External users that communicate through a third-party messenger service also require an account. The diagram below shows the account lifecycle. Like the user lifecycle, they have a main state and in some cases also a sub state. The combinations are visible in the diagram, and actions, and processes triggering a state change are also visible.
Account lifecycle for external users, without access to Engage
App Integration
Flowable Engage offers the possibility to enrich the web interface with additional work management apps. Different apps out of the *Flowable Portfolio" might be added to help to organize and to manage your daily work.
Further information on the Apps of Flowable Work such as Work, Tasks, and Reports can be found in the Flowable Work User Guide.
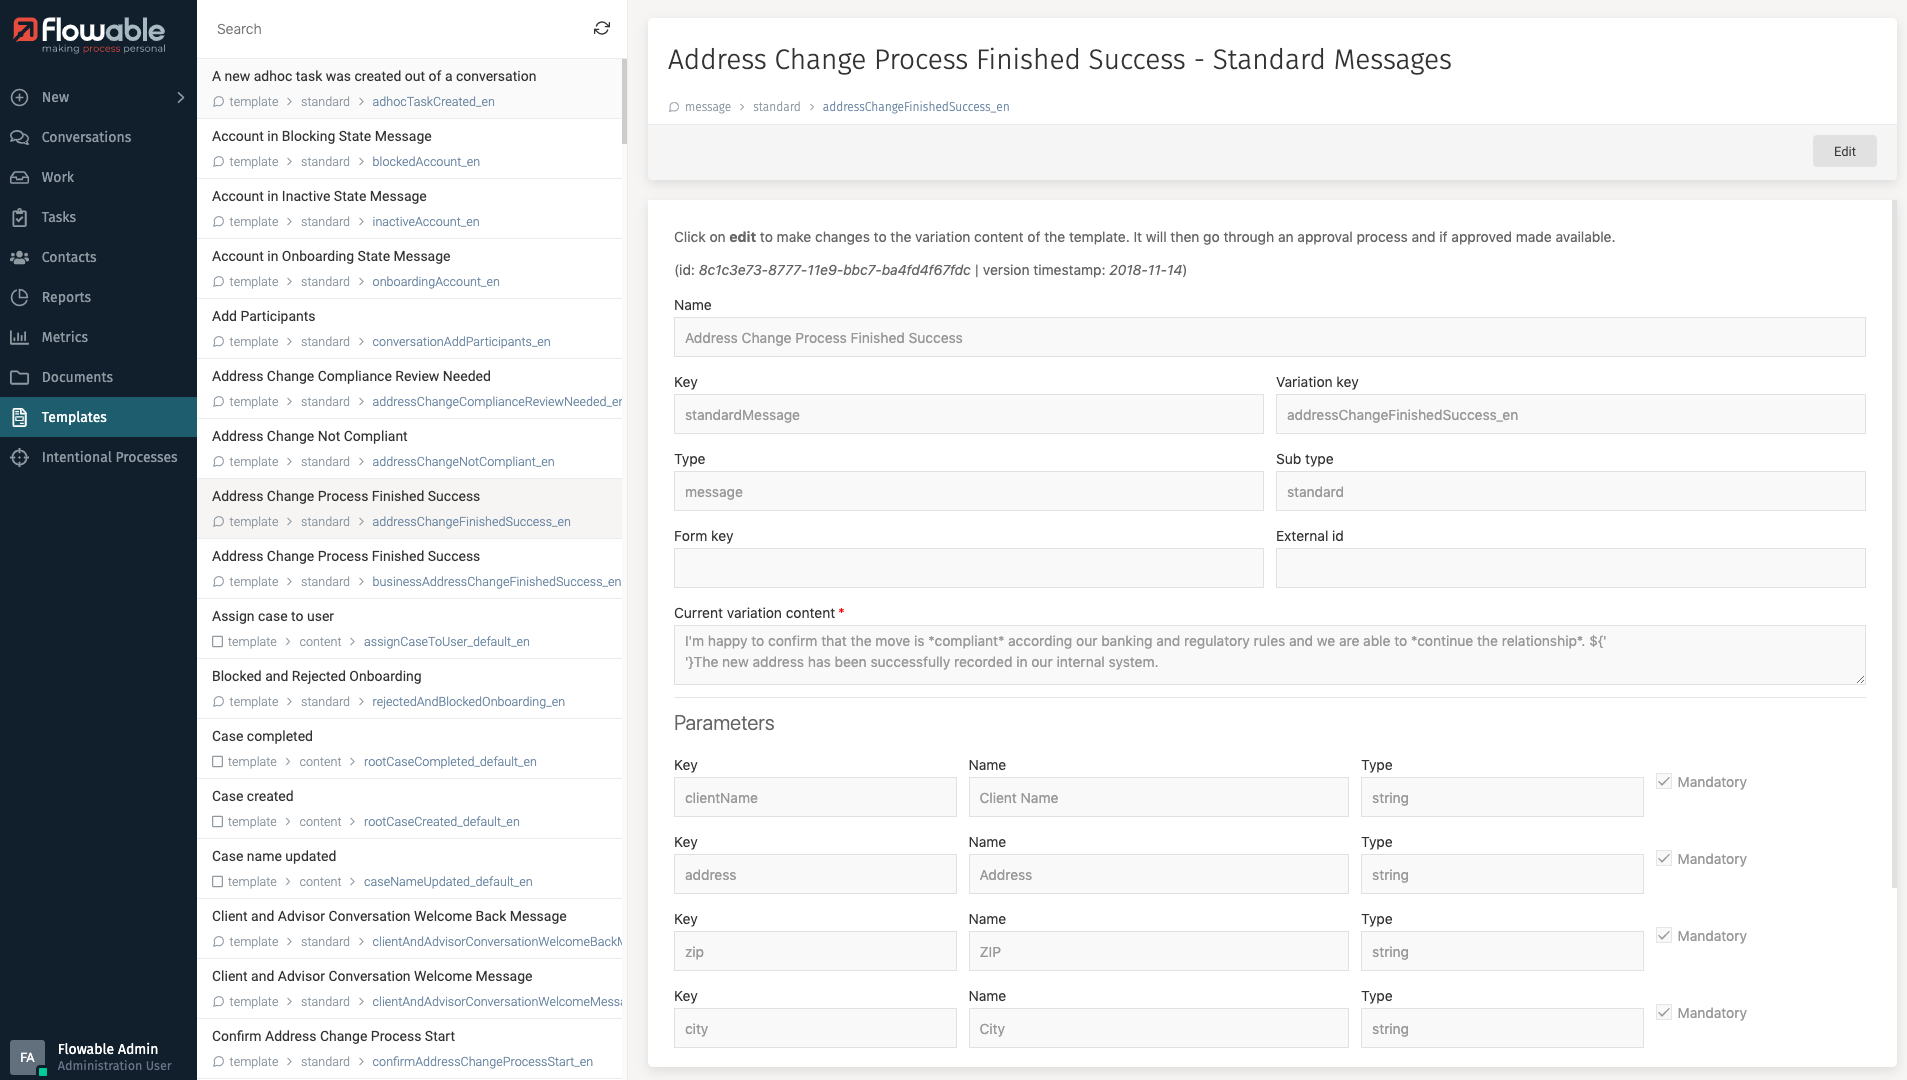
Templates App
With the templates app you can manage all the content of message templates that are sent within conversations. The Digital Assistant typically sends those messages.
The template list displays all templates available for editing. Each template is displayed with a template name, its sub type and a variation key. The variation key is used for unique identification. The variation key generally also indicates the language used in the template. Use the search field above the template list to quickly find a specific template. The following default search criteria are available for template search:
-
Template name
-
Template key
-
Template variation key
The default process to update a template follows a four-eyes review principle. A user with the respective permissions can initiate a template update, but the update requires a second user that approves the template changes before they are applied. The reviewer may also decline the update.

When updating a template, ensure that you do not accidentally remove or change an important parameter or formatting of the template.