Create a Case with a human task that has a SLA
Introduction
SLA models can be used to define service level agreements on a task in a case or process model.
In this documentation the SLA models are going to be explained by the use case of creating a case instance that immediately creates a human task with a SLA.
Part 1: Creating the case model
First, we need to create an App in Flowable Design which will contain the case and SLA model that we require for this tutorial.
Let's create a new Case model with just two human tasks, and let's create a new SLA model from the first human task like it's shown in the screenshot.
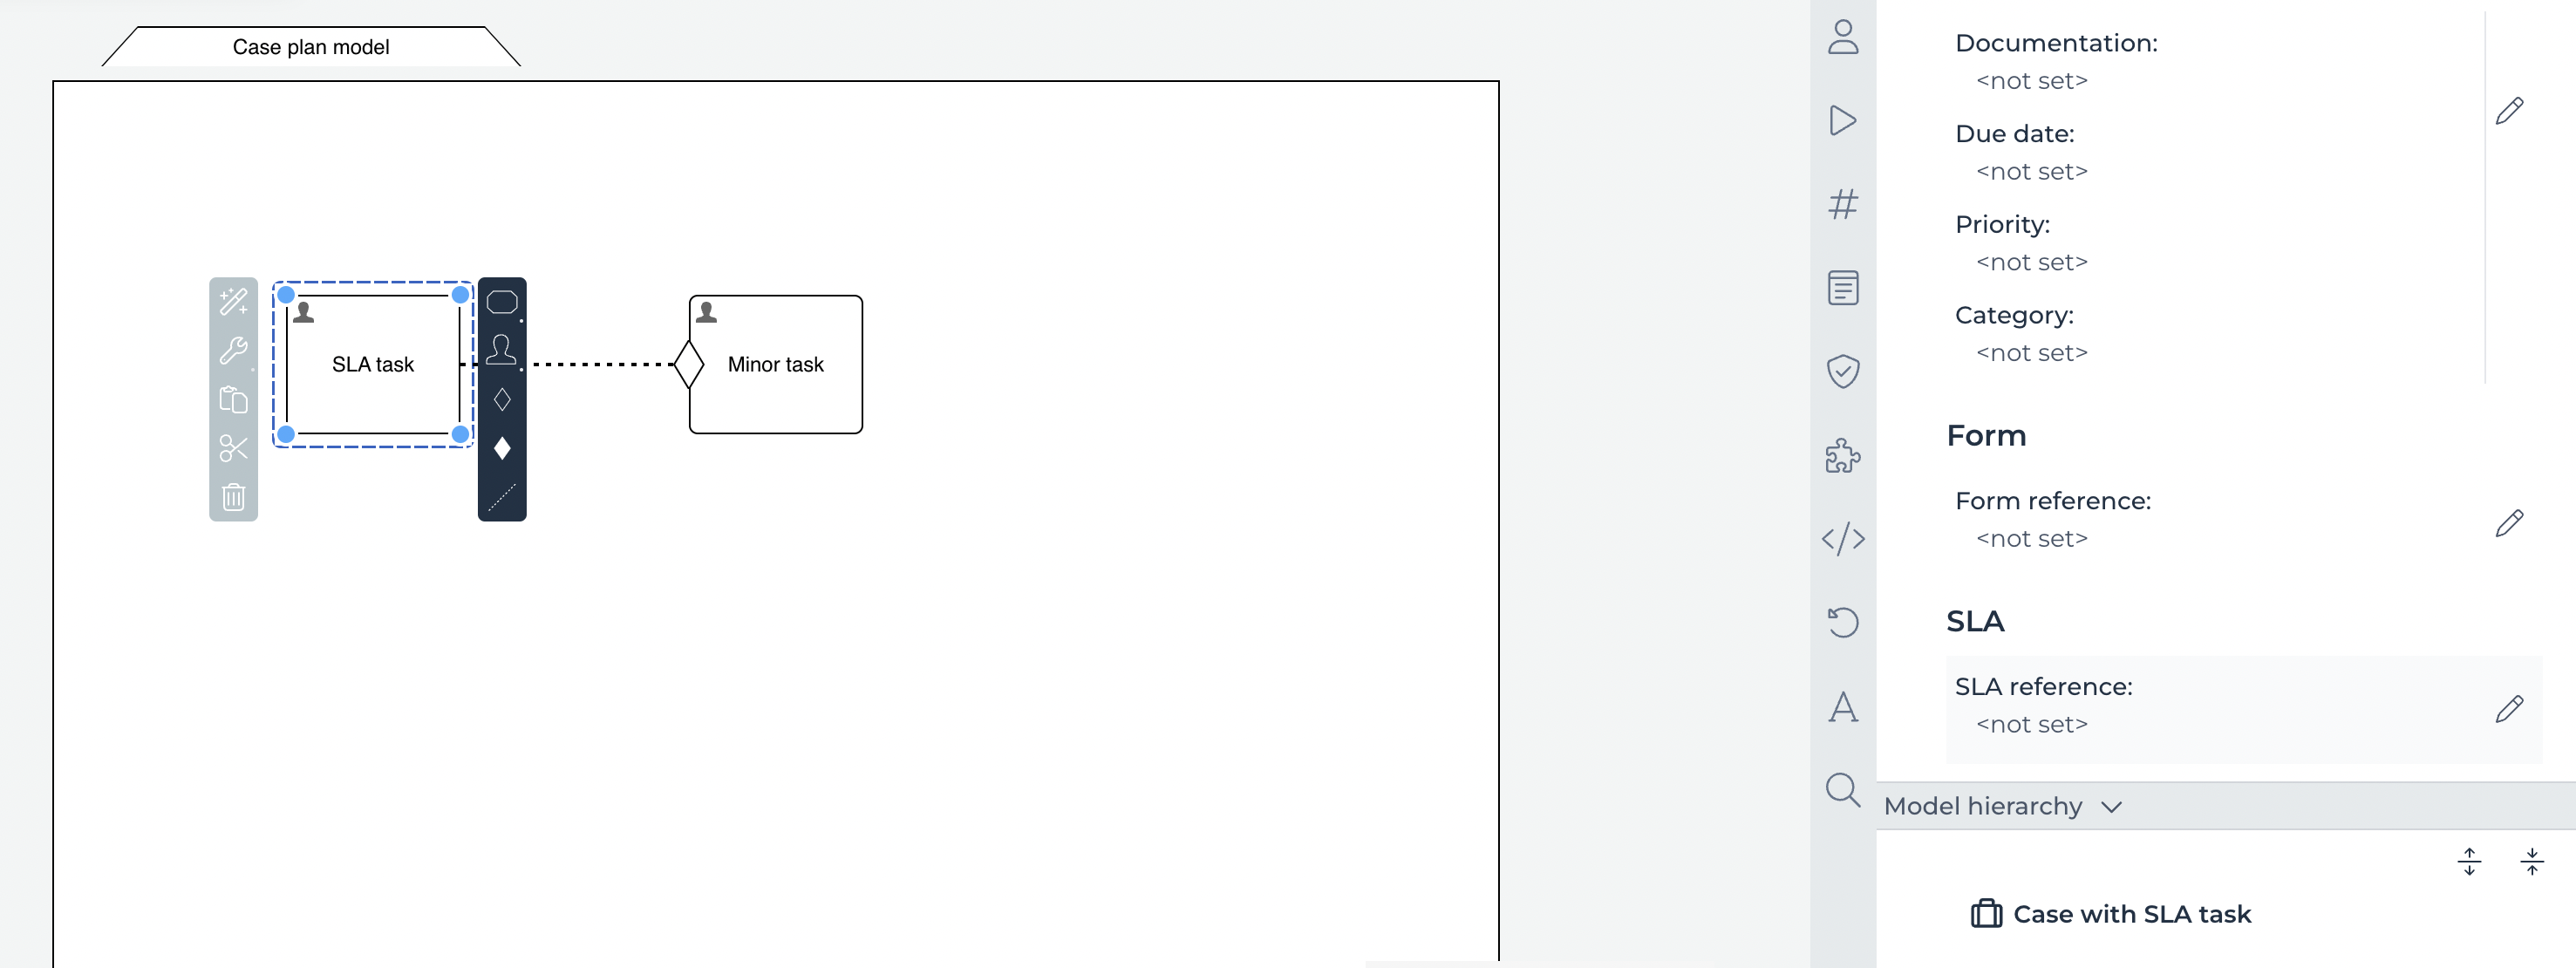
From the SLA reference property we can now create a new SLA model, let's give it a name like My first SLA model.
Part 2: Configuring the SLA model
After the SLA model was created in part 1 from the Case model human task property, the initial model view looks similar to this:

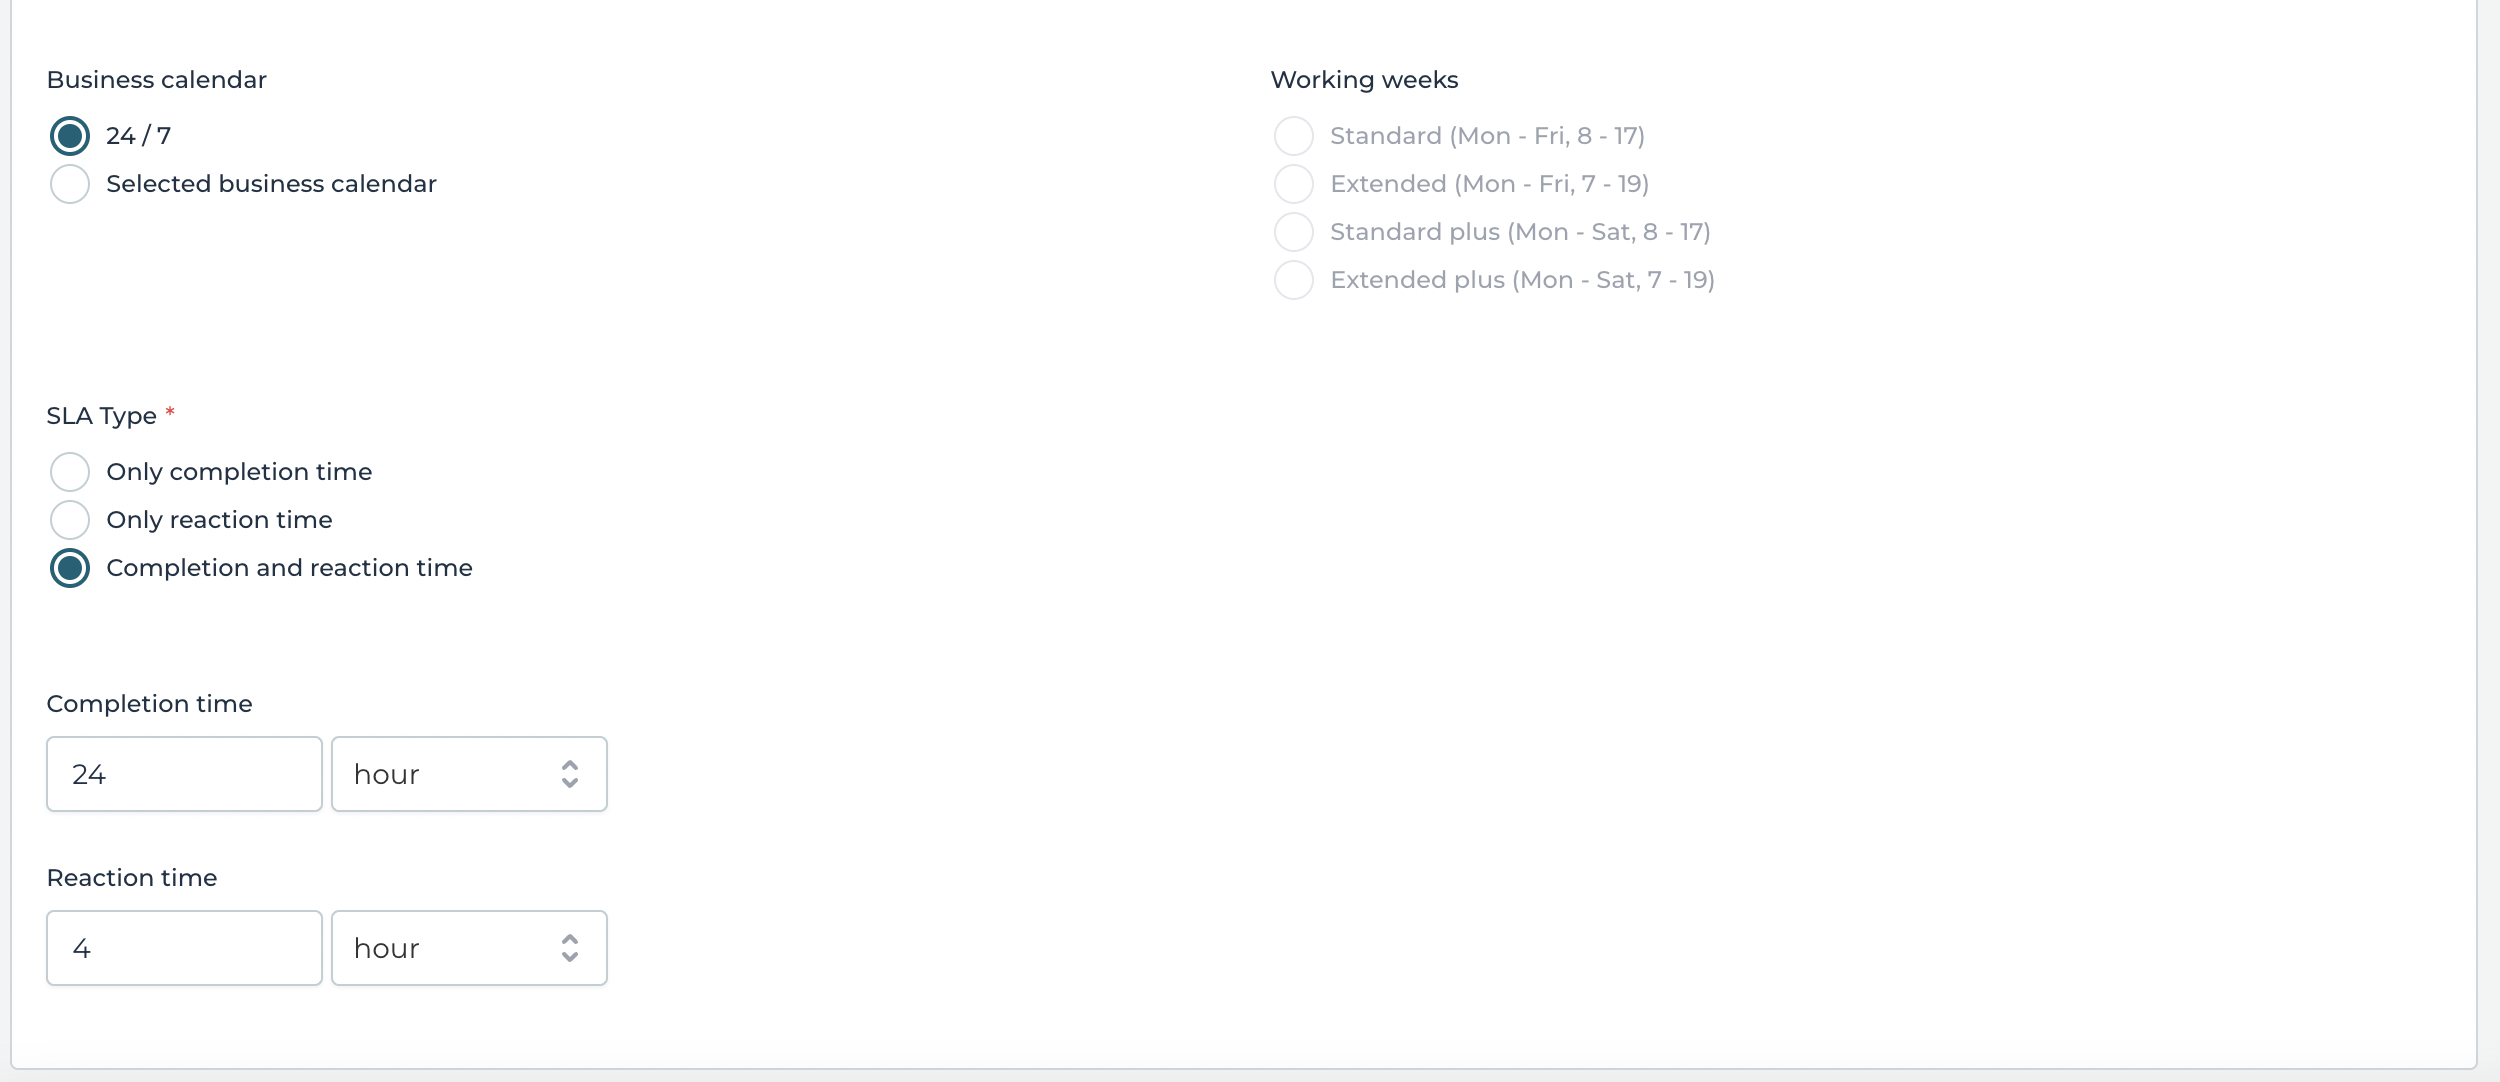
We can now select a business calendar, which can be a working hour calendar, but let's stick with the default 24/7 business calendar for this example.
Next we can select the SLA type, and we want both the reaction and completion time to be set. So next we can fill-in a completion and reaction time due date. After the task is created we expect the task to be completed within the next 24 hours and the task reaction should be done within 4 hours. The SLA definition should now look similar to this:
Now let's navigate to the Initialization tab and start to create a number of initialization steps to be executed when the task is created. Let's start with changing the priority in the first step and set a priority value of 80. In a second step let's set the assignee of the task to the user anne.barton like is shown here:
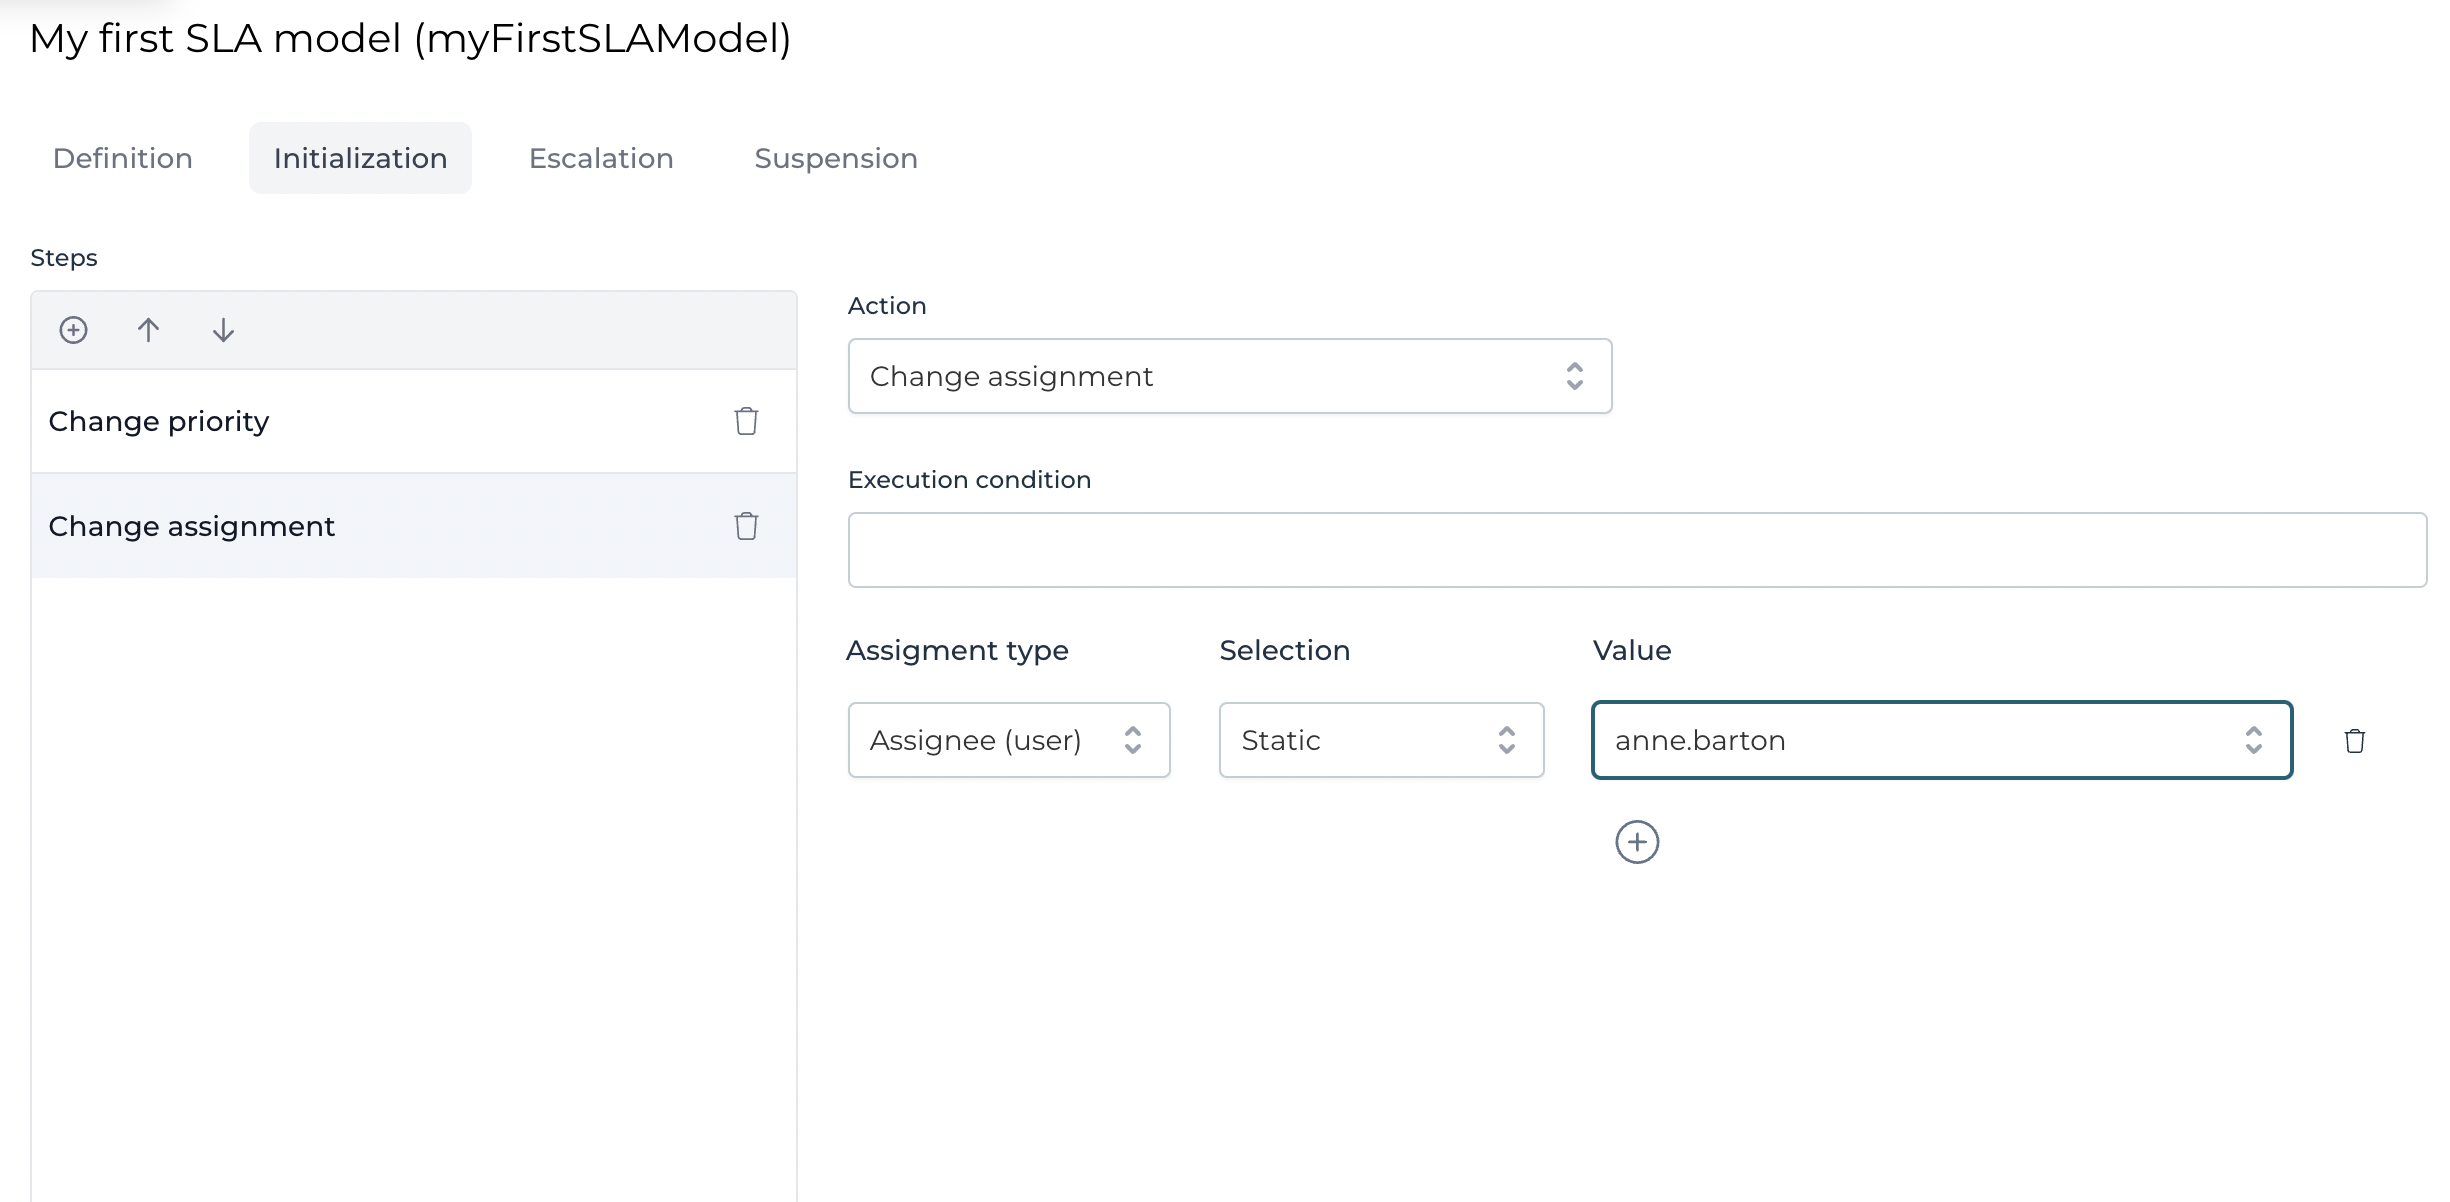
An initialization step can also have an execution condition that needs to be an expression using $, and then the execution of the step will be conditional based on the boolean value of the expression. With two initialization steps defined, let's now start adding a number of escalation steps. When defining an escalation step, the first thing to configure is the amount of time the escalation should be triggered when compared to the completion or reaction due date. Let's configure an escalation step that will run 2 hours before the reaction time due date and set the priority to 90.
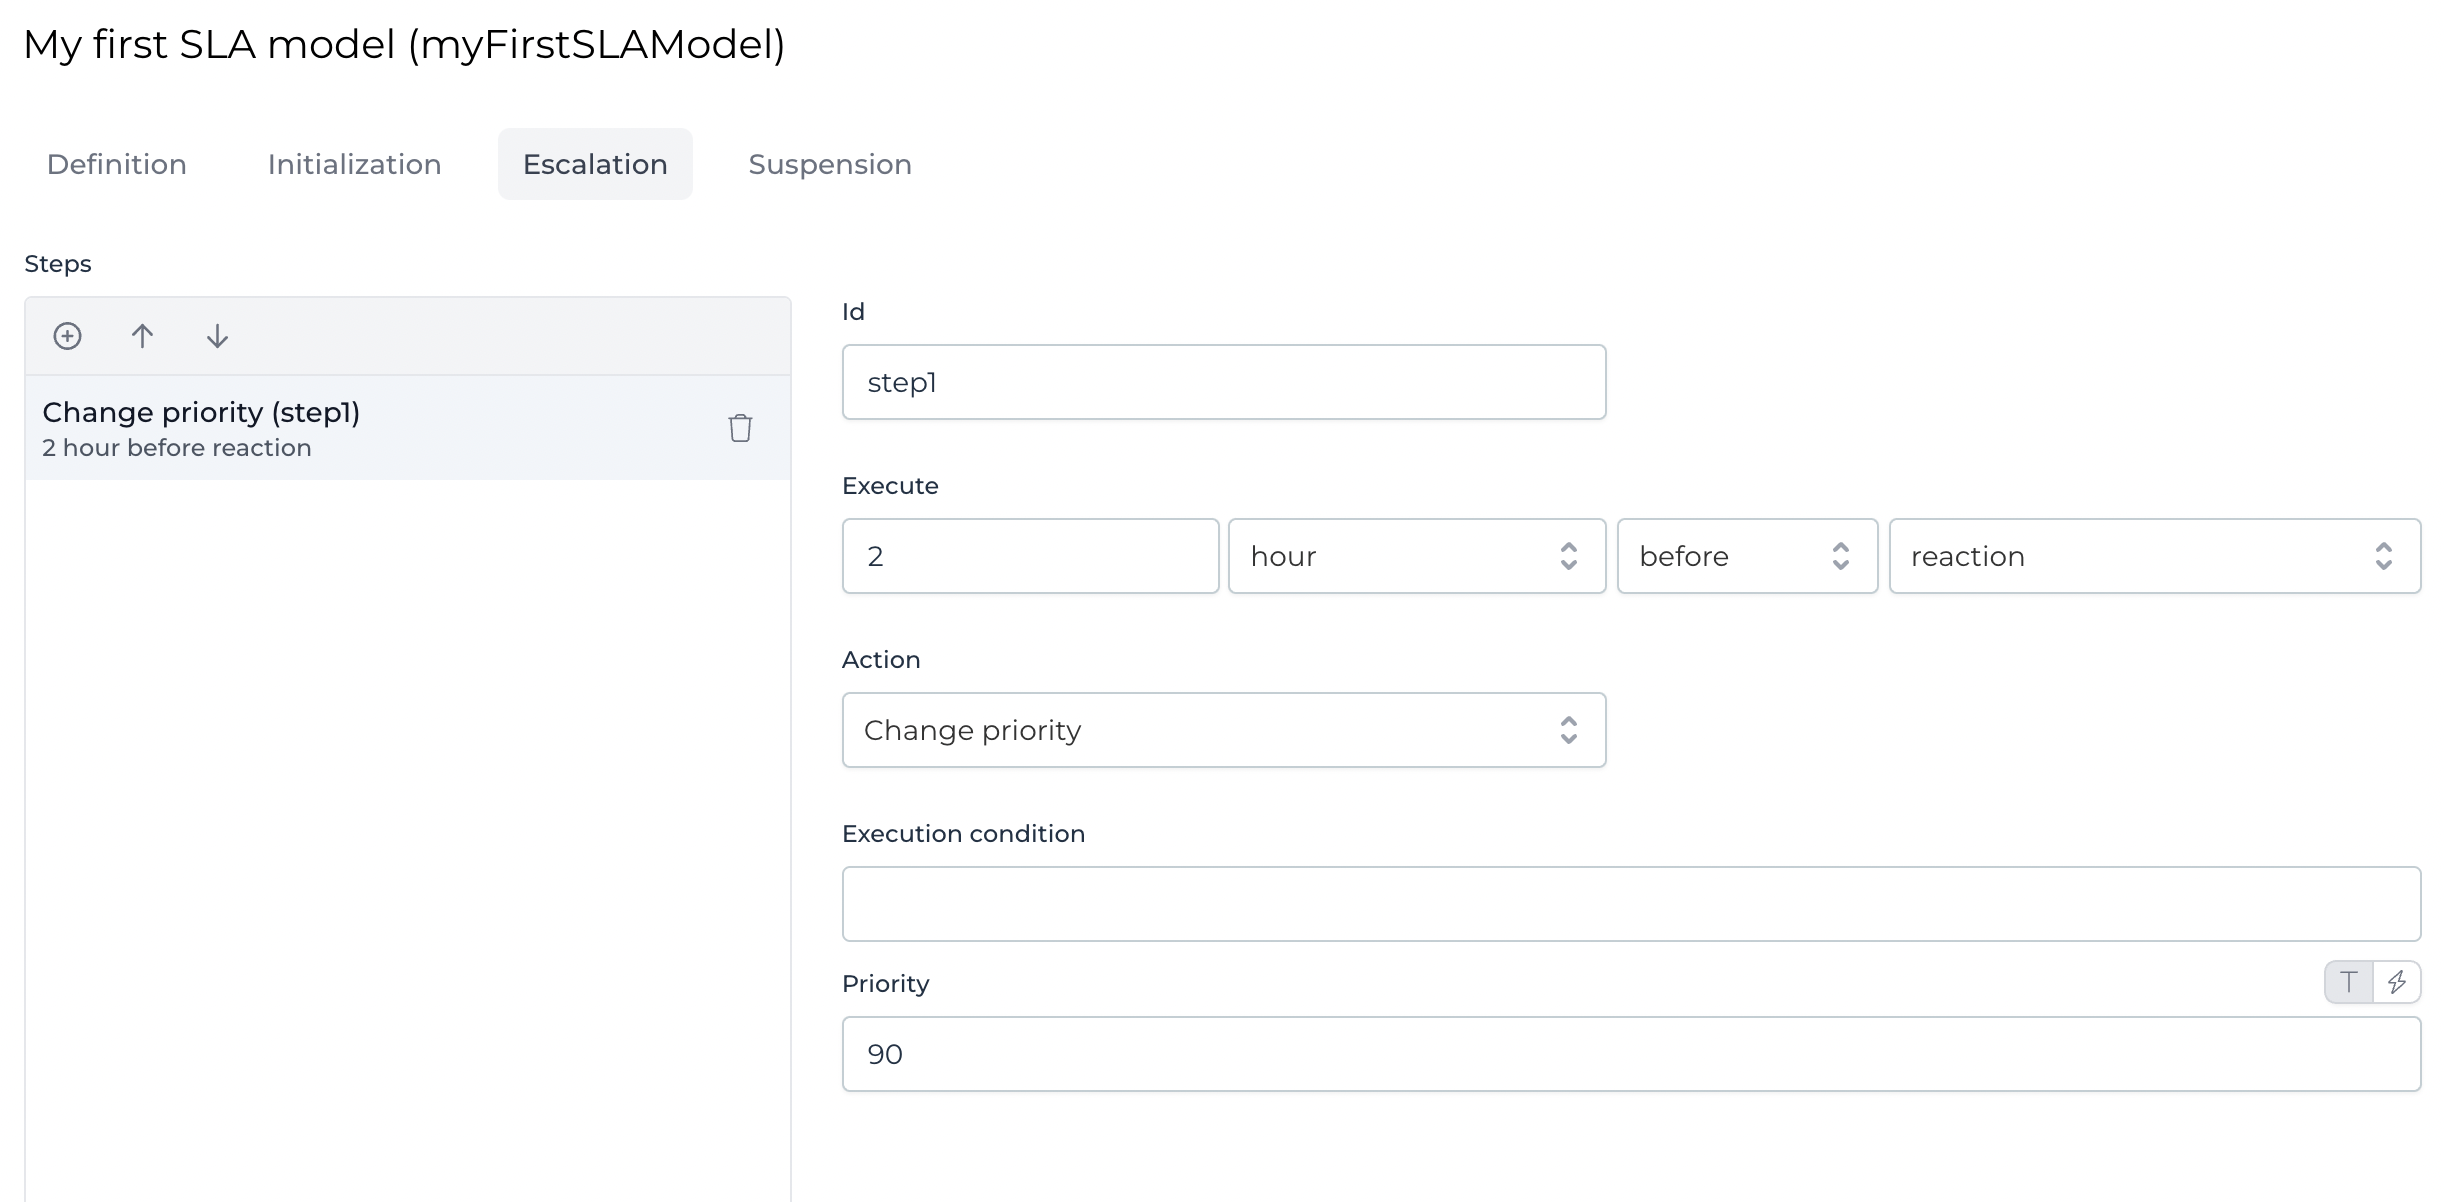
Note that if the reaction time is already done within an hour of the task being created, then all escalation steps that have a time set after this will not be executed anymore, and cleaned up. An escalation step is executed using a timer job, so you can use for example Flowable Control or Inspect to check for escalation jobs. Let's add a second escalation step that will be executed 12 hours before the completion due date is reached and will set the assignee of the task to ben.snow.
With the SLA model defined, let's now continue with running this Case and SLA model in Flowable Work by deploying the app.
Part 3: Running the SLA model in Flowable Work
Let's start a new Case instance of the Case model we just deployed and check the SLA task that was created and the initialization steps that should have been executed.
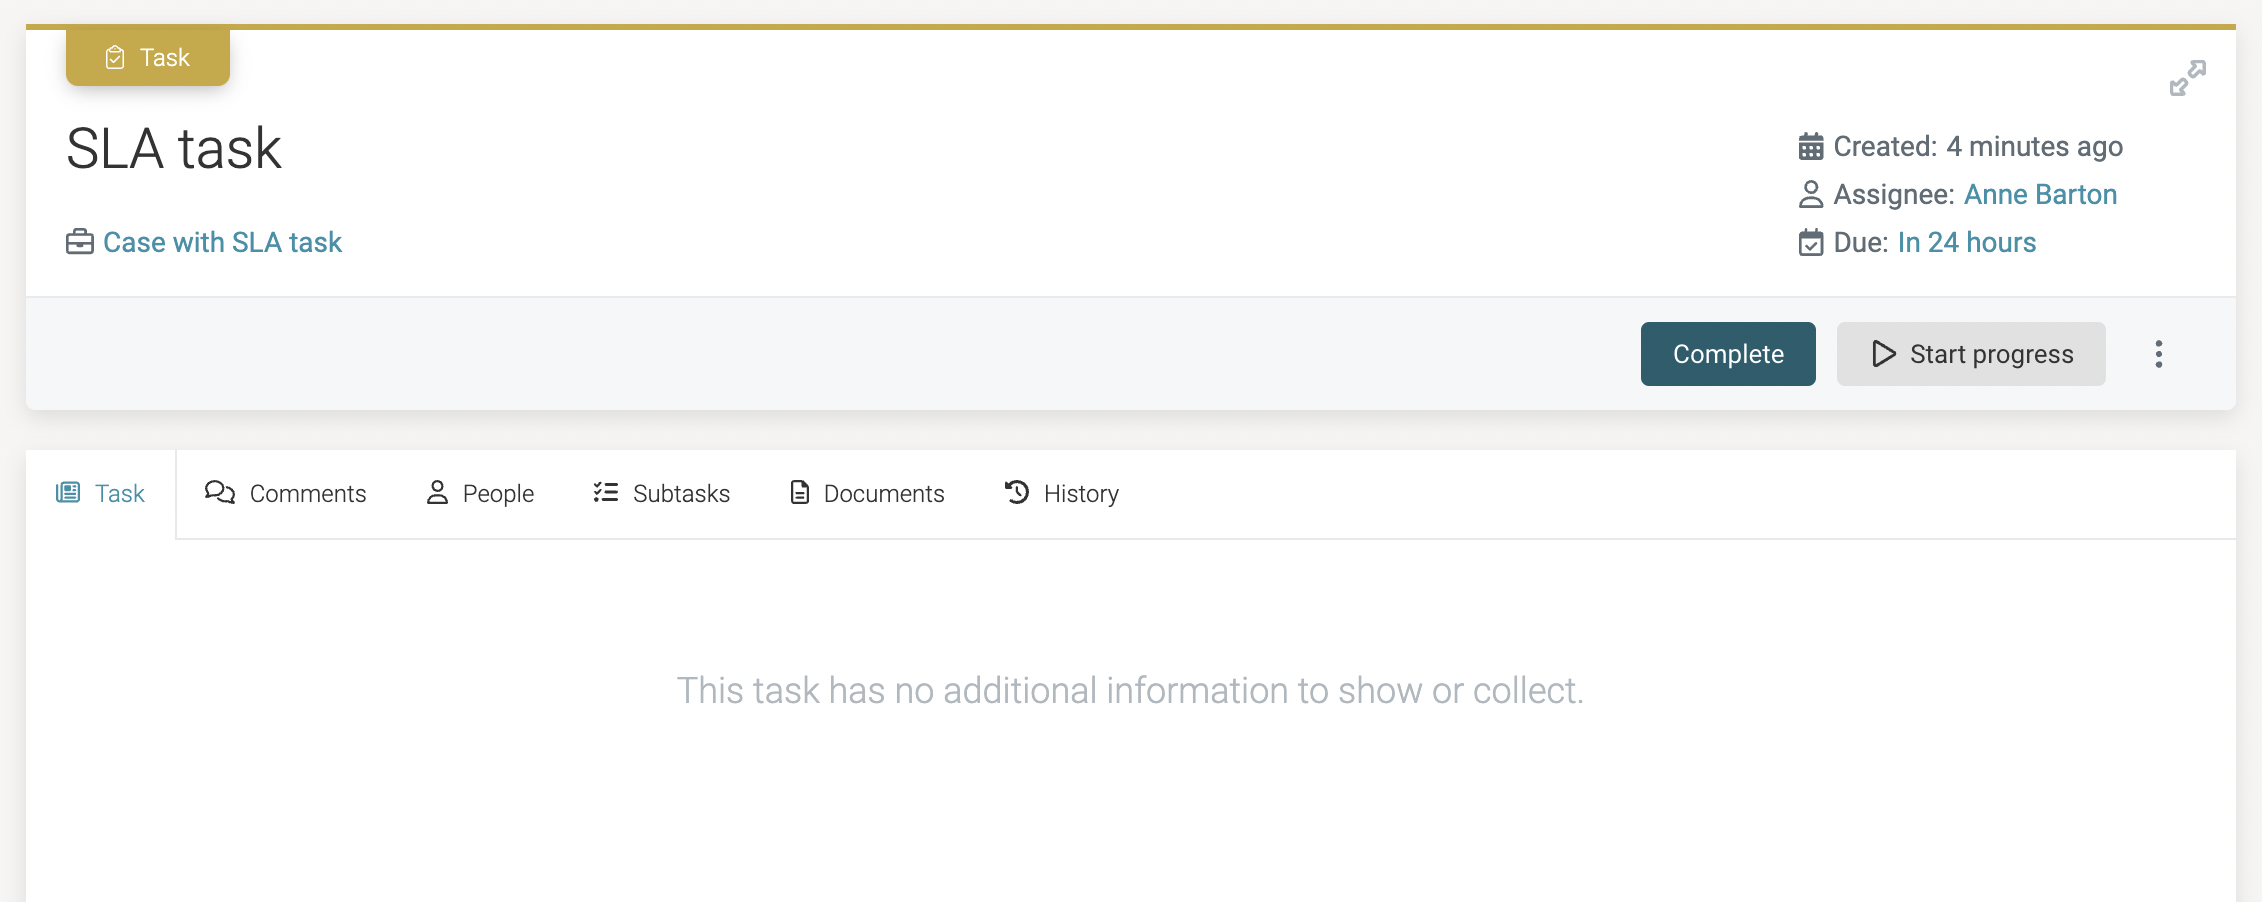
As can be seen, the assignee is set the Anne Barton as was configured, and in Control you can also check that the priority of the task is set to 80. Also we can see that there is a Start progress action button available on the task that will set the reaction time for the task. As a next step we can check if the timer jobs have been created for the 2 escalation steps. We can do this by opening Inspect and navigating to the Case instance level. Then in the dropdown in the details section let's choose for the option Timers.
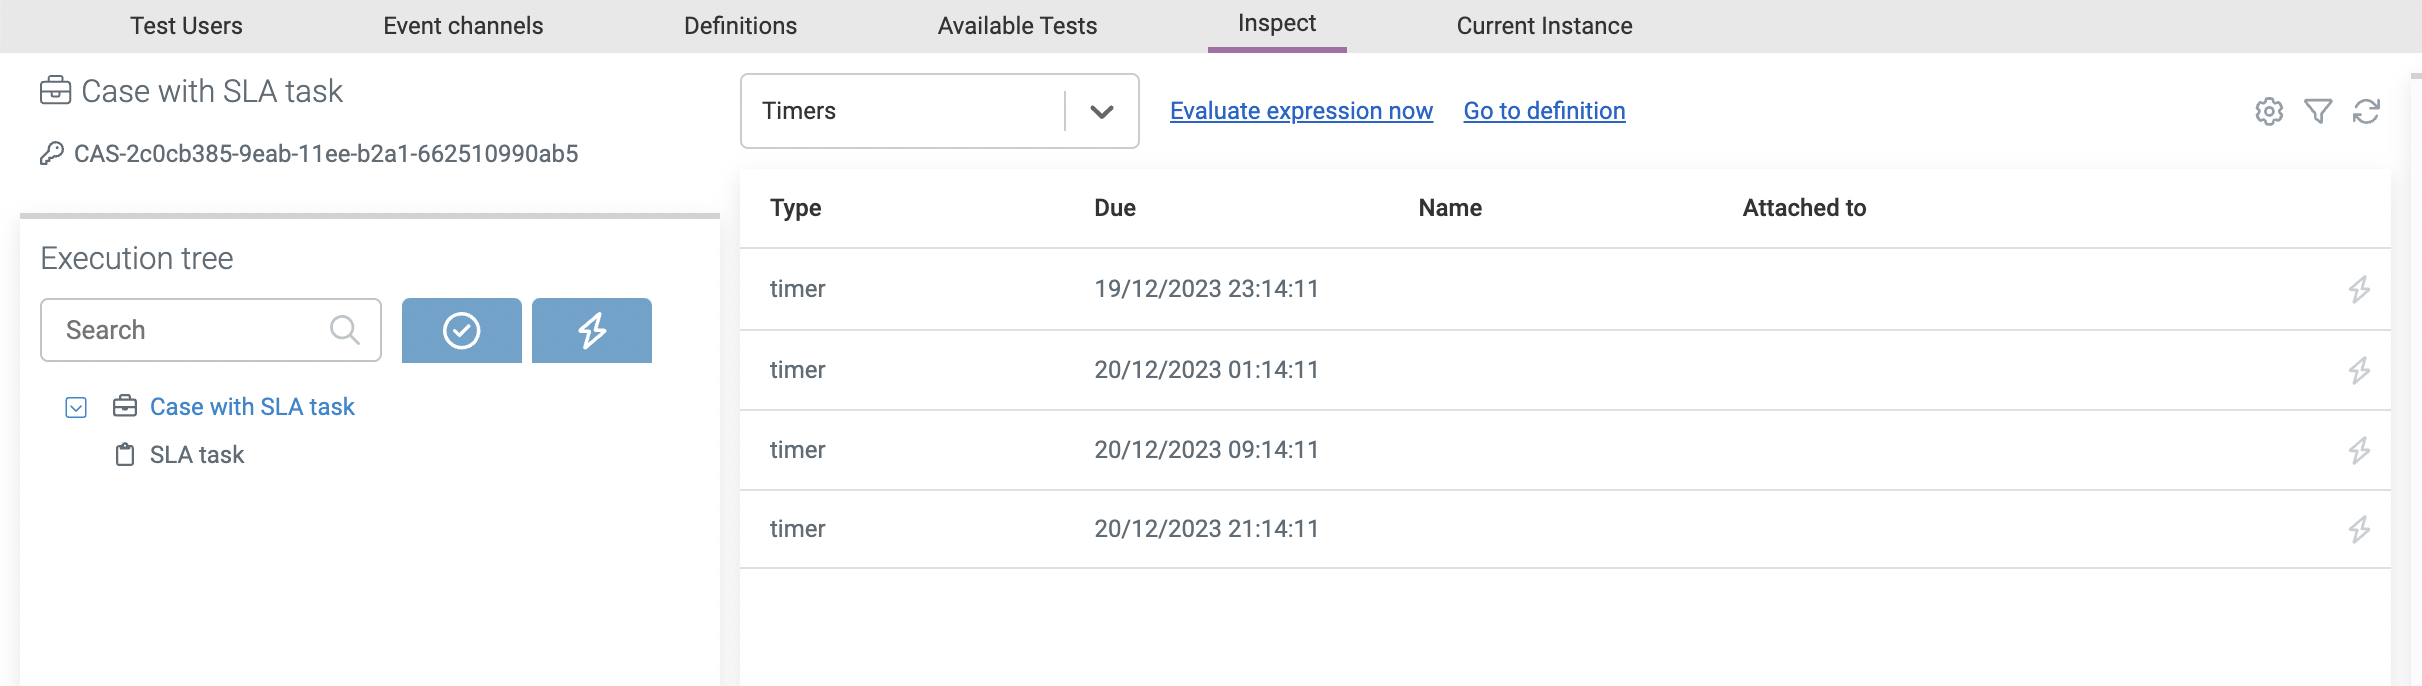
Instead of the 2 timers that we expected to see, there are actually 4 timer jobs. This is because for each due date, reaction and completion, also a timer job is set to make sure that when the due date has passed the SLA audit instance for this task is set to breached if the SLA audit instance storage option is set to true (flowable.platform.enable-sla-audit-instance=true). When we go back to the SLA task and click the Start progress button we can see that only 2 timers are remaining in the overview in Inspect. When triggering the escalation timer job, which is with the due date set 12 hours before the completion due date, you can see that the assignment of the task has changed to Ben Snow, as we configured in the escalation step.
This completes the introduction of the SLA model and how it can be used in a Case or Process model. As you can see in the SLA model editor, there are other step types that can be configured as well, like starting an escalation process or case, or sending an email.