Create a new process palette
Introduction
Palette models can be used to define a set of elements to model with for the Case, Process and Form editor.
In this documentation the Palette models are going to be explained by the use case of creating a new Process palette based on the default Work Process Palette.
Part 1: Creating the Palette model
First let's navigate to the Palette editor by clicking on the user profile icon on the right top as shown in the following view.
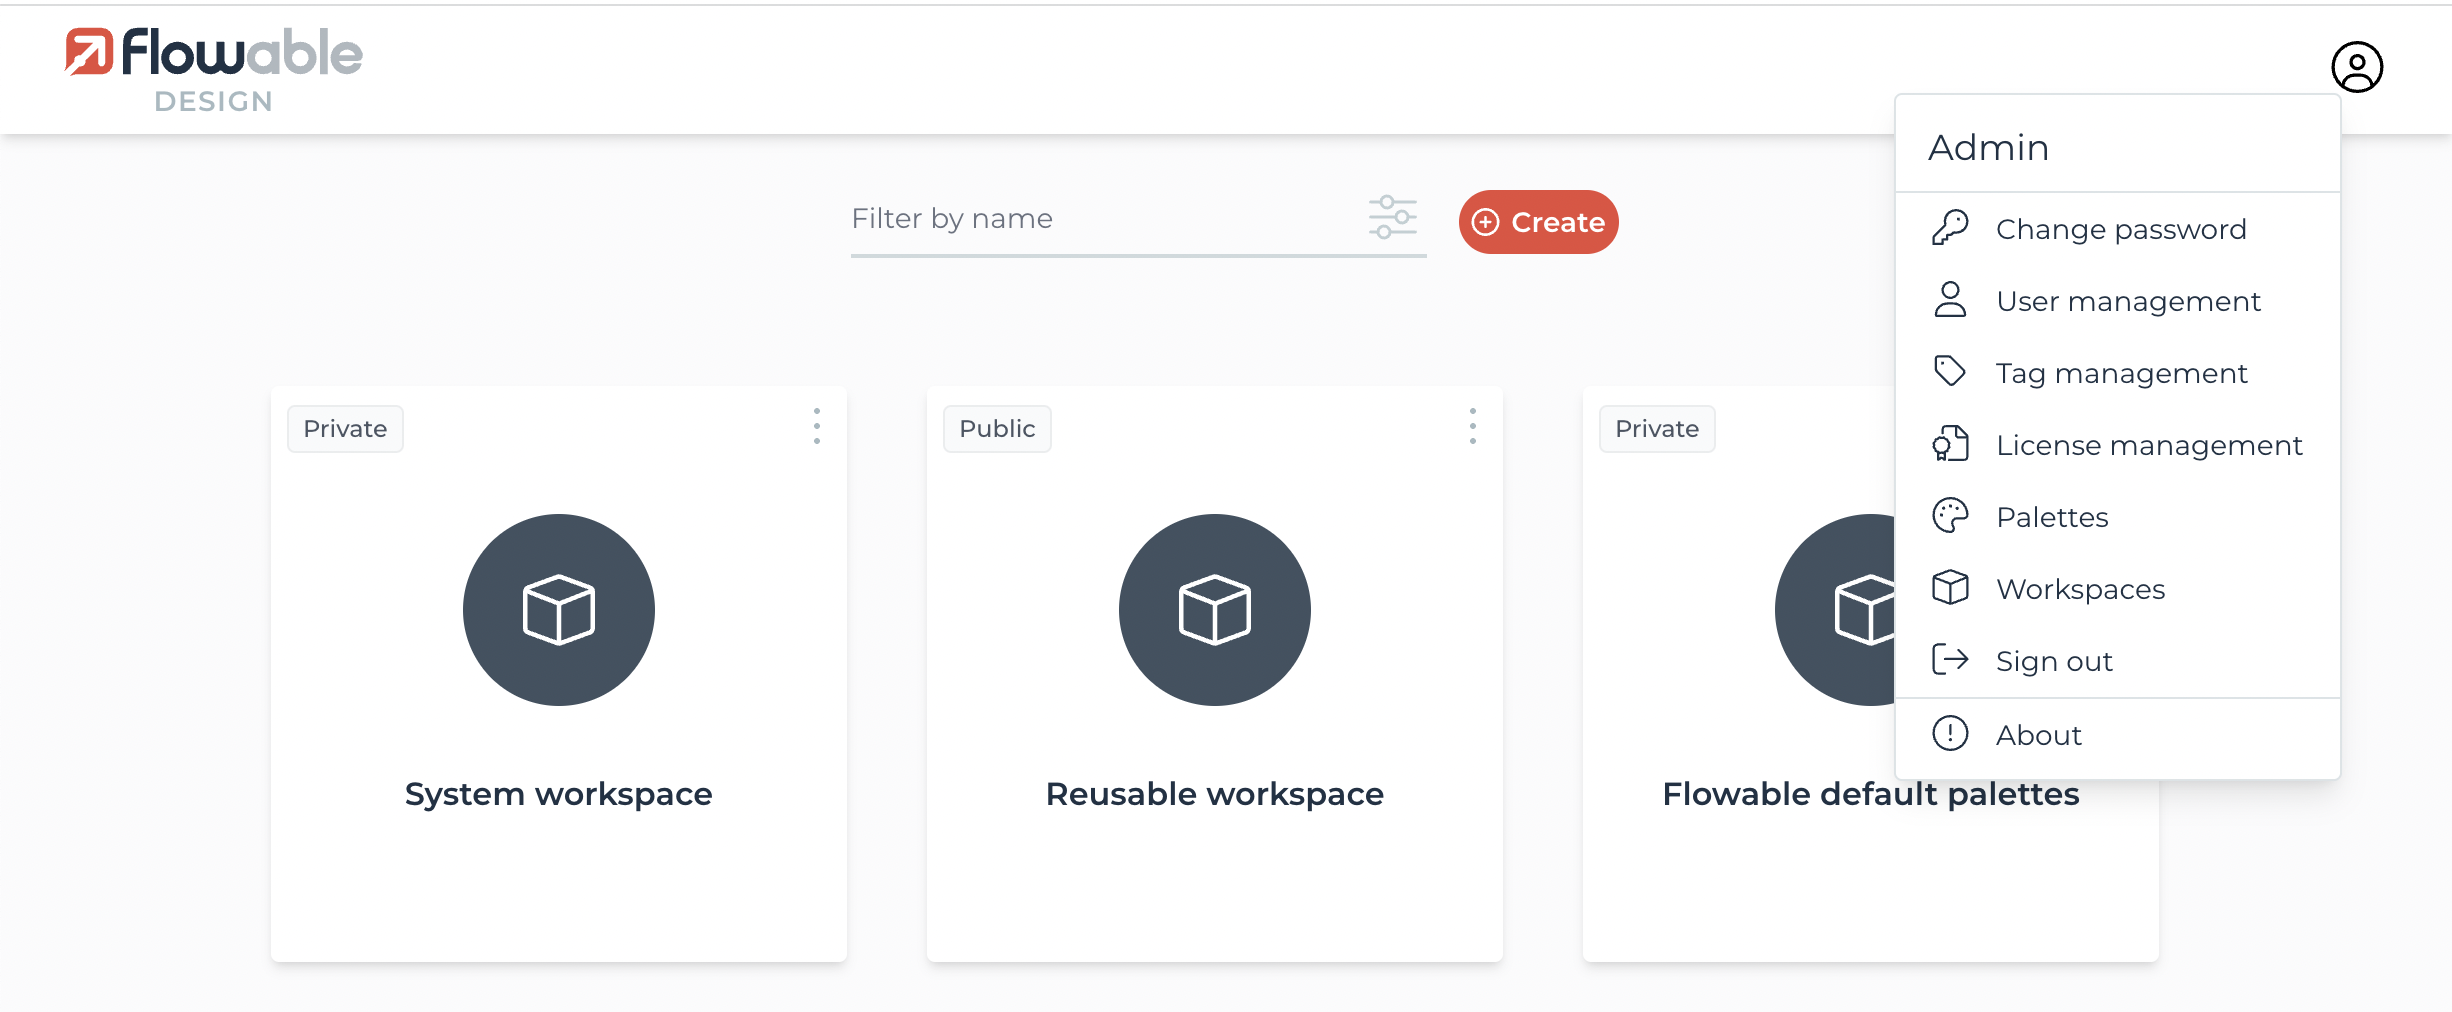
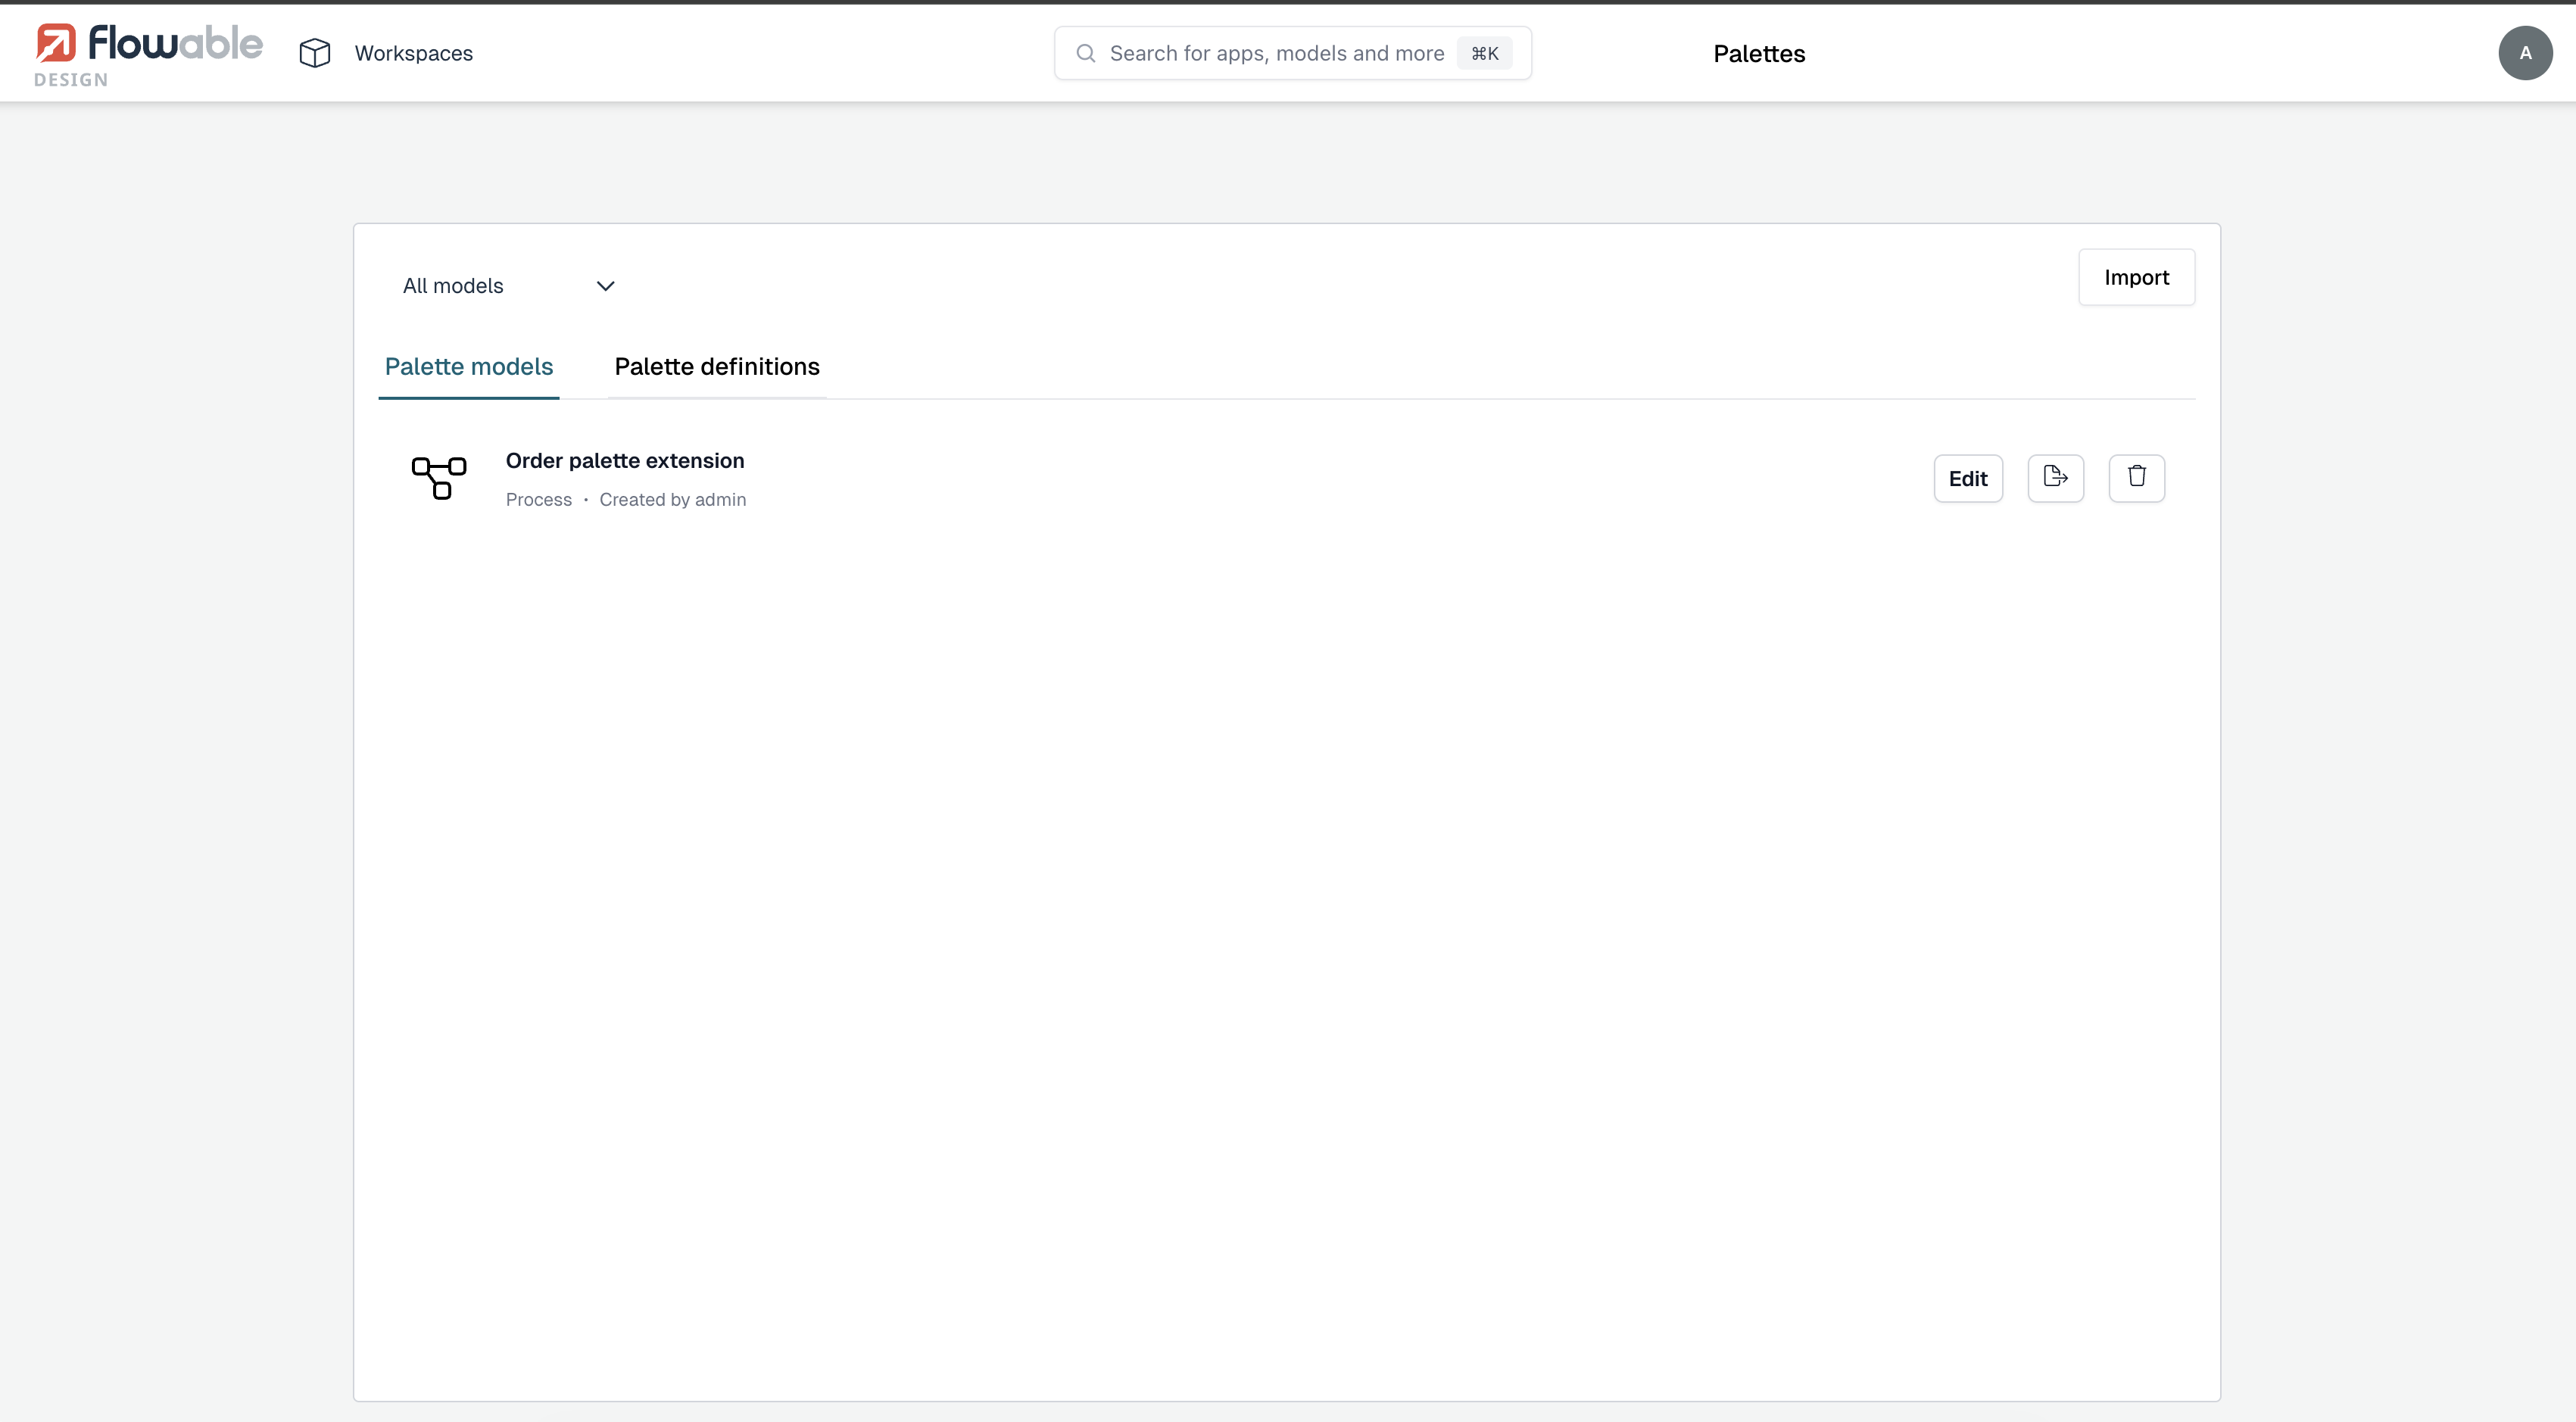
Now that we are in the Palette editor view we can see all existing Palette models, which can be empty for you, and a list of Palette definitions that are already available in Design. You should see the existing Palette definitions like the Flowable Work Forms and Flowable Work BPMN items there.
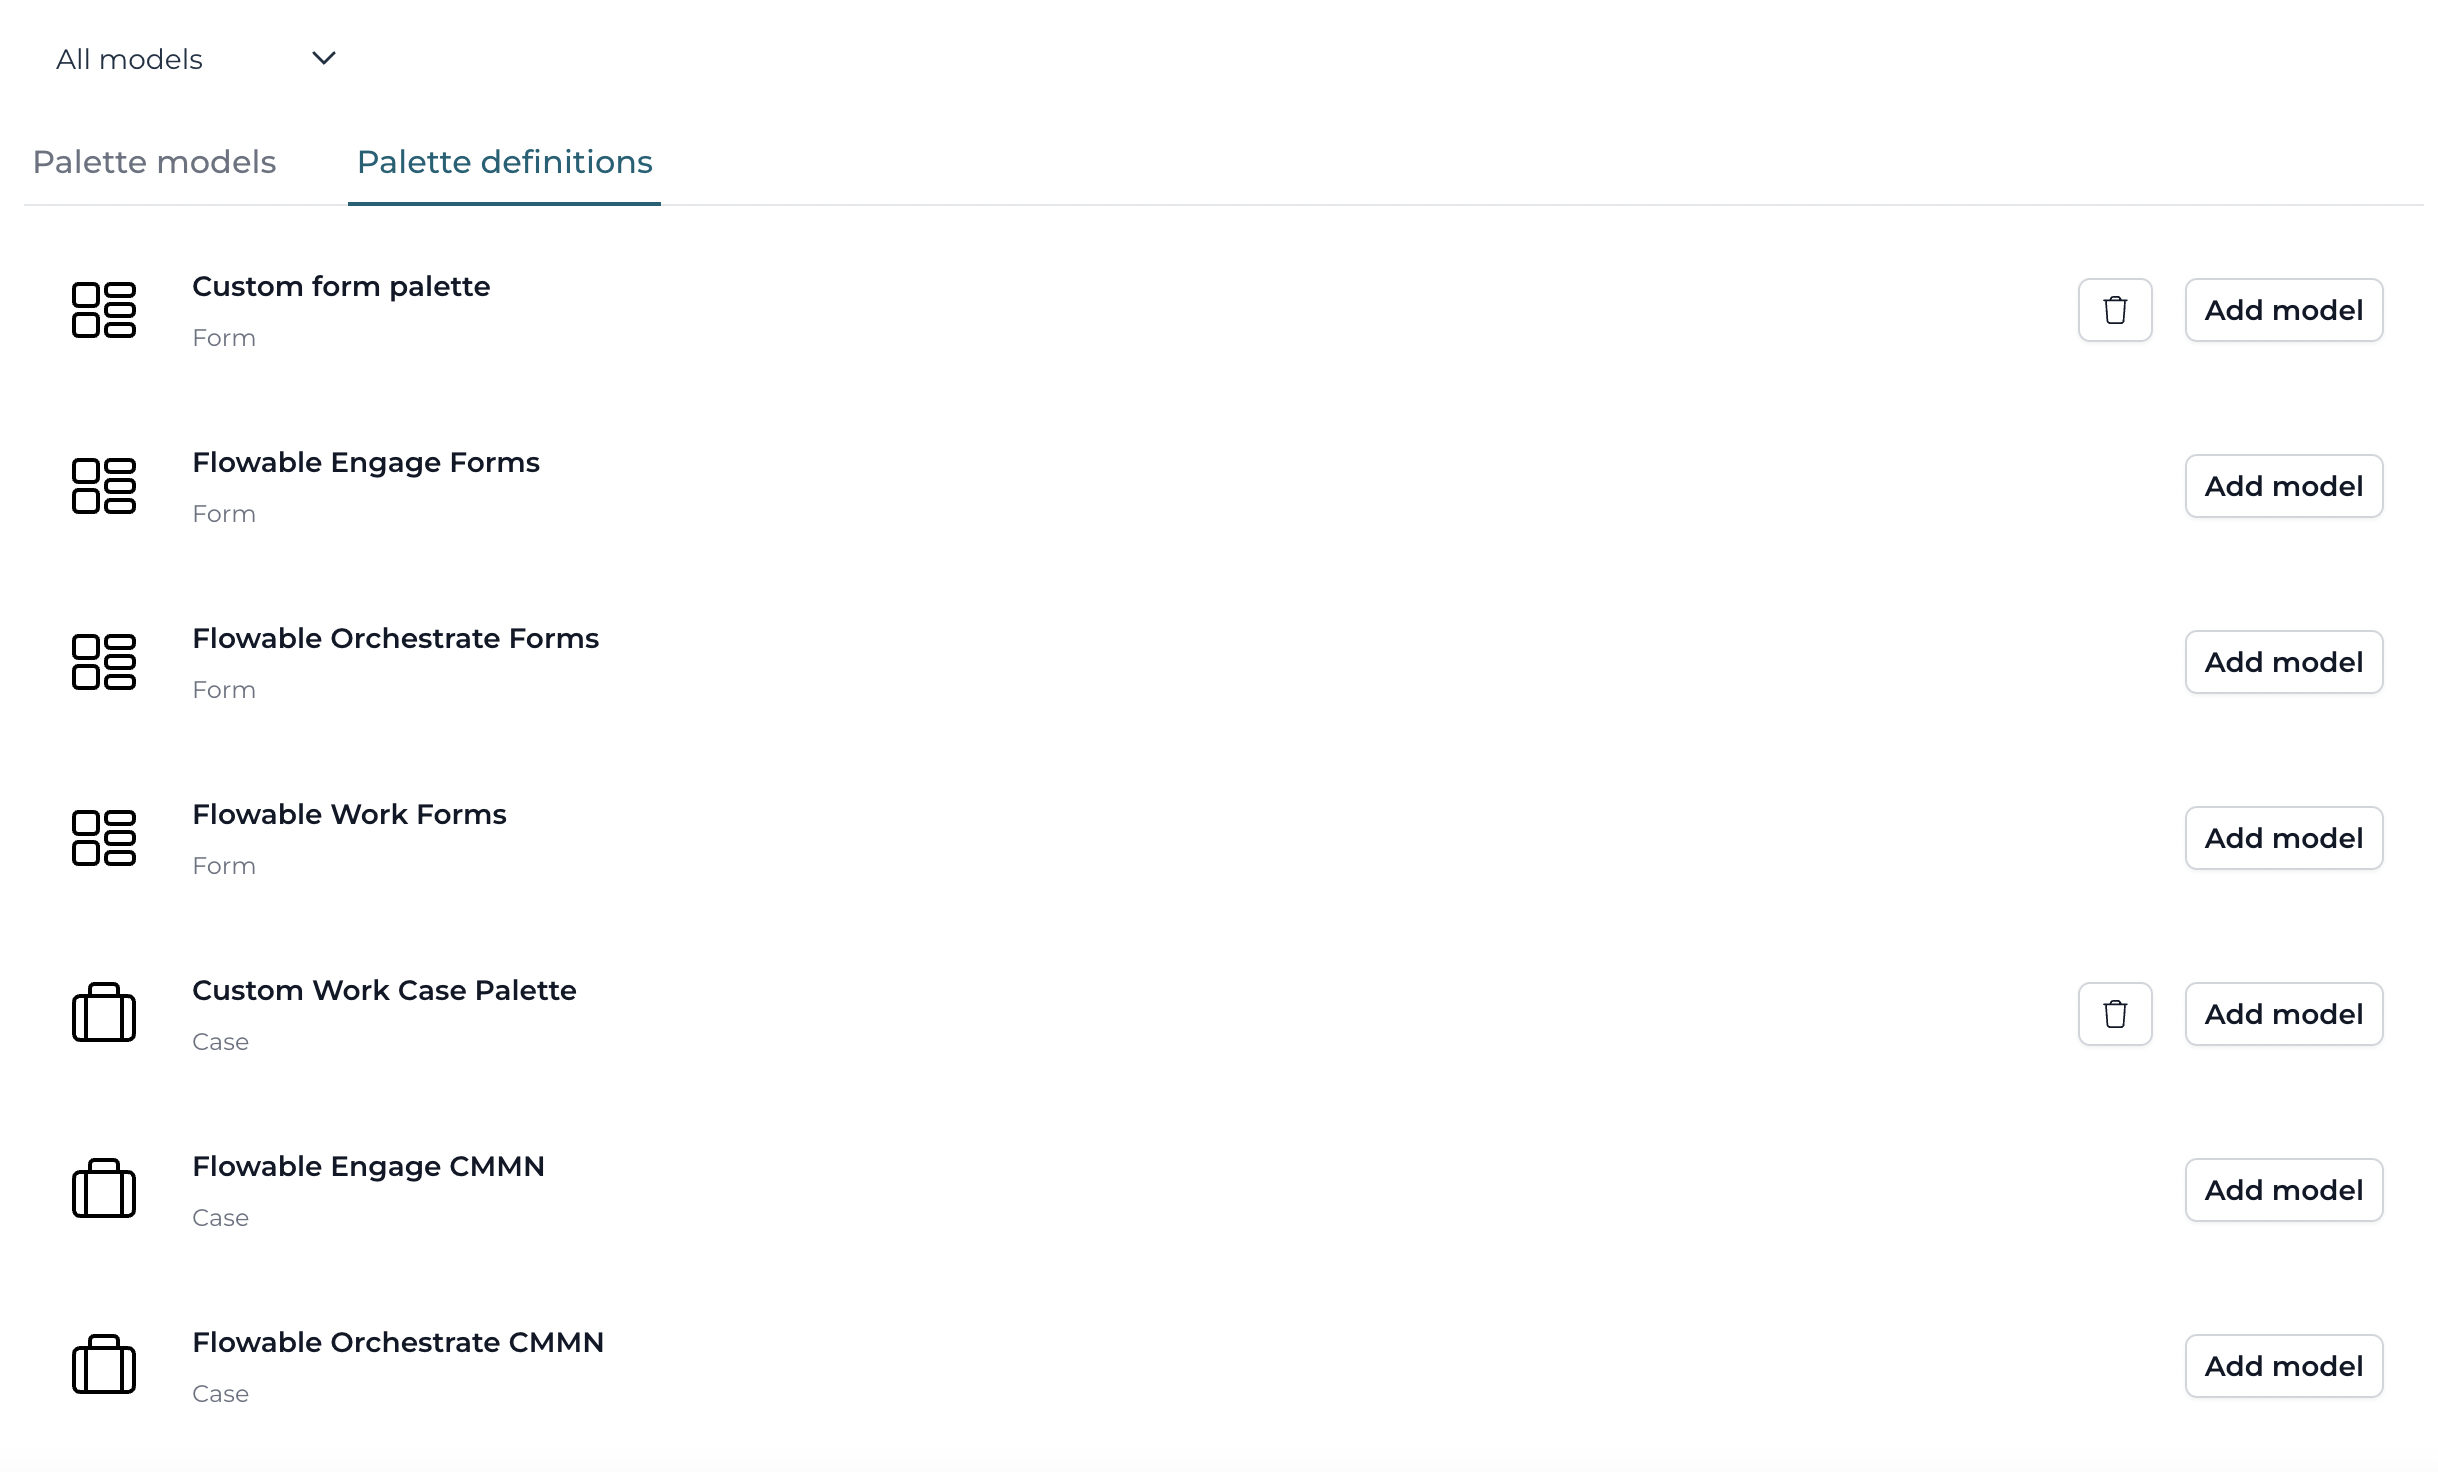
Now let's go to the Flowable Work BPMN item and click on the Add model button to create a new Palette model based on the standard Work BPMN palette. Next we need to fill in a name and key for the new Palette. The name is important, because it will be used to show as an option in the Palette selection dropdown when creating a new Process model in the end.
Part 2: Adding a new Service Task to the Palette
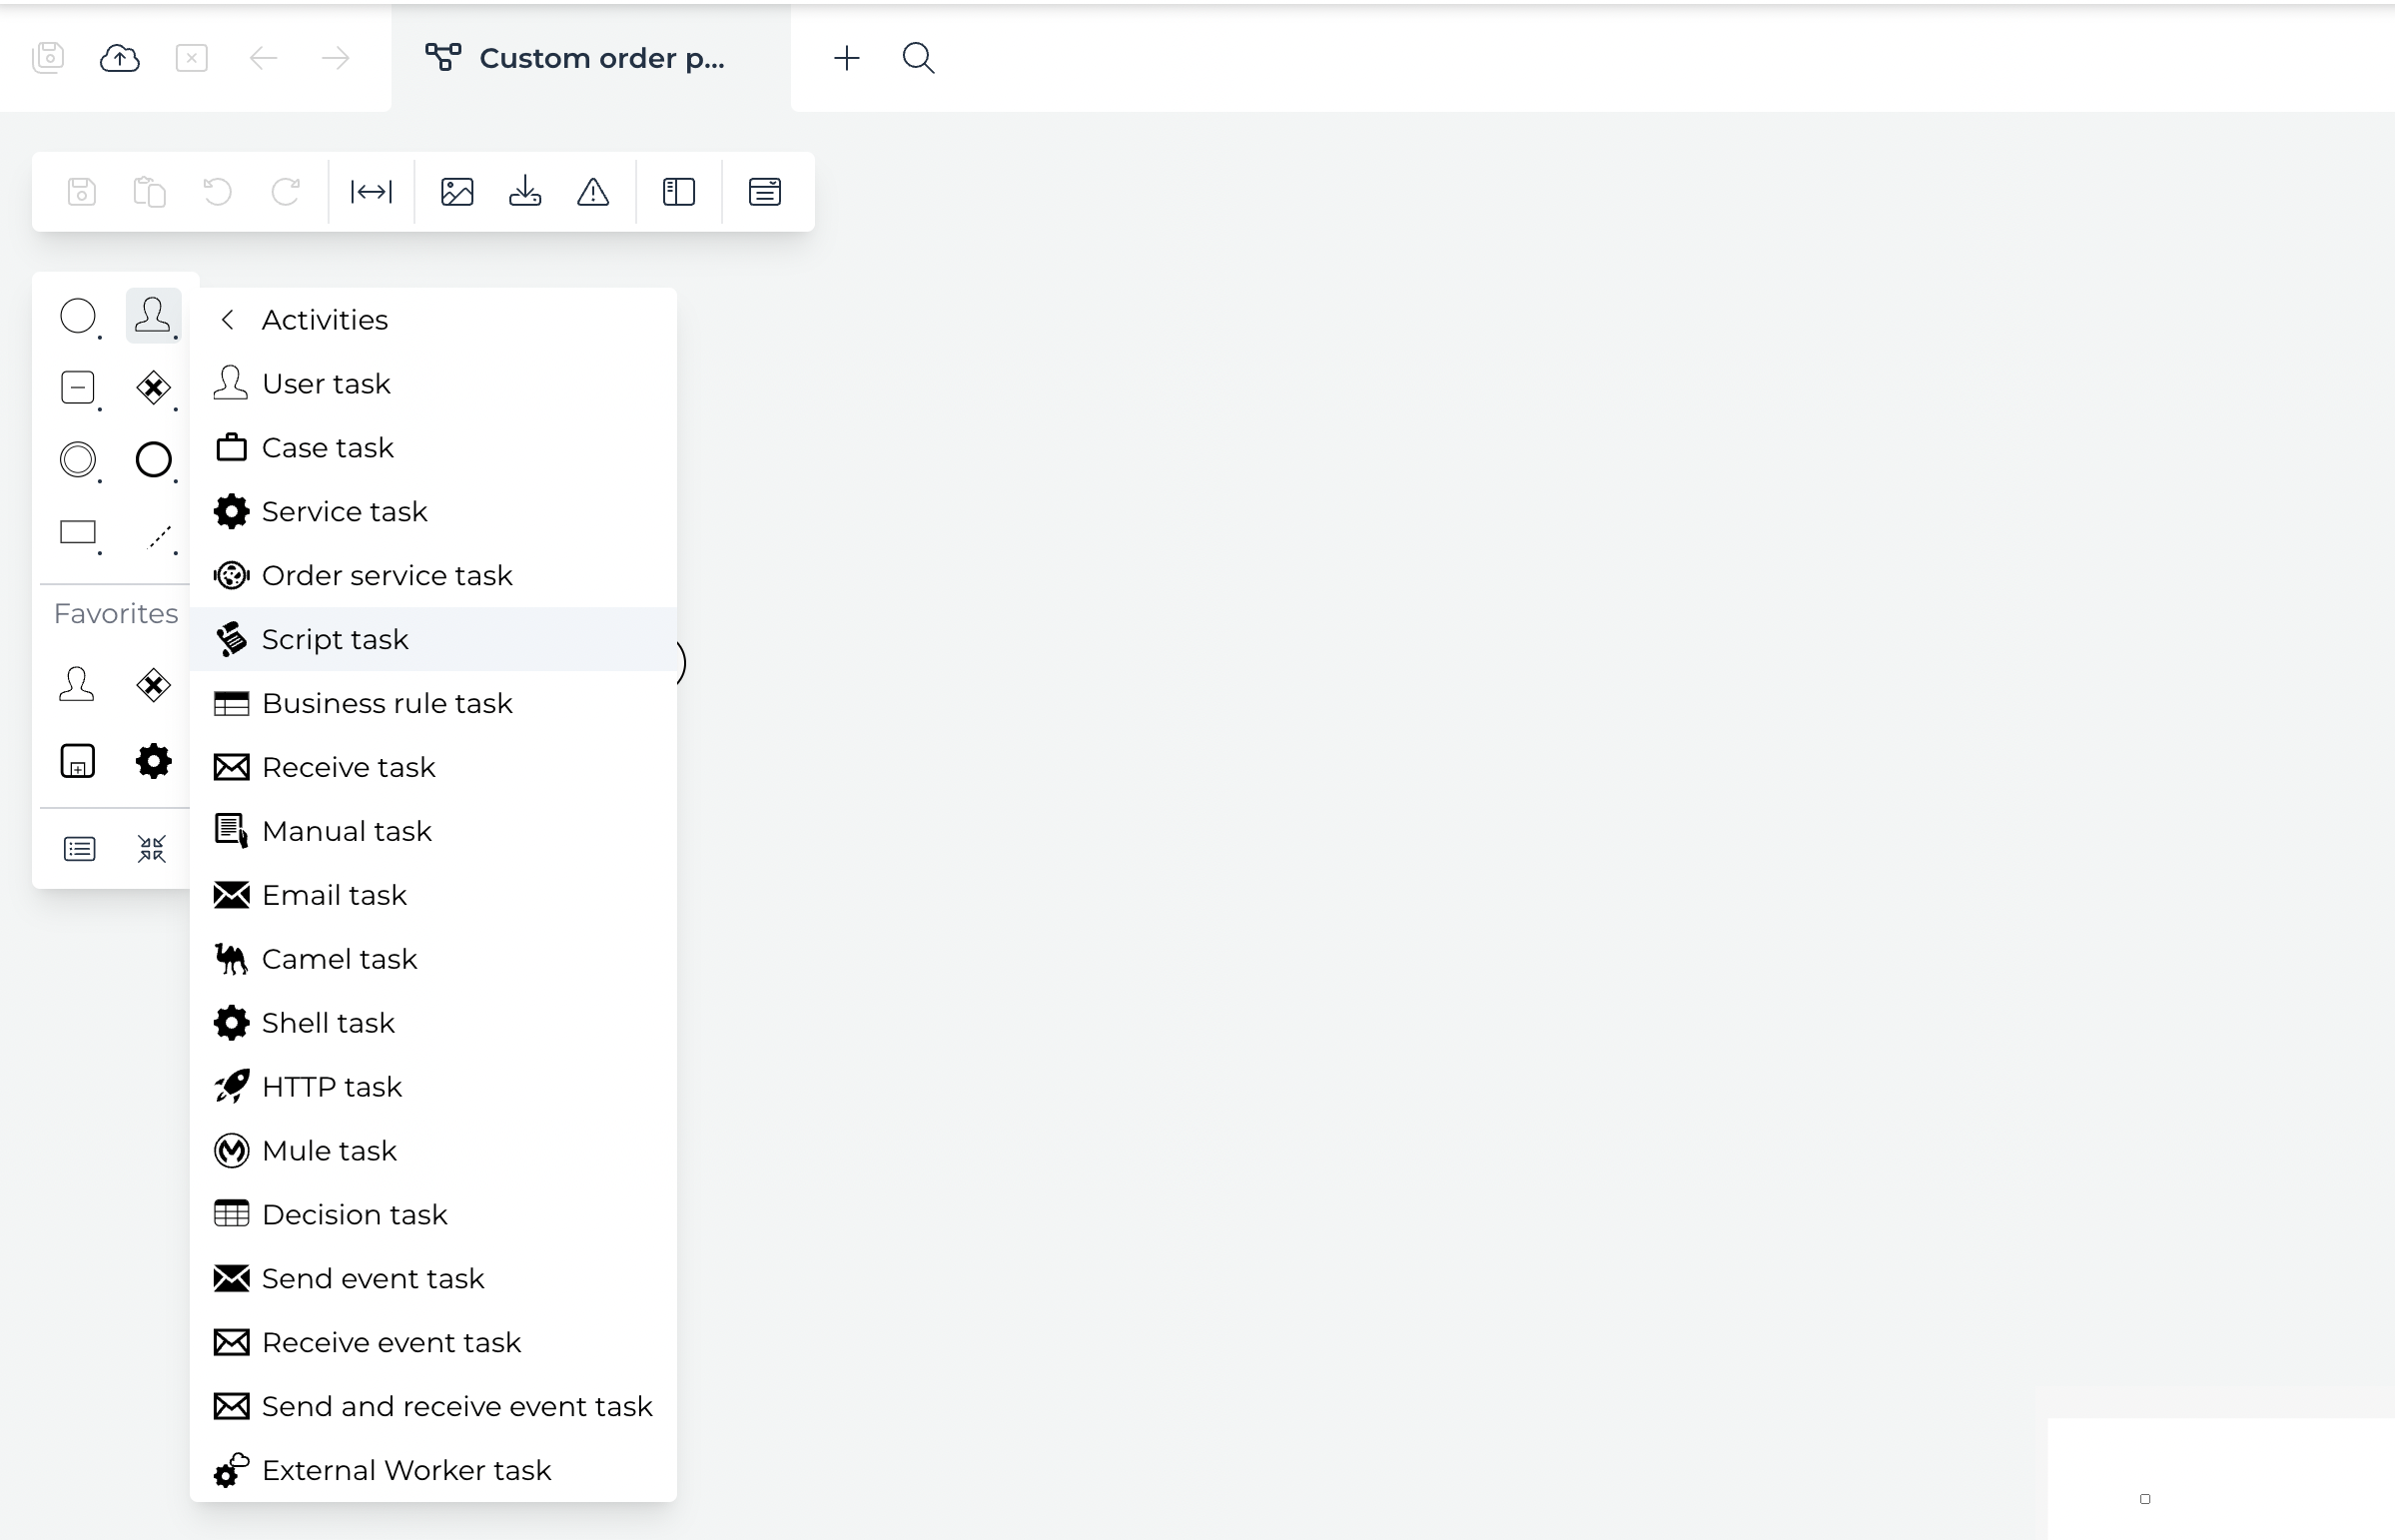
With the new Palette model created we now see the Palette editor screen that allows us to create a new Service or Script task.
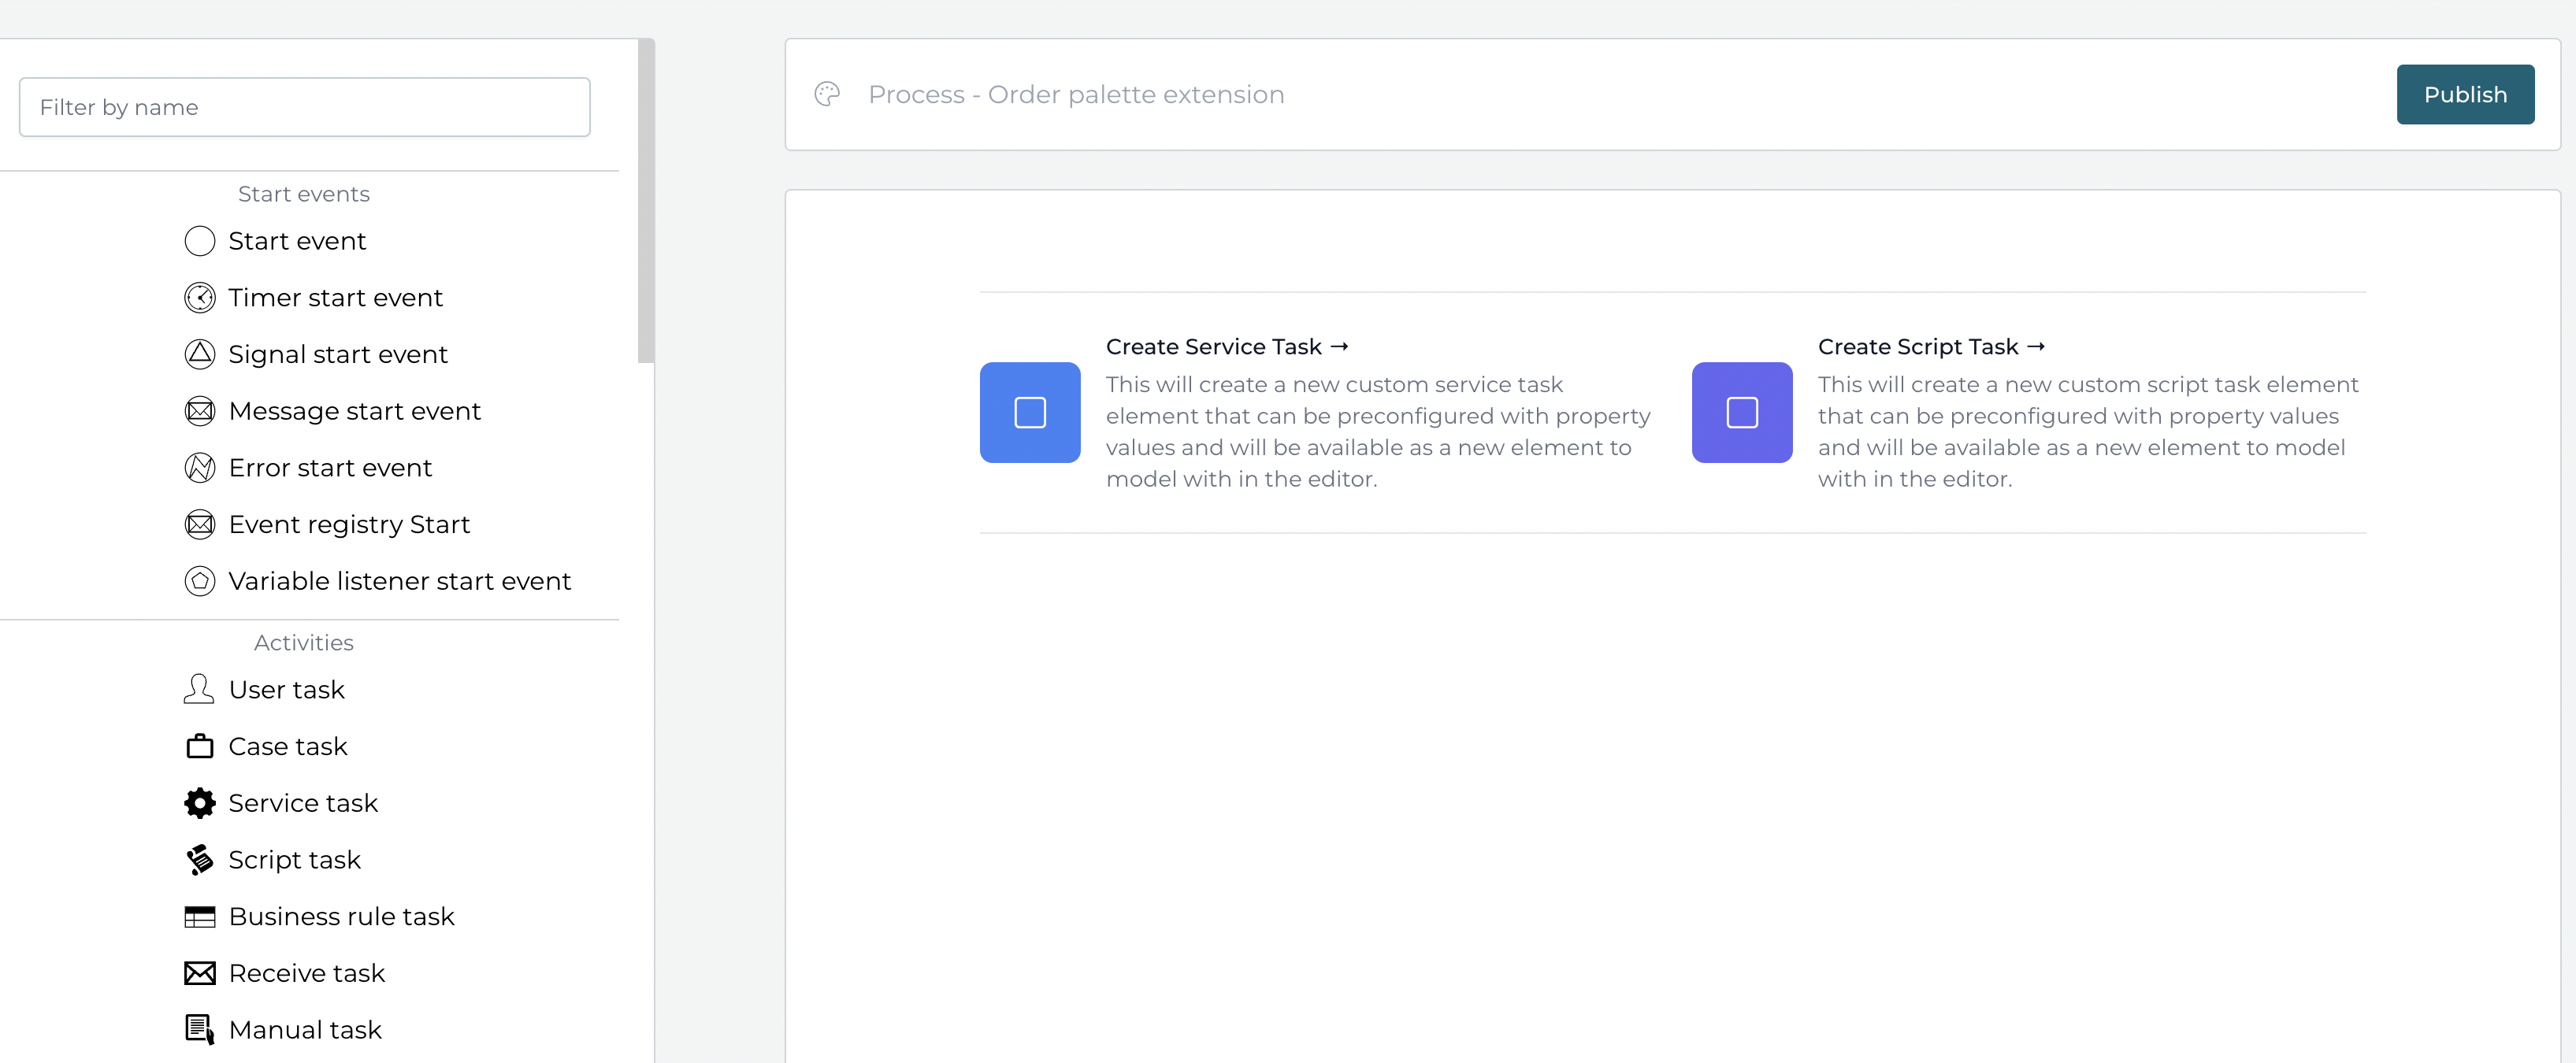
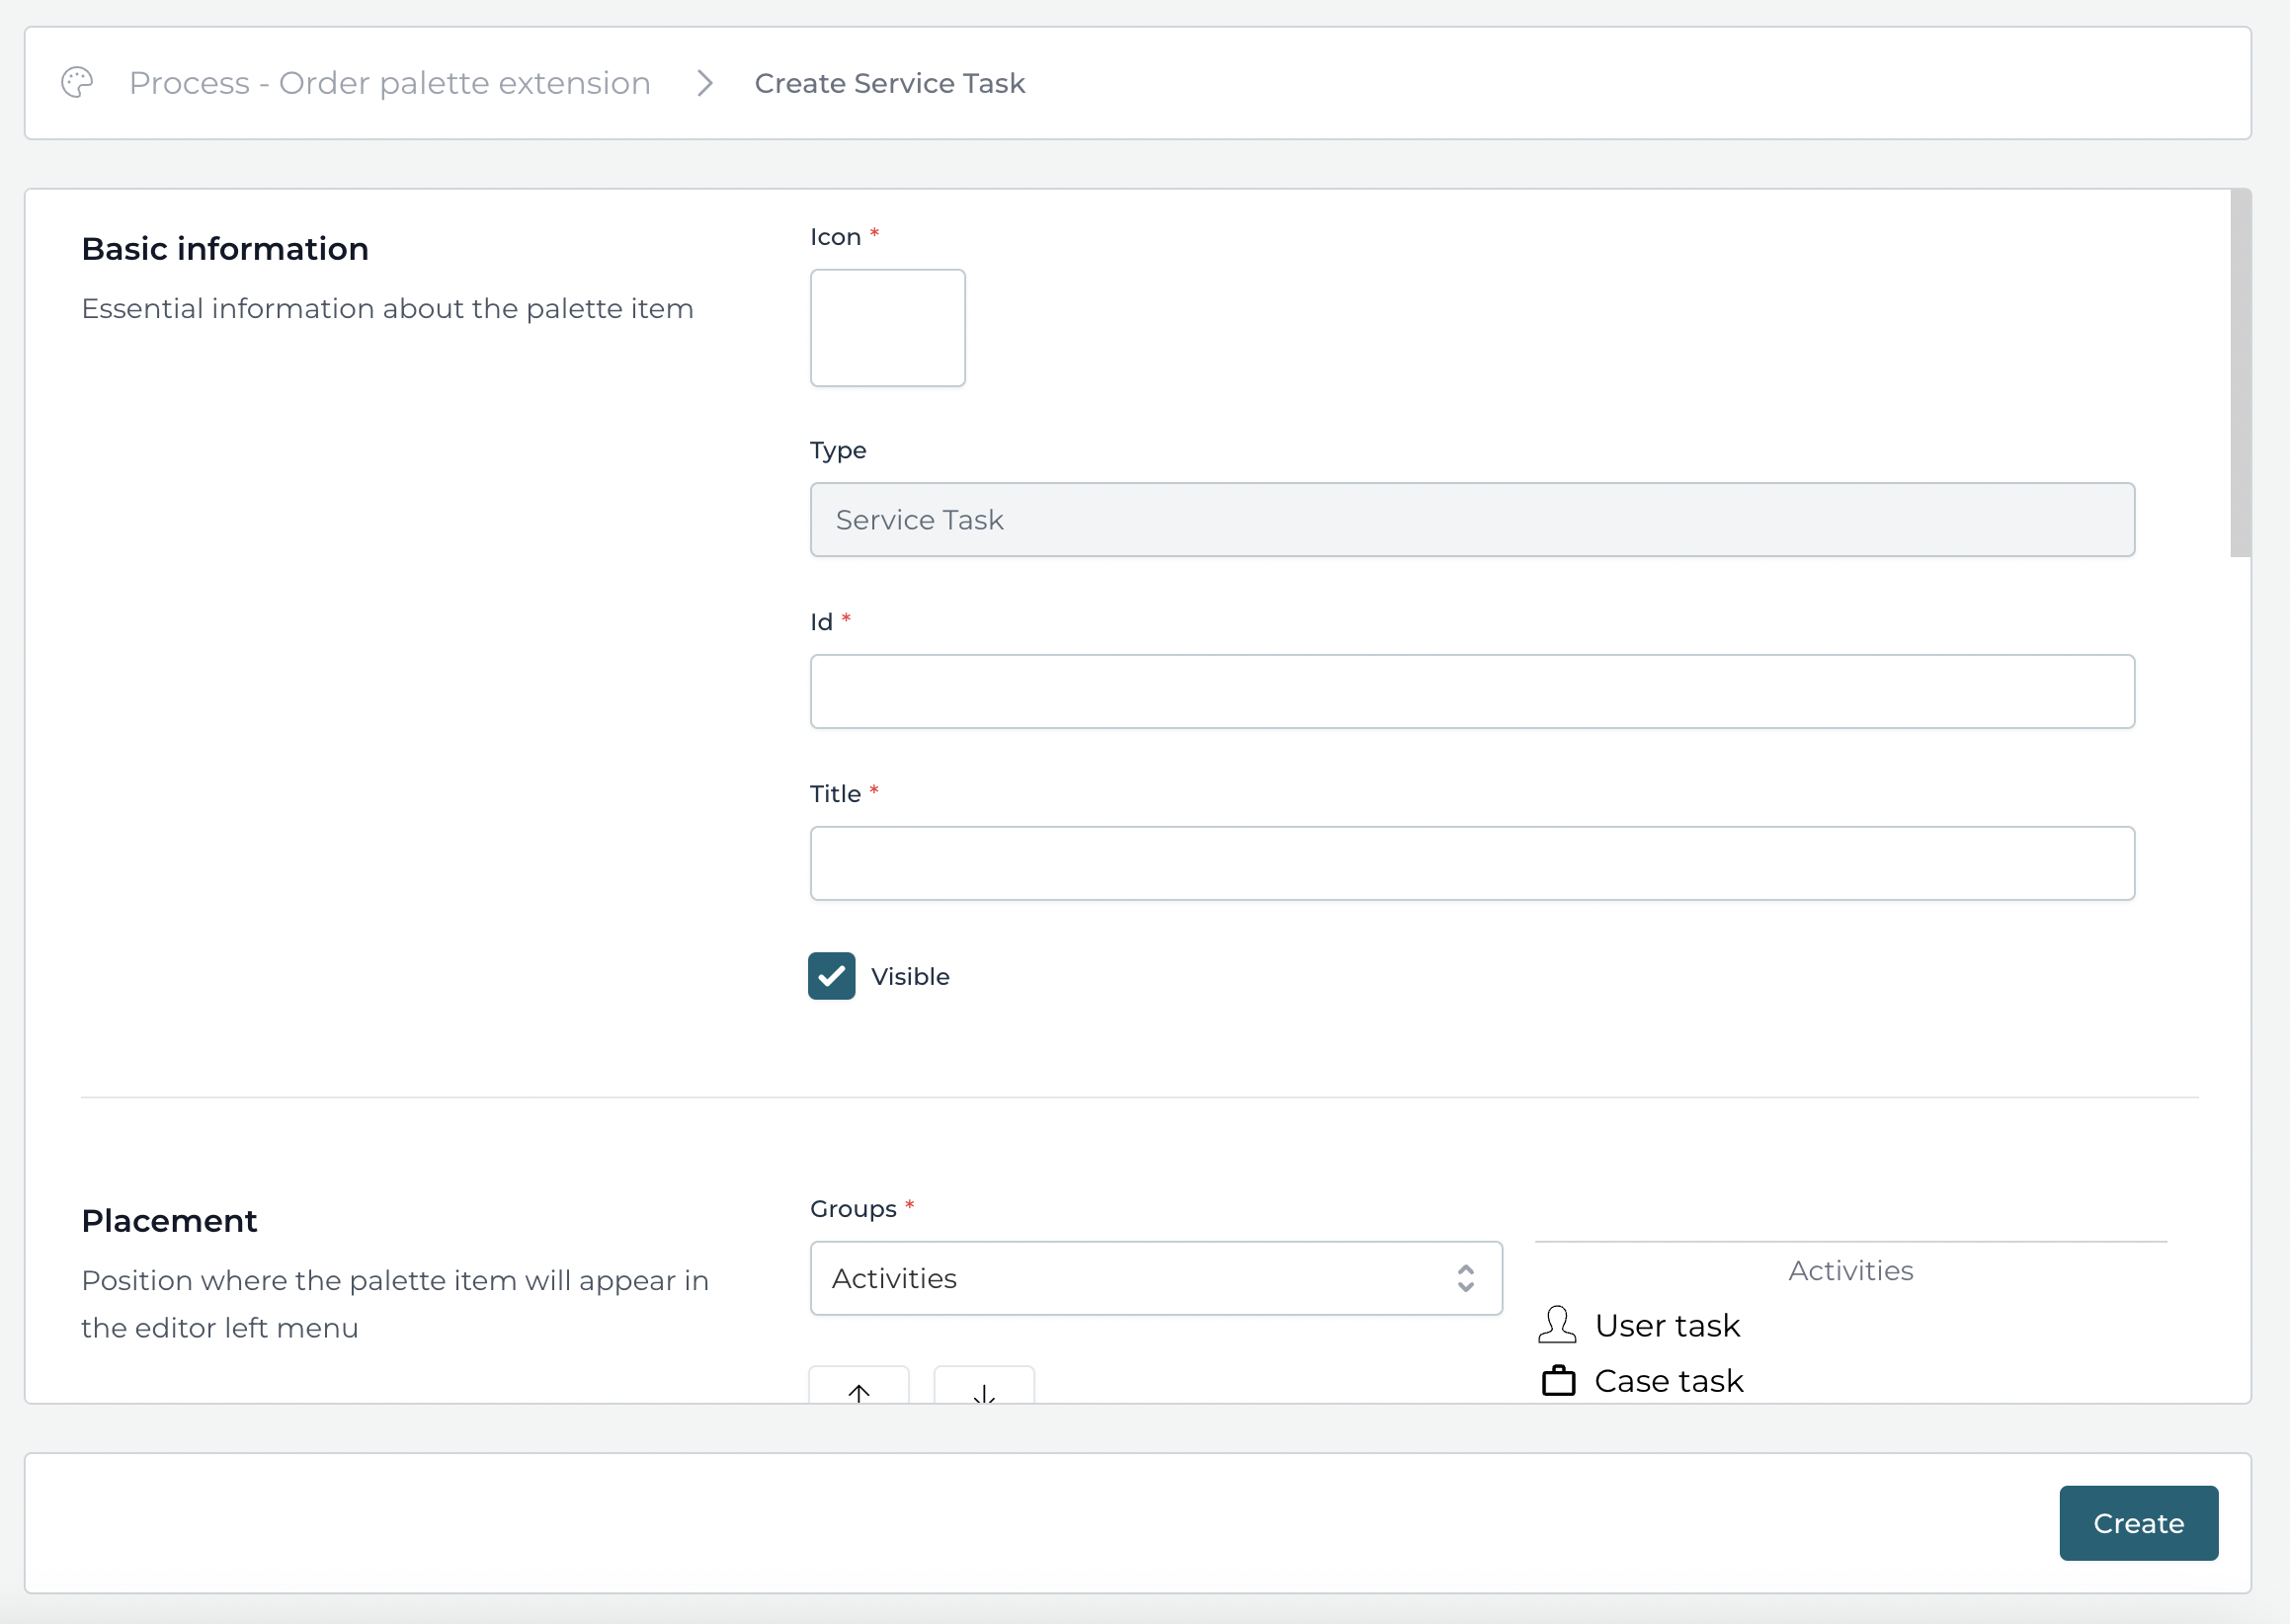
Let's go ahead and choose to create a new Service task. We now get a view to fill-in information about the new Service task, like the icon that should be used in the palette selection component and the task element on the editor canvas, the title or name and a unique id.
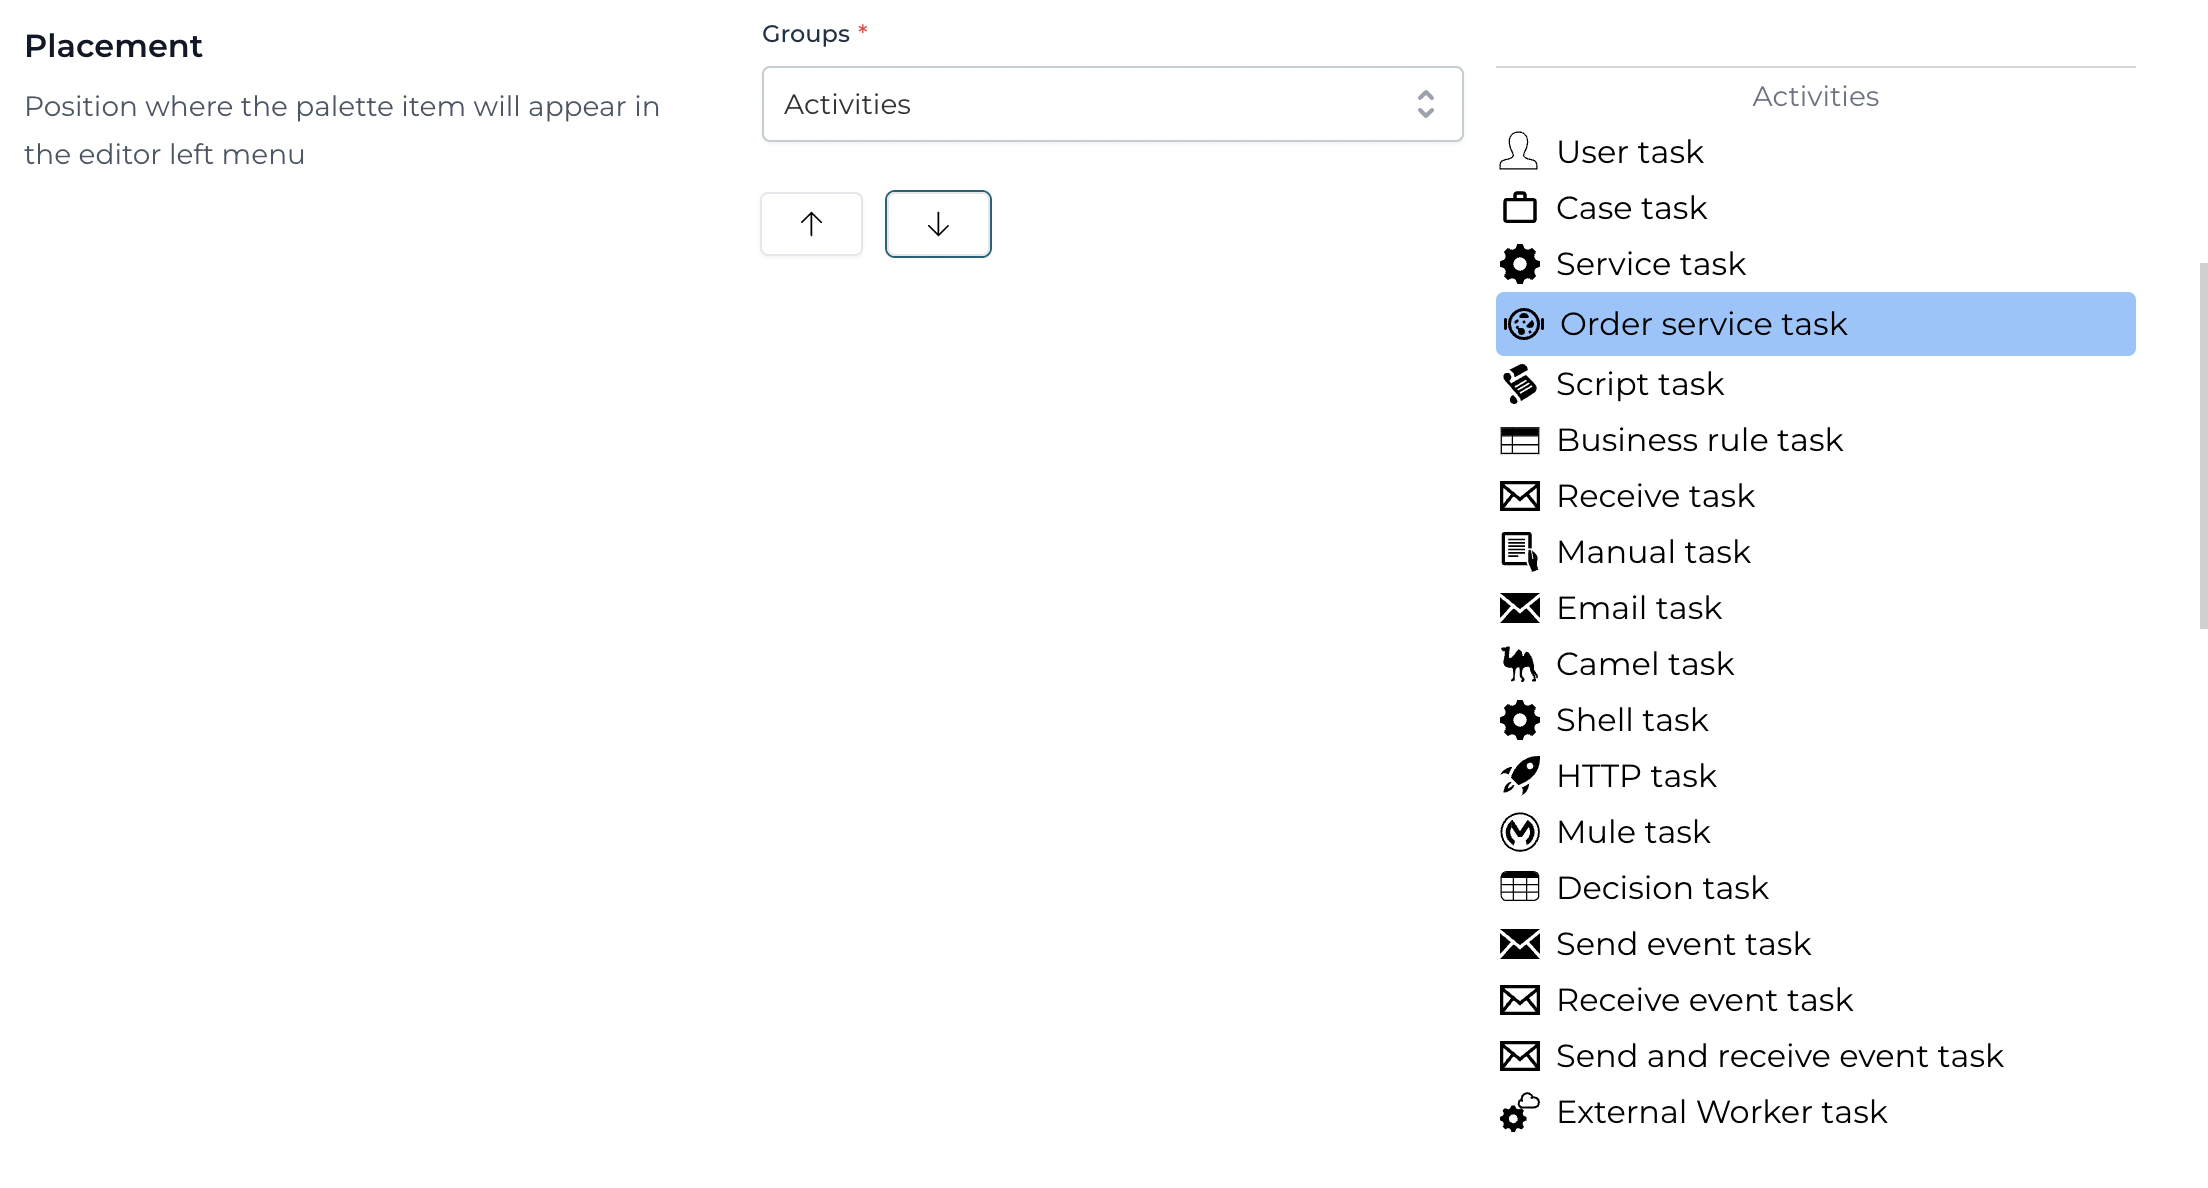
In the placement section, we can choose the group in which the new task should appear, the default is Activities, and the position in the group the new element should be placed. Let's place the new Service task below the regular Service task element.
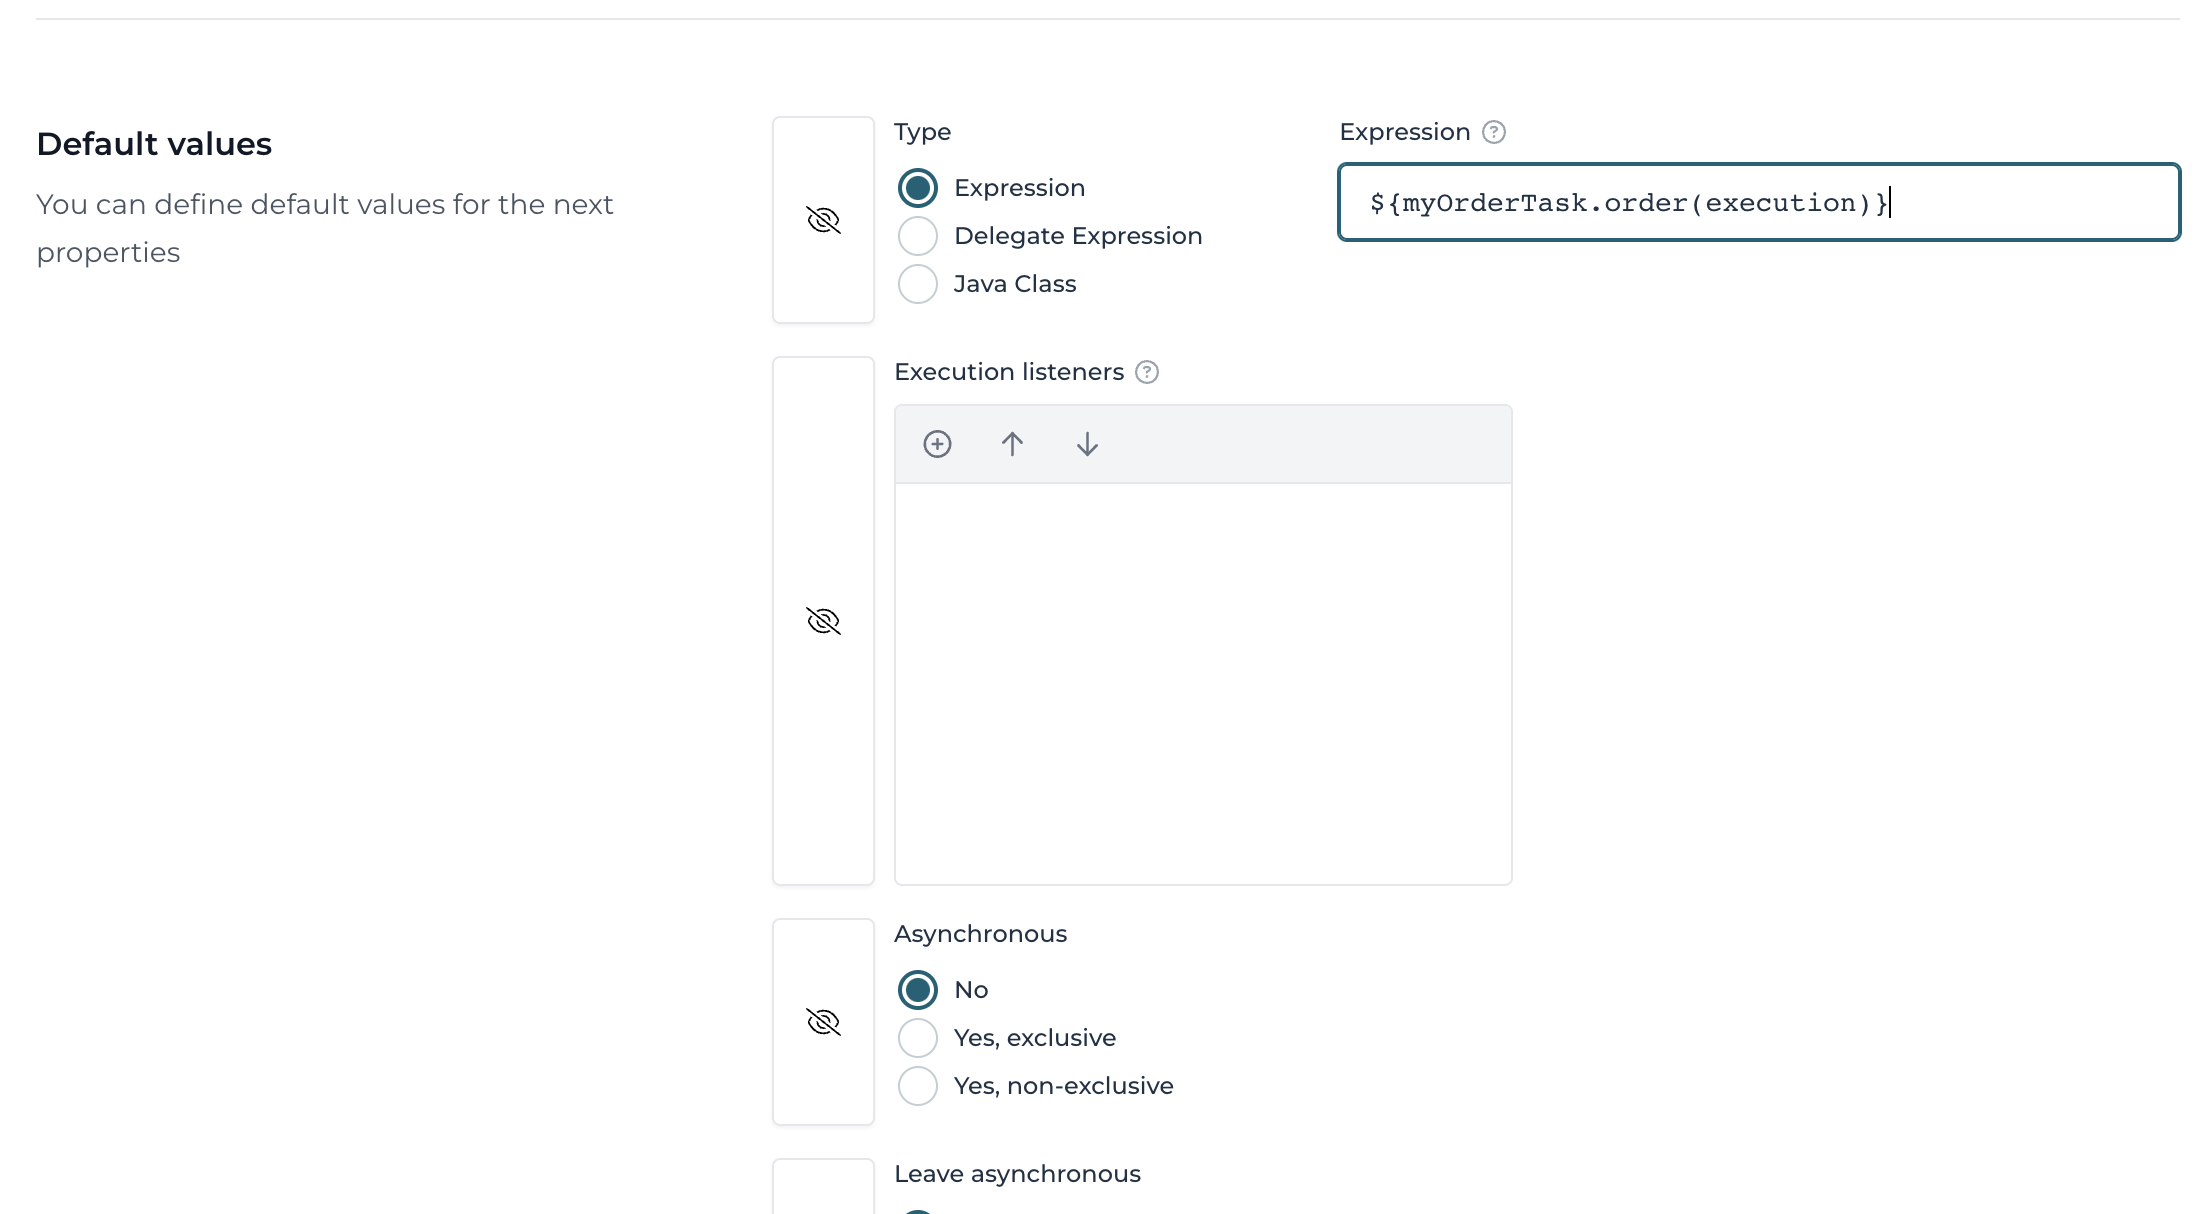
Next we can fill-in the default values for some of the properties of the new Service task, like the implementation type and value, execution listeners and the async configuration. Also the border color
and background color of the element can be defined here. For each of these properties it can also be defined, if the property should still be shown in the BPMN editor when we add this element to the canvas.
For example, if we choose an expression implementation type and fill-in an expression value of ${myOrderTask.order(execution)} we probably don't want these technical values to be exposed in to the modeler user.
That's why by default, the properties are set to not appear in the properties panel of the editor. But this can be changed if the value should still be shown in the editor.
Now we can go ahead and create the Service task. Next, a read-only view of the newly created Service task is shown. Here we can add some custom property values as well in addition to the default properties that we already filled-in. Let's click on the Add property button and create a custom property for our new Service task.
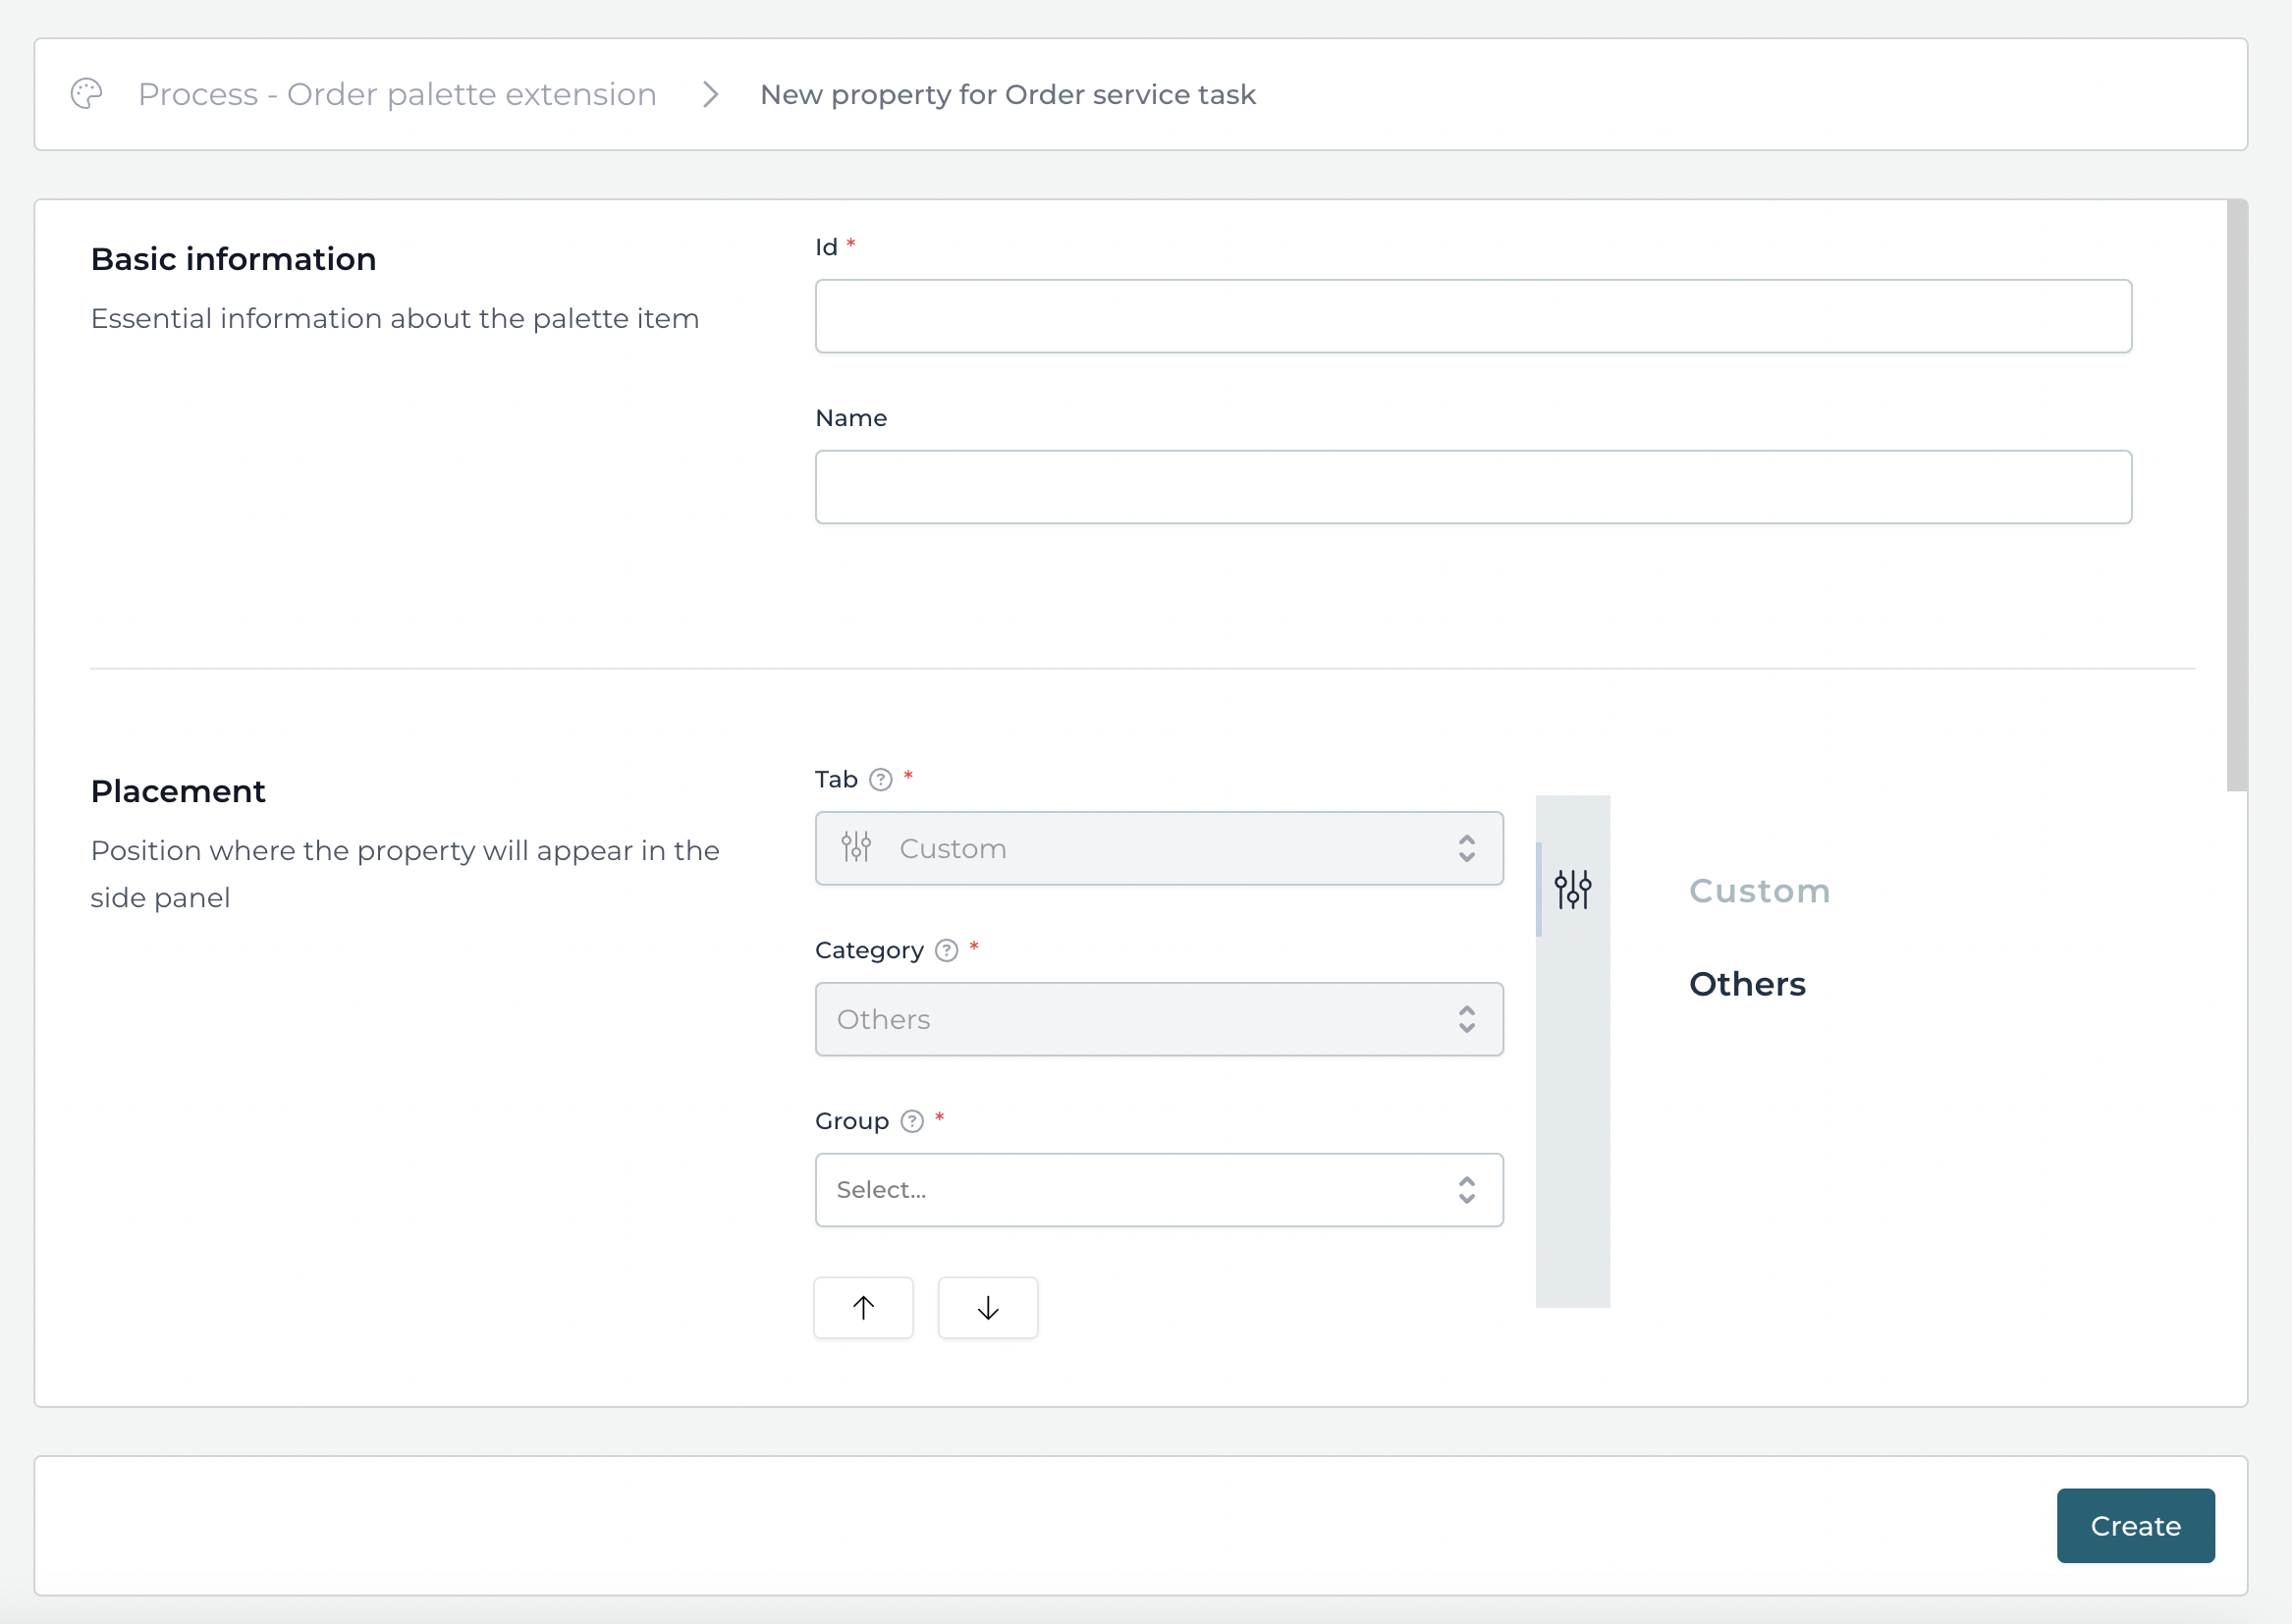
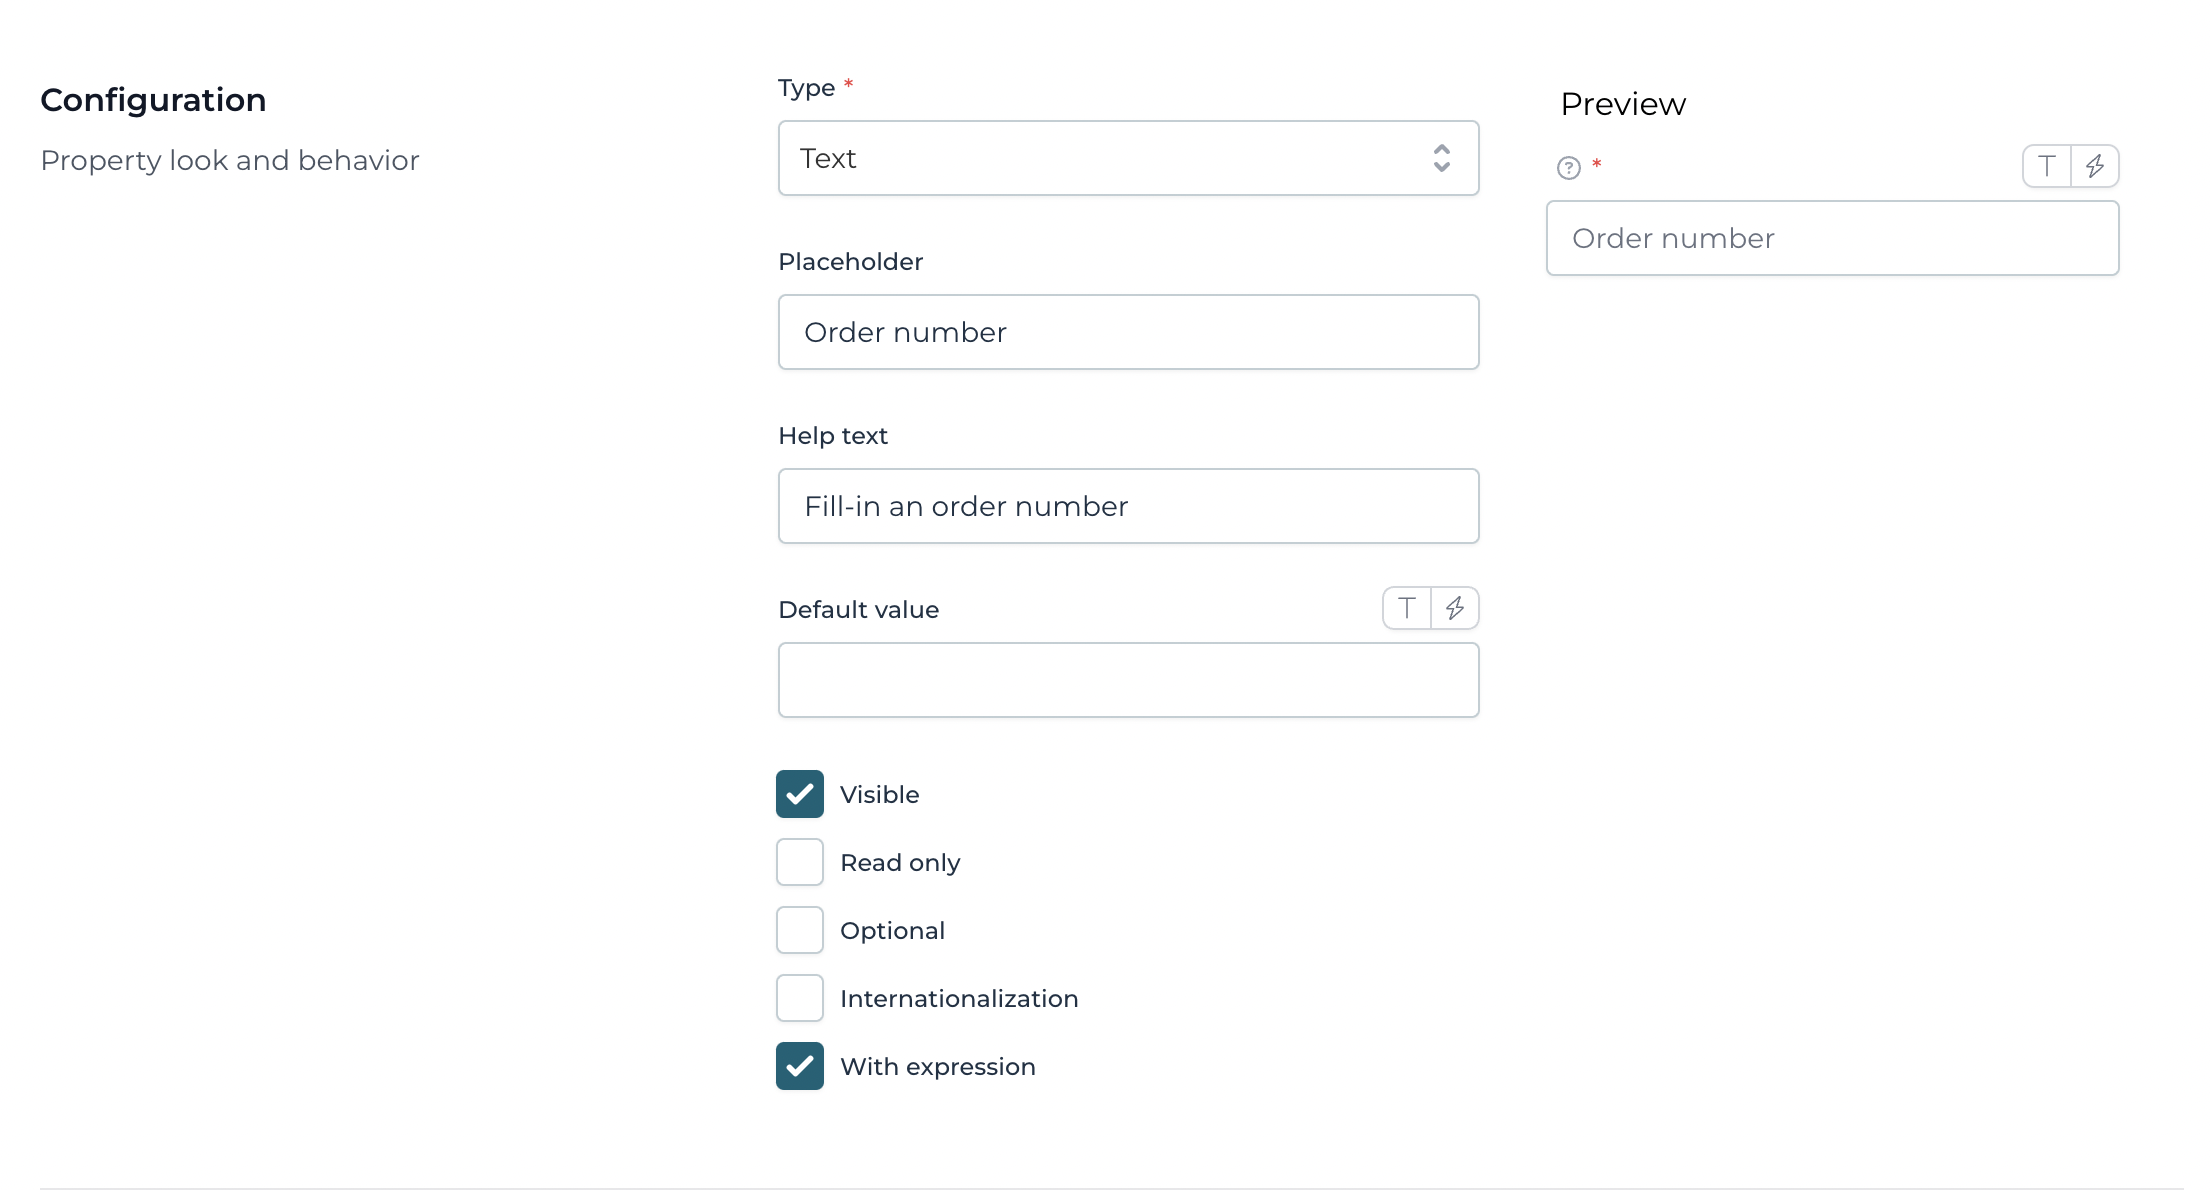
For a custom property we have to fill-in a unique id and choose a name that will be used as the label for the property. Also for the custom property we have to choose how it will appear in the property panel. A custom property is always added to the Custom tab and a group name should be defined. Next, the custom property type can be selected, like Text, Number or another type. In addition a placeholder and help text can be configured, or a default value can be set. Then a number of options are available to be enabled, like internationalisation to enable a multi-language option, and enable to fill-in an expression value.
Now we can click the Create button to add the new Custom property to the Order Service task and we are ready to publish the Palette model to Design and start using it for a new Process model. Finally, click the Publish button, and when clicking on the top Palettes link and navigating to the Palette definitions list, the newly created Palette should be shown in the list.
Part 3: Using the new Palette in the Process editor
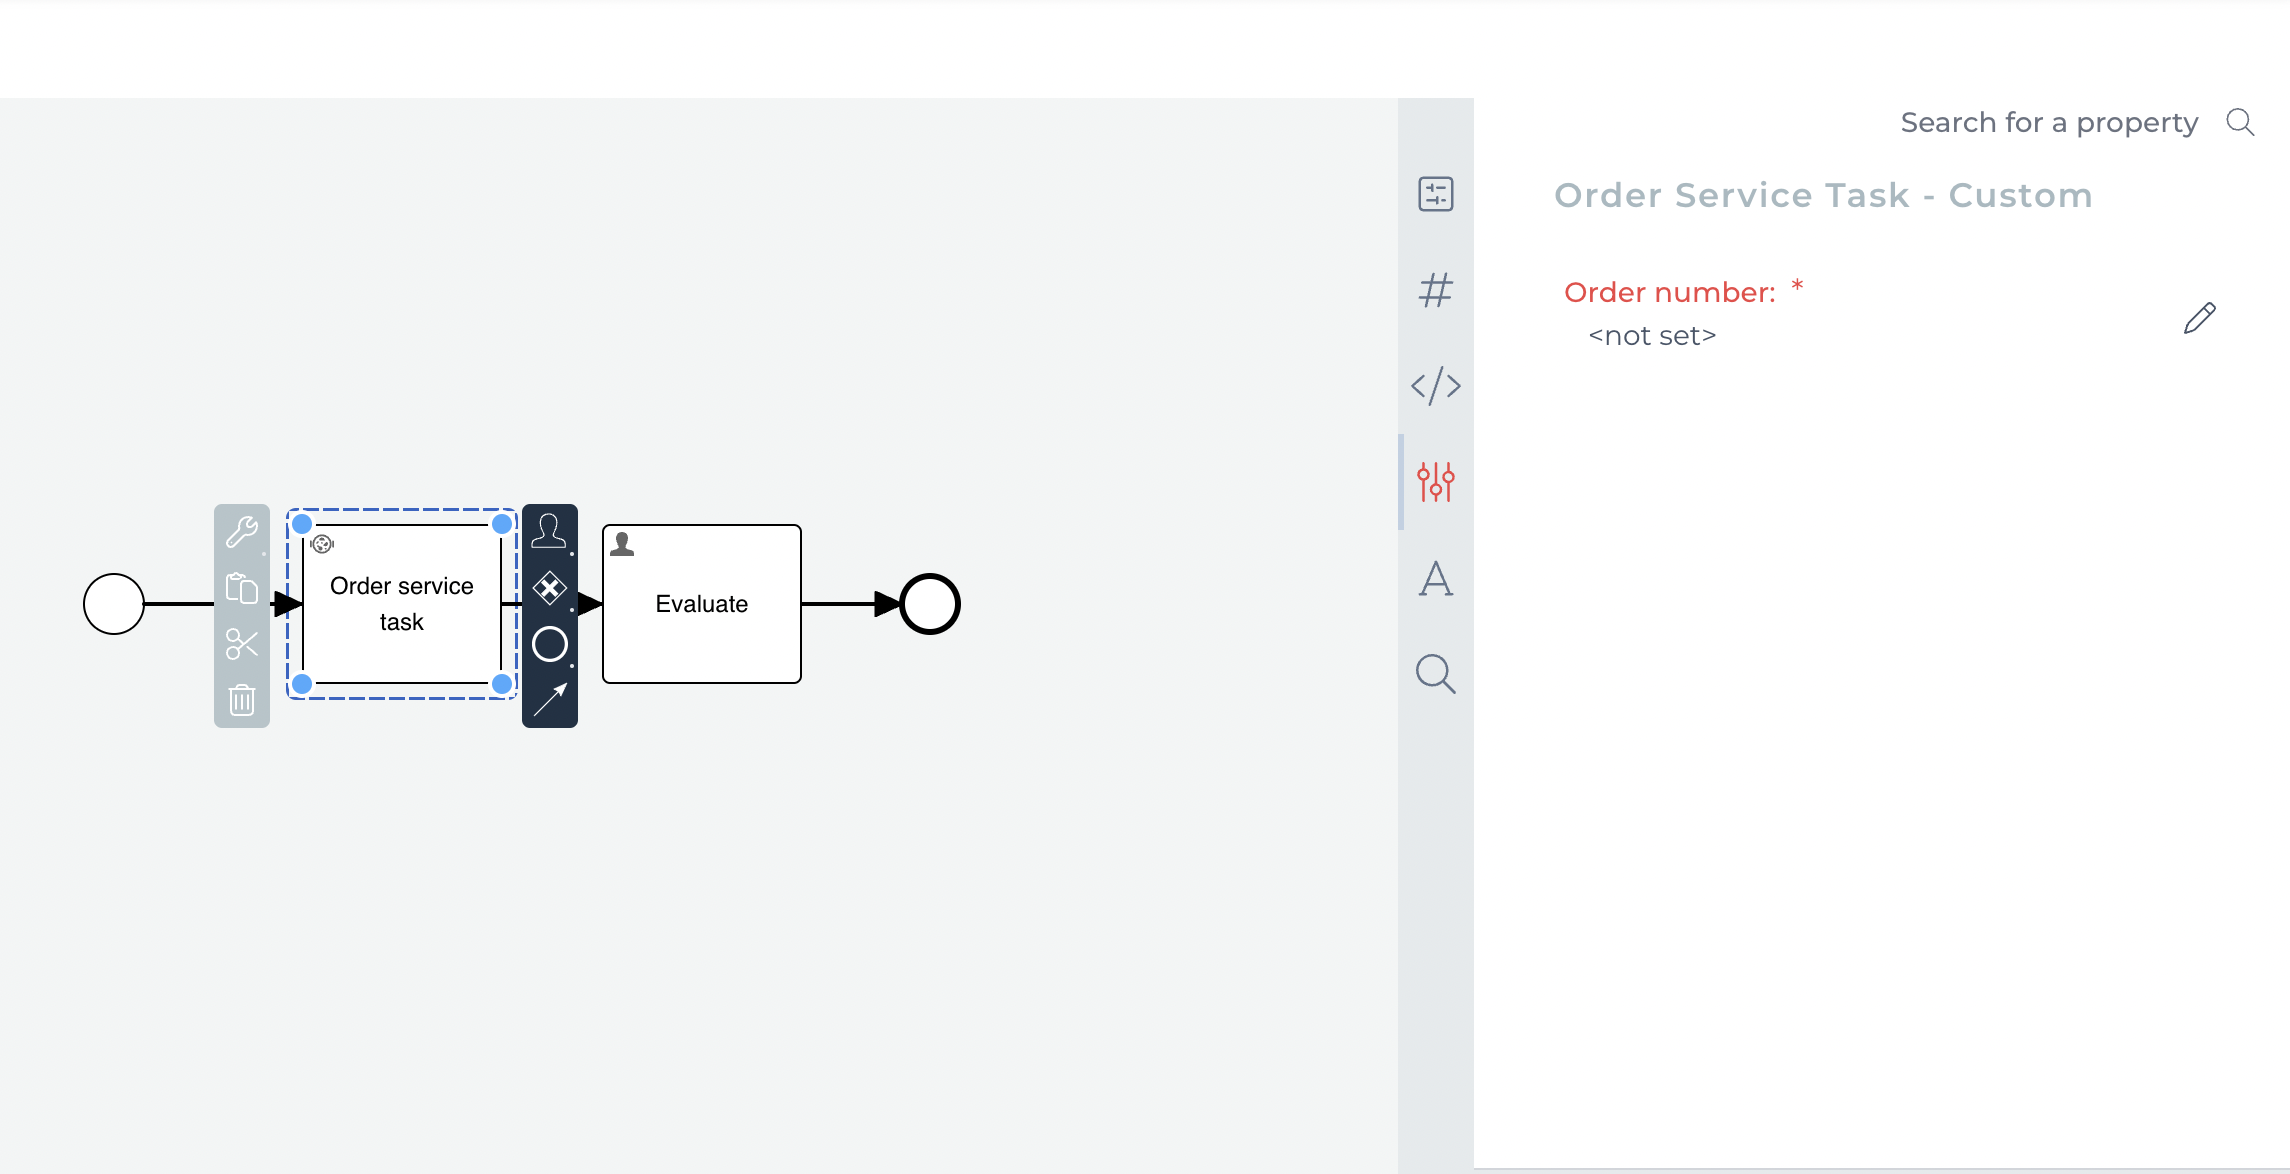
Now that the Palette definition is available we can create a new Process model selecting the new Palette definition as the Palette type. In the Process editor we can now select the custom Service task that we created in the new Palette definition, and drag the element on the canvas.
As can be seen, the service task doesn't have the usual implementation type and value properties, and also the async option is not included in the properties panel. Instead, you can see the custom property that we added to the custom Service task and it's appearing like we have defined it there.
This completes the introduction of the Palette model and how it can be used in a Process model. You can also define a custom Palette for the Case and Form editor, and this works in a similar way as we could see in this introduction for the Process editor.
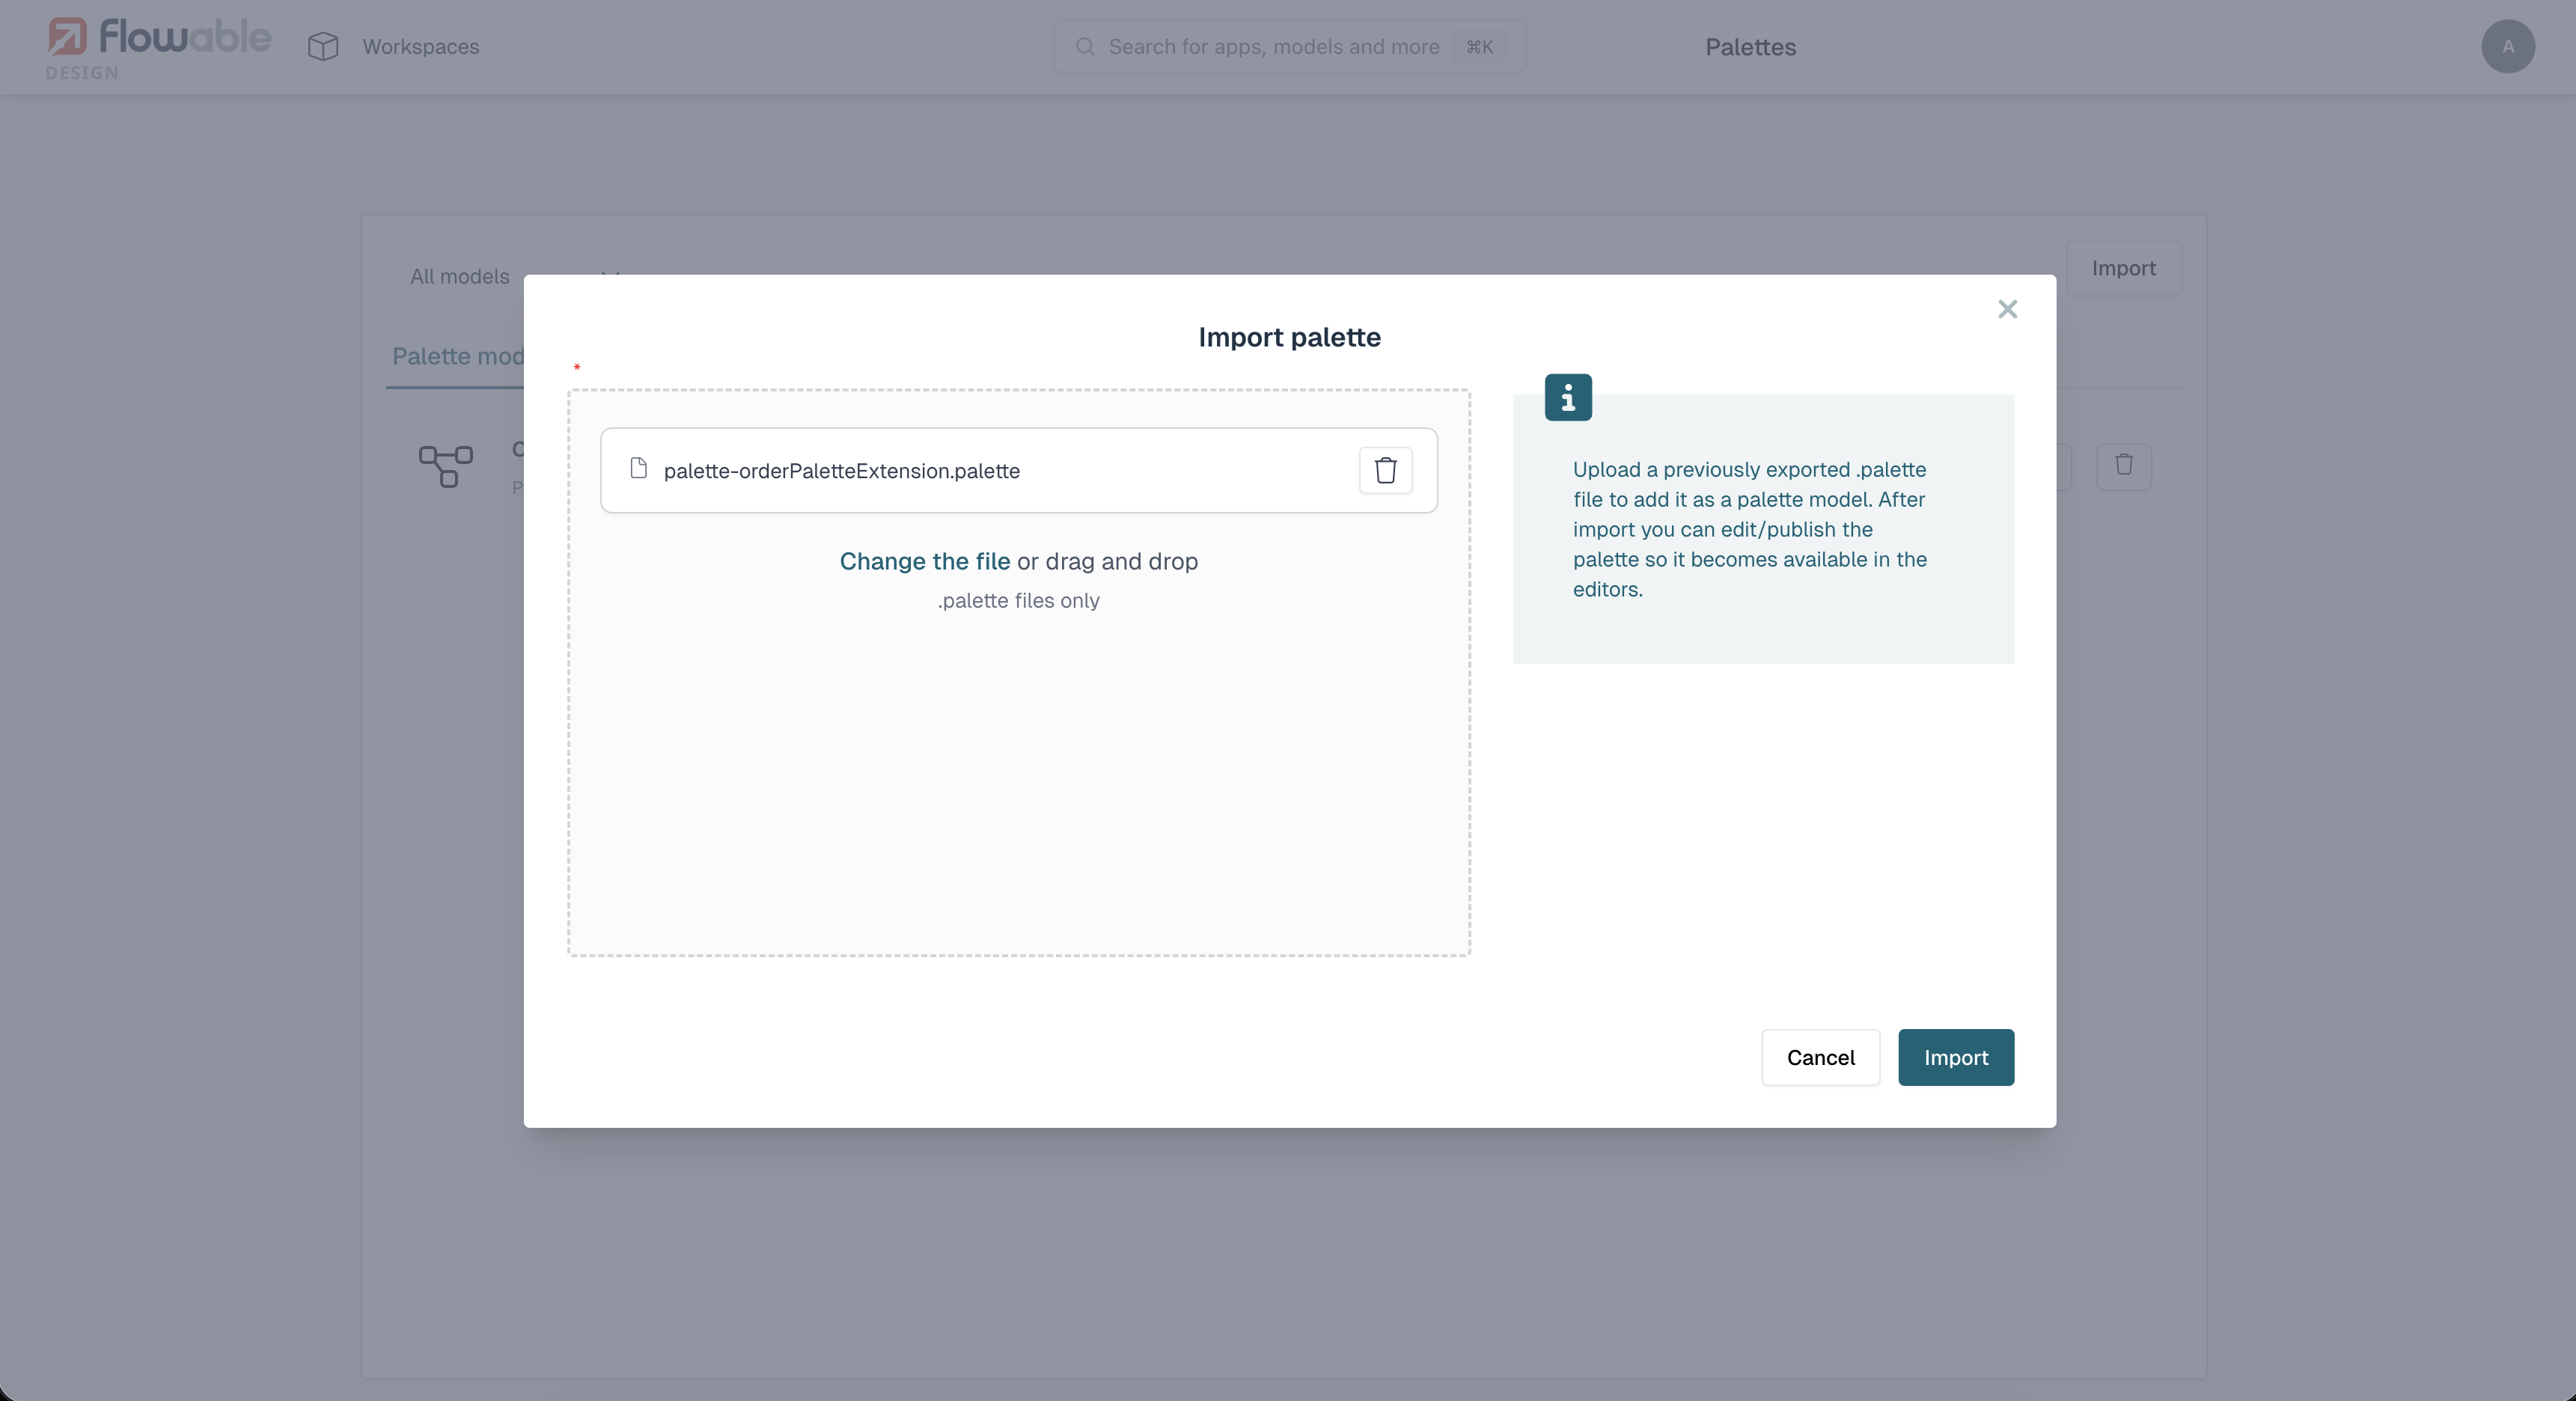
Part 4: Exporting and importing a Palette model
2026.1.0+Once a Palette model has been created, it can be exported to a file and imported into another Flowable Design environment. This is useful when you want to reuse the same Palette on multiple Flowable instances.
To export a Palette model, open the Palette editor and select the Palette model you want to export. From the Palette model's actions, choose the Export option. This downloads the Palette model as a file to your machine.
To import a Palette model, navigate to the Palette editor and choose the Import option. Select the previously exported file to upload it. After the import completes, the Palette model appears in the list of Palette models, where it can be edited and published to Design in the same way as a Palette model that was created directly in the editor.