Add a Flow-App with Flowable Design
Adding a new Design Flow-App
Concept
In Flowable Design applications are used to group Case, Process, Decision and Form definitions together into a single package that is deployed into Flowable Work or Flowable Engage. In addition to this, applications can also be marked as a Flow-App. A Flow-App is a specific type of an application that provides Pages, which appear in the left menu of a Flowable Work and Engage application. The Flow-App appears as a top-level menu item, and each Page is made available as a sub-menu item of the Flow-App menu item.
A Page provides a dashboard view that can contain, for example, a list of open tasks or a list of open case instances. Also, chart and graph components like a bar, line or pie chart can be added, showing, for example, the number of started process instances, or an overview of the duration of each task type in a set of case or process definitions. In addition to the list and chart field types, the dashboard can also contain text fields, labels, and date fields like a regular start, task, and work form. The same React form engine that is used to render start, task, and work forms is used to render the Page dashboards.
Creating a Flow-App
To create a Flow-App, we first need to start by creating a Page in Flowable Design. In the Pages section of Flowable Design, a new Page is created. Let us look at an example that contains a task list component and three charts. The first chart shows the number of case instances in a bar graph, the second, the number of process instances in a line graph and the third a pie chart showing the number of tasks created per task type.
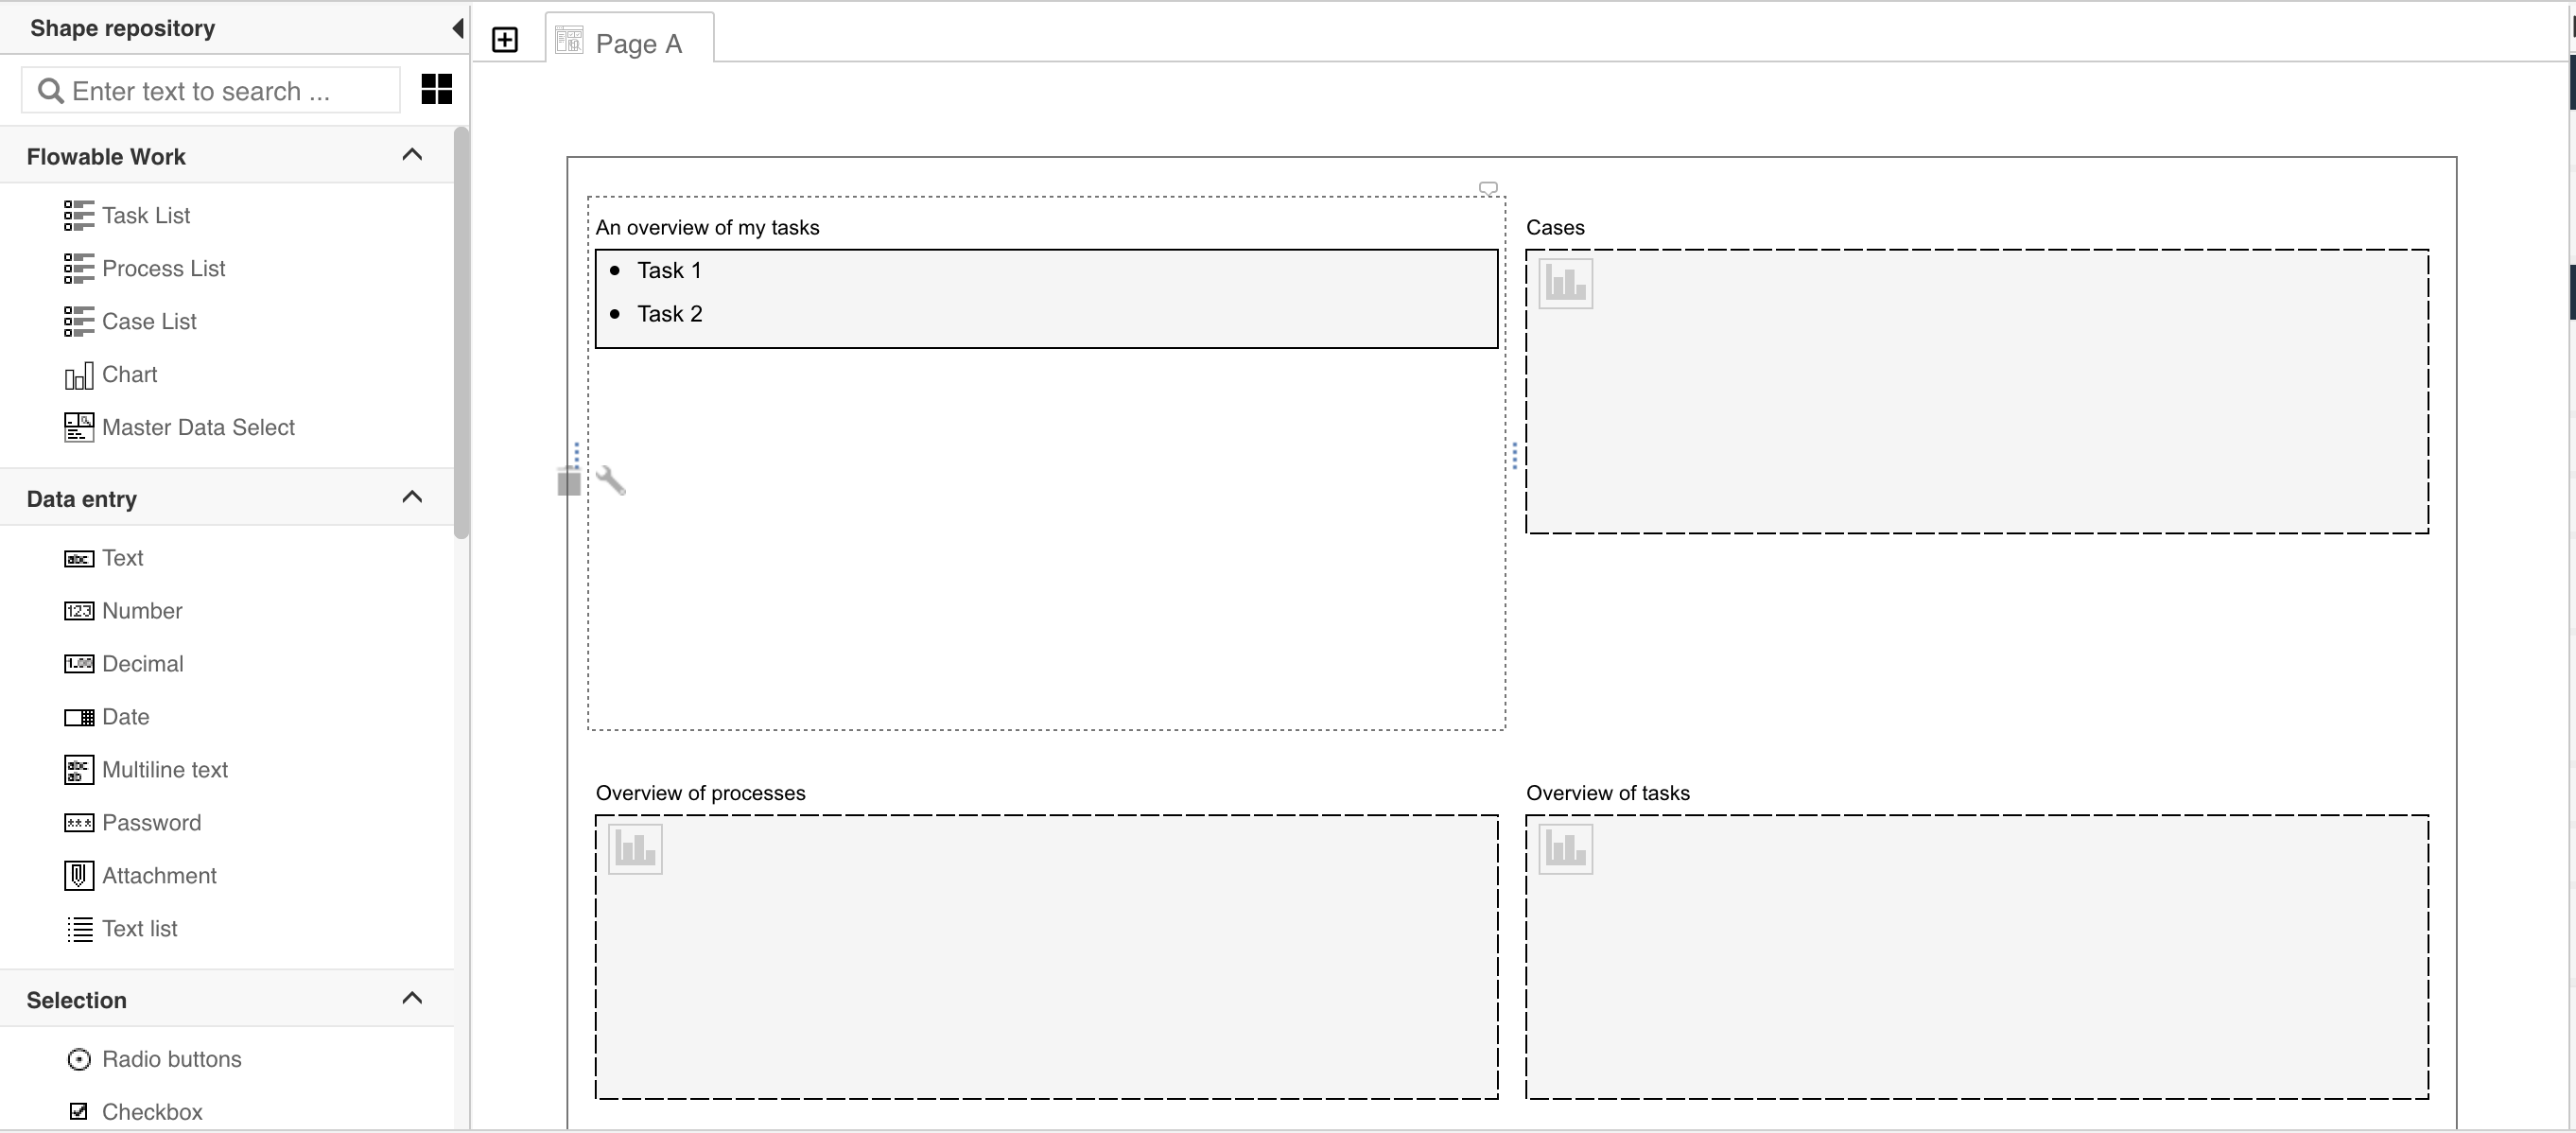
Let us have a closer look at the configuration of the task list. First, a filter is selected for the task list. This filter can be, for example, open to get a list of all the open CMMN and BPMN tasks. However, the filter can also be set to all to get a list of all tasks, open and completed. Another important filter is the definition keys field, which defines the list (comma-separated) of case and process definitions that should be filtered on. When the task list shows the tasks for two case definitions with keys customerCase and orderCase then the definition keys field is filled with customerCase, orderCase. In the following task list configuration example, the filter is set to open, and the definition keys field is left empty, which means that all open tasks where the logged-in user is involved in are shown in the task list.
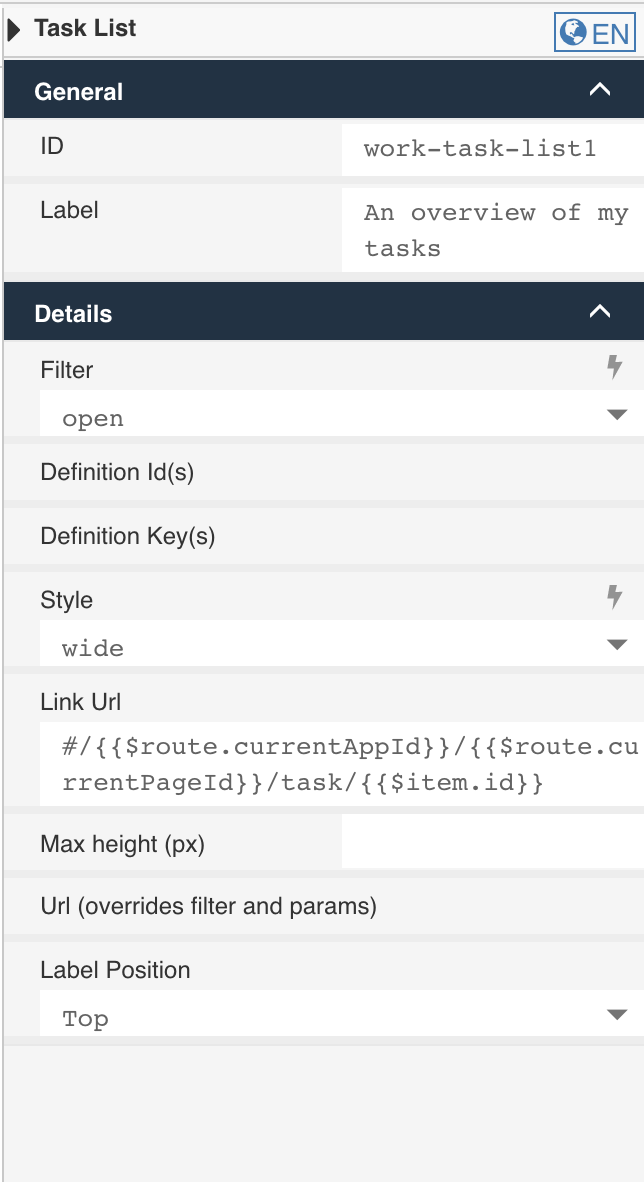
The link URL defines to which URL the Flowable Work or Engage application
navigates to when an item in the task list is clicked. By default, the
navigation goes to the task details view within the Flow-App context
(which is discussed in detail below). This is done with the following
default link URL value
#/{{$route.currentAppId}}/{{$route.currentPageId}}/task/{{$item.id}}
which uses the front end expression language to use the current app and
page context and refers to the selected item with {{$item.id}}.
In the screenshot of the task list configuration,
the link URL is filled-in, but if left empty, this same default link URL is used.
Now that the first Page is created, the Page is added to a Flow-App and deployed to the Flowable Work or Engage application. To create a Flow-App, a new application is created within the Apps tab. In addition to the Flow-App configuration, additional Case, Process, Decision, and Form models can be added here as well, like with any other application. The main difference is that the Include FlowApp pages checkbox is selected for a Flow-App, which enables the ability to add Pages to the application definition.

In this example, the Include FlowApp pages checkbox is selected, and the
FlowApp URL key is filled with a value of flowApp1. This means that the
URL part of this Flow-App that refers to the current app context has the
value of flowApp1. Two Pages are selected as part of this application,
including the Page with the task list and three charts previously discussed.
For each Page, a URL is defined that specifies what is used for the URL part
of the Page context. In addition, a comma-separated list of group permissions
is defined that limits the visibility of the Page to only users of one of
these groups. The same group permission can be set on the application level
as well with the Groups access, separated by commas property.
Now the Flow-App is defined, the next step is to publish the application and look at the result in the Flowable Work or Engage application.
Using a Flow-App in Flowable Work or Engage
After the Flow-App is published to the Flowable Work or Engage application the new app, Flow app A, appears as a menu item in the left menu.
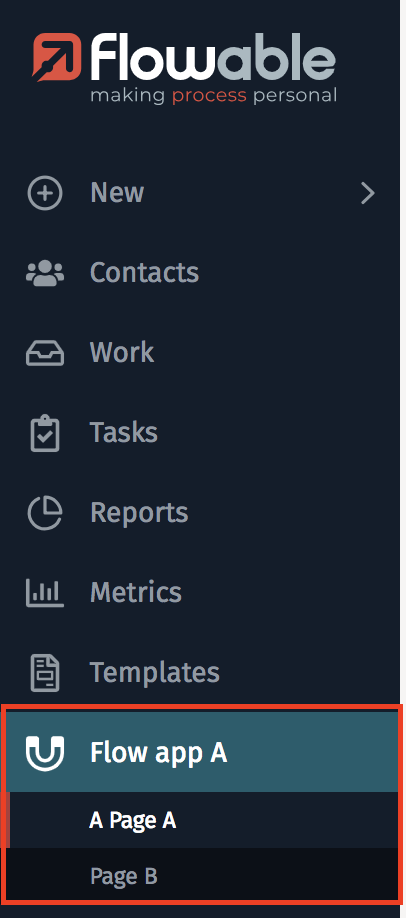
The name of the application is the label of the menu item, and each Page of the Flow-App is a sub-menu item. When the Flow-App menu item is selected, automatically the first Page in the sub-menu list is presented in the details view.
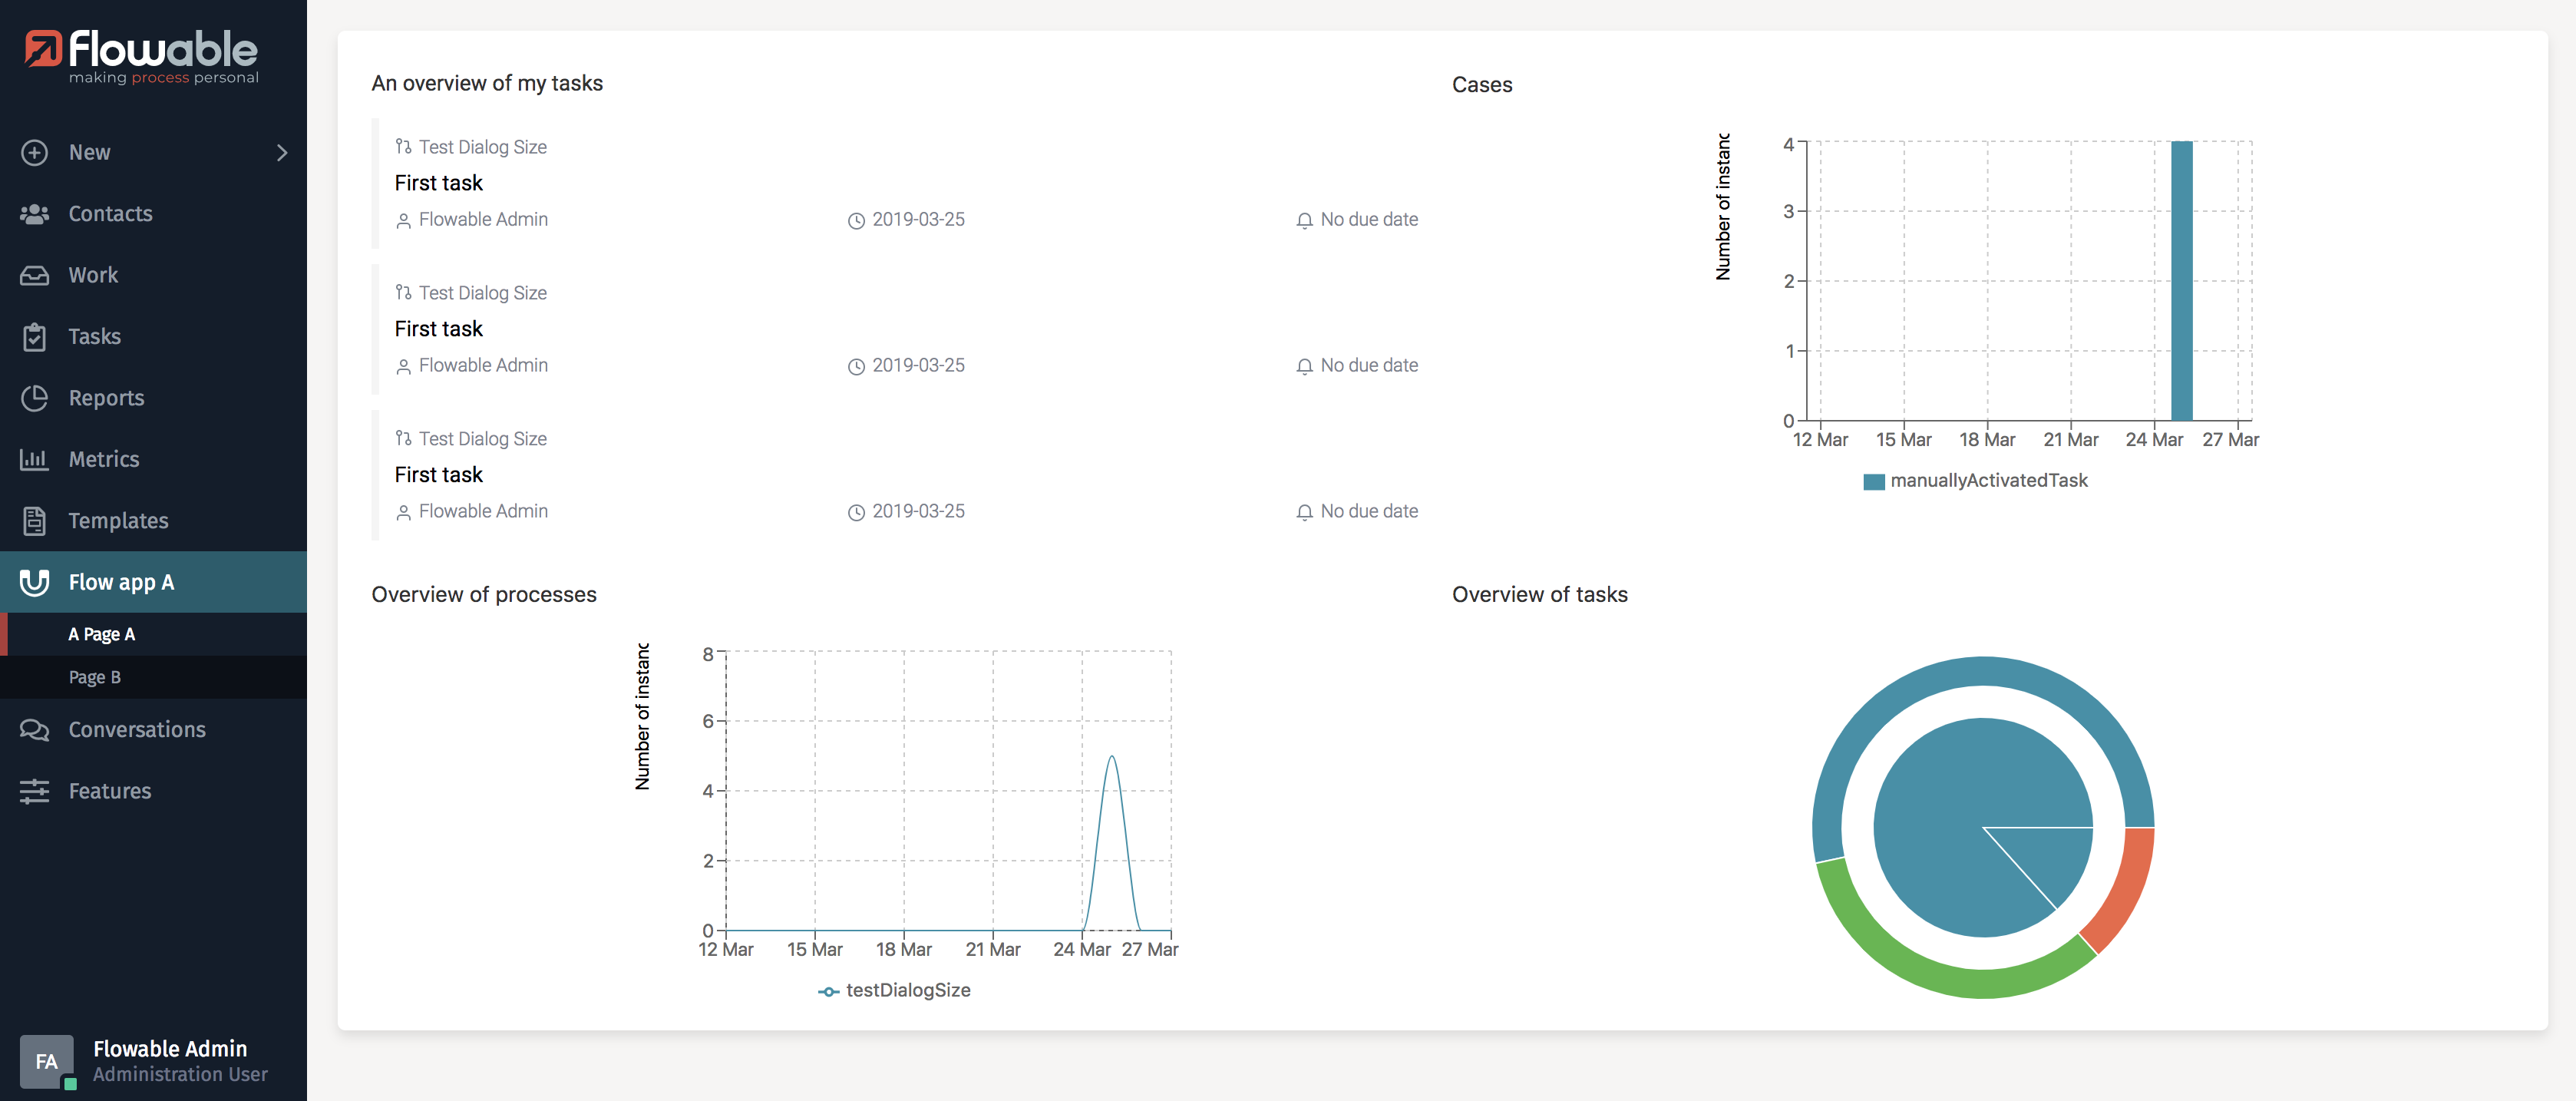
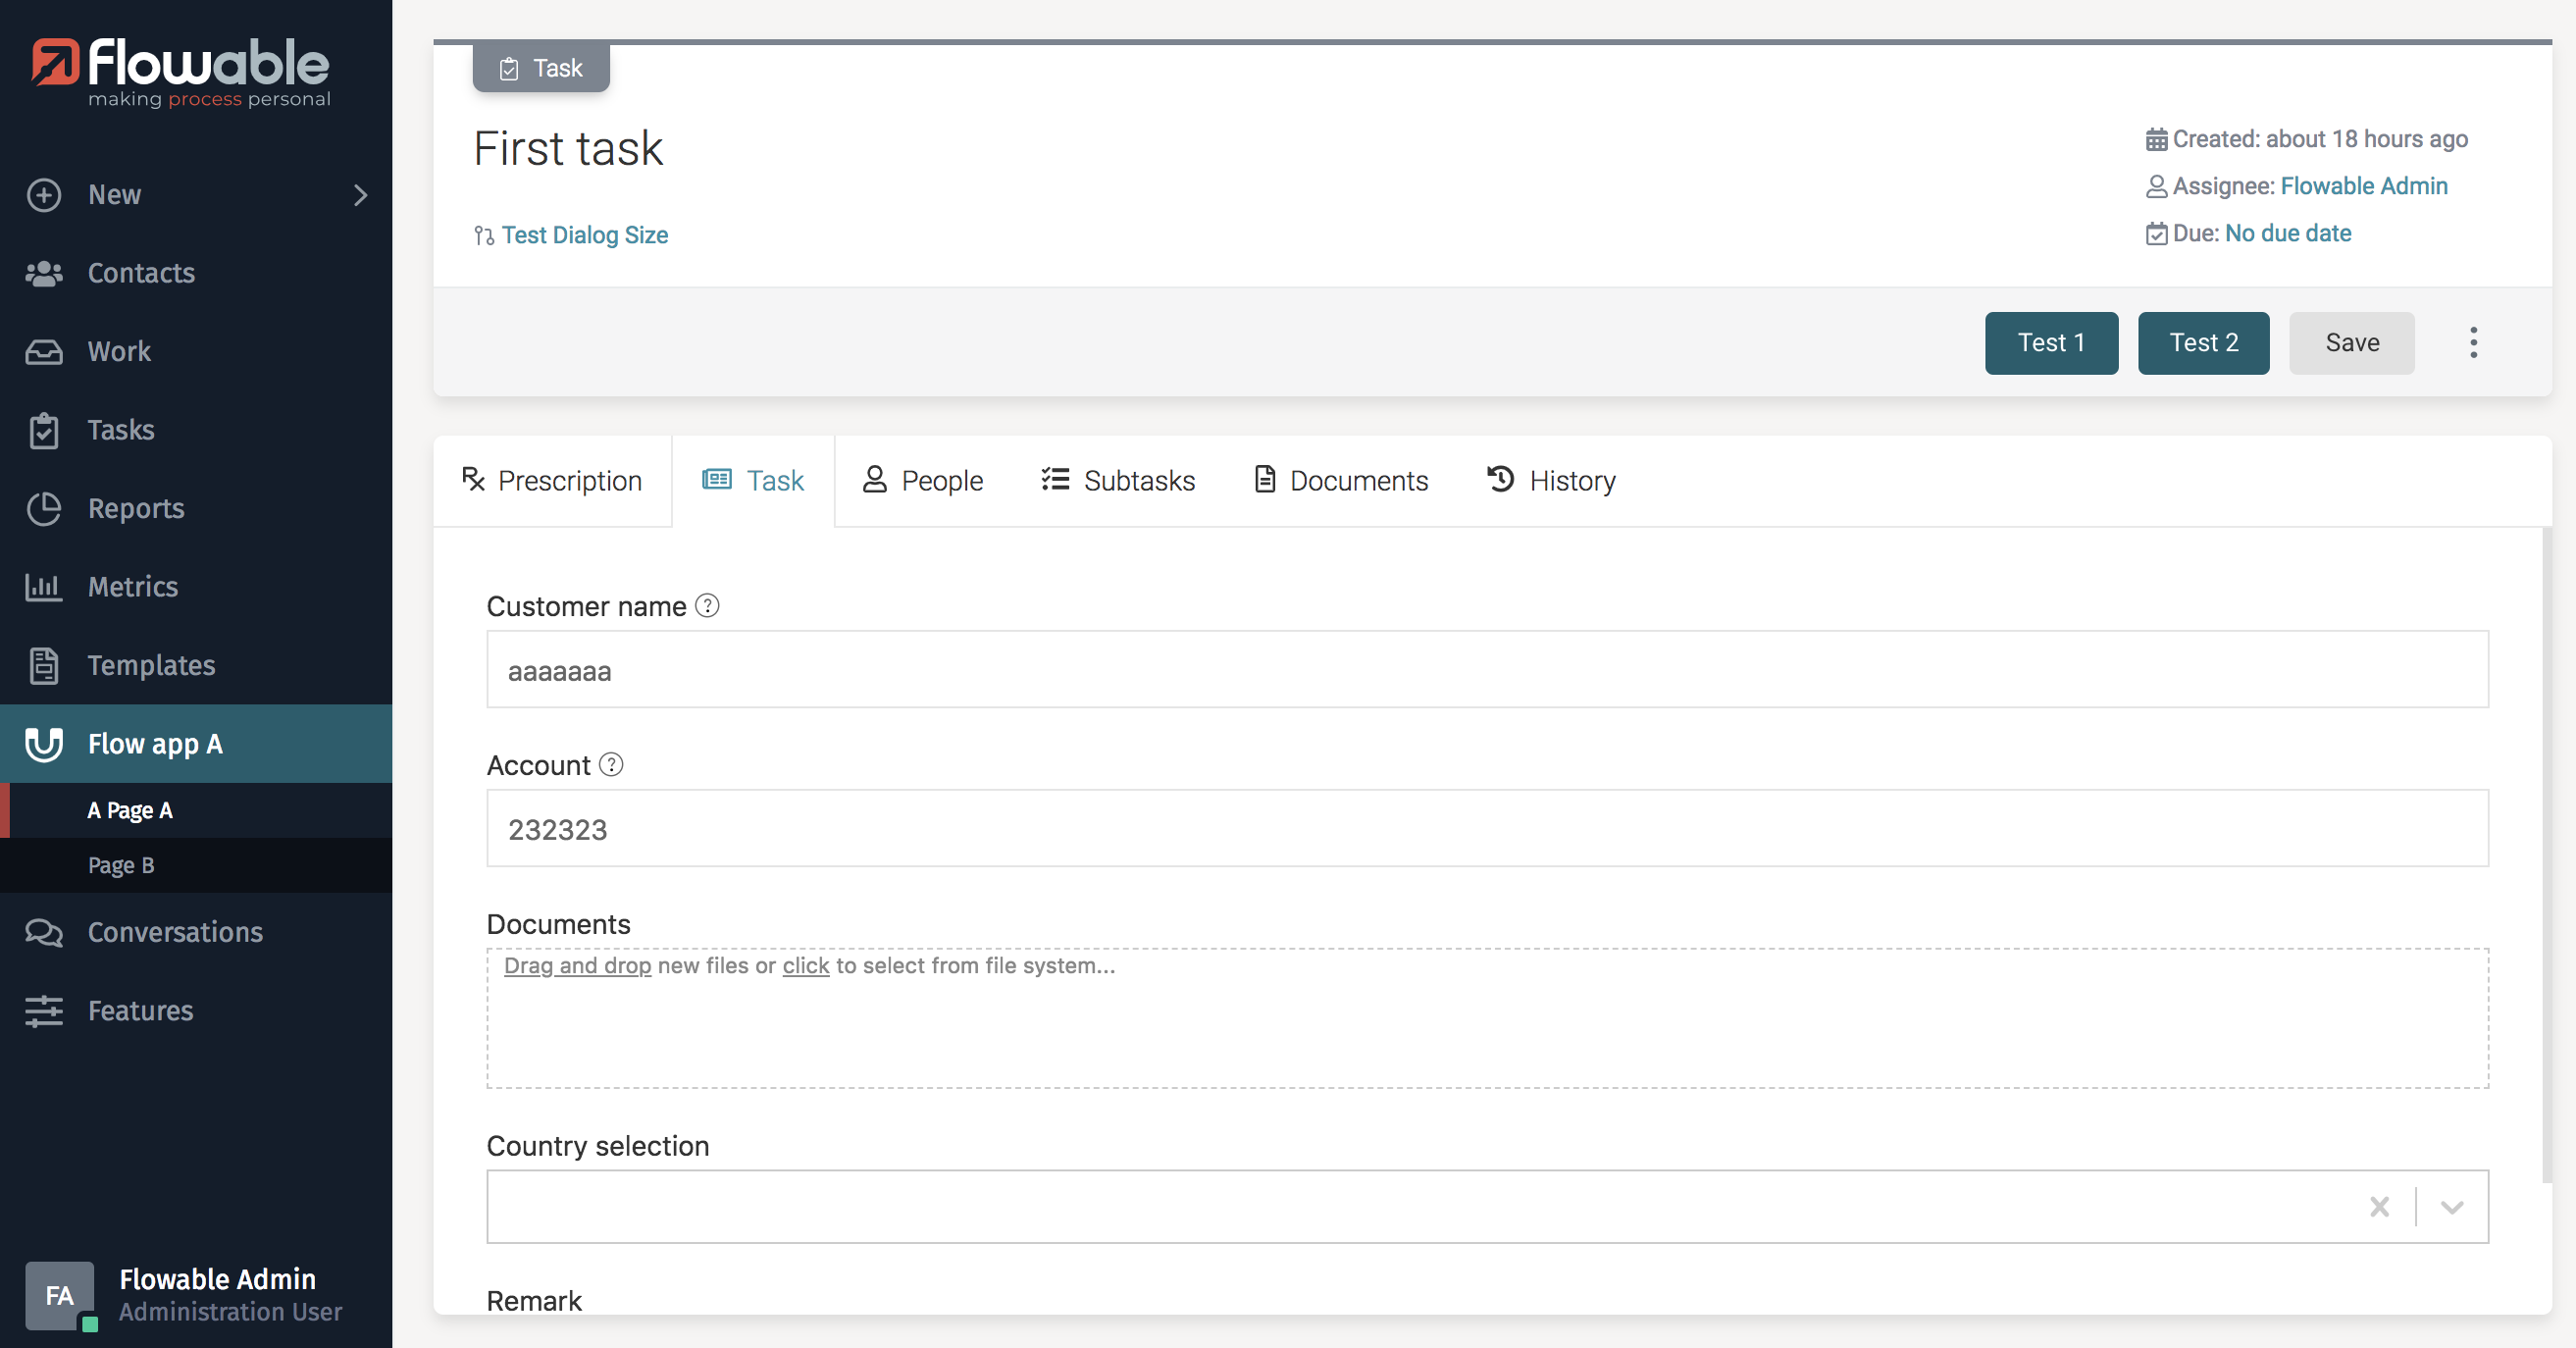
As can be seen in the screenshot, this Page view example contains the four form field components added in Flowable Design. The task list is showing three open tasks for the logged-in user. In the case and process charts, the number of started instances per day is shown, and in the task pie chart, the number of created tasks per task type is shown. When clicking on one of the task items in the task list, the Flowable Work or Engage application navigate to the task details view. It is important to note that the application stays within the context of the Flow-App and the selected Page.
Also, when navigating to the parent process instance, the Flowable Work or Engage application shows the view within the context of the selected Flow-App and Page. To go back to the Page dashboard view, once again click the Page sub-menu item.