Verify Address
 Outdated documentation page
This is an old version of the documentation for Flowable until version 3.13 and for the Angular-based Flowable Design 3.14/3.15. If you are running the latest version of Flowable please check out the current version of this page.
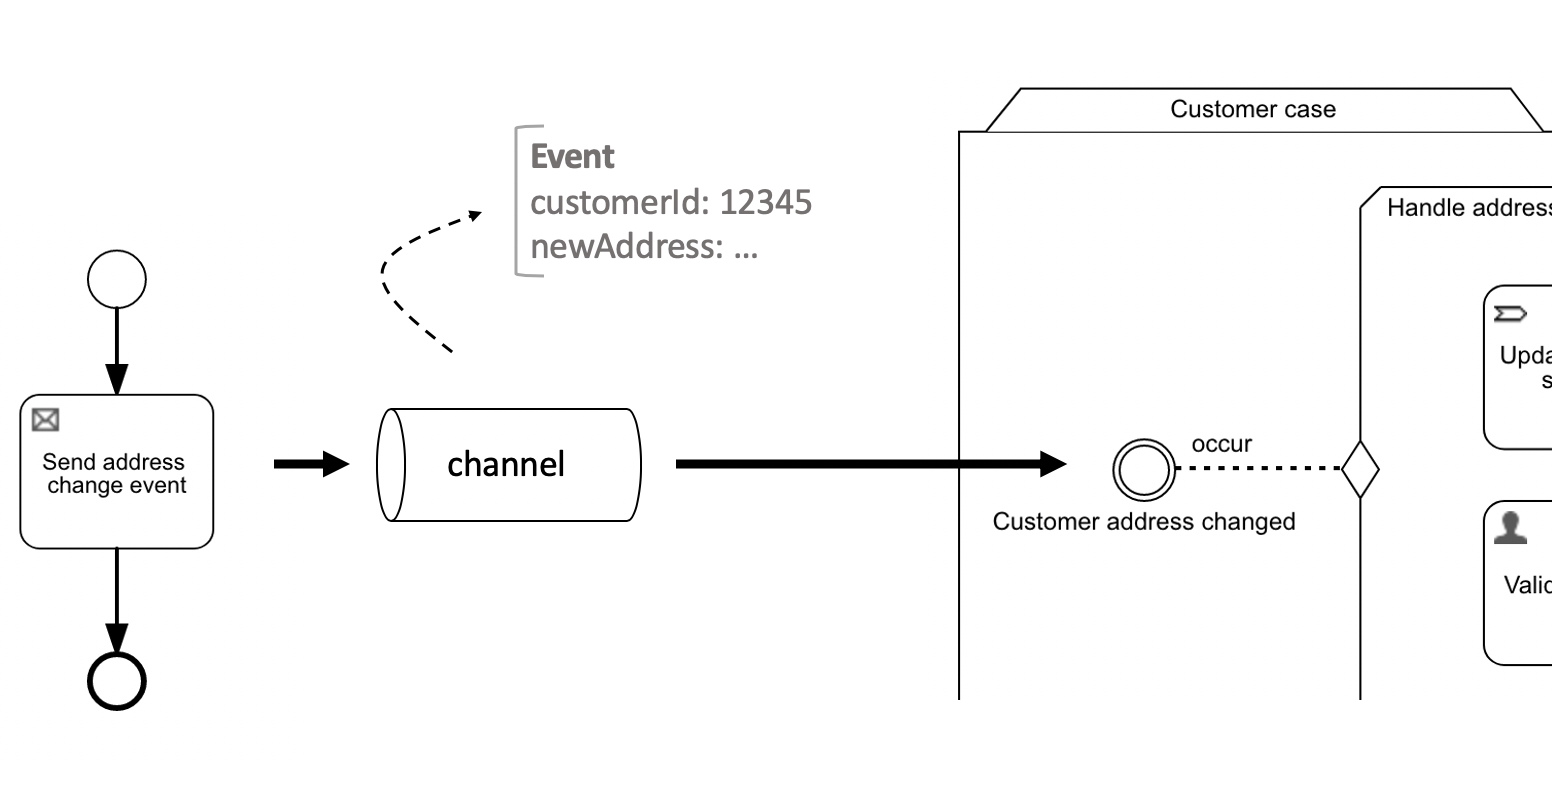
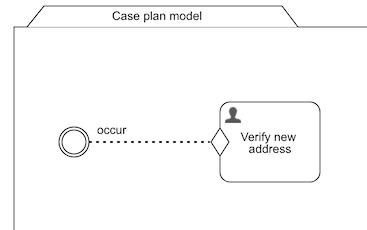
Let's build a simple example to get familiar with channel and event model concepts. We'll use the "customer address change" event that's been used throughout the previous sections. To keep things simple, we'll model the "event sending" part in a BPMN process model and the "event receiving" part in a CMMN model, as shown in the picture below.
(In a realistic setup, the event probably comes from an external system like a CRM application)
 note
noteWe'll be using Apache ActiveMQ in this example. Of course, this can be changed to Apache Kafka or RabbitMQ easily.
If you want to follow along, the Flowable Engage Trial is configured out of the box to have ActiveMQ enabled and Flowable able to connect to it.
The App Model
Let's create the app model first. In Flowable Design go to Apps, click the large plus icon and then select Create a new app. Give it a name and key. We'll be creating the process and case model from here. That way, all referenced models (like the channel and event model) will be part of the same app automatically.
The Process Model
Create a new BPMN process model. In the app view, click on Add model and select Create a new model for the app and then Process. Give it a name and key.
We're going to keep it simple:
- Add a
Send event task, following the start event - Add a none
end event, following the send event task
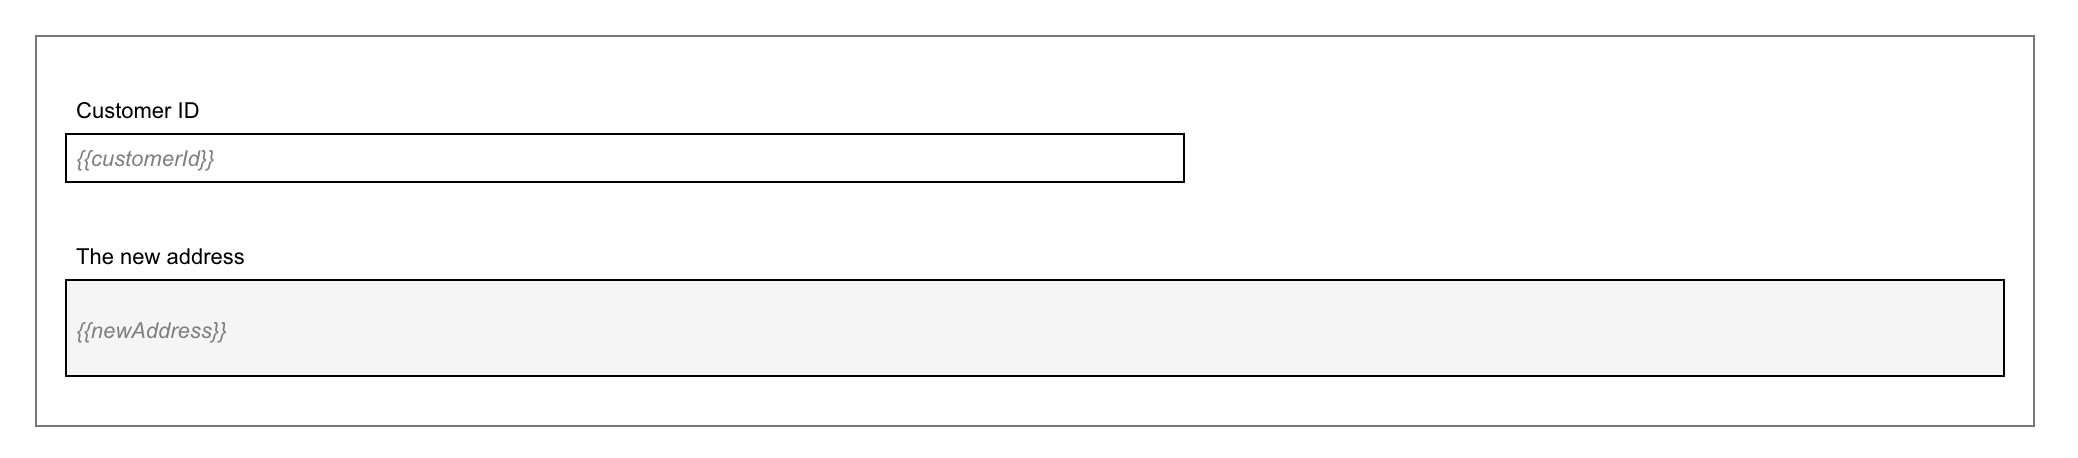
Select the start event, and create the following start form, containing a customerId and newAddress form field:
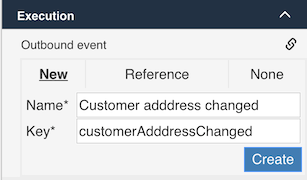
Now select the Send event task and give it a new name like Send address changed event. In the property panel on the right-hand side, click on the Outbound event property and create a new event model we'll name Address changed:
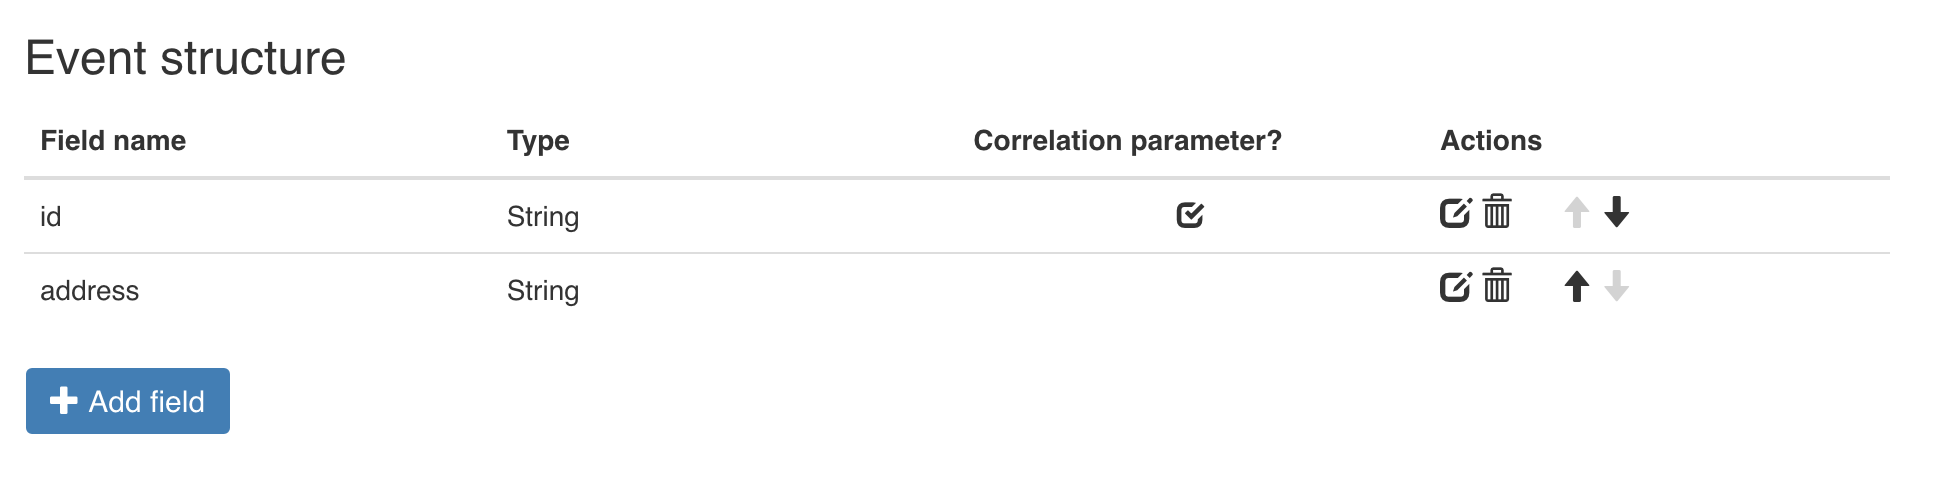
Add two fields to the event model:
- id, which we'll also mark as a correlation parameter
- address
It should look like this:
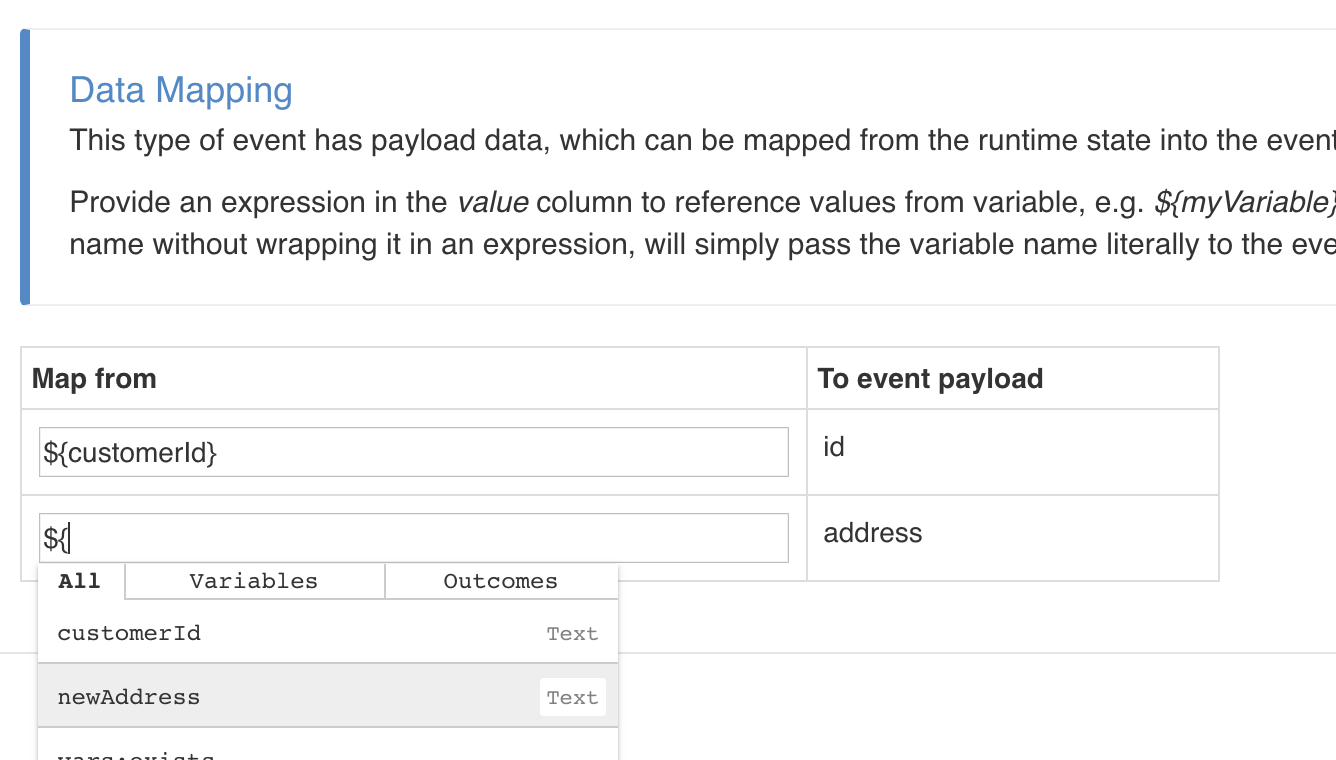
Save all models (the second button on the toolbar). Switch back to the process model (select the tab above in the editor). A new property saying no outbound event configuration has appeared. Click it.
Now we need to map the fields from the start form to the event data structure. Note that typing ${ will show the variable assistant which makes this an easy job:
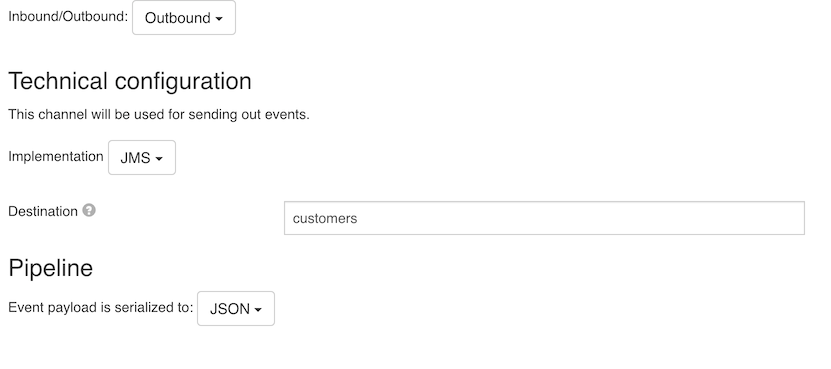
The last thing we need to do is configure which channel we want to send out this event. Select the Outbound channel property and create a new channel model, like we did above for the event model.
Configuring this channel is easy:
- Change the type to
Outbound. - Select
JMSfor the implementation. - Pick a name for the destination (ActiveMQ creates a new queue automatically when it doesn't exist)
It should look like this:
Save all models (second button from the left on the toolbar) and switch back to the process model.
That's it! Let's have a look at the receiving CMMN side of things.
The Case Model
Let's create the case model now. From the current view, click the plus icon just below the toolbar and select Case. Give it a name and key as usual.
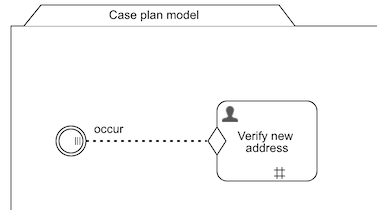
There's a plethora of things possible now, but for the sake of simplicity, let's only listen to the event and create a user task when it is received:
- Create a start form for the case, with only one text field
customerId - Add an event listener to the case
- Add a user task to the case
- Add a form to the user task with one text field
customerAddress - Connect the event listener with an entry sentry to the event listener
It should now look like this:
noteWe'll create the case instance 'manually', passing in the customer ID in the form. It's also possible to have an event start the case instance. Select the case plan model and then select the Inbound event property to do this.
Select the event listener. In the property panel, select the Inbound event property and choose (second tab) the same event as the one that was created for the send event task in the previous section.
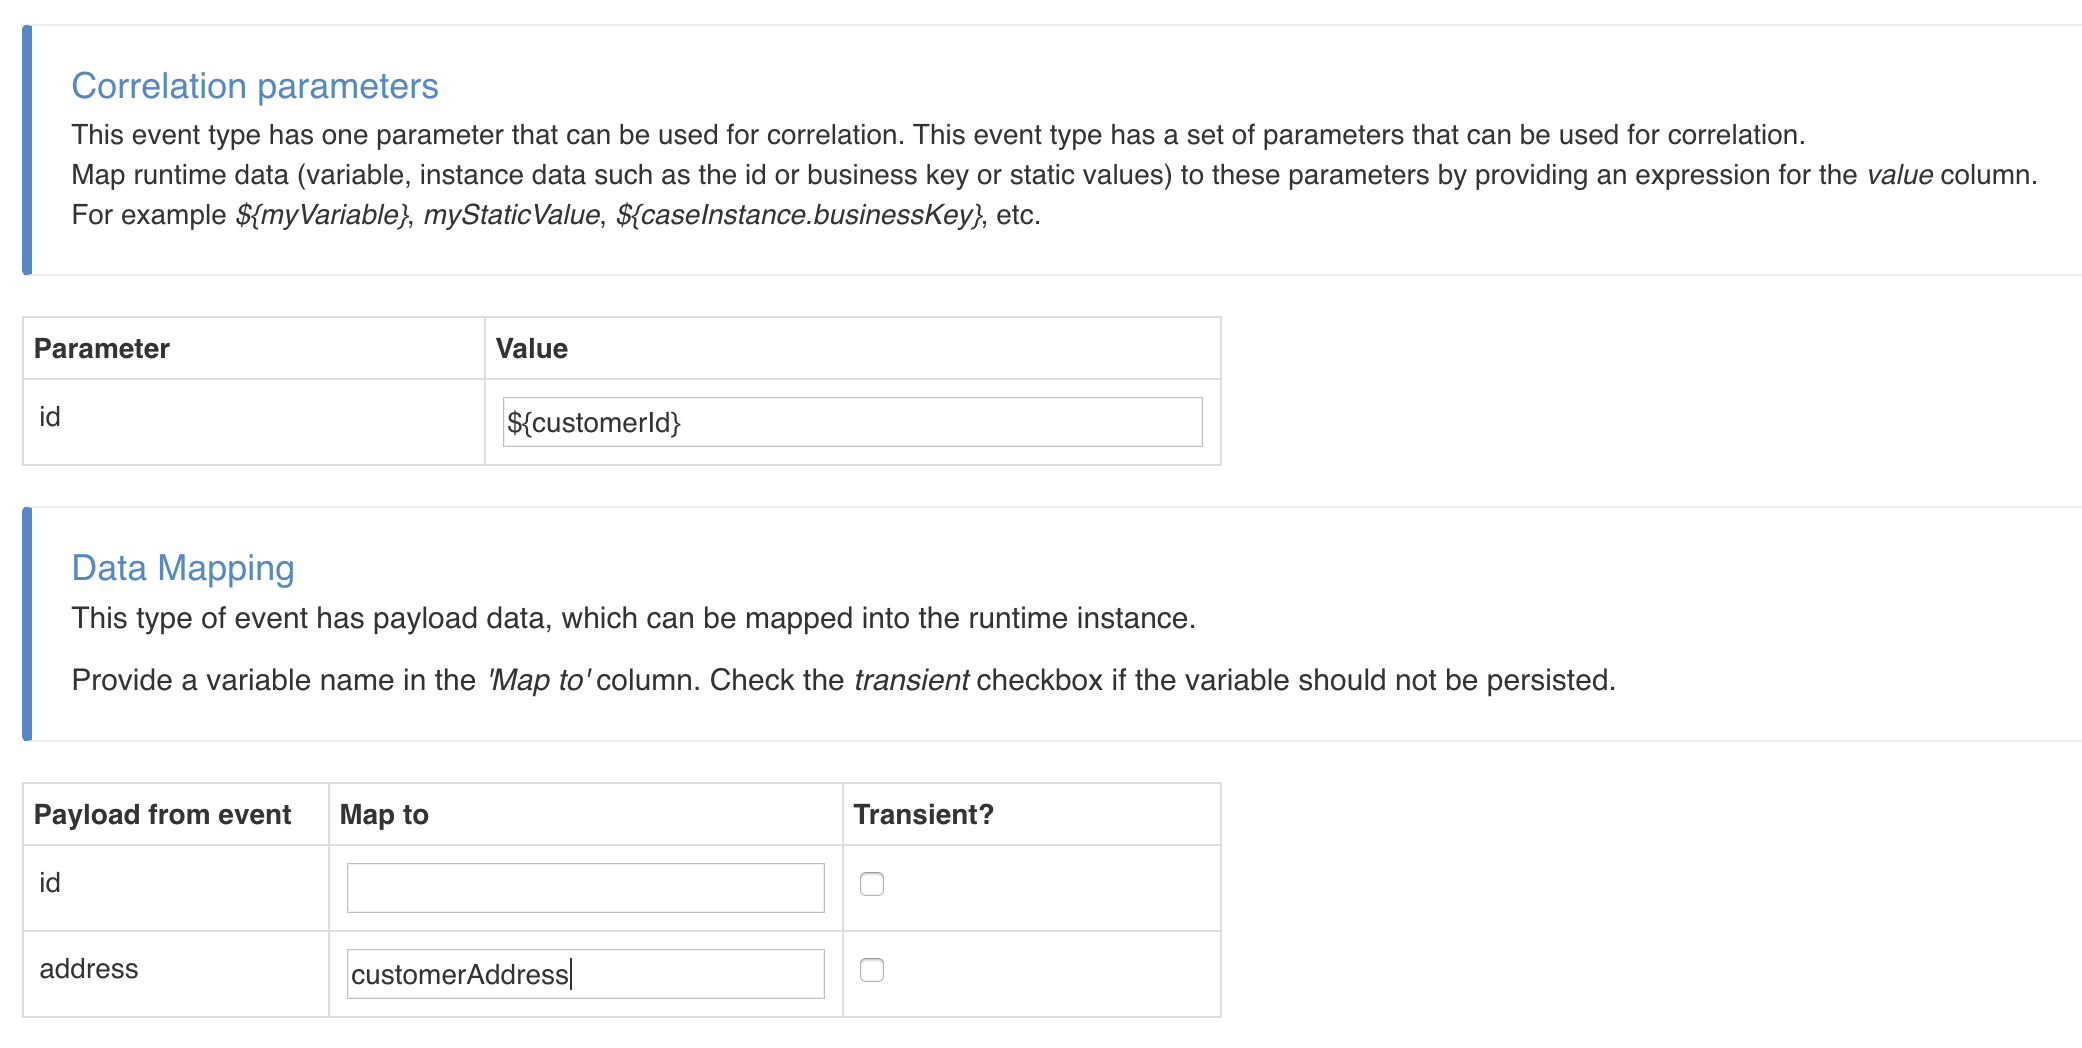
Now No inbound event configuration appears in the property panel. Click it and fill in the event mapping) as follows:
- We want to correlate on the customer identifier. Fill in
${customerId}for theid. - No need to map the
idevent field (leave it blank), we already have it stored in the case. - Add
customerAddressas the variable name to store the new address. Note that this needs to map the name of the variable we added to the task form, as we want to display the new address in this form.
The last thing to do here is to create a channel model to receive the incoming channels.
noteChannel and event models can be reused over multiple process and case models.
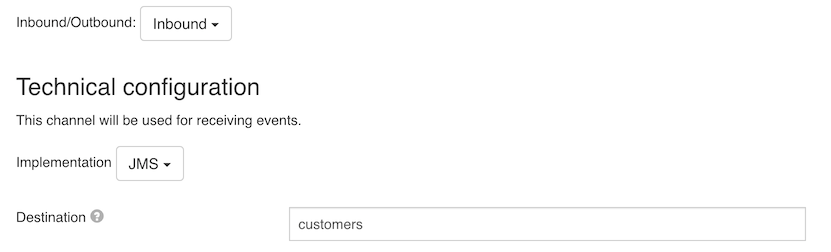
Click on the Inbound channel property, and create a new channel model. Do the following steps:
- Change the implementation to
JMS - Fill in the same name for the
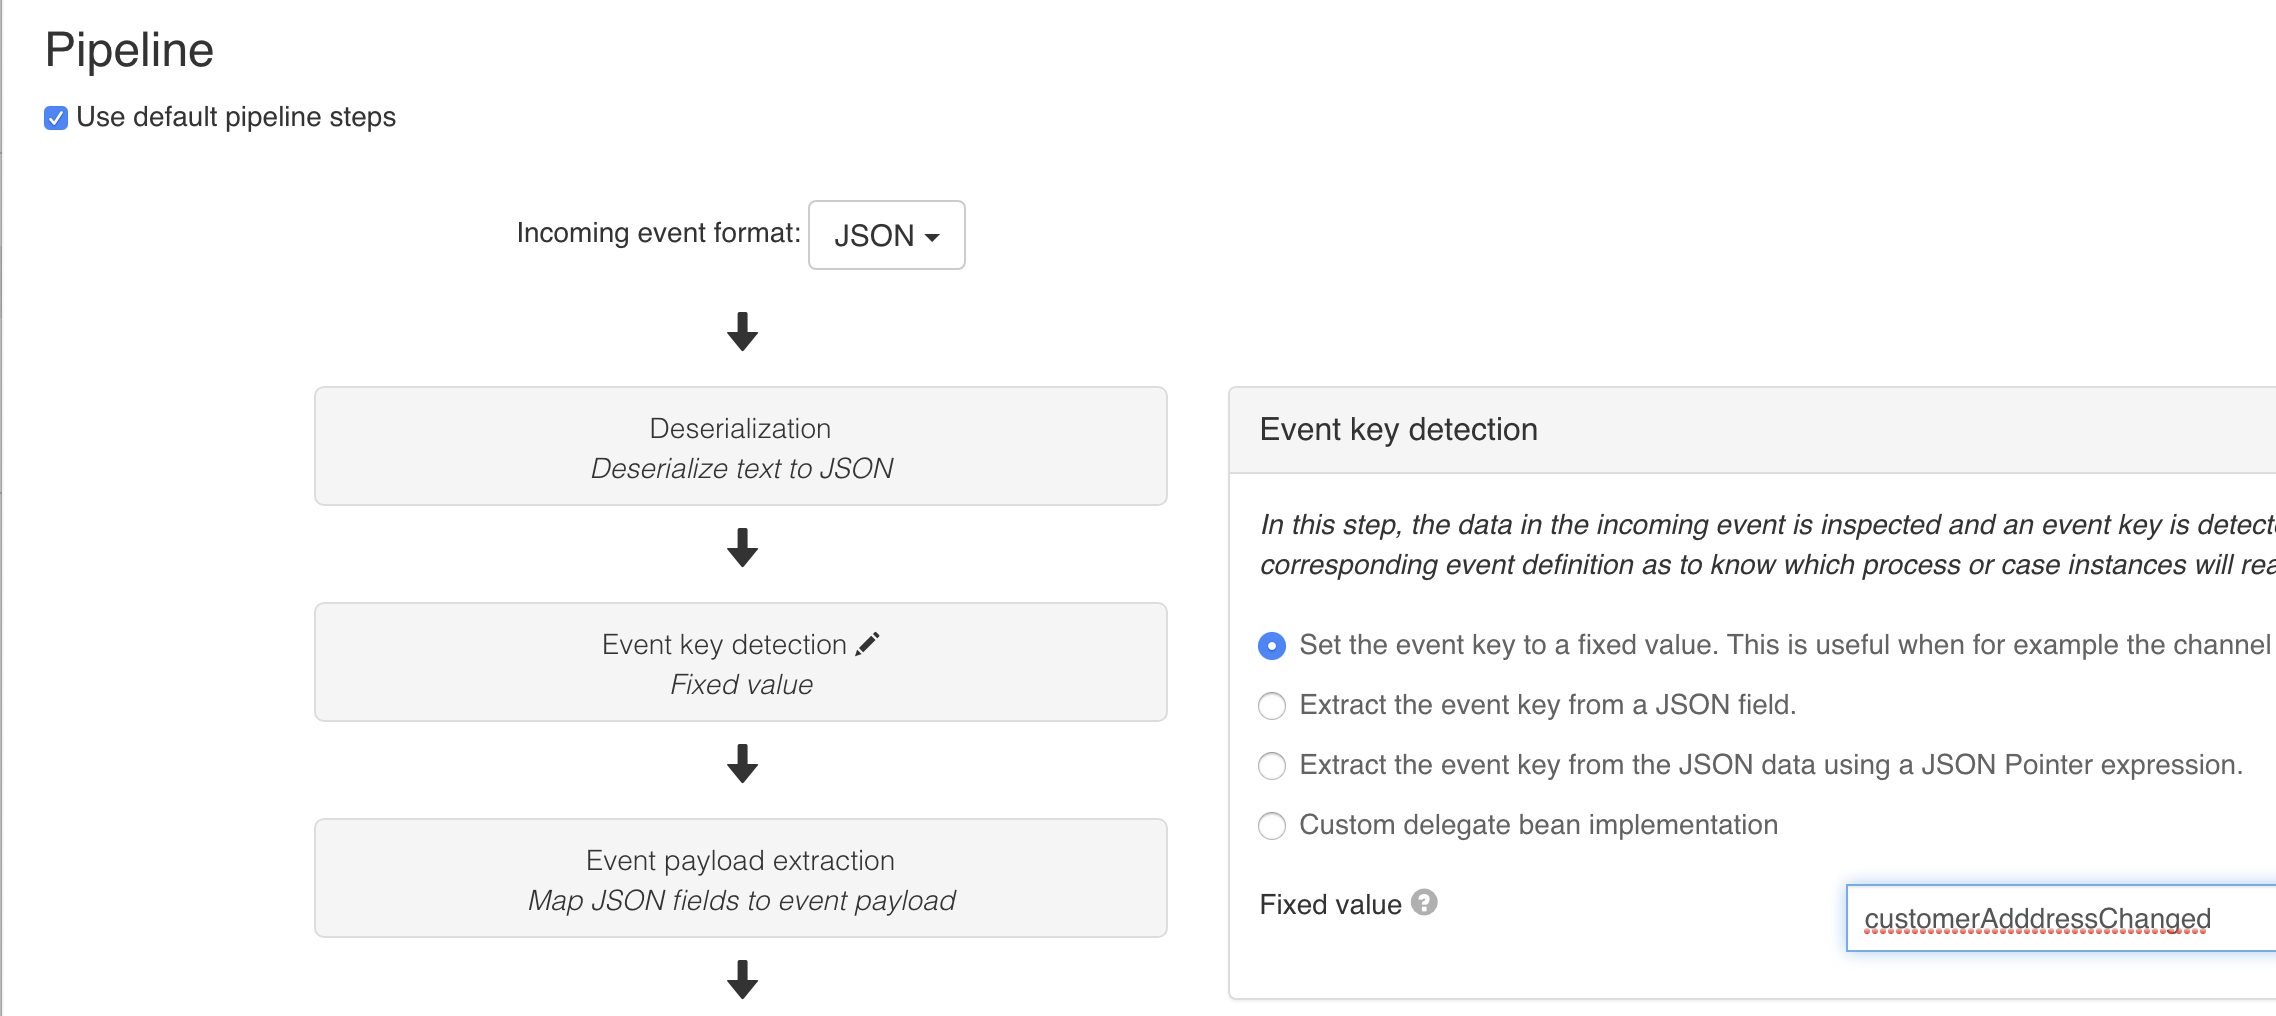
Destinationas the name used in the send event task above. - In the pipeline, select the
Event key detectionstep, keep the first selection option and fill incustomerAddressChanged(the key of the event model created earlier).
This should look like this:
And for the pipeline:
Save all models. That's it. It's now time to see in action!
Run it
Deploy the app model. Switch to Flowable Work or Engage.
We need to start the case instance first, mimicking that we've got a long-running case instance per customer:
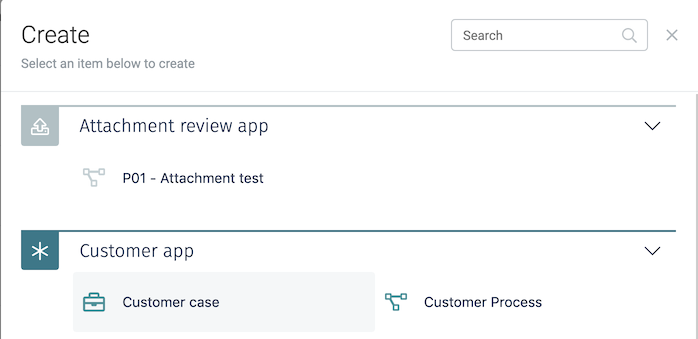
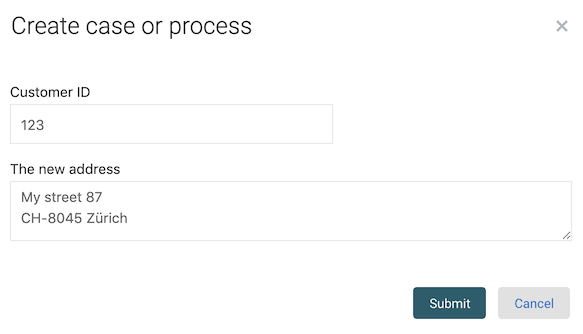
The start form will be shown. Fill in a customer ID value, for example 123. The case instance will have nothing open right now (because the only thing it is doing is waiting for the event).
Now start the process from the same app. Fill in the start form and make sure the same 123 customer id is used:
What will happen now:
- The form fields are stored as process variables
- The process variables are mapped into the event fields in the send event task
- The event is passed to the channel, which will send it to the
customersJMS destination - The inbound channel is listening to the same
customersqueue. It receives the event, which is processed in the pipeline. The event key is extracted, so now is known which event type is received. - The case instance we've started earlier, is waiting to receive an event of that type. It is correlating on the
123value of the customer Id. It's received and the task is created.
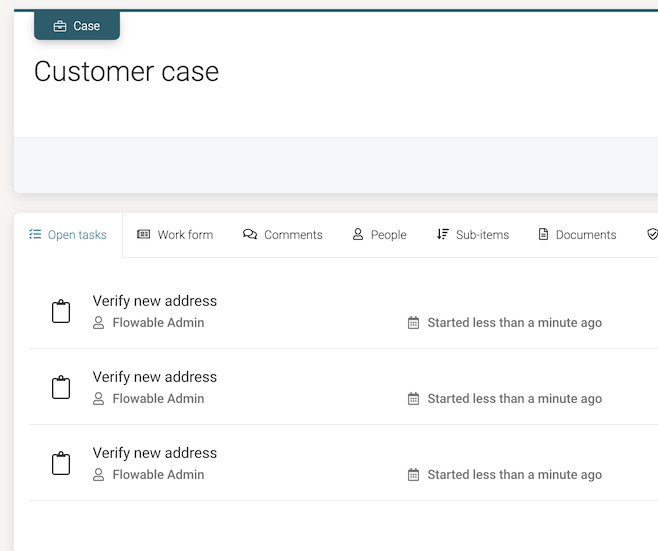
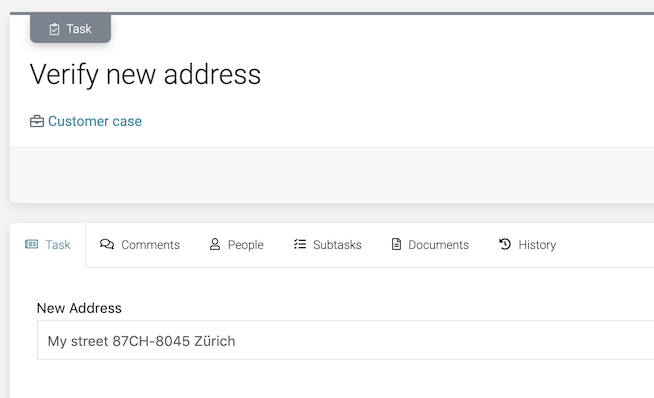
Now refresh the case instance view. Before, there was no user task. But now there is a Verify new address task, showing the new address:
Make It Repeatable
There's a downside to our current model: it only captures the event once. Let's fix that.
Switch back to Flowable Design and open the case model. Select the event listener. In the property panel, check the repetition checkbox under Execution. Do the same thing for the user task. This is visually indicated with a small marker on both elements:
Deploy the app model again.
noteThis actually creates a new channel definition version which gets deployed. When this happens, the previous JMS listener is removed and a new one, with the latest configuration properties, is instantiated.
Create a new case instance, giving it another customer id. Start a few process instances with the same customer id. For each address change, there will now be a user task created: