Part 2: Decision Service
 Outdated documentation page
This is an old version of the documentation for Flowable until version 3.13 and for the Angular-based Flowable Design 3.14/3.15. If you are running the latest version of Flowable please check out the current version of this page.
In the first part of this modeling guide we created the process 'Loan Request Approval' that used the outcome of a DMN decision table. We will reuse this process but in this part we will create a DMN decision service that consists of multiple DMN decisions with decision tables. The Decision task will execute the DMN decision service instead of DMN decision table. The process will act on the outcome of the decision service.
The process 'Loan Request Approval'
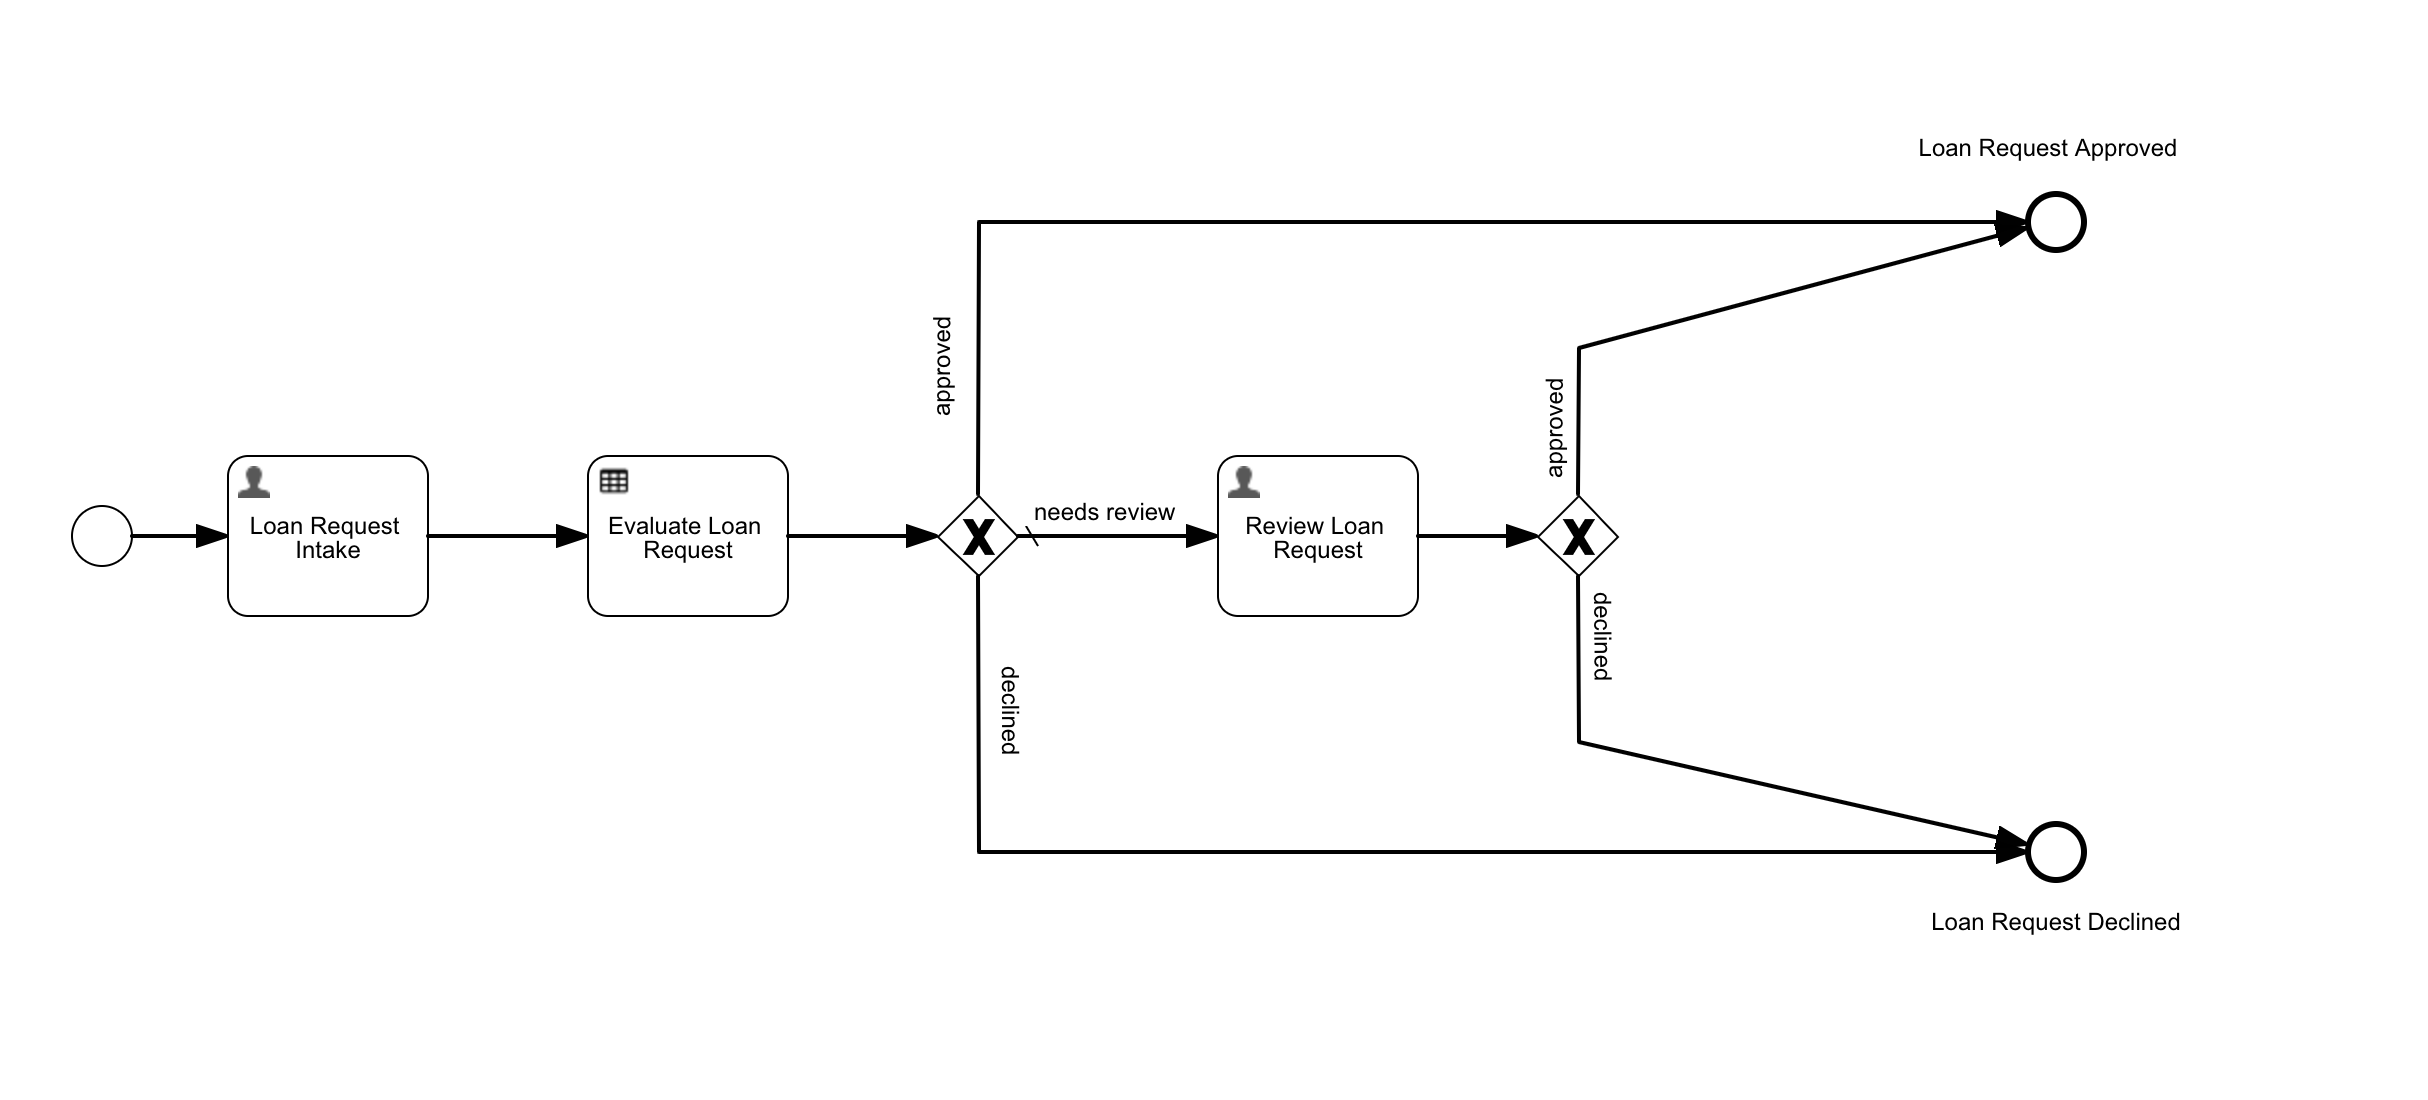
We will modify the following parts of the process;
- Add an input field to the
Loan Request Intake Form - Create a DMN decision service that will be executed by the
Evaluate Loan Request Decision Task
The additional field in the Loan Request Intake Form will be used in one of the decisions in the decision service.
In the new DMN decision service an additional decision table will be executed (in addition to the existing table). The result of both tables will be used to evaluate a new DMN decision. The result of this decision will be the result of the decision service and made available to the process.
Step 1: Modify the 'Loan Request Intake Form'
In Flowable Design, select the Apps section and then select the Loan Request App. Then select the Forms section and open the Loan Request Intake form by selecting it.
In the Form Designer, we will add the following field;
- type: 'Number', name: Credit Score, id: creditScore
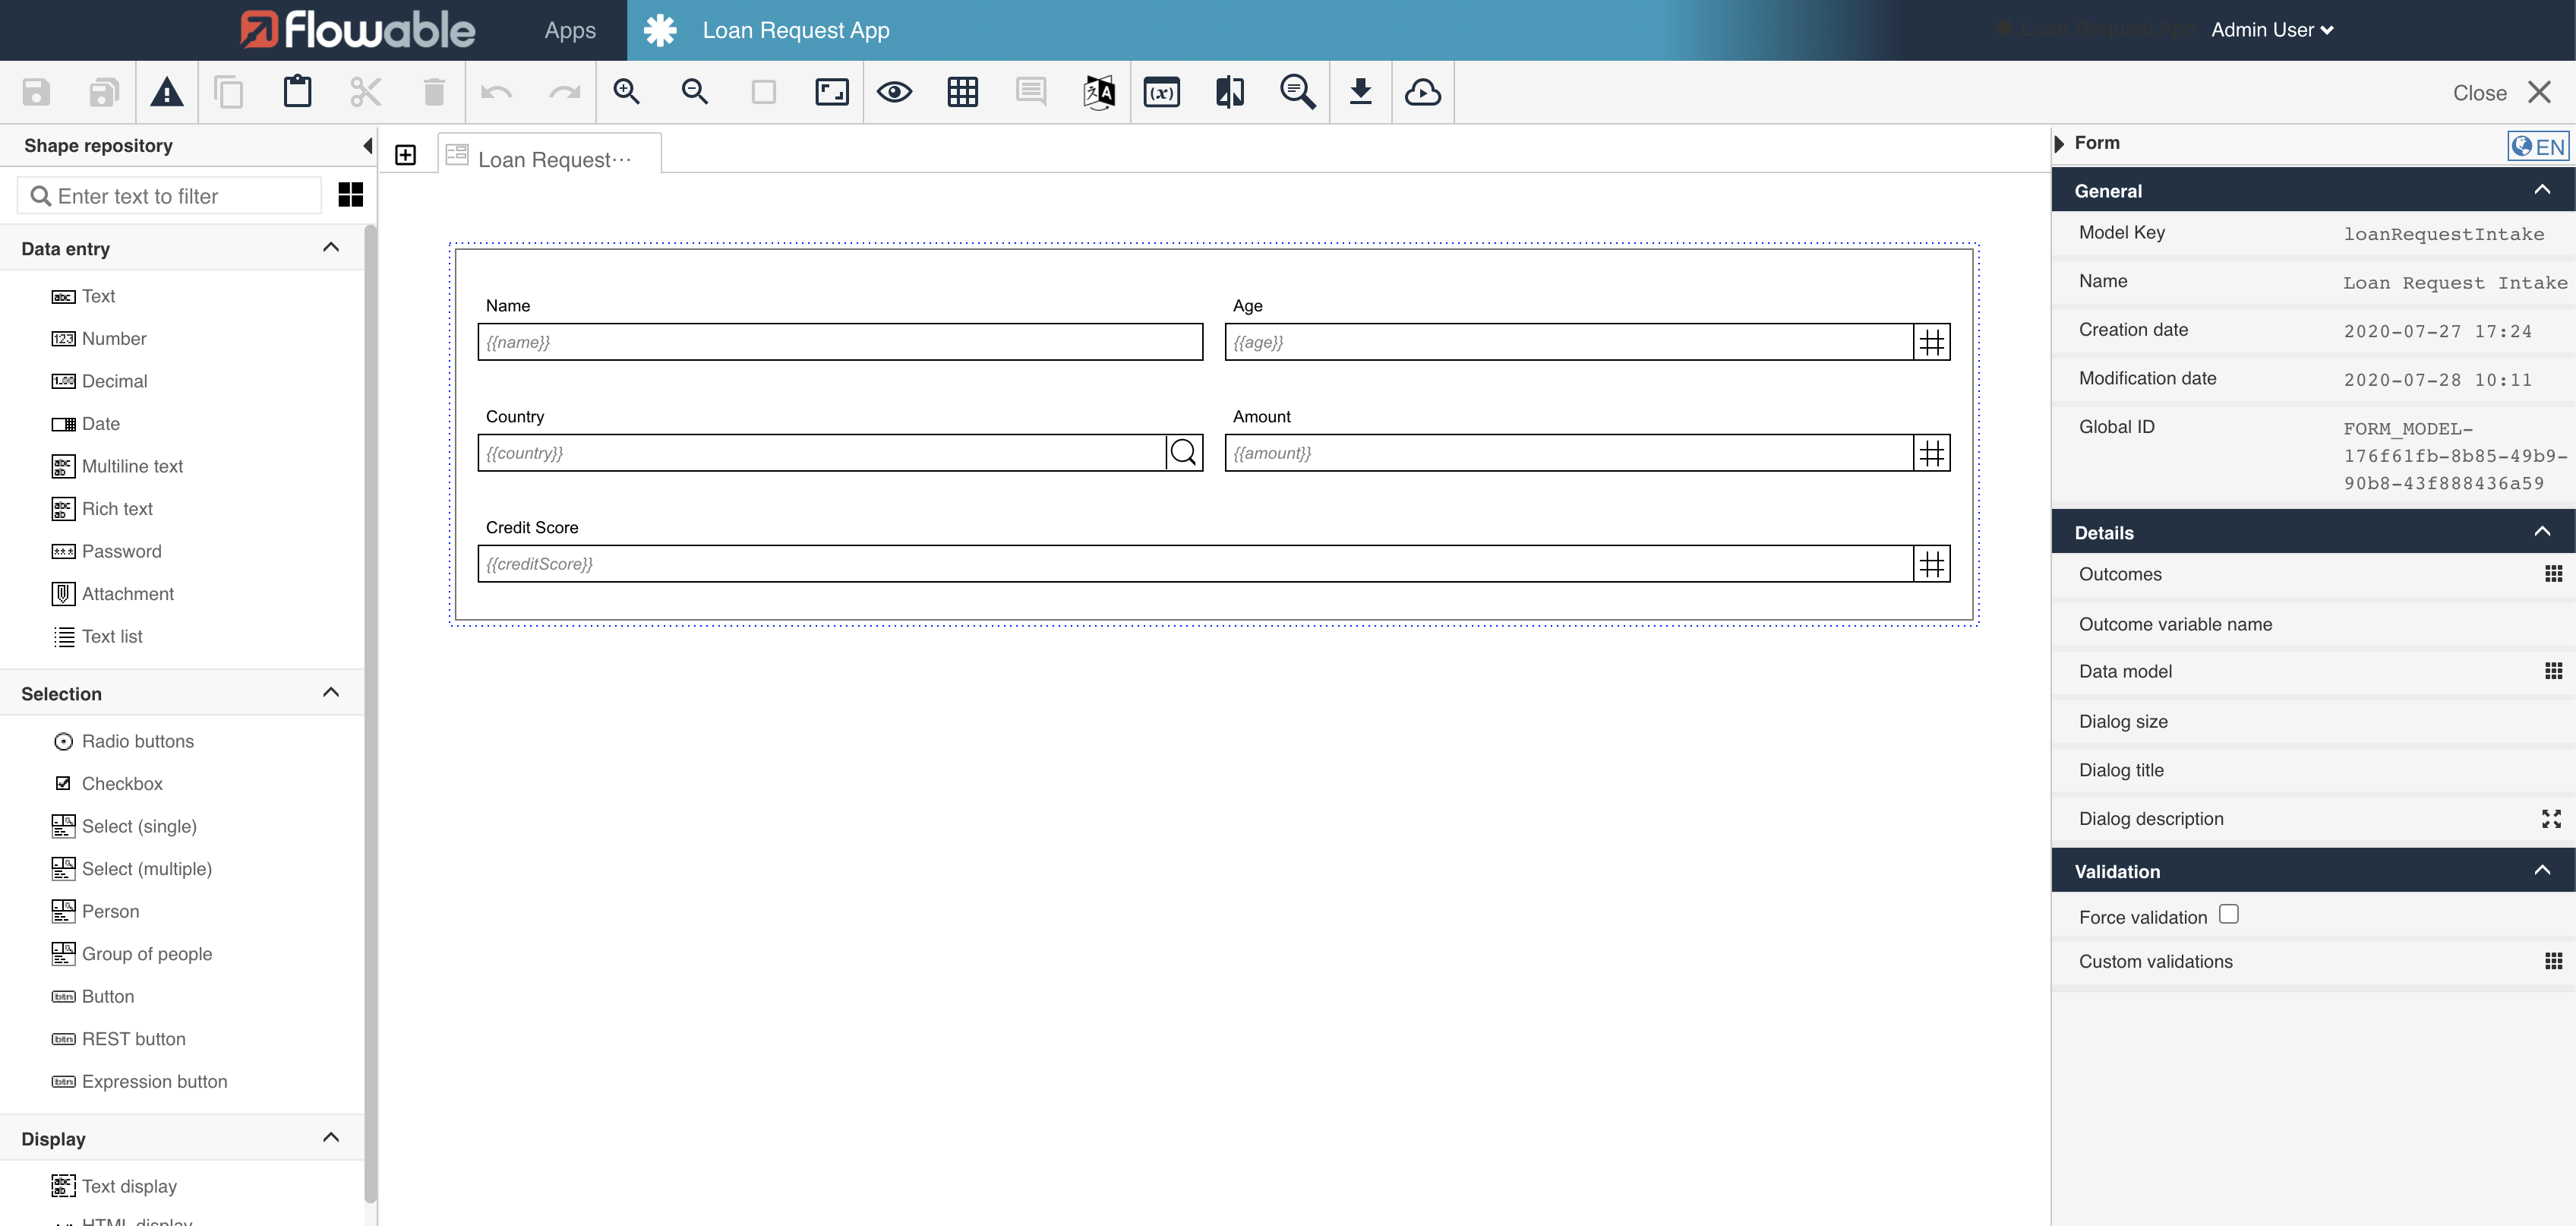
The form is done and is saved by selecting the Save button in the toolbar. After the form is saved, navigate back to the app by selecting the Close button in the toolbar.
Step 2: Create the DMN decision service
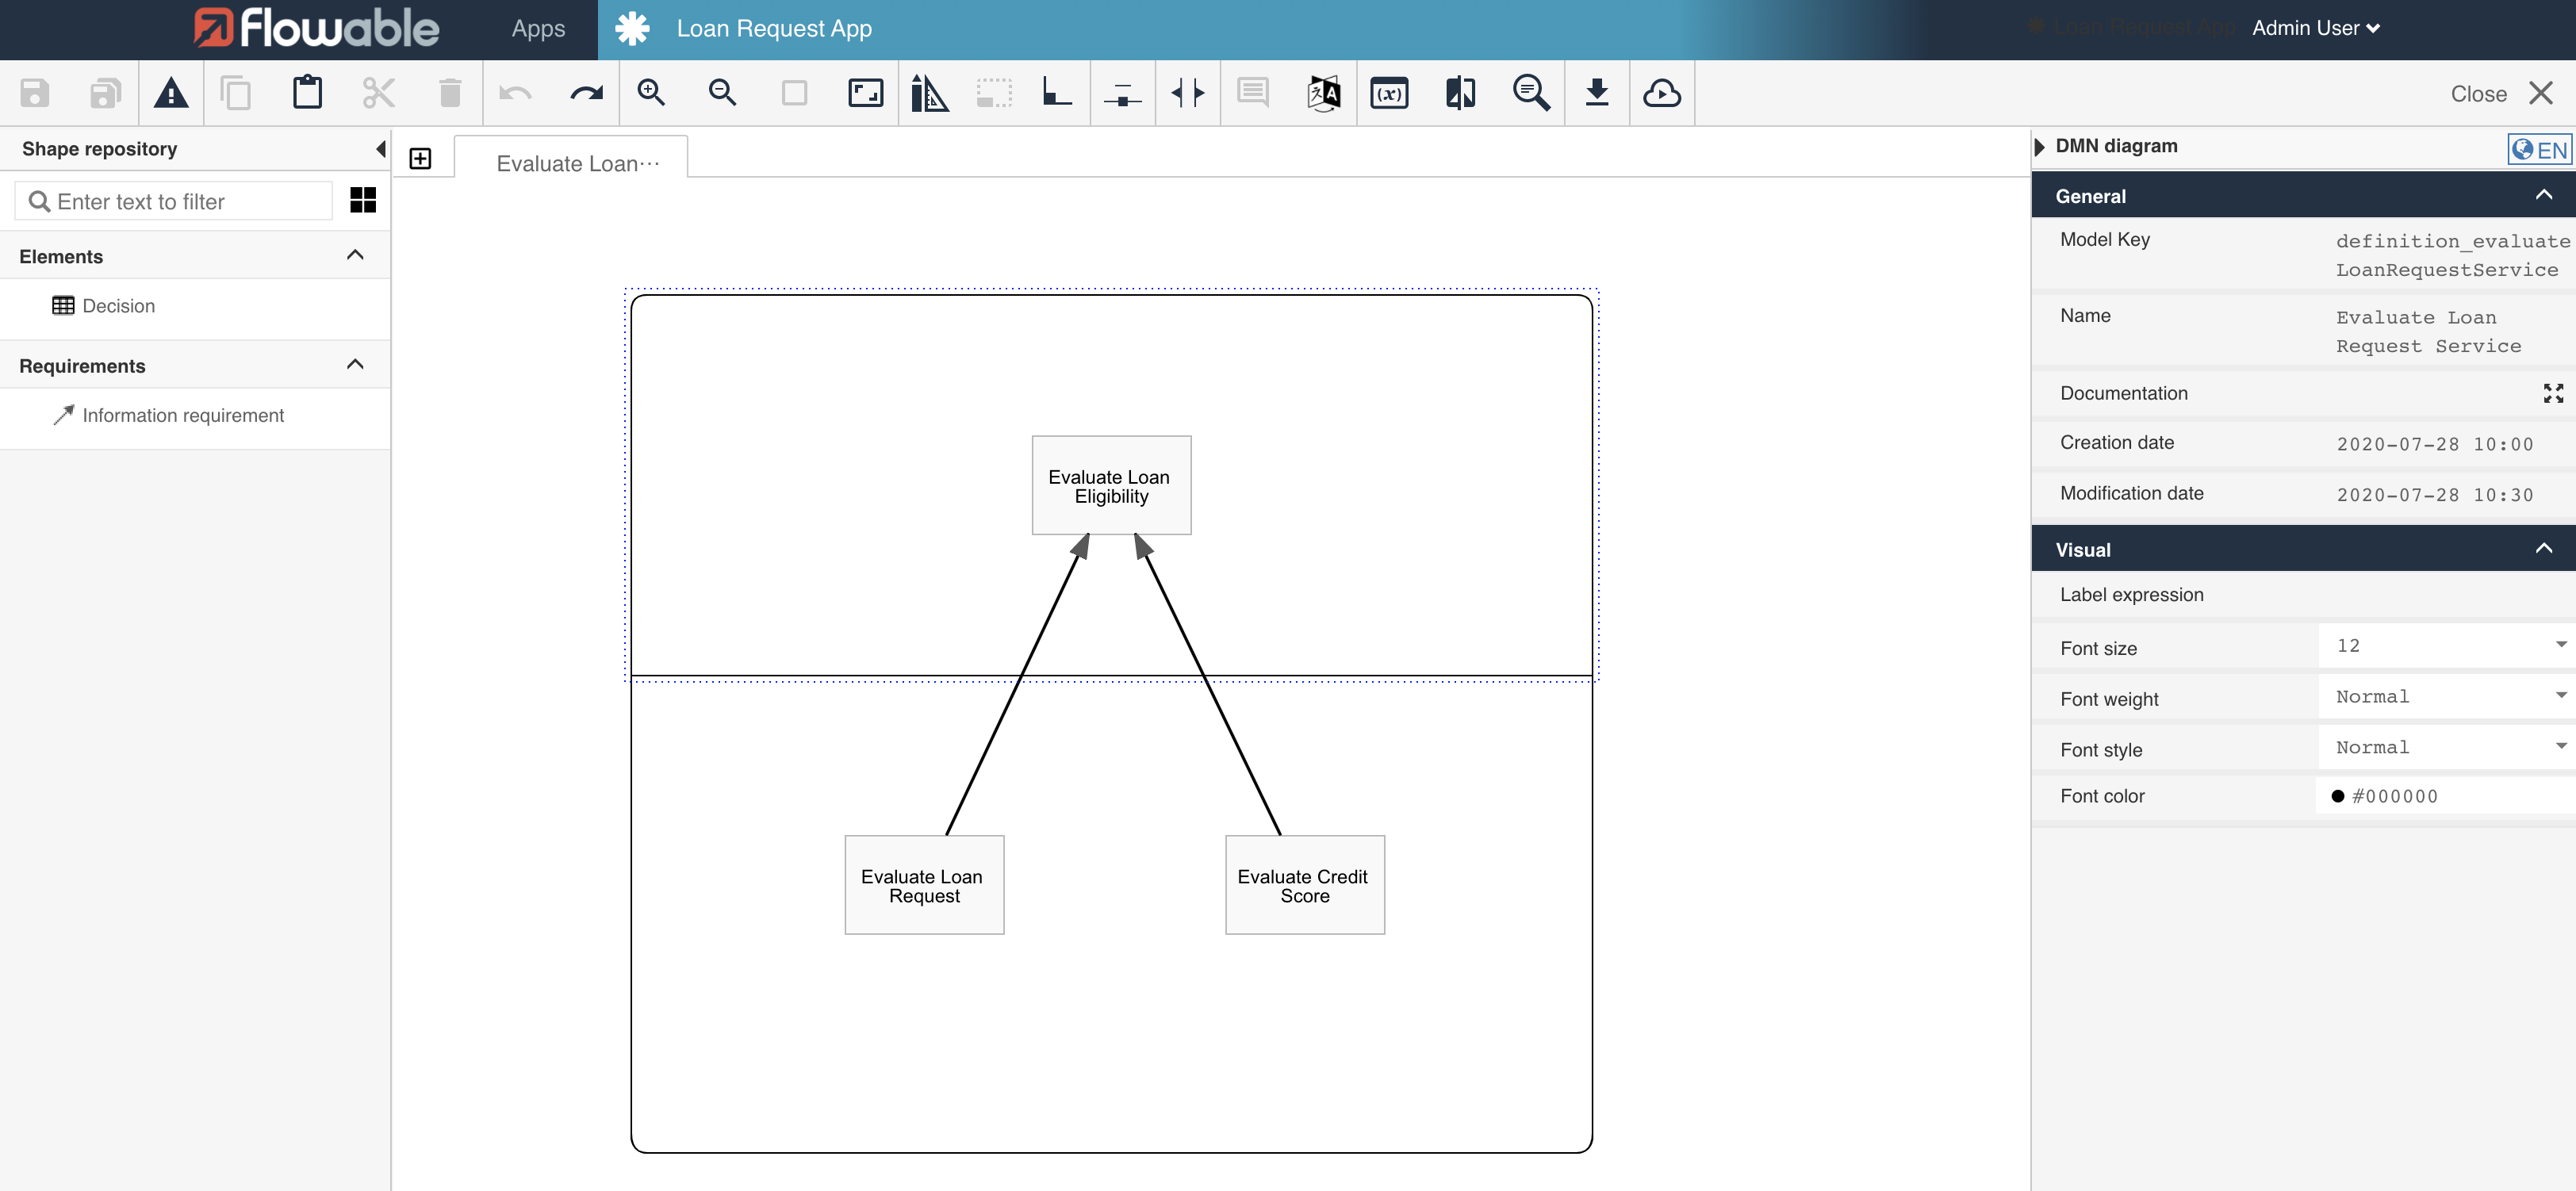
A DMN decision service has two sections; the upper part; the output decisions section and the lower part; the encapsulated decisions section. The results of the decisions that are part of the encapsulated decisions section can be used in other decision service decisions but are not part of the output of the decision service. The results of the decisions that are part of the output decisions section compose the result of the decision service.
The new decision service will consist of 3 decisions with decision tables;
- 2 encapsulated decisions;
- a decision using the (already existing)
Evaluate Loan Requestdecision table - a decision with a 'Evaluate Credit Score' decision table
- 1 output decision;
- a decision with a 'Evaluate Loan Eligibility' decision table
The 'Evaluate Credit Score' decision table will evaluate the credit score and result in a credit rating. Both the credit rating and the result of the Evaluate Loan Request decision table will be used as inputs for the Evaluate Loan Eligiblity decision table.
This decision table will 'overrule' the approvalState for specific credit scores.
Step 2A: Modify the Evaluate Loan Request decision table
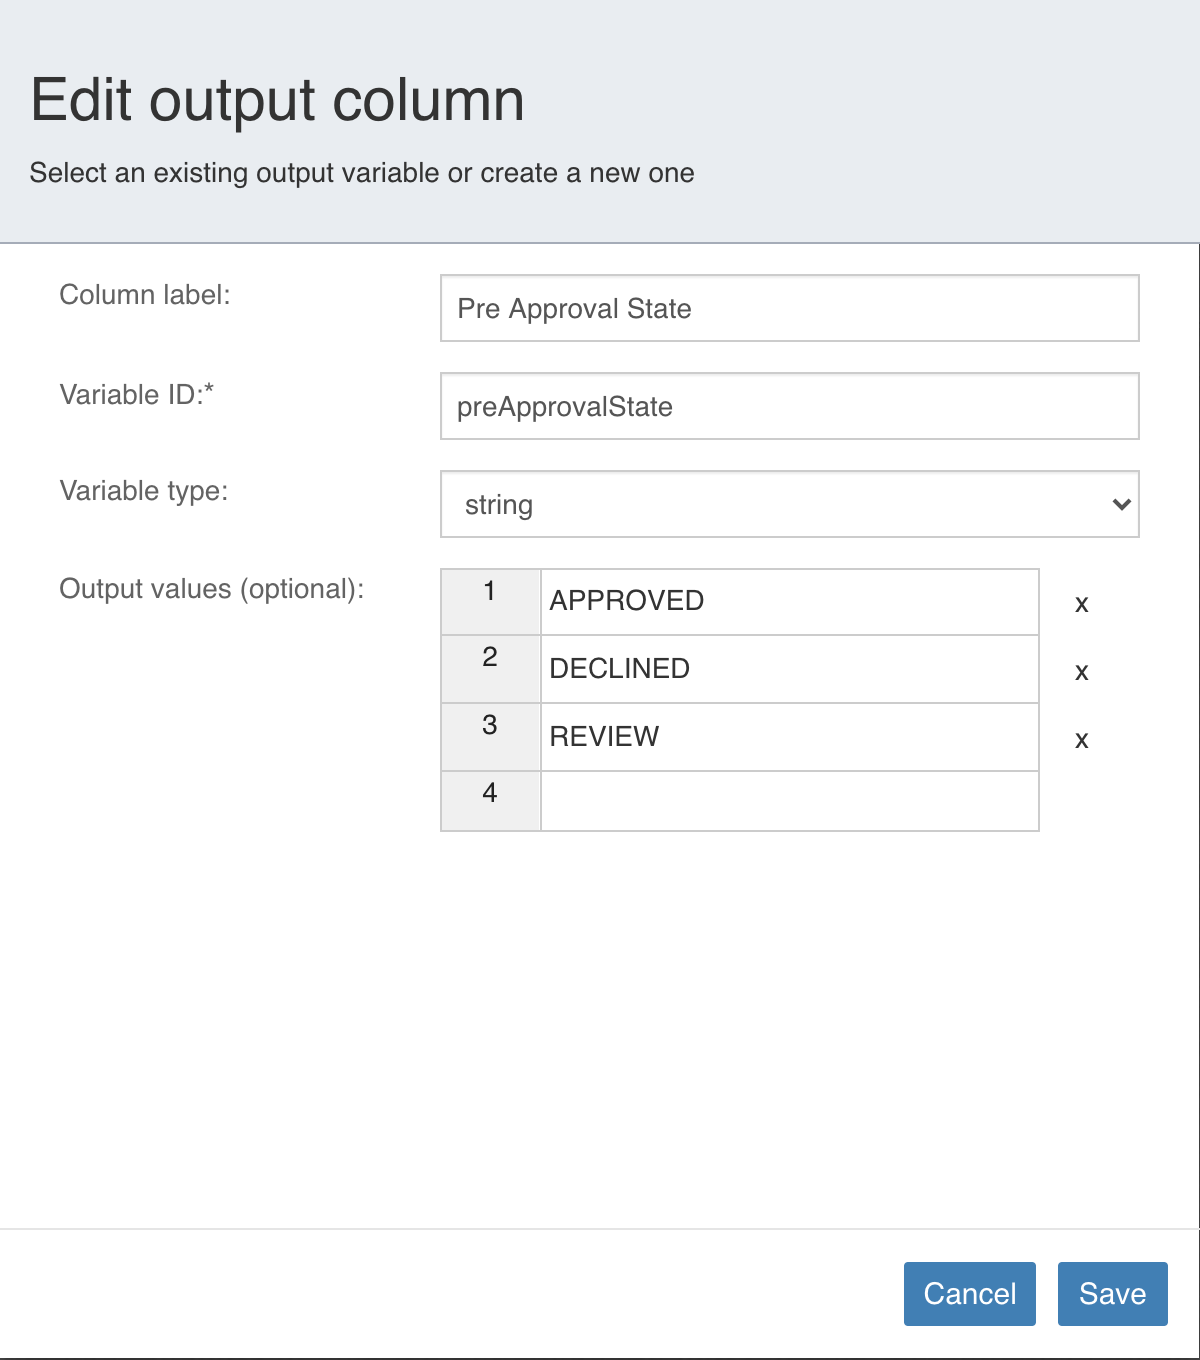
The existing decision table Evaluate Loan Request will not be an output decision and thus will not be used as the result of the decision service. For clarity we will rename the output of this decision table.
Select the Decision tables section (in the Loan Request App) and select the Evaluate Loan Request decision table.
The DMN Decision Table Editor will be opened.
Modify the column label and variable name of the output by selecting the Approval State column header.
- Column label: Pre Approval State, Variable name: preApprovalState.
Please note that since we're using the variable 'approvalState' in the conditional expressions
${approvalState == 'APPROVED'}and ${approvalState == 'APPROVED'}of the sequenceFlow in the
'Loan Approval App', we have to change it to ${preApprovalState == 'APPROVED'}
and ${preApprovalState == 'APPROVED'}.
Save the changes by selecting the Save button. Then save the decision table by selecting the Save button in the toolbar. After that close the editor and return to the App by selecting the Close button in the toolbar.
Step 2B: Create the 'Evaluate Loan Request Decision Service' model
Go back to the Loan Request App and hit Add model then Create a new model for the app , select Decision and
Decision service.
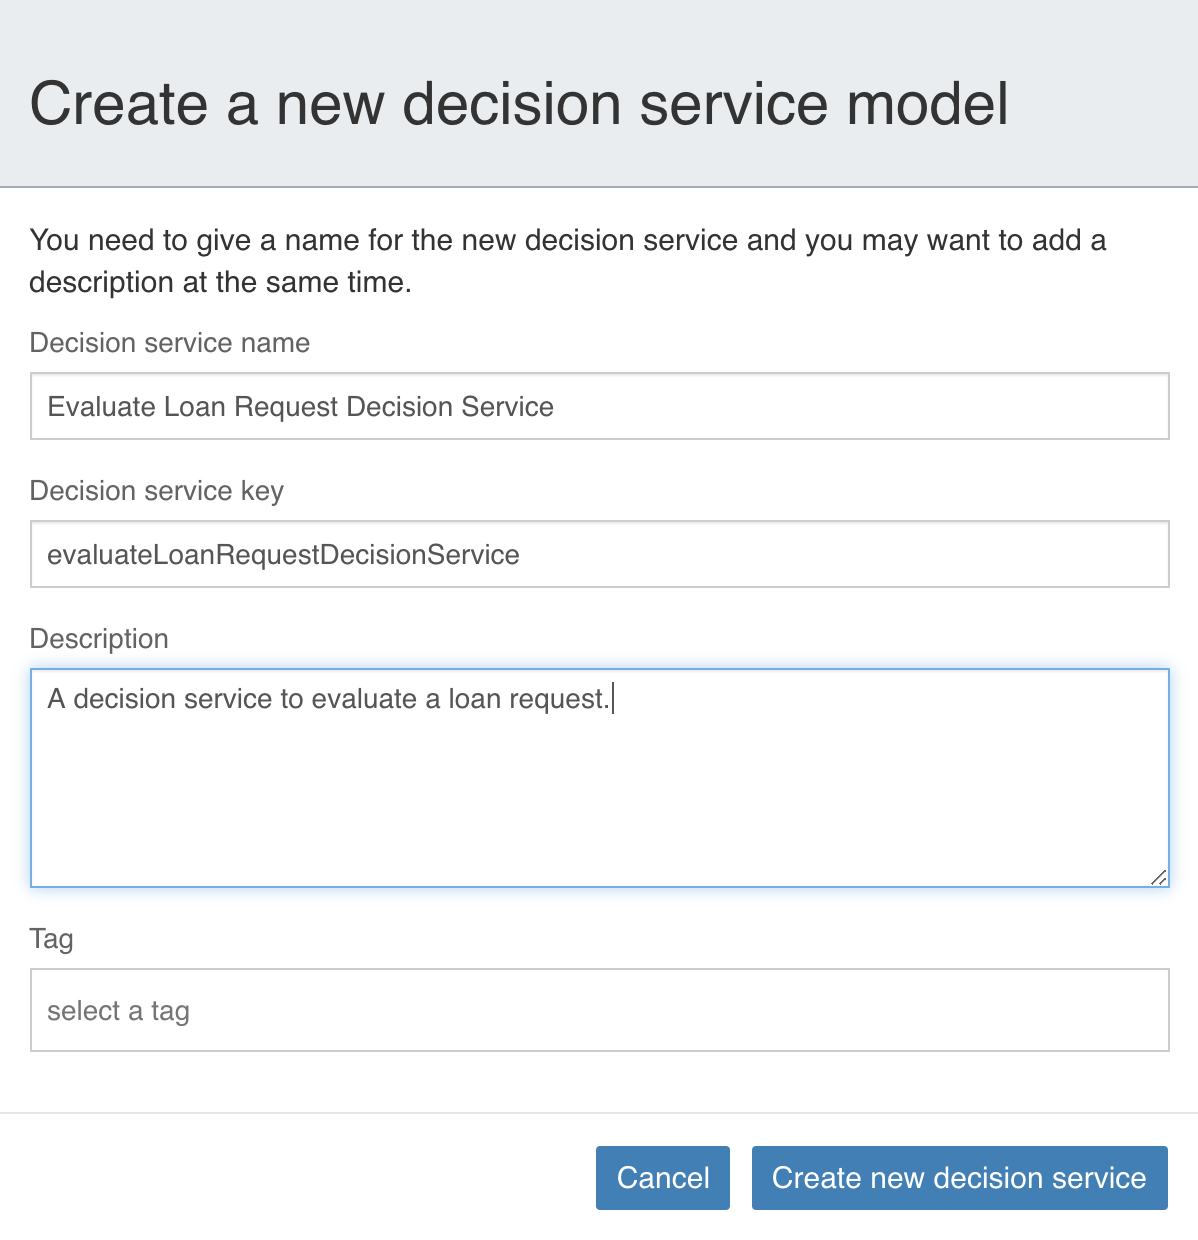
Finally, select the Create new decision service button.
Step 2C: Model the 'Evaluate Loan Request Decision Service'
The DMN Decision Service Editor is automatically opened after creating the decision service.
Start by creating a encapsulated decision by dragging the Decision element to the lower part of the decision service.
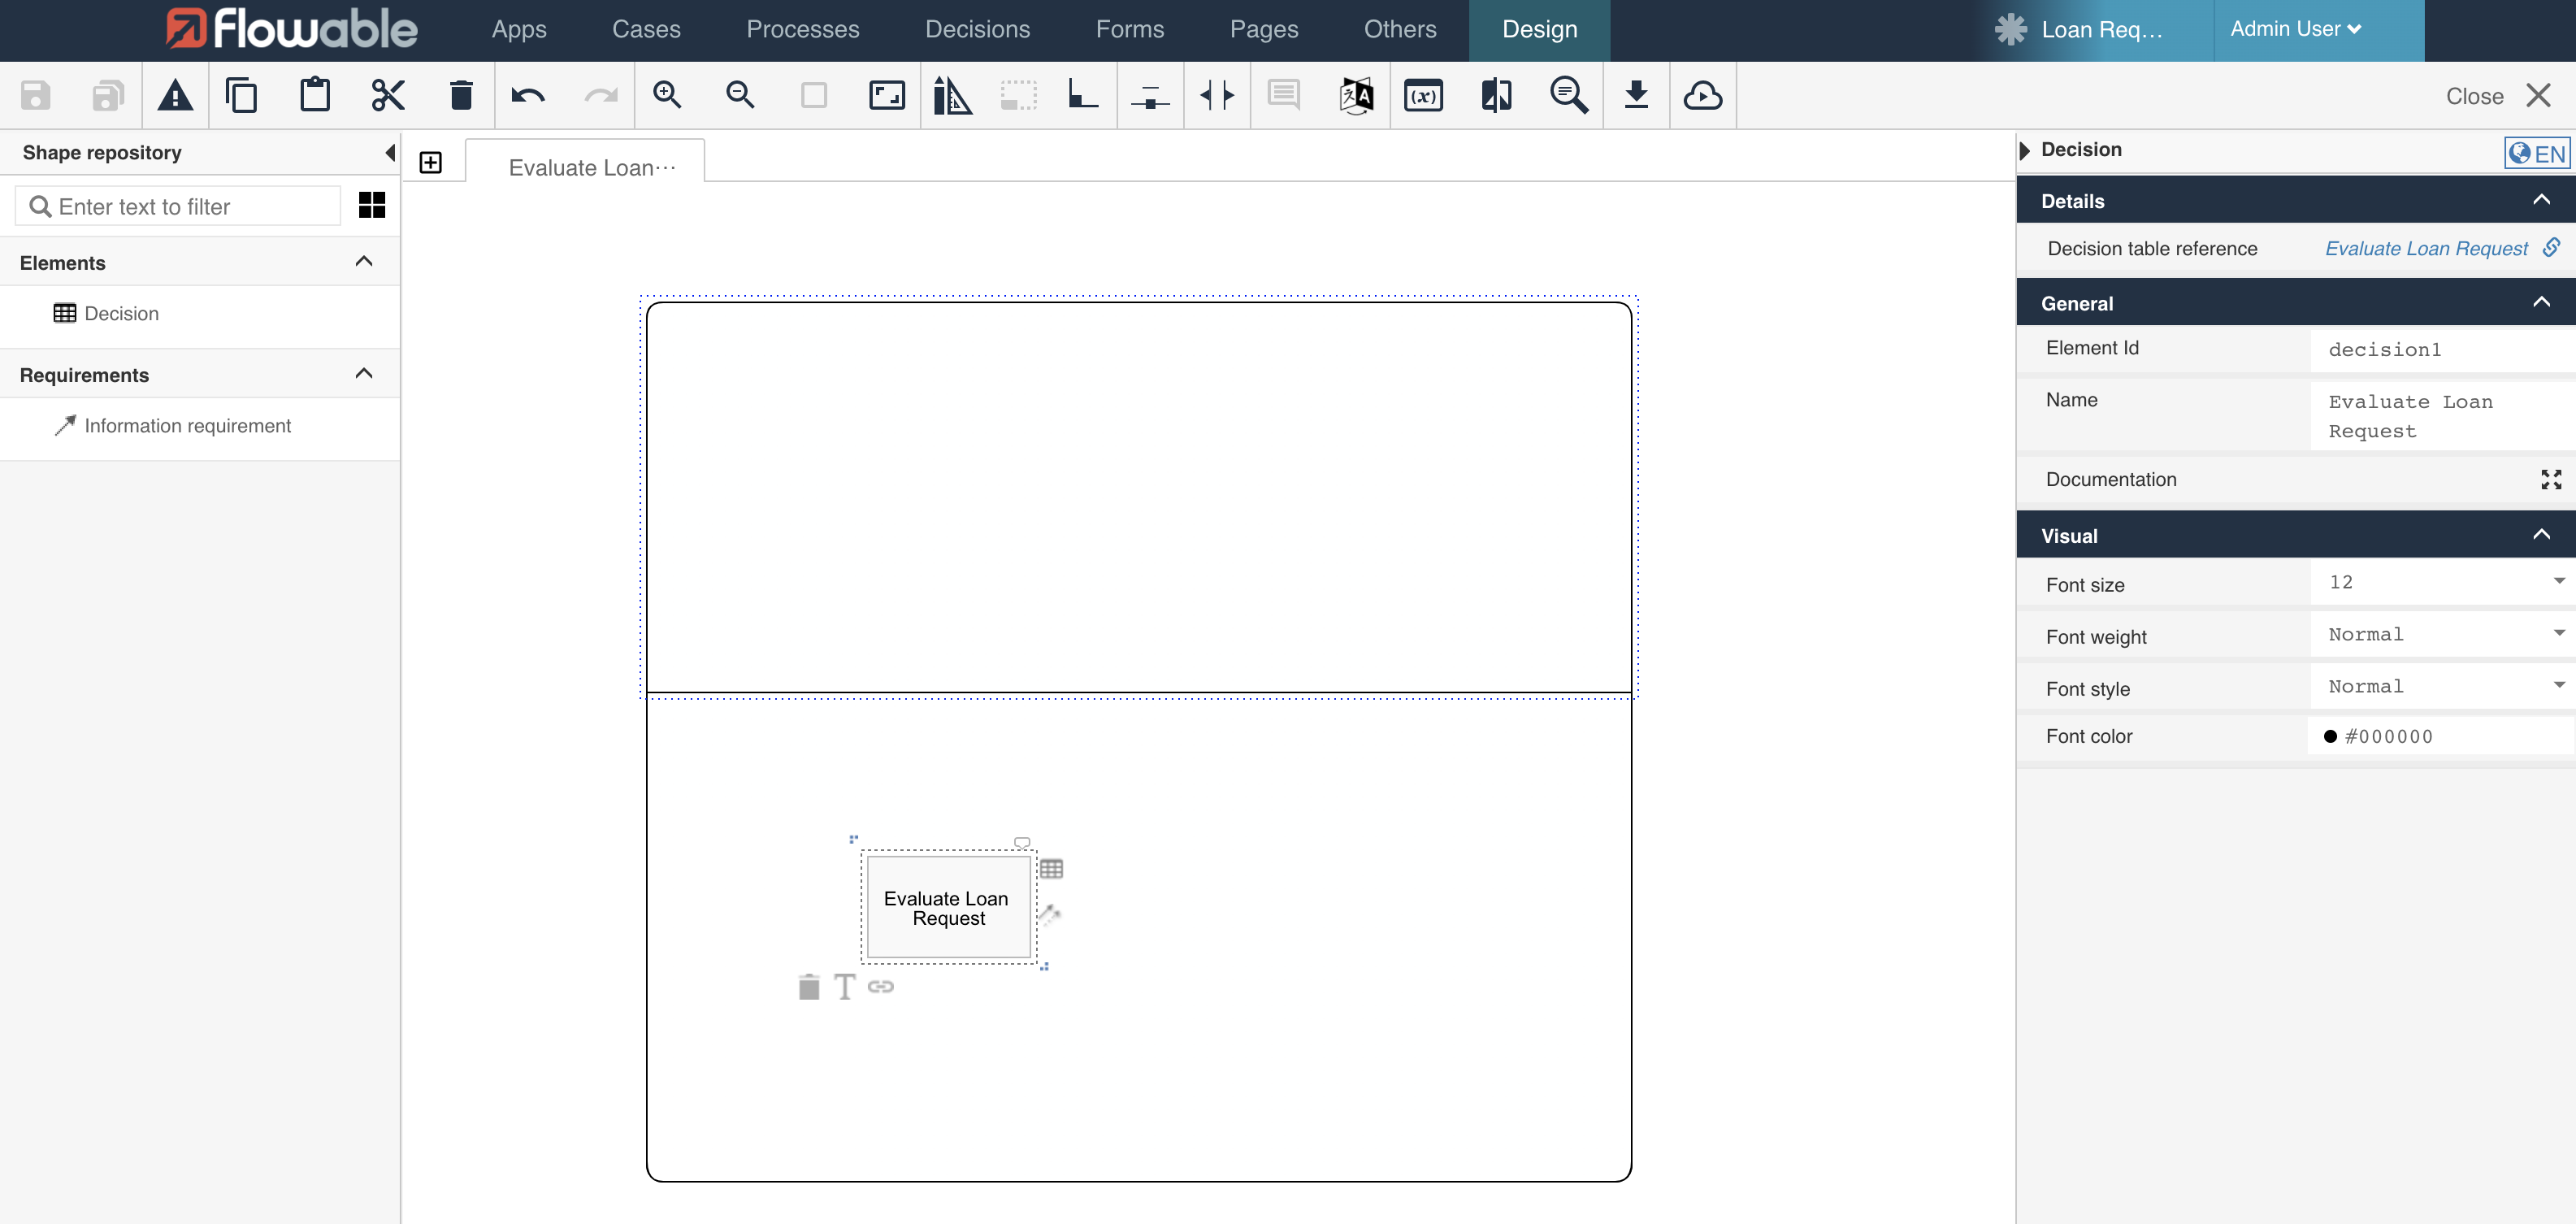
Select the Evaluate Loan Request as the Decision table reference. This is done by selecting the decision and then selecting Decision table reference and then Reference in the panel on the right side of the screen.
Provide 'Evaluate Loan Request' as the name of the decision.
Step 2D: Create the Evaluate Credit Score decision table
Add another encapsulated decision by dragging the Decision element to the lower part of the decision service.
Provide 'Evaluate Credit Score' as the name of the decision.
Create a new decision table by selecting Decision table reference and then selecting New.
Provide the following info;
- Name: Evaluate Credit Score, Key: evaluateCreditScore
Create the decision table by selecting the Create button.
After the DMN Decision Table Editor is opened create the following decision table.
Inputs;
- Column label: Credit Score, Variable name: creditScore, Variable type: number
Outputs;
- Column label: Credit Rating, Variable name: creditRating, Variable type: string, Output values; BAD, FAIR, and EXCELLENT
Rules;
-
Credit Score: < 500 / Credit Rating: BAD
-
Credit Score: < 600 / Credit Rating: FAIR
-
Credit Score: >= 700 / Credit Rating: EXCELLENT
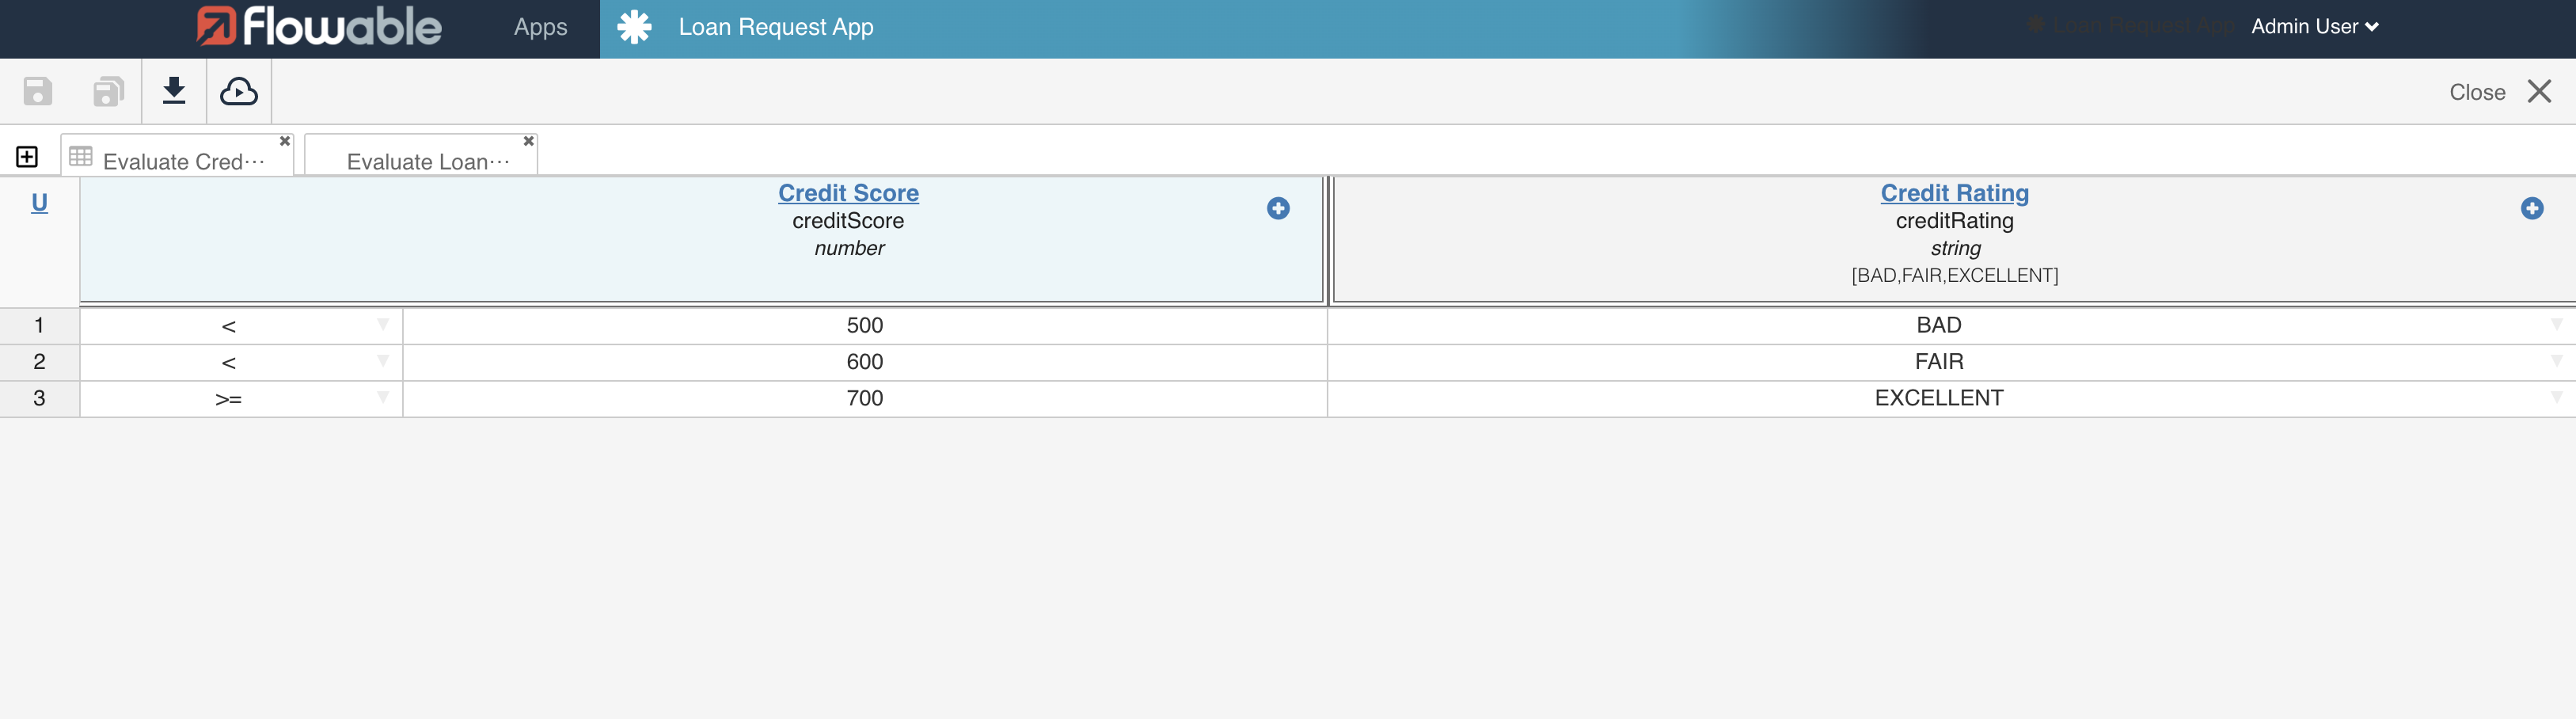
For the hit policy choose 'UNIQUE' to determine that the result of the decision table is then and only then valid, when one rule is valid.
Step 2E: Create the Evaluate Loan Eligibility decision table
Back to the Evaluate Loan Request Decision Service add an output decision by dragging the Decision element
to the upper part of the decision service.
Provide 'Evaluate Loan Eligibility' as the name of the decision.
Create a new decision table by selecting Details>Decision table reference and then selecting New.
Provide the following info;
- Name: Evaluate Loan Eligibility, Key: evaluateLoanEligibility
Create the decision table by selecting the Create button.
After the DMN Decision Table Editor is opened create the following decision table.
Inputs;
- Column label: Pre Approval State, Variable name: preApprovalState, Variable type: string
- Column label: Credit Rating, Variable name: creditRating, Variable type: string
Outputs;
- Column label: Approval Rating, Variable name: approvalRating, Variable type: string, Output values; DECLINED, REVIEW, and APPROVED
Rules;
-
Pre Approval State: == DECLINED / Credit Rating: == EXCELLENT/ Approval State: REVIEW
-
Pre Approval State: == DECLINED / Credit Rating: != EXCELLENT/ Approval State: DECLINED
-
Pre Approval State: == REVIEW / Credit Rating: == FAIR/ Approval State: DECLINED
-
Pre Approval State: == REVIEW / Credit Rating: != FAIR/ Approval State: REVIEW
-
Pre Approval State: == APPROVED / Credit Rating: == BAD/ Approval State: REVIEW
-
Pre Approval State: == APPROVED / Credit Rating: != BAD/ Approval State: APPROVED
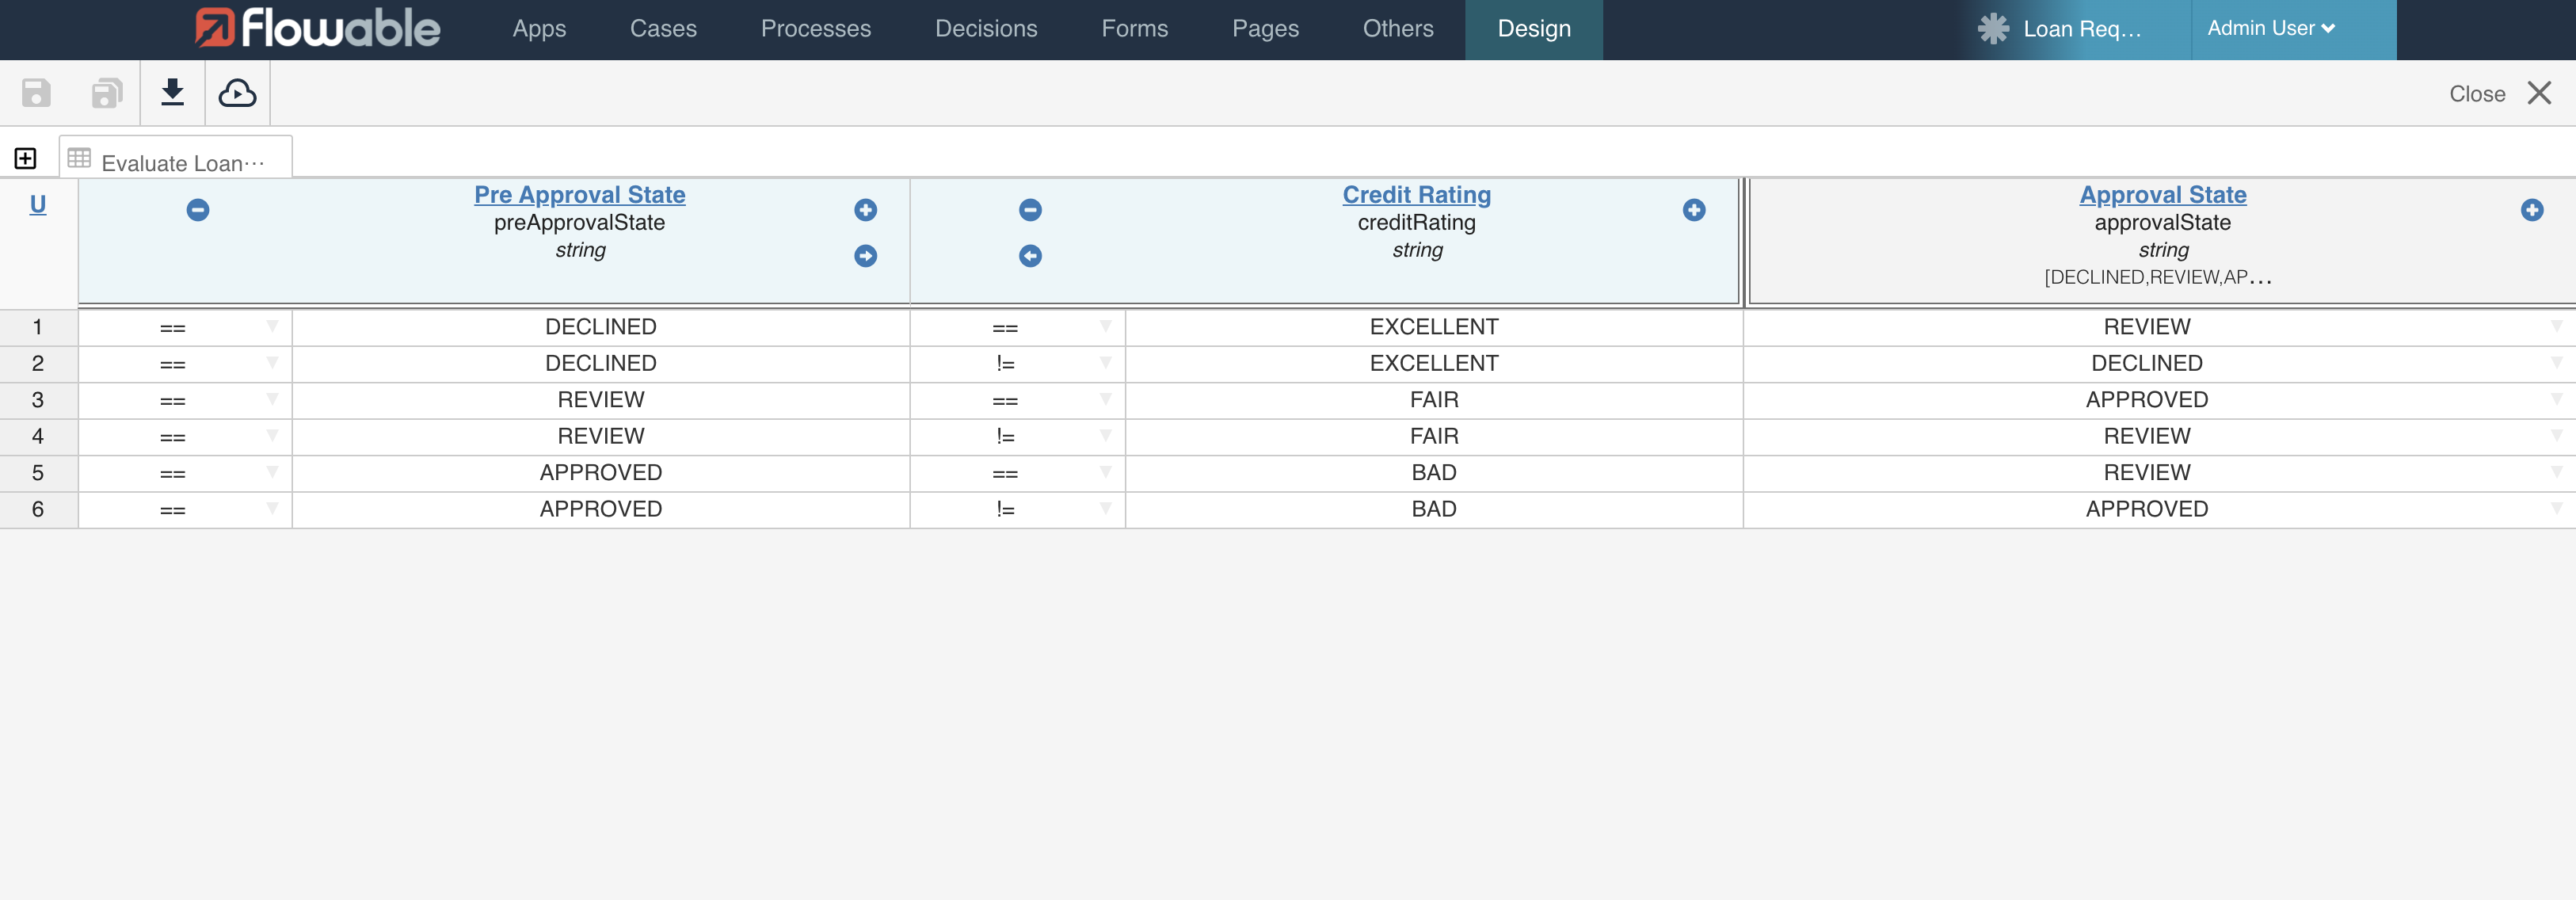
For the hit policy choose 'UNIQUE' to determine that the result of the decision table is then and only then valid, when one rule is valid.
Save the decision table and close the editor to return to the app.
Step 2F: Provide the Information Requirements
Open the decision service editor for the Evaluate Loan Request Decision Service.
In order to specify what decision results can be used in other decisions we have to provide what decision is a Information Requirement of another decision.
Select the Evaluate Loan Request decision and select the arrows icon on the right hand side of the selected decision.
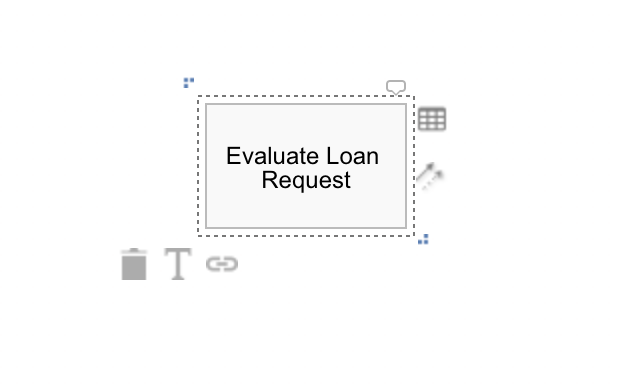
Drag the arrows icon to the Evaluate Loan Eligibility decision.
Do the same for the Evaluate Credit Score decision.
After this the decision service is ready and can be saved and closed.
Decision service: Deploy the App
To execute the process and it's decision service we need to redeploy the App containing the updated artifacts.
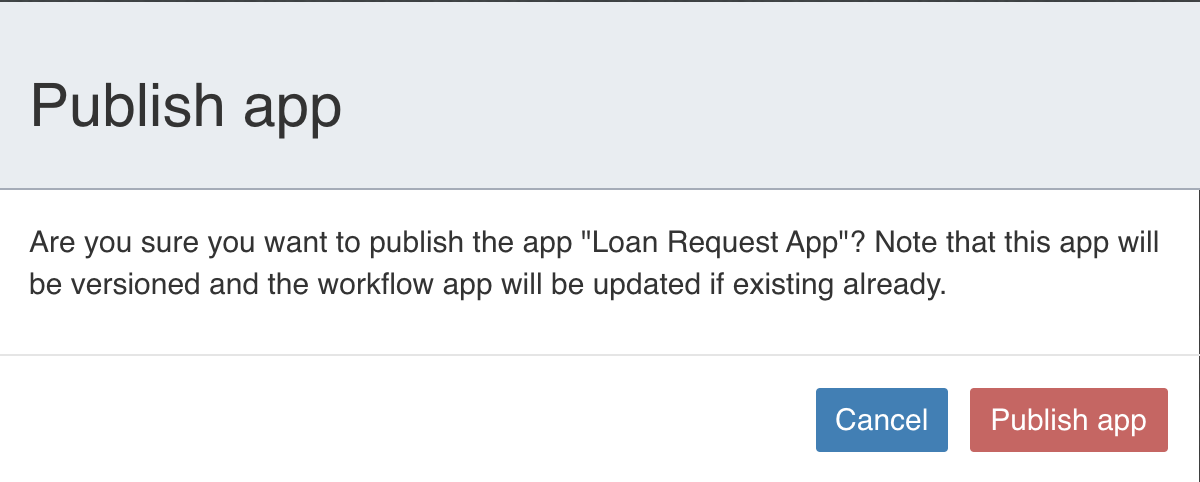
Navigate to the Loan Request App and deploy the App by selecting the Publish button in the toolbar. Confirm by selecting the Publish app in the modal.
Decision service: Execute the Process
Flowable Engage is used to demonstrate the process and two different scenarios are showing the various potential outcomes of the decision service.
Scenario 1
In Flowable Engage select Work>Create new in the left menu. Select the Loan Request Approval Process from the Loan Request App.
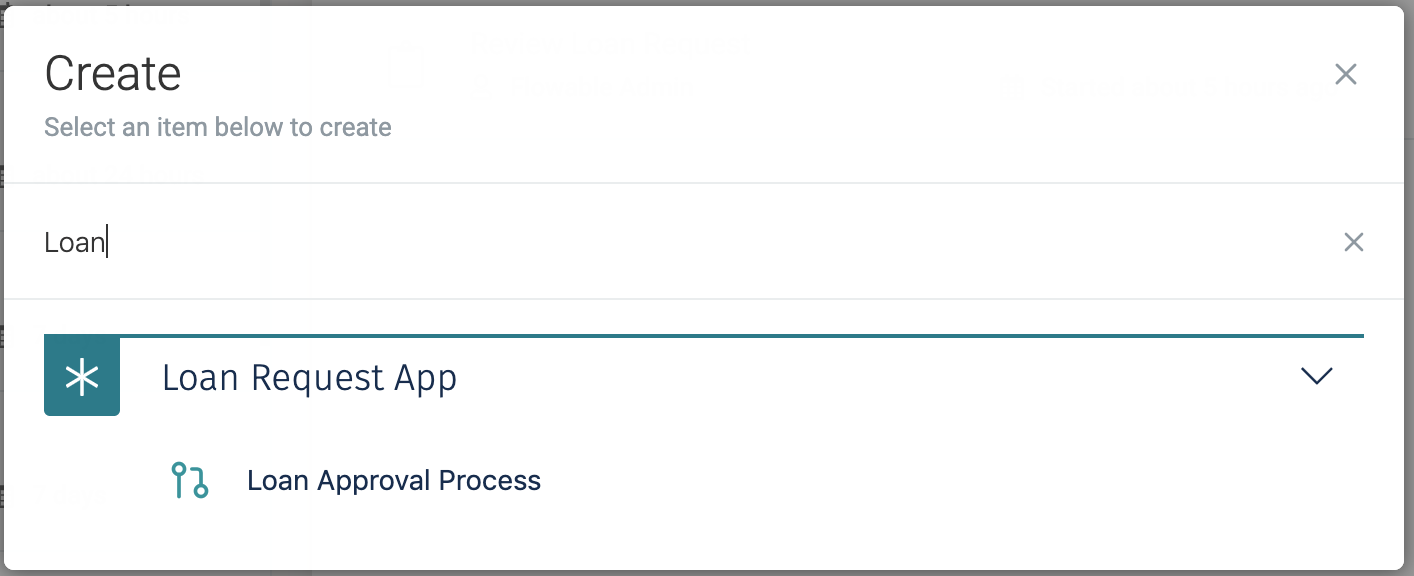
Select Continue.
A process instance is started and the process execution halts at the
first step; the Loan Request Intake user task.
Select the task in the Open tasks list.
The form is presented. In this first scenario, enter the following data:
name: Requestor Three
age: 20
country: The Netherlands
amount: 200.000
credit score: 800
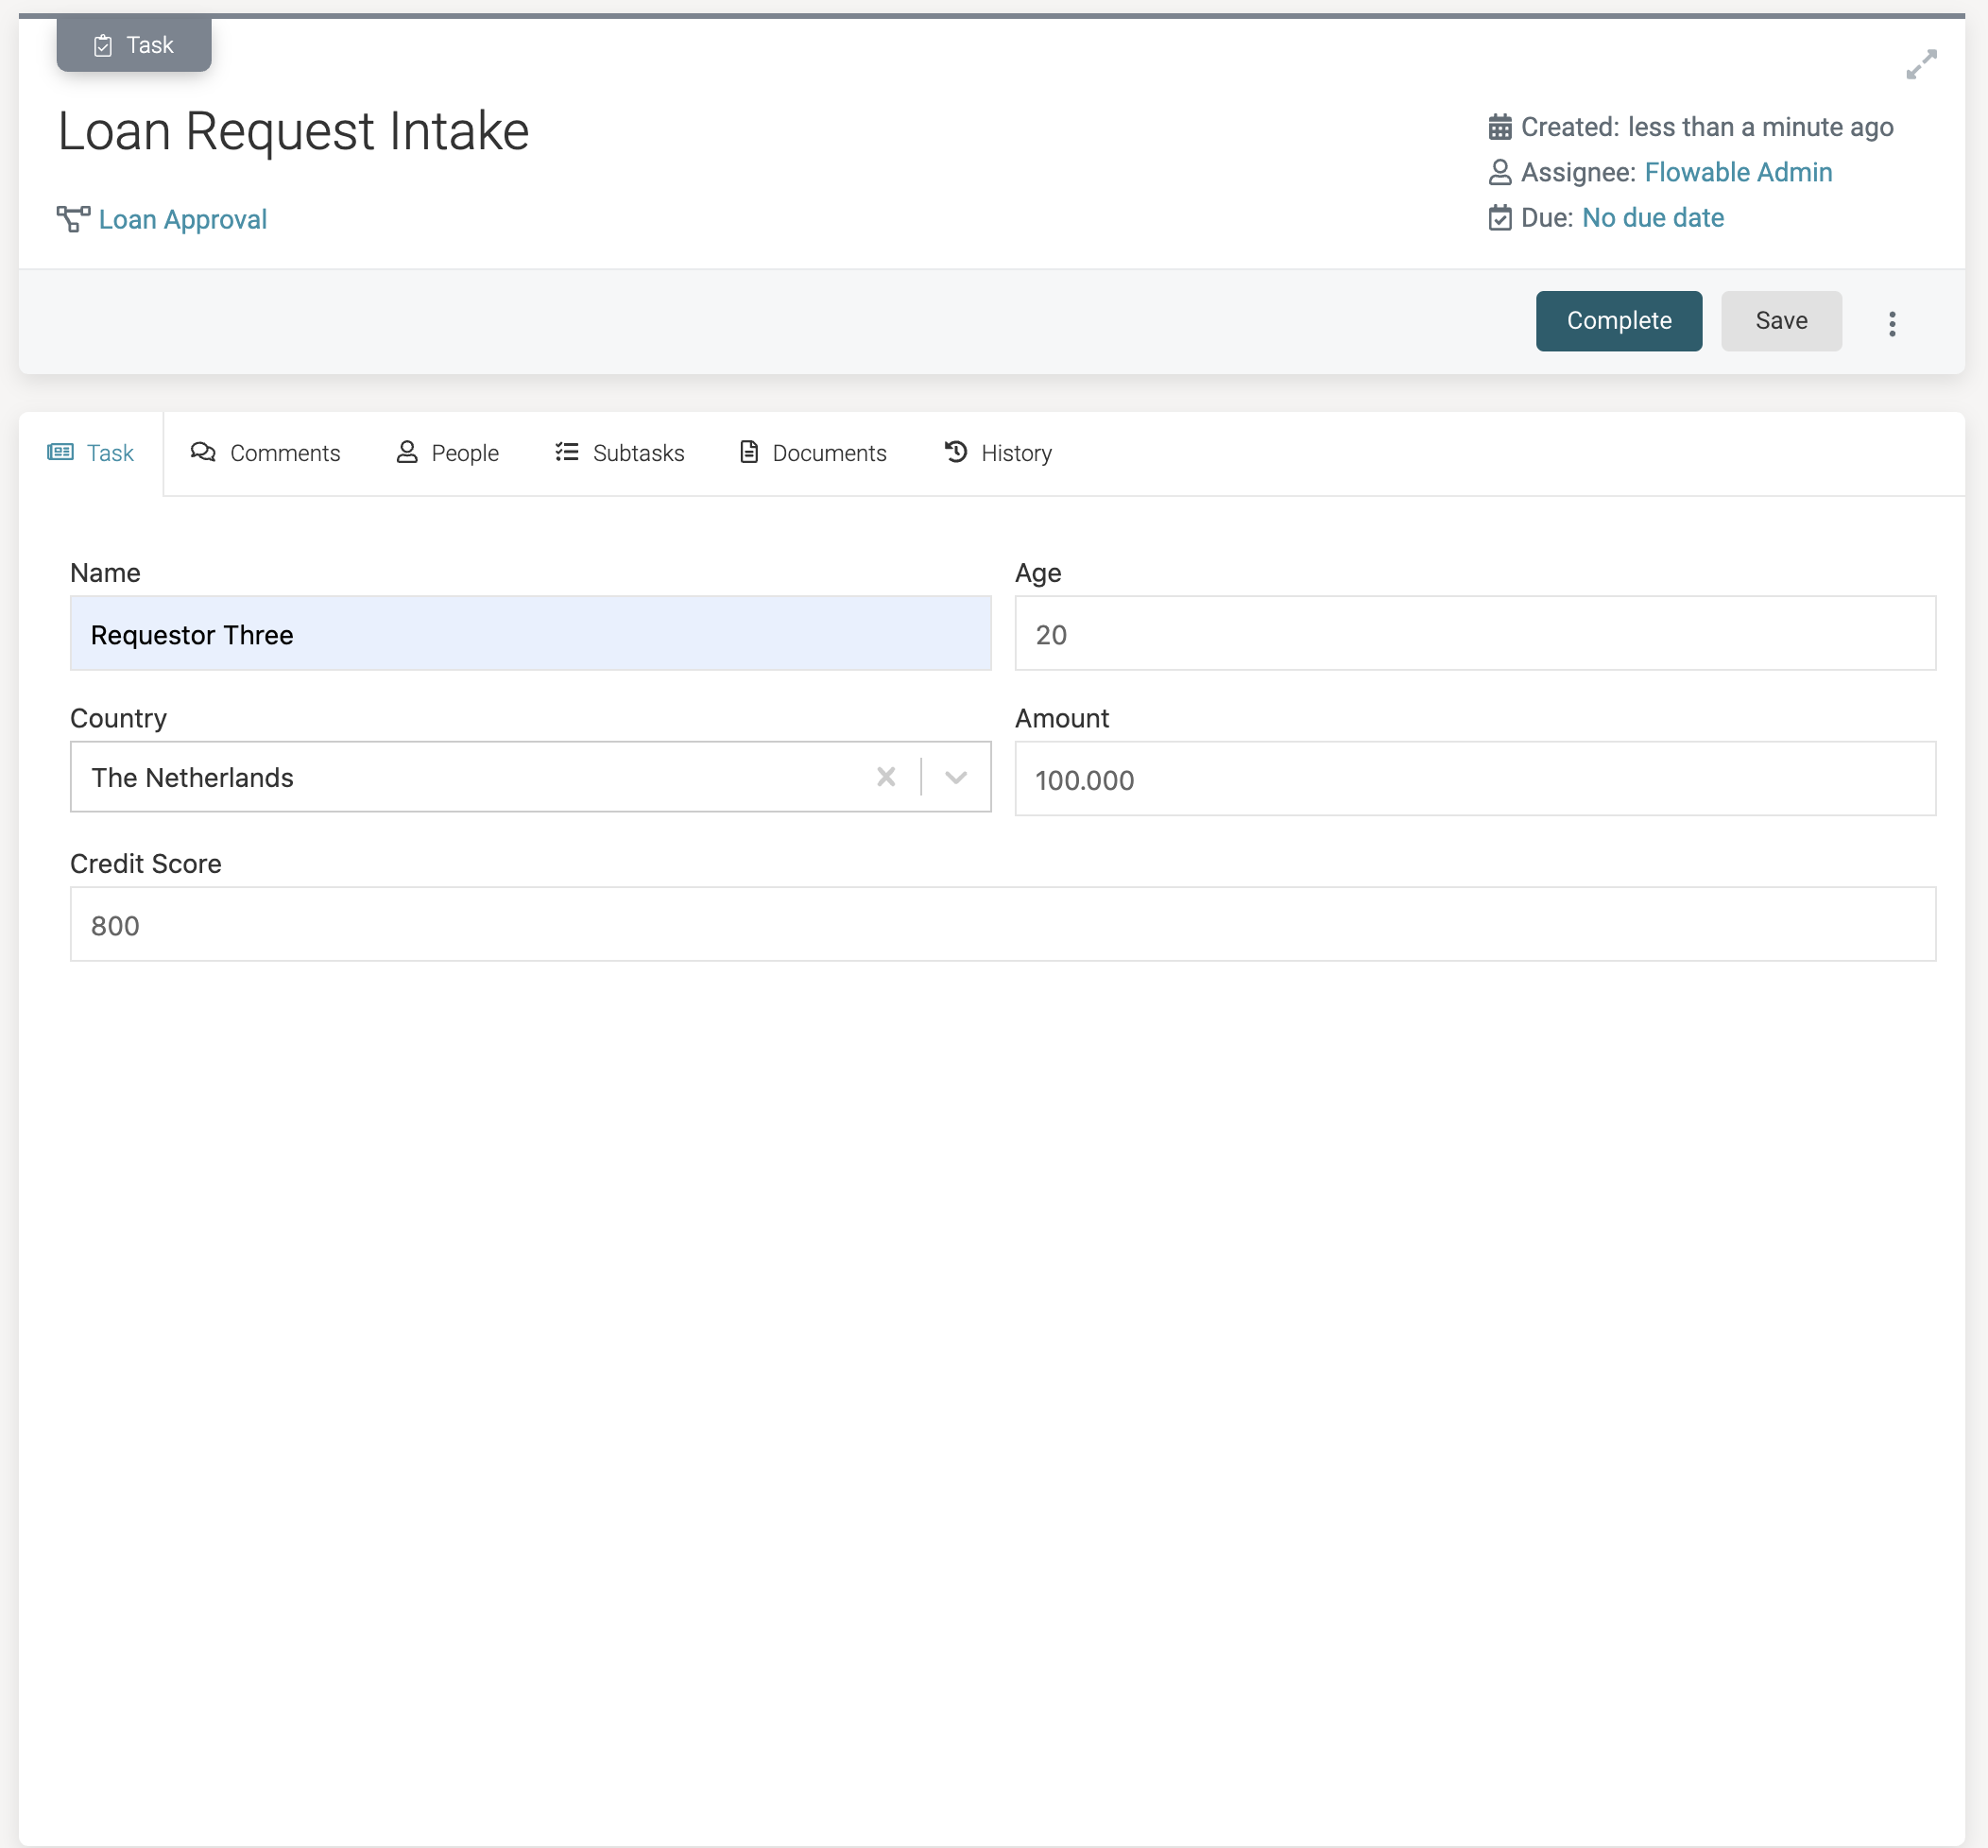
With a lower credit score than 700 the request would in this case be DECLINED. But because of the credit rating EXCELLENT the request was marked for REVIEW.