Individual App Registrations
Single vs. Individual App Registrations
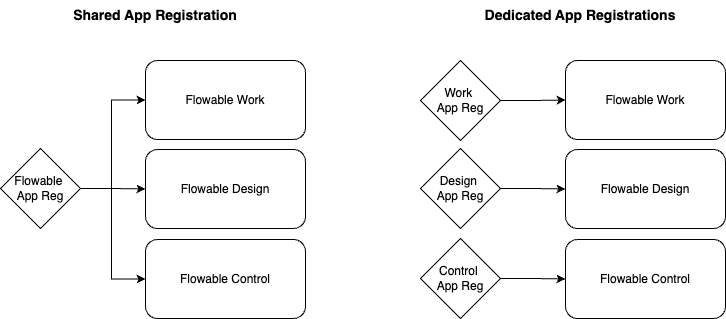
Flowable consists of 3 separate applications: Flowable Work, Flowable Design and Flowable Control. Each of these applications provide their own login. Of course, with SSO, the user only has to login once to access all applications.
Most authentication scenarios for Flowable can be covered with a single shared App Registration for all Flowable applications. Please refer to the Shared App Registration Setup chapter for more details on this.
Certain alternative authentication patterns require to have individual app registrations for each Flowable application (Work, Design, Control)
The decision depends on how the communication between the Flowable applications should be authenticated. Please refer to the Flowable Design/Control to Flowable Work Communication chapter for more details on this.
In a nutshell, if you want to use OAuth2 service accounts for the communication between Flowable applications, you will need separate App Registrations for each application. For all other scenarios (like e.g. API Token), a single App Registration is sufficient.
Creating Individual App Registrations for EntraID
If you want to use OAuth2 service accounts for the communication between Flowable applications, you will need separate App Registrations for each application. This section describes how to create these individual App Registrations in Entra ID.
Flowable Work App Registration
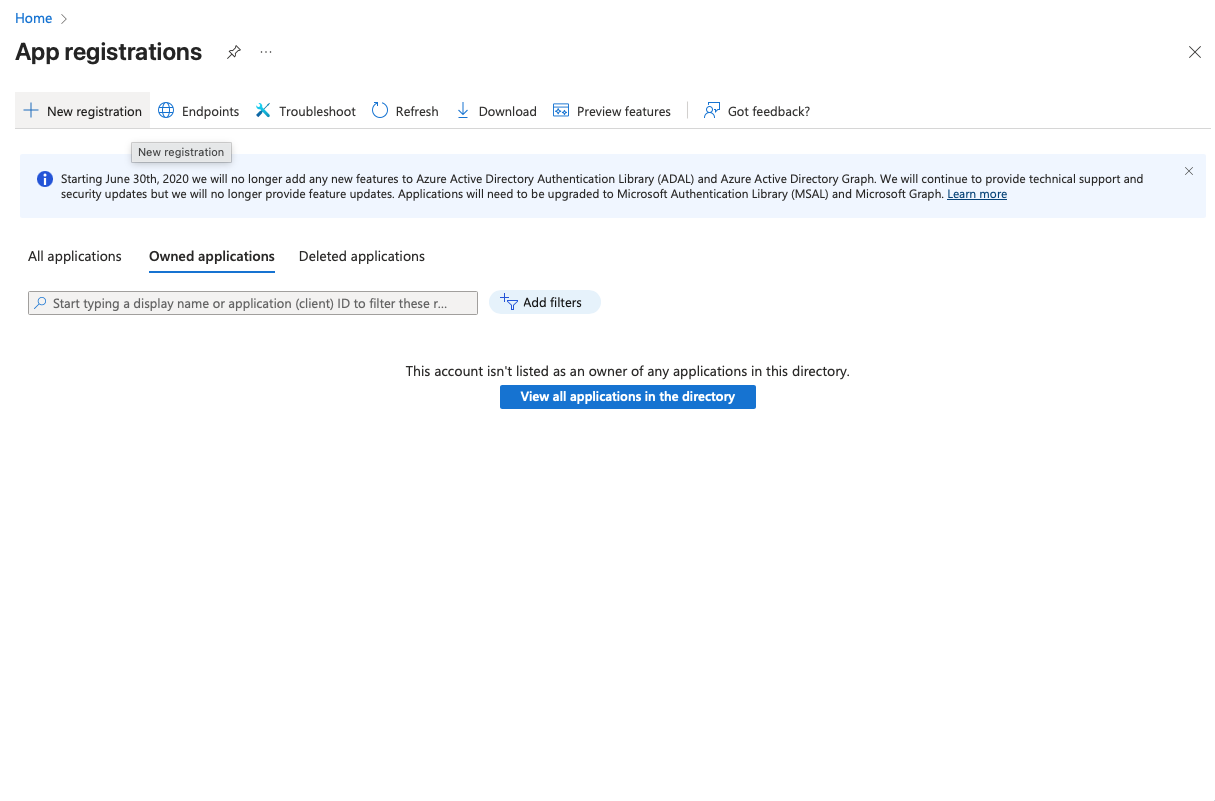
- Open Azure Portal → Go to "App registrations" → "New registration". Create a new registration for Flowable Work. Choose a name for the registration (e.g. "Flowable Work"). Redirect URI can be left empty for now and will be added later.

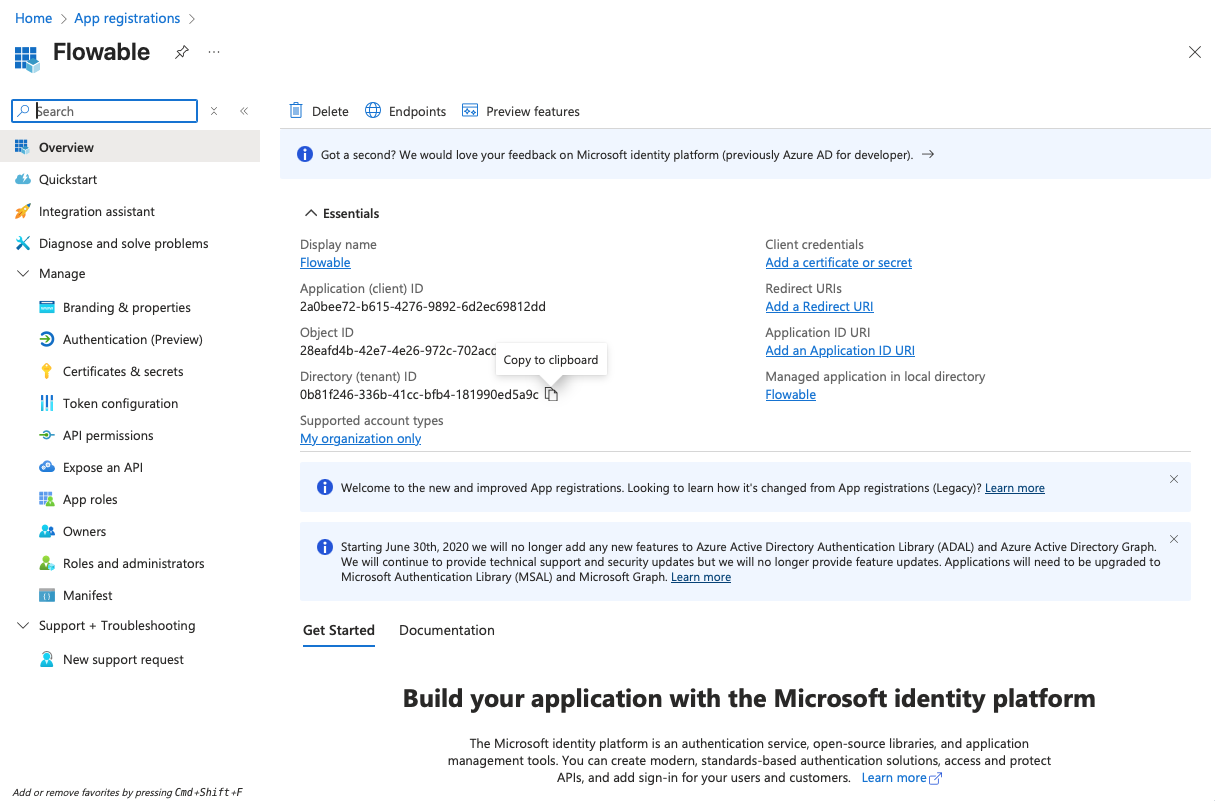
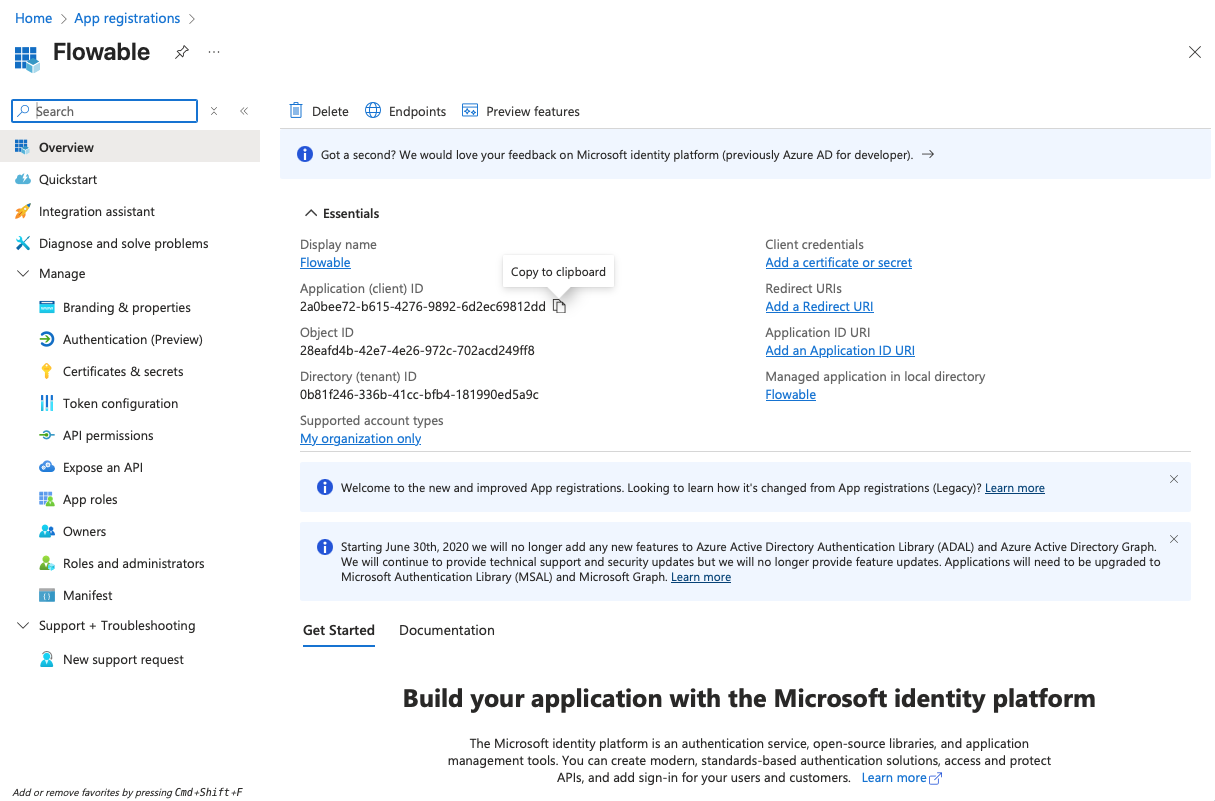
- Copy the Client ID (Application ID) and the Tenant ID from the "Overview" page to a text editor for later use.
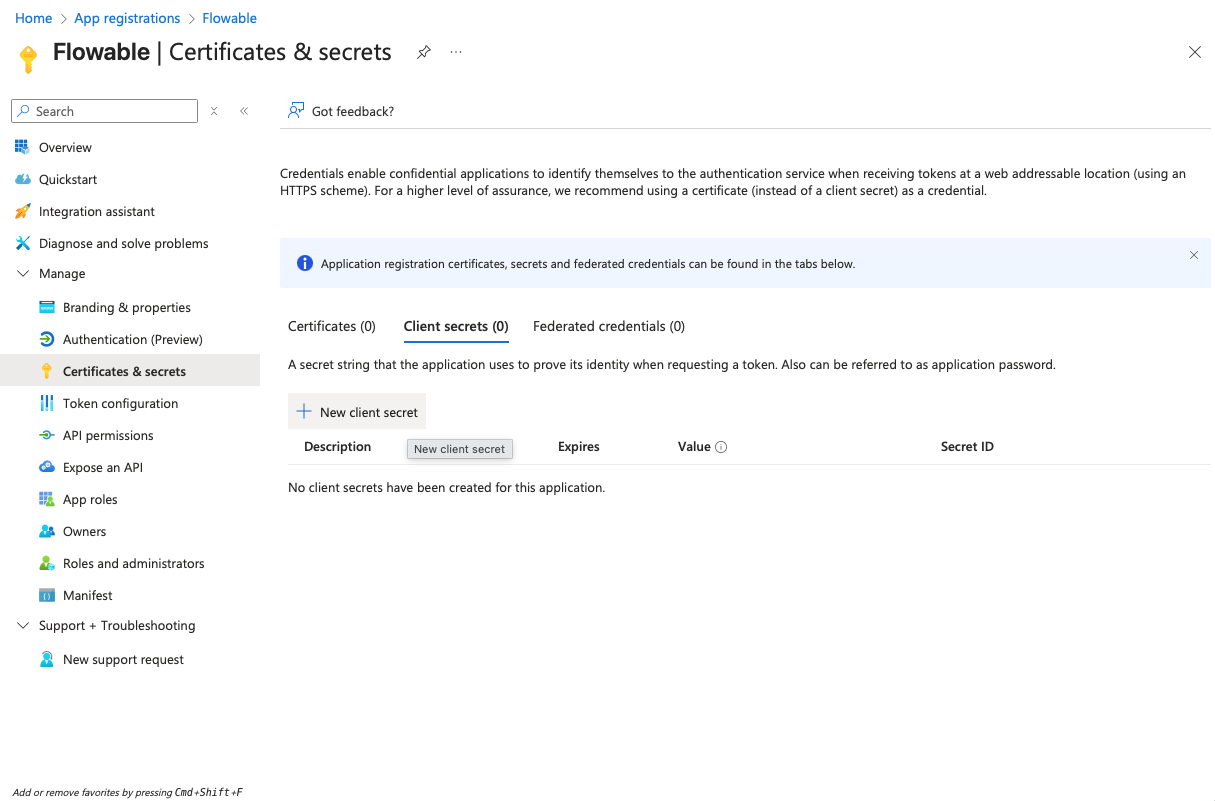
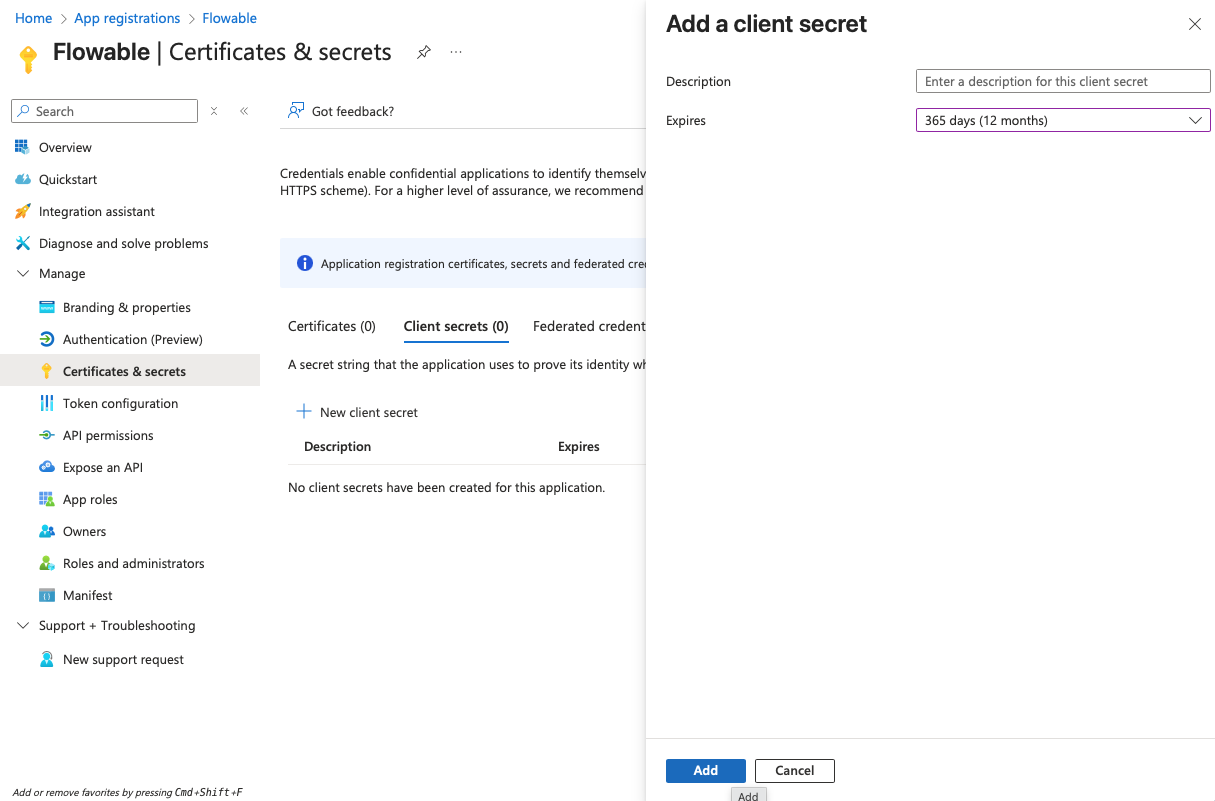
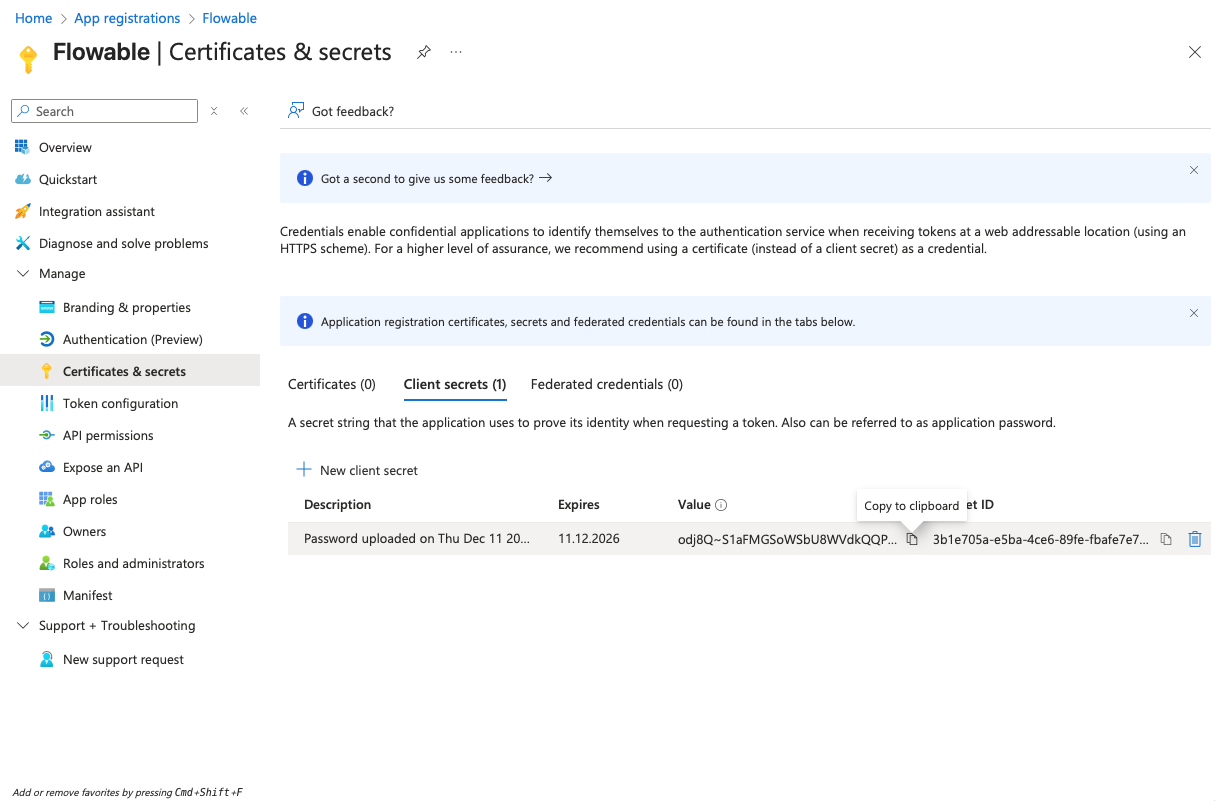
- Navigate to "Certificates & secrets" and create a client secret by clicking "New client secret". Copy the secret value to a text editor for later use (it will become invisible after you leave the page).
-
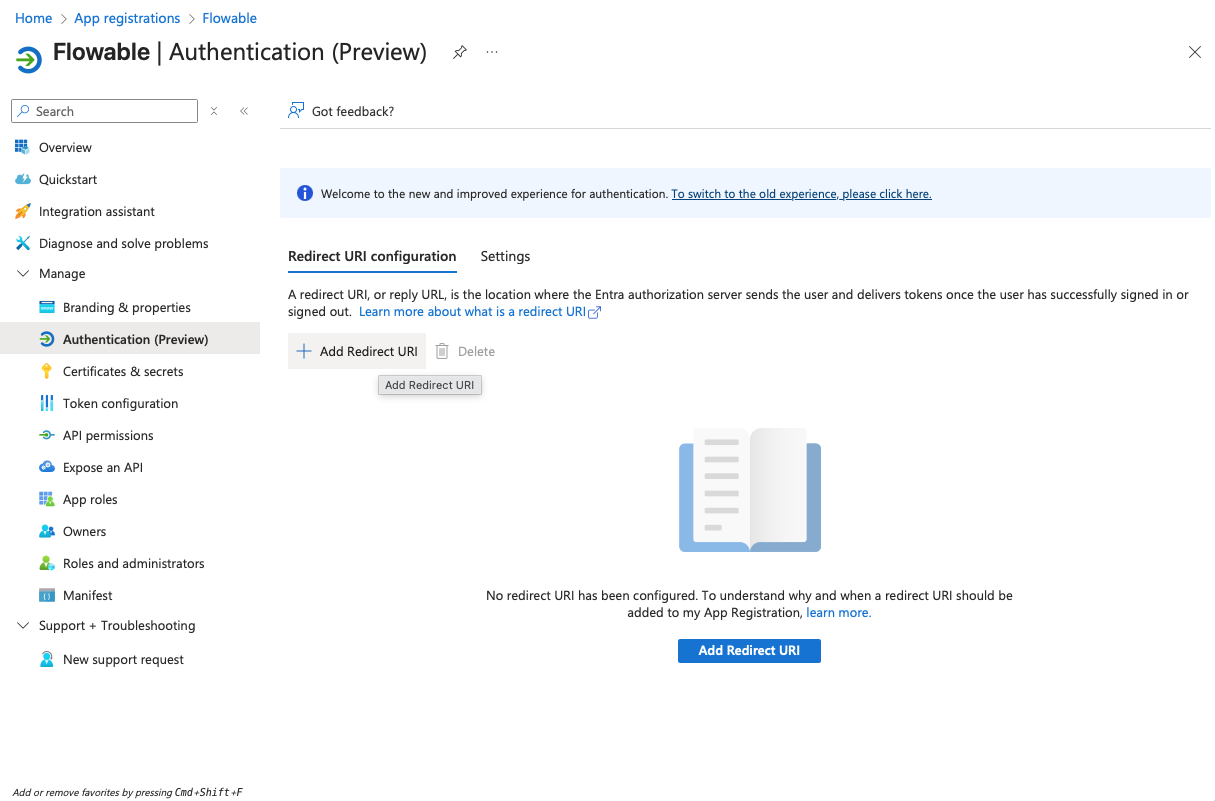
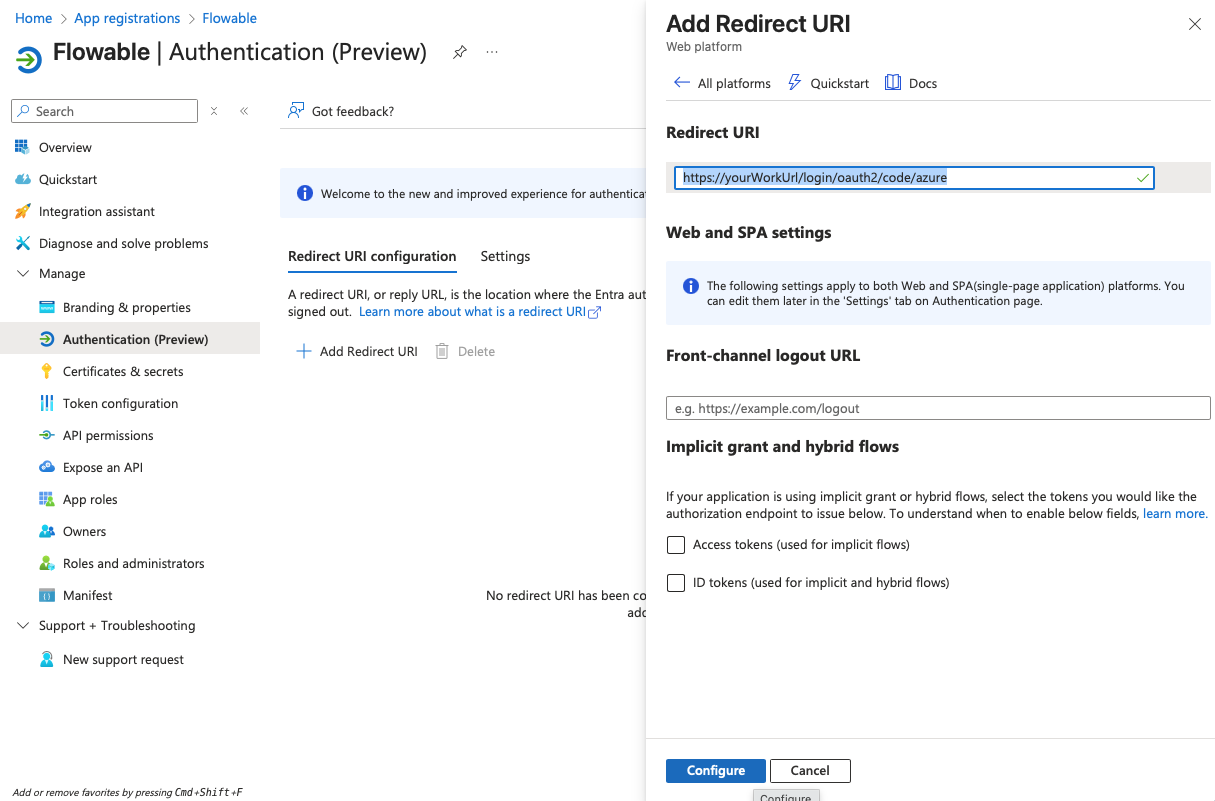
Navigate to "Authentication" and add a redirect URI of type "Web" and with the value:
https://<yourWorkUrl>/login/oauth2/code/azure
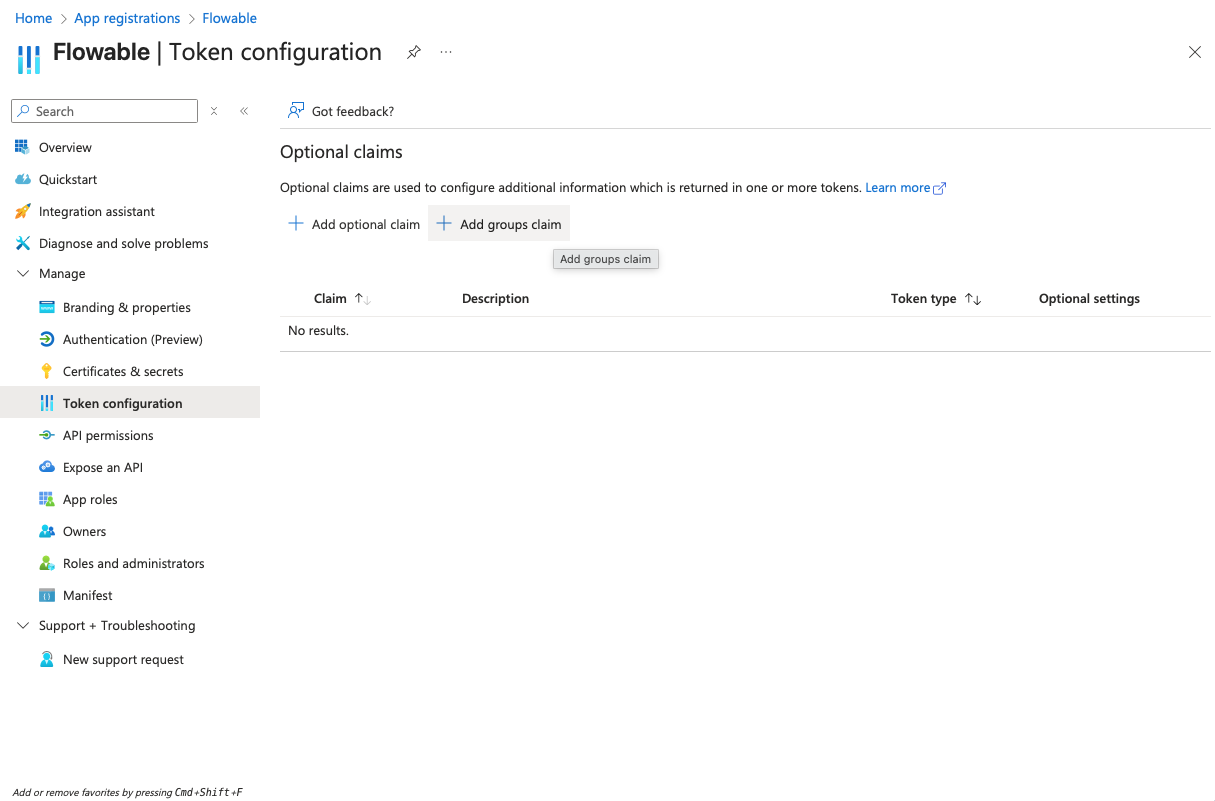
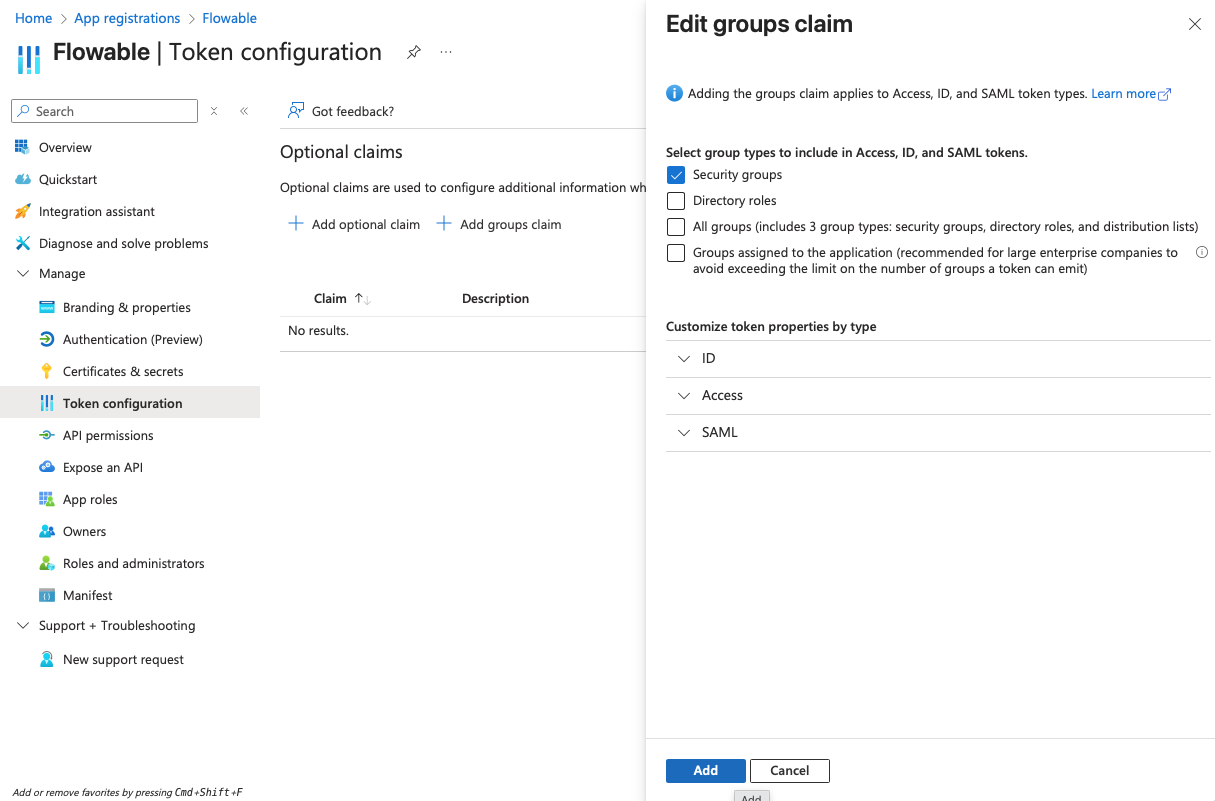
- Navigate to "Token configuration" and add a groups claim for "Security groups" to the token:

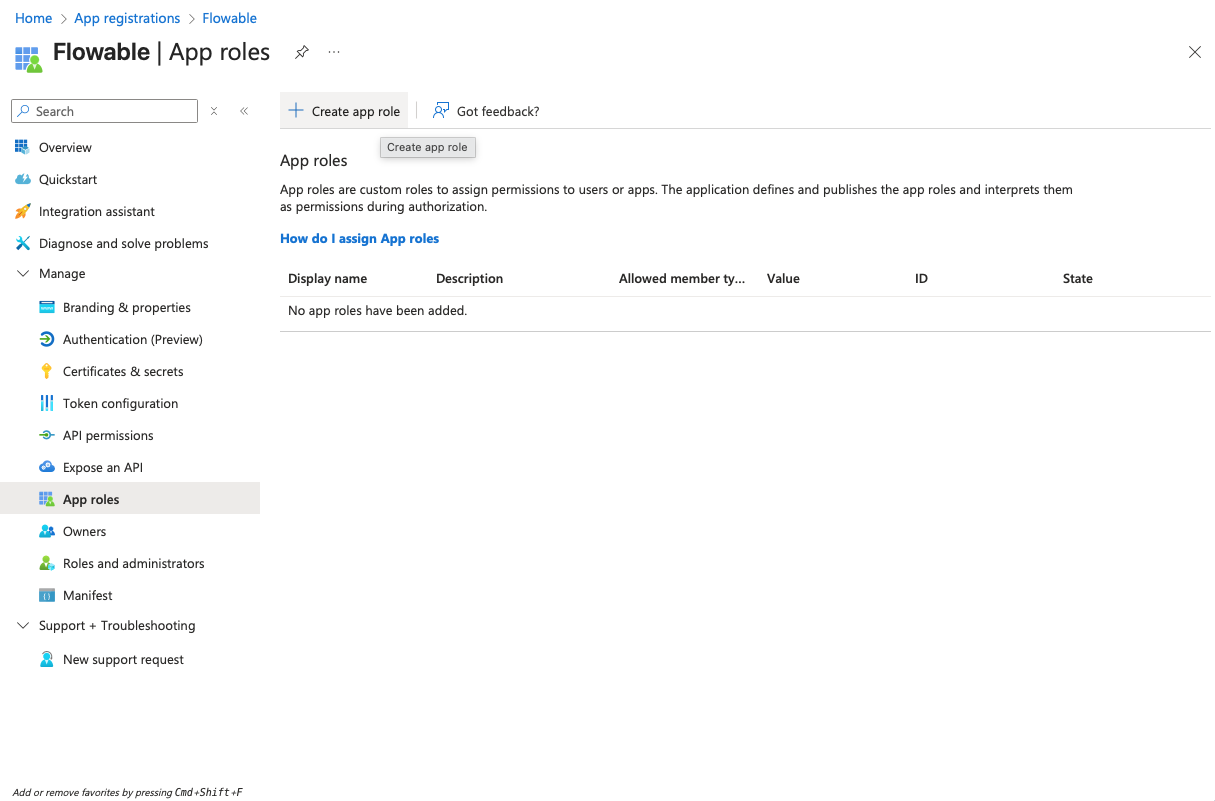
- Navigate to "App roles" and create the following app roles:
| Display Name | Value | Description | Allowed member types |
|---|---|---|---|
| Flowable Work Administrator | USER_DEFINITION_KEY_user-admin | Role for admin permissions in Flowable Work | Both |
| Flowable Work User | USER_DEFINITION_KEY_user-default | Role for default user permissions in Flowable Work | Both |


- Navigate to "API permissions" and make sure that the "User.Read" permission is added under "Microsoft Graph" as a delegated permission (should be there by default).
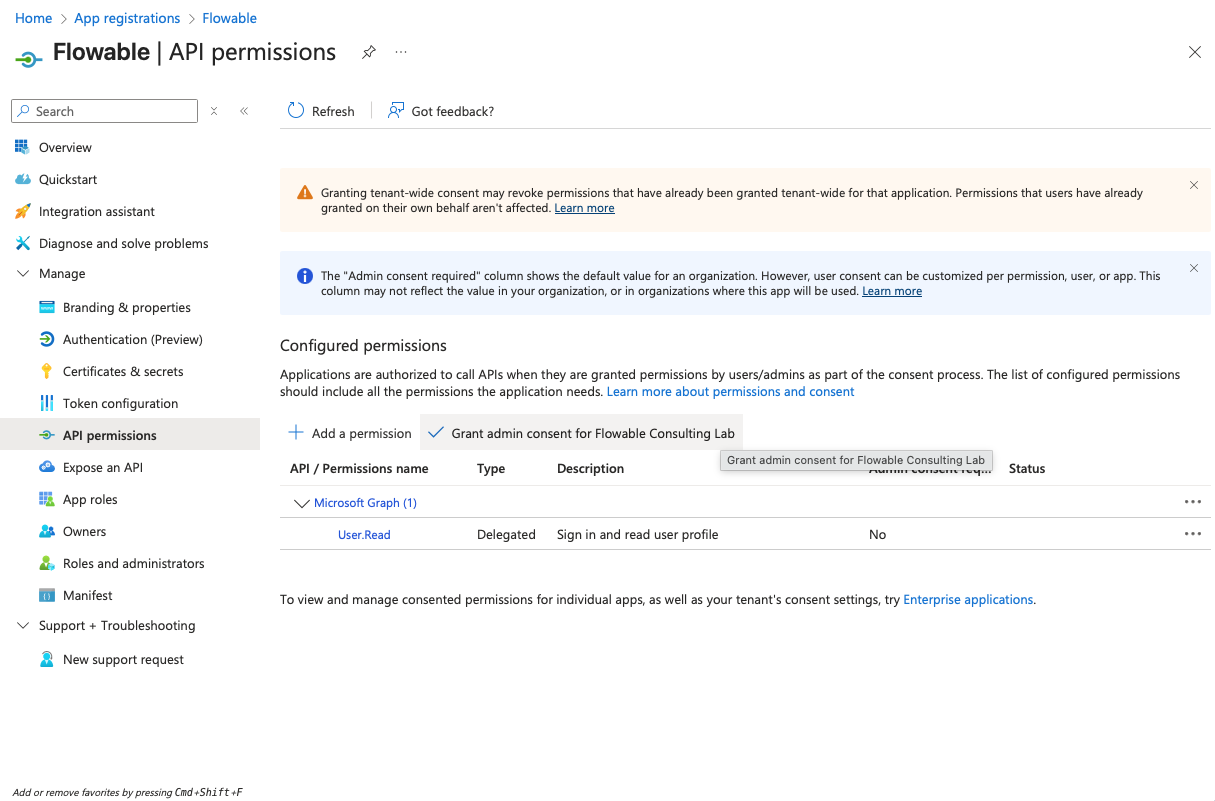
 caution
Usually, no admin consent is needed for this permission. However, Entra ID can be configured to require admin consent for any permission. If you run into issues during login, please check if admin consent is required and provide it if necessary.
Flowable Design App Registration
- Open Azure Portal → Go to "App registrations" → "New registration". Create a new registration for Flowable Design. Choose a name for the registration (e.g. "Flowable Design"). Redirect URI can be left empty for now and will be added later.
- Copy the Client ID (Application ID) and the Tenant ID from the "Overview" page to a text editor for later use.
- Navigate to "Certificates & secrets" and create a client secret by clicking "New client secret". Copy the secret value to a text editor for later use (it will become invisible after you leave the page).
-
Navigate to "Authentication" and add a redirect URI of type "Web" and with the value:
https://<yourDesignUrl>/login/oauth2/code/azure
- Navigate to "Token configuration" and add a groups claim for "Security groups" to the token:
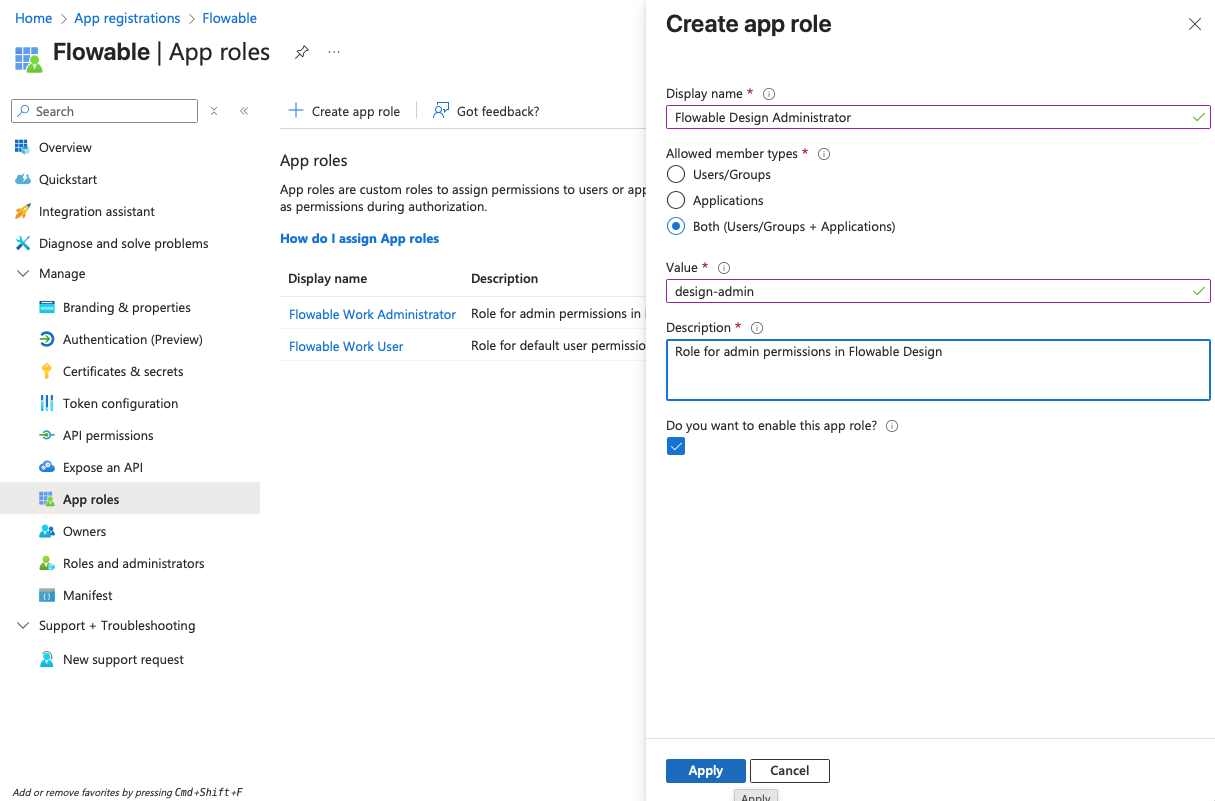
- Navigate to "App roles" and create the following app roles:
| Display Name | Value | Description | Allowed member types |
|---|---|---|---|
| Flowable Design Administrator | design-admin | Role for admin permissions in Flowable Design | Both |
- Navigate to "API permissions" and make sure that the "User.Read" permission is added under "Microsoft Graph" as a delegated permission (should be there by default).
cautionUsually, no admin consent is needed for this permission. However, Entra ID can be configured to require admin consent for any permission. If you run into issues during login, please check if admin consent is required and provide it if necessary.
Flowable Control App Registration
- Open Azure Portal → Go to "App registrations" → "New registration". Create a new registration for Flowable Control. Choose a name for the registration (e.g. "Flowable Control"). Redirect URI can be left empty for now and will be added later.
- Copy the Client ID (Application ID) and the Tenant ID from the "Overview" page to a text editor for later use.
- Navigate to "Certificates & secrets" and create a client secret by clicking "New client secret". Copy the secret value to a text editor for later use (it will become invisible after you leave the page).
-
Navigate to "Authentication" and add a redirect URI of type "Web" and with the value:
https://<yourControlUrl>/login/oauth2/code/azure
- Navigate to "Token configuration" and add a groups claim for "Security groups" to the token:
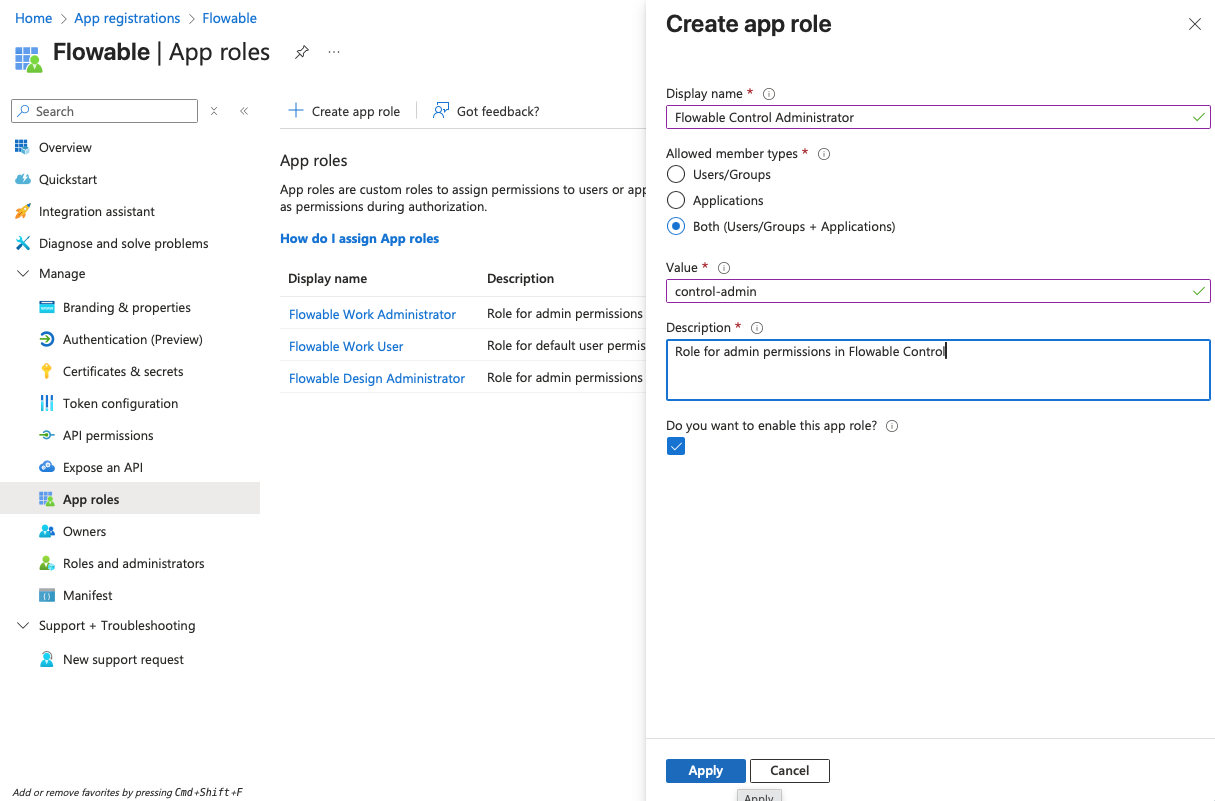
- Navigate to "App roles" and create the following app roles:
| Display Name | Value | Description | Allowed member types |
|---|---|---|---|
| Flowable Control Administrator | control-admin | Role for admin permissions in Flowable Control | Both |
- Navigate to "API permissions" and make sure that the "User.Read" permission is added under "Microsoft Graph" as a delegated permission (should be there by default).
cautionUsually, no admin consent is needed for this permission. However, Entra ID can be configured to require admin consent for any permission. If you run into issues during login, please check if admin consent is required and provide it if necessary.
Assigning App Roles to Users/Groups
After creating the individual app registrations for Flowable Work, Design and Control, you need to assign the created app roles to the users or groups that should have access to the applications. This part is basically the same as for the single app registration and is described in detail in the Single App Registration Setup chapter.