Setup SSO for Entra ID
This guide describes how to set up Single Sign-On (SSO) for Flowable Cloud Dedicated using Microsoft Entra ID (formerly Azure Active Directory).
With Flowable Cloud Dedicated, you will get multiple environments (e.g. non-prod and prod) that are completely separated from each other. This also means that the SSO configuration for each environment is independent and has to be configured separately. This allows to give users different access permissions on the different environments.
The creation and configuration of the App Registration shown in this chapter has to be repeated for each environment (e.g. PROD, NON-PROD, etc.).
Single App Registration Setup
In this setup a single shared App Registration for all Flowable applications is used. Flowable Control will access Flowable Work with a Technical User while Flowable Design will use User Propagation to ensure that only Design users with the appropriate application role can deploy apps to Flowable Work.
Certain alternative authentication patterns require to have individual app registrations for each Flowable application. Please refer to Flowable Design/Control to Flowable Work Communication for an overview on the different authentication patterns available for Flowable.
For most authentication scenarios, a single shared App Registration for all Flowable applications (Work/Design/Control) is sufficient.
This will create the Flowable Application Registration in Entra ID.
- Open Microsoft Entra admin center (https://entra.microsoft.com) or the "Microsoft Entra ID" service in the Azure Portal (https://portal.azure.com)
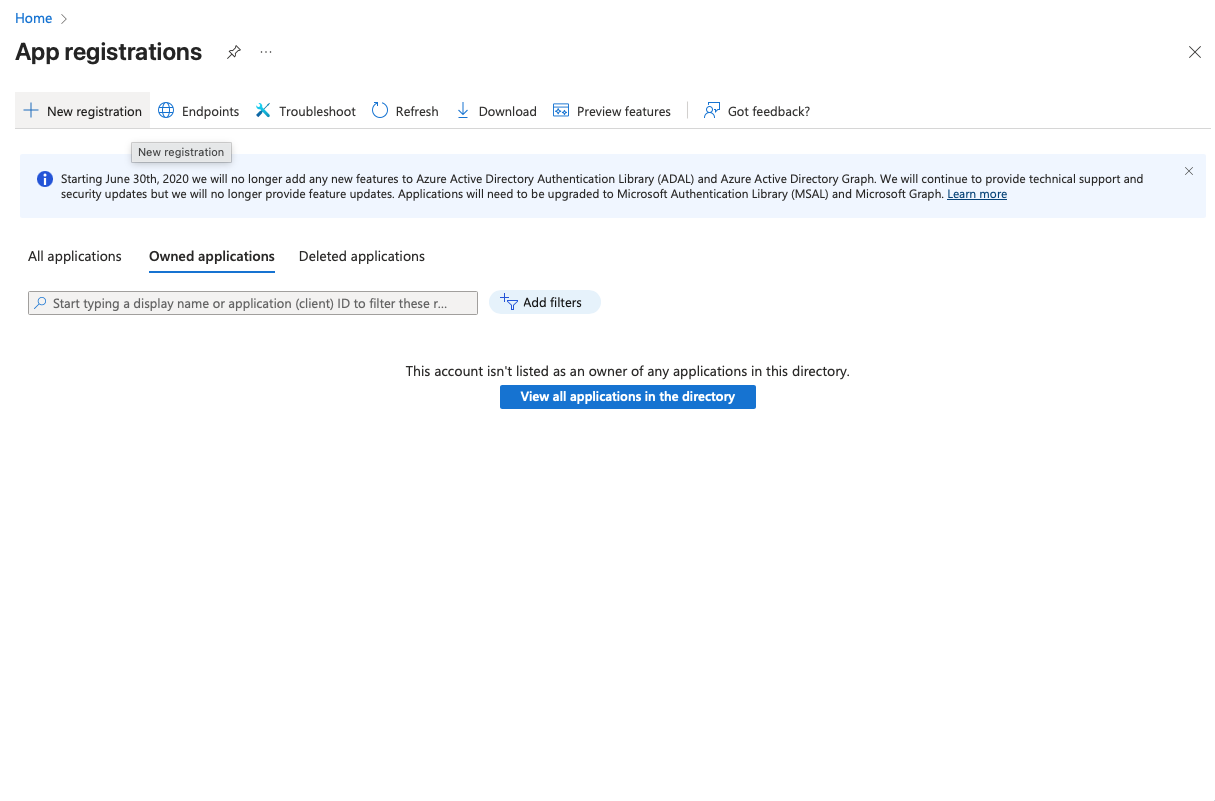
- Go to "App registrations" → "New registration". Create a new registration for Flowable. Choose a name for the registration (e.g.
Flowable SSO NON-PROD). Redirect URI can be left empty for now and will be added later. Click "Register".

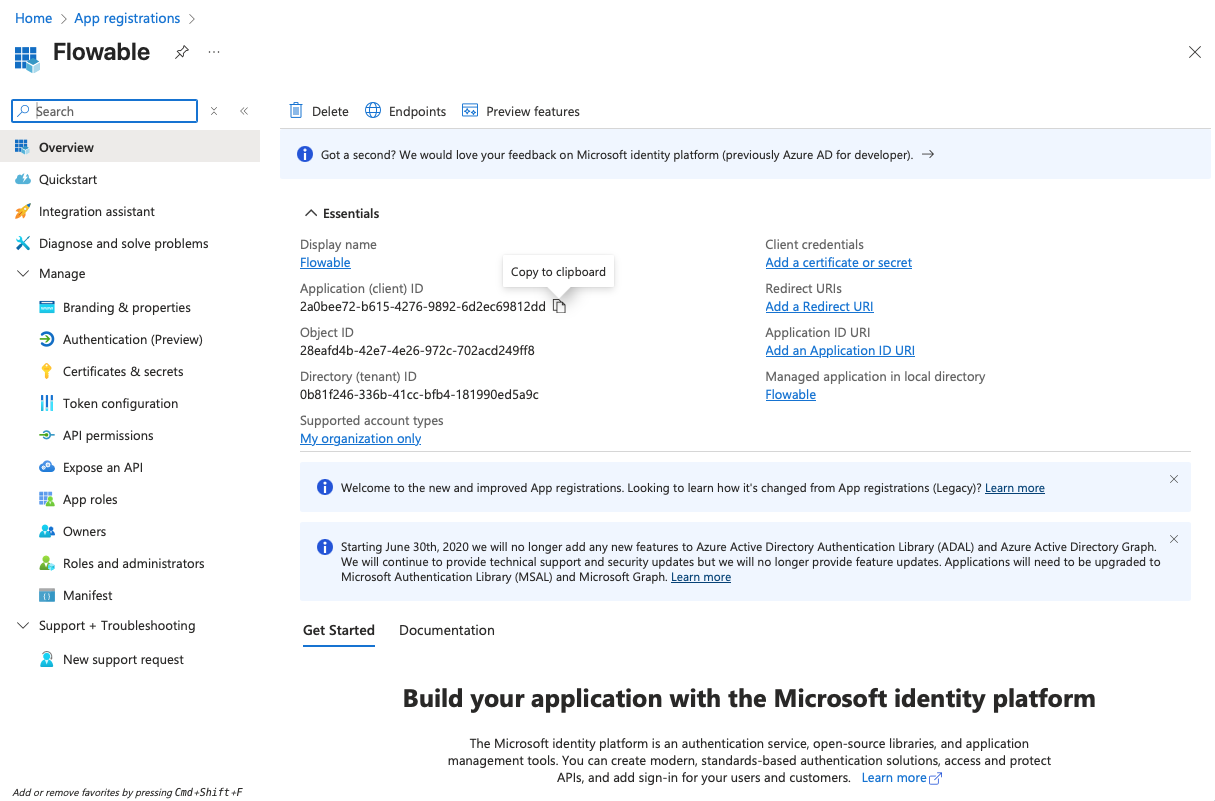
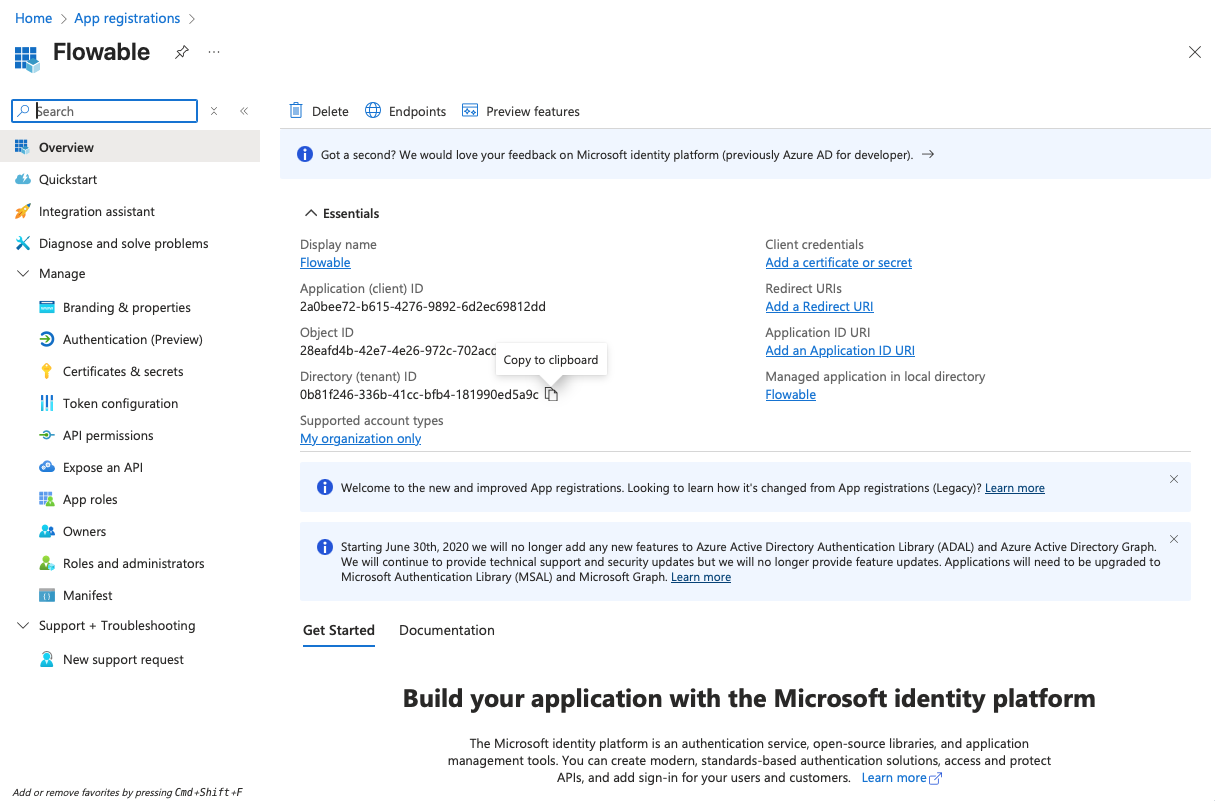
- Copy the Client ID (Application ID) and the Tenant ID from the "Overview" page to a text editor for later use.
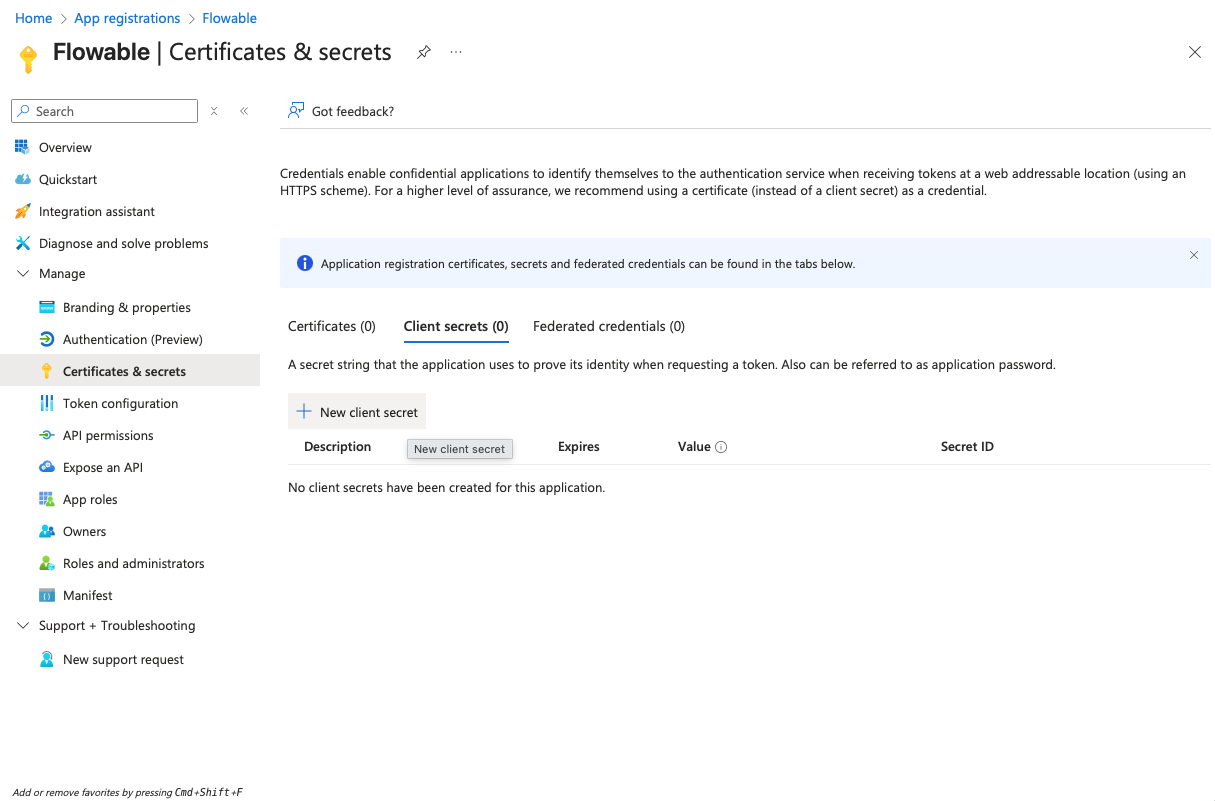
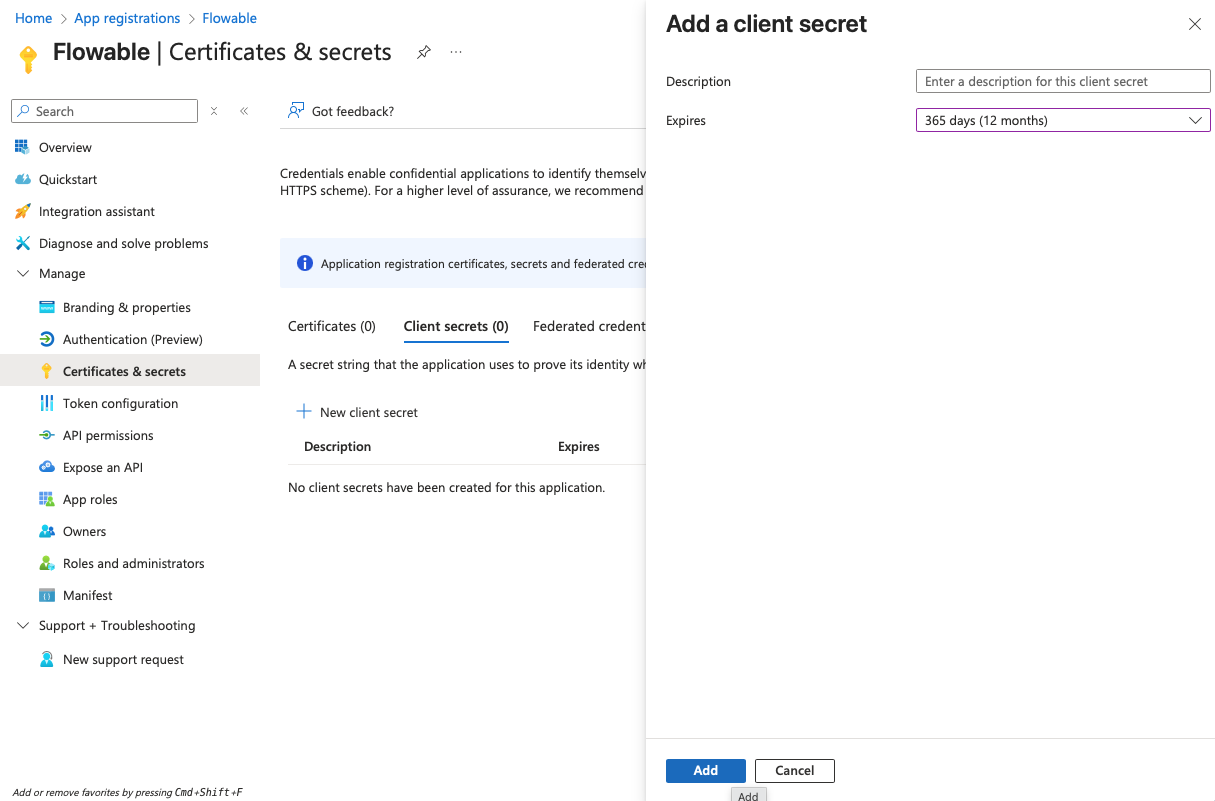
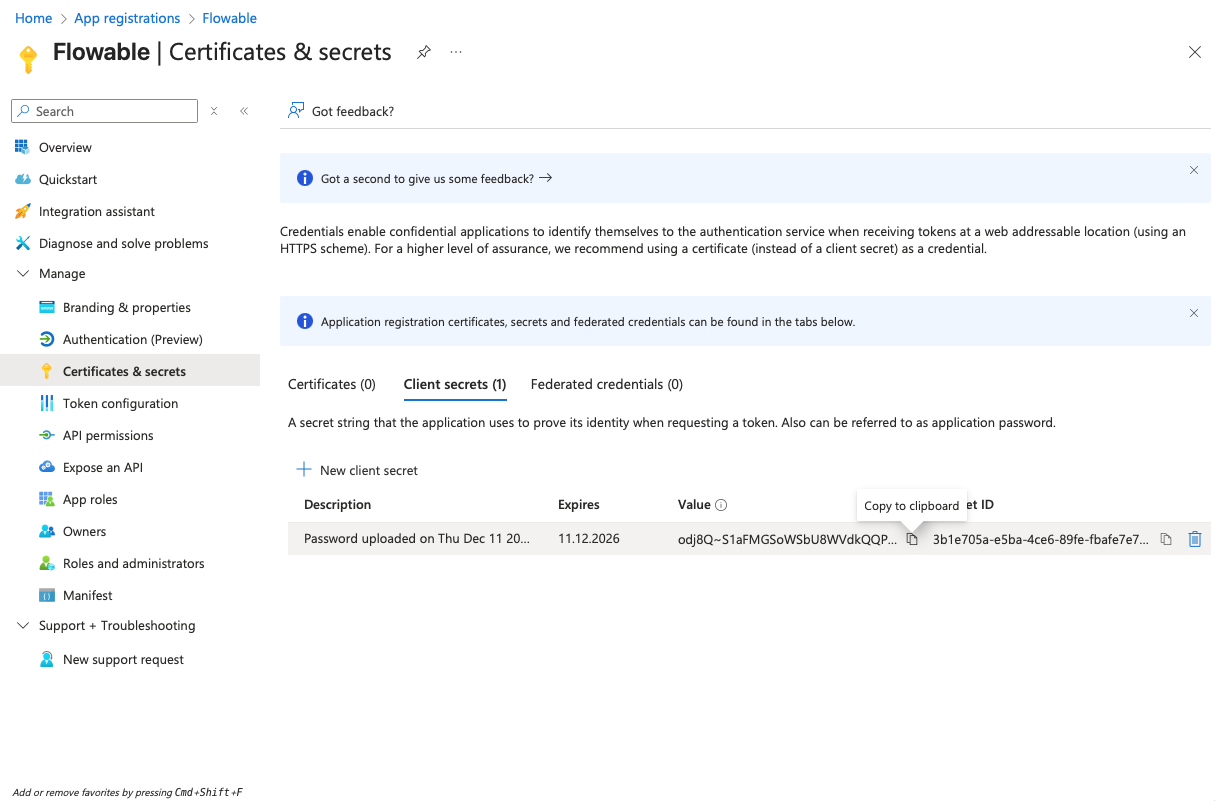
- Navigate to "Certificates & secrets" and create a client secret by clicking "New client secret". Copy the secret value to a text editor for later use (it will become invisible after you leave the page).
-
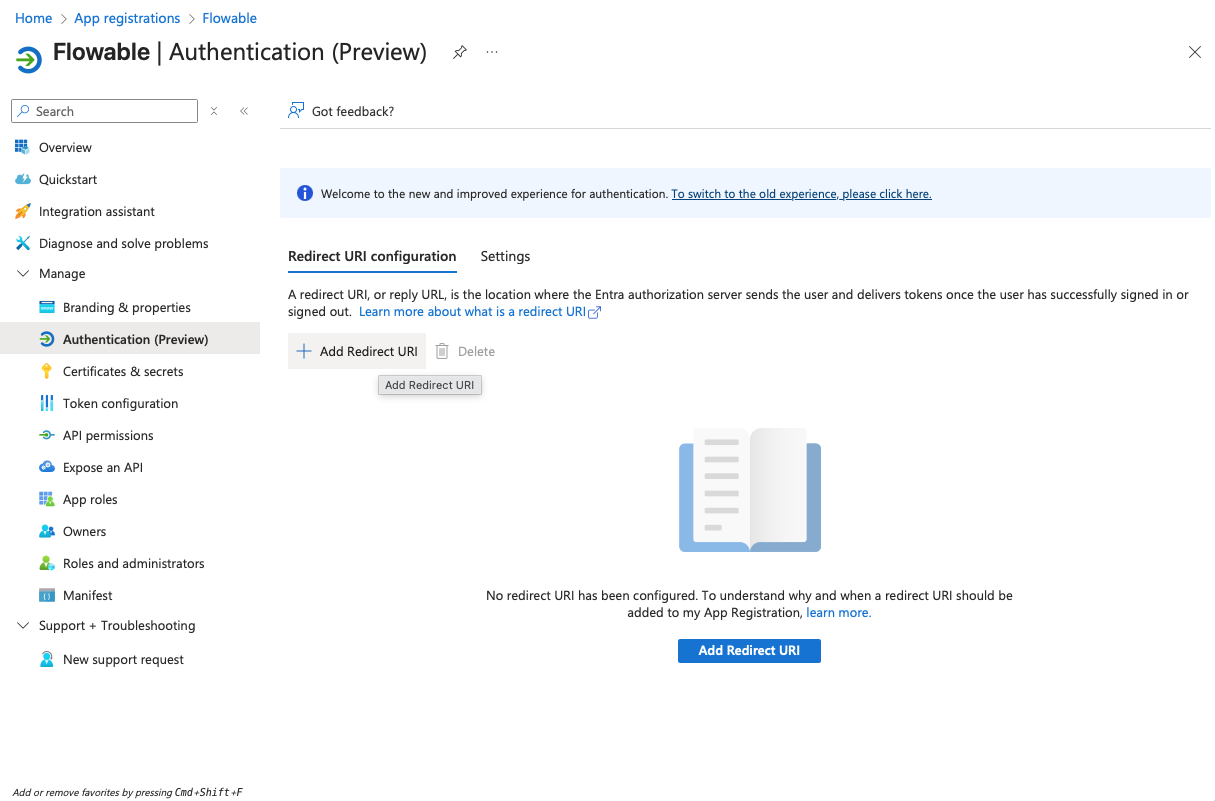
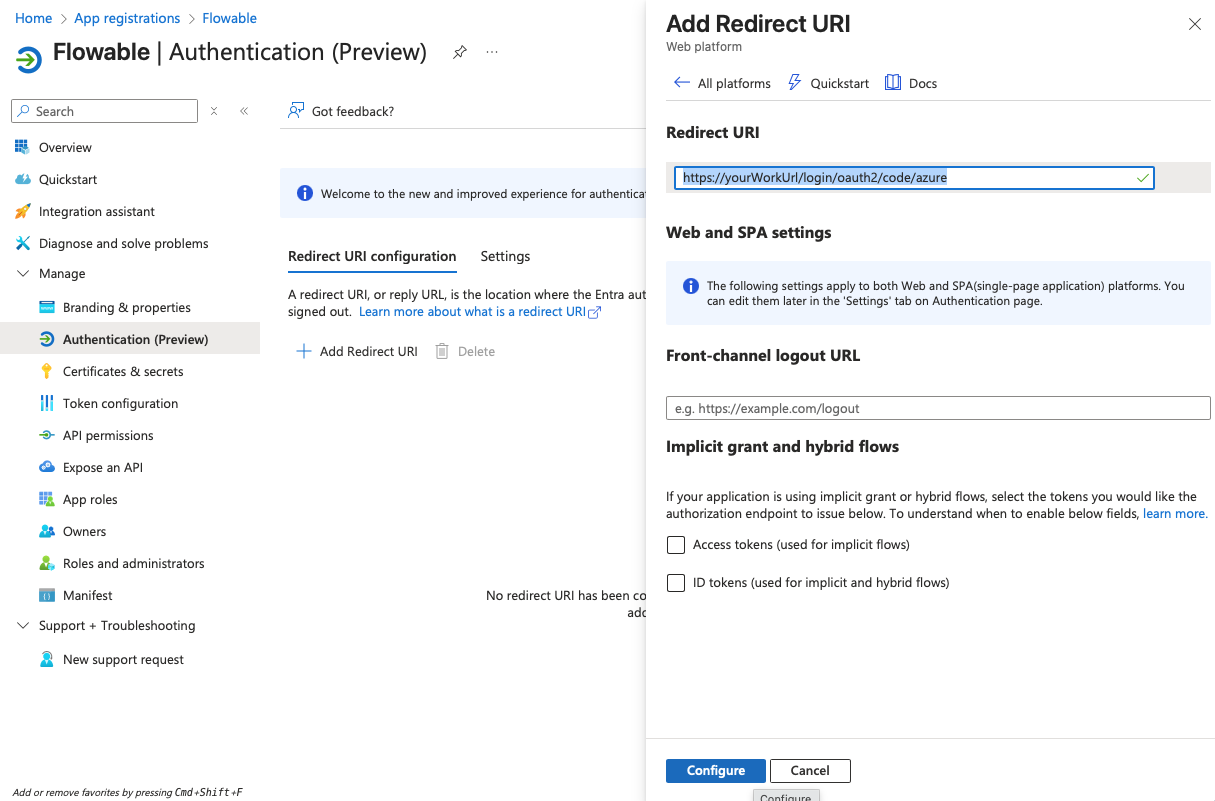
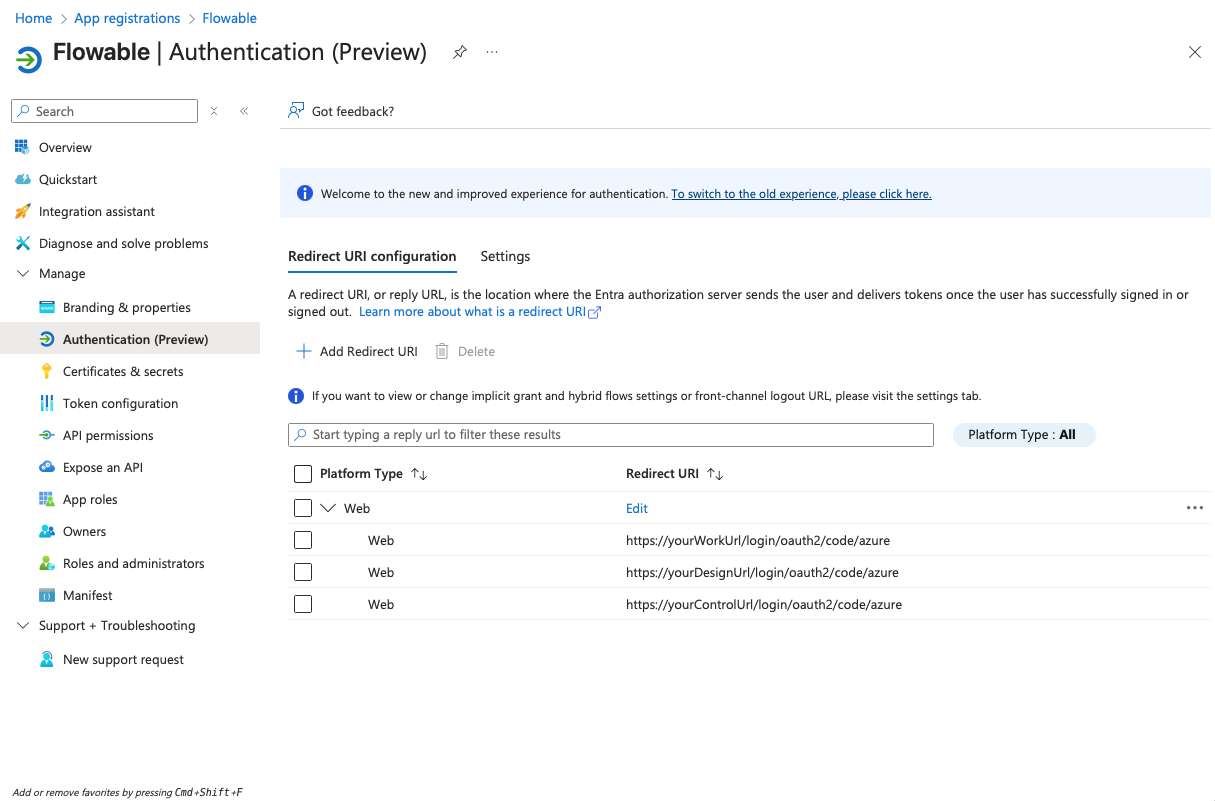
Navigate to "Authentication" and add redirect URIs of type "Web" and with the values:
https://<yourWorkUrl>/login/oauth2/code/azurehttps://<yourDesignUrl>/login/oauth2/code/azurehttps://<yourControlUrl>/login/oauth2/code/azure
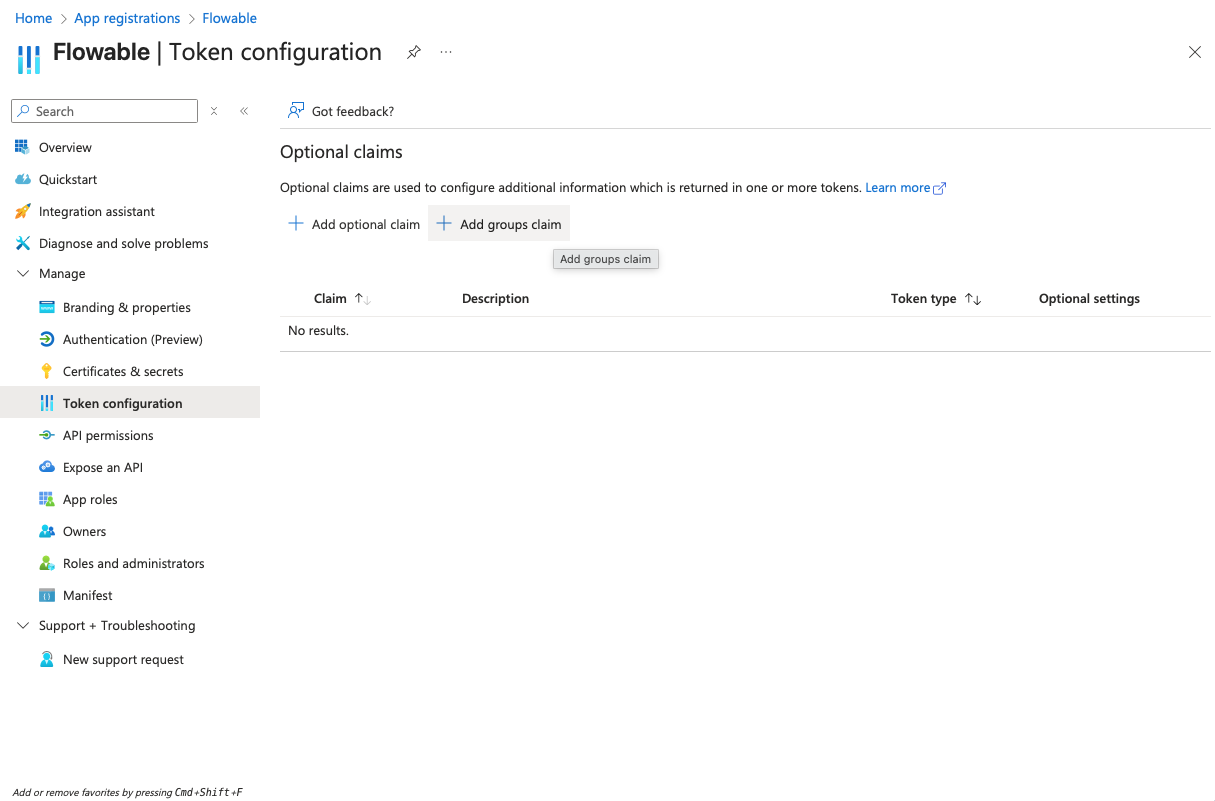
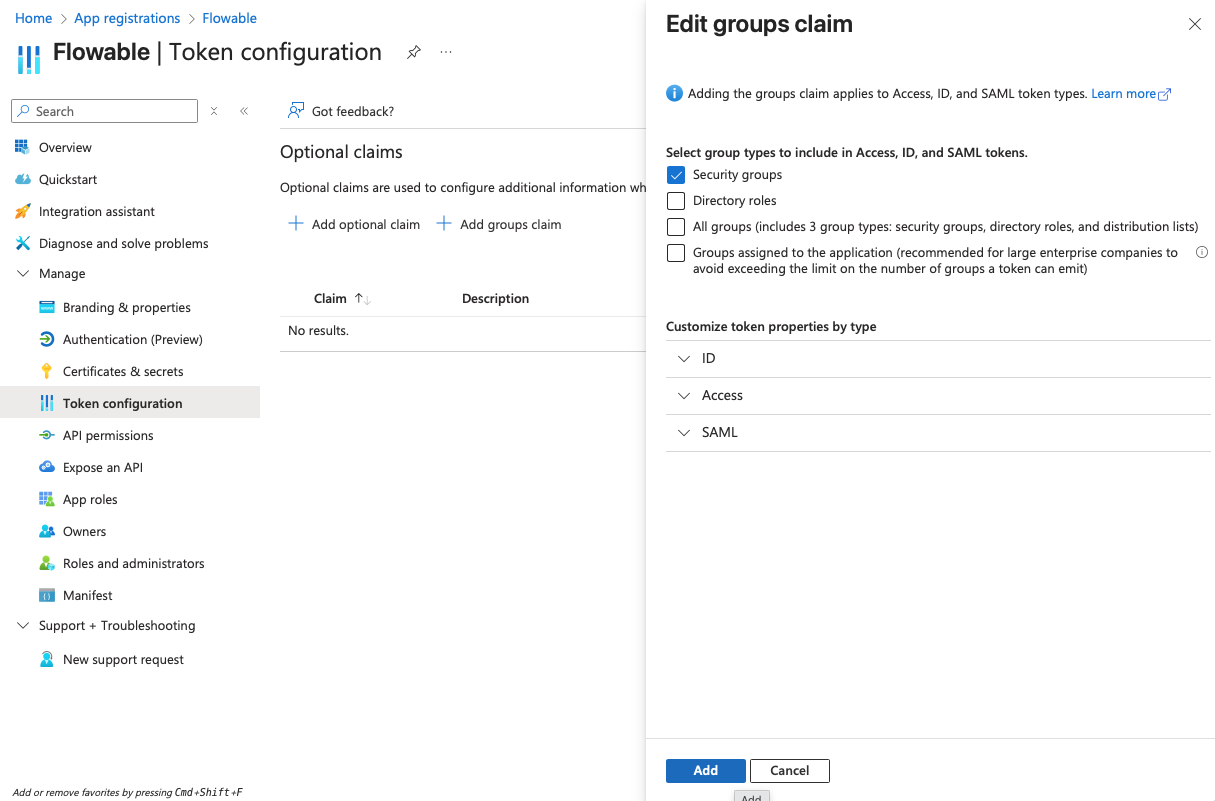
- Navigate to "Token configuration" and add a groups claim for "Security groups" to the token:

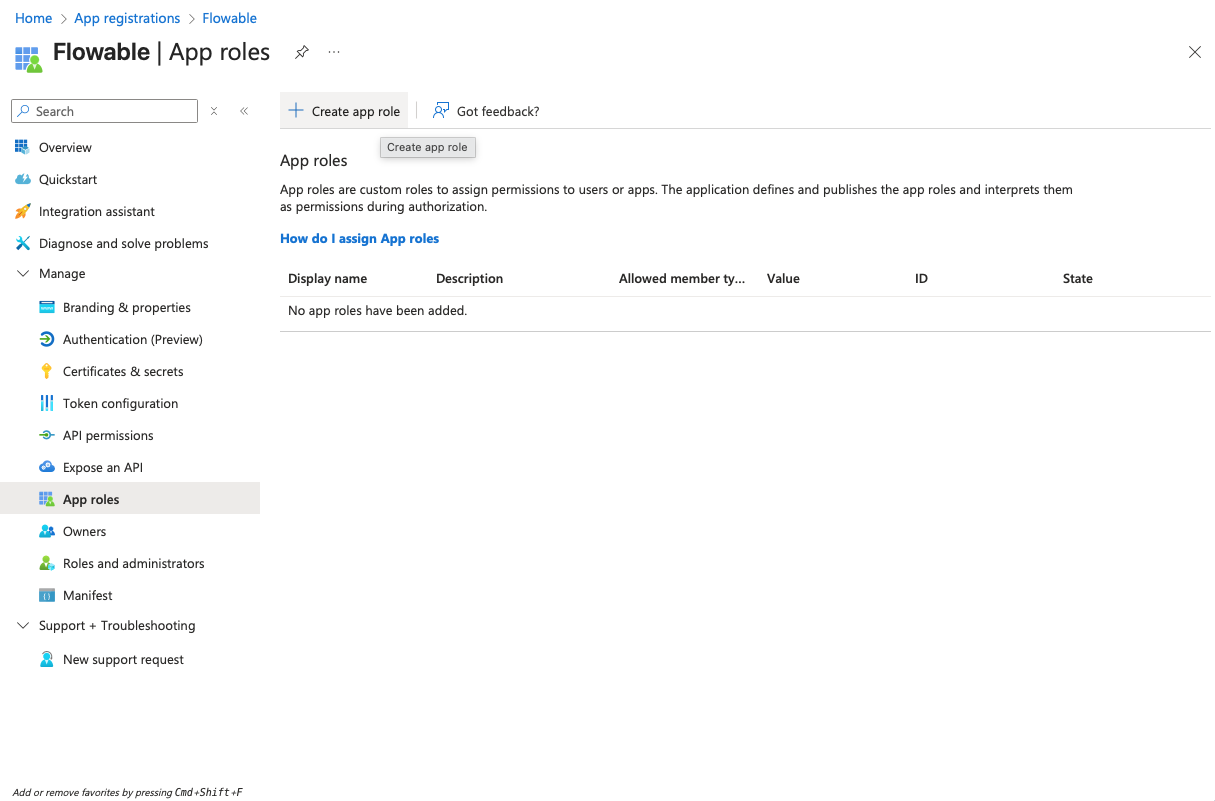
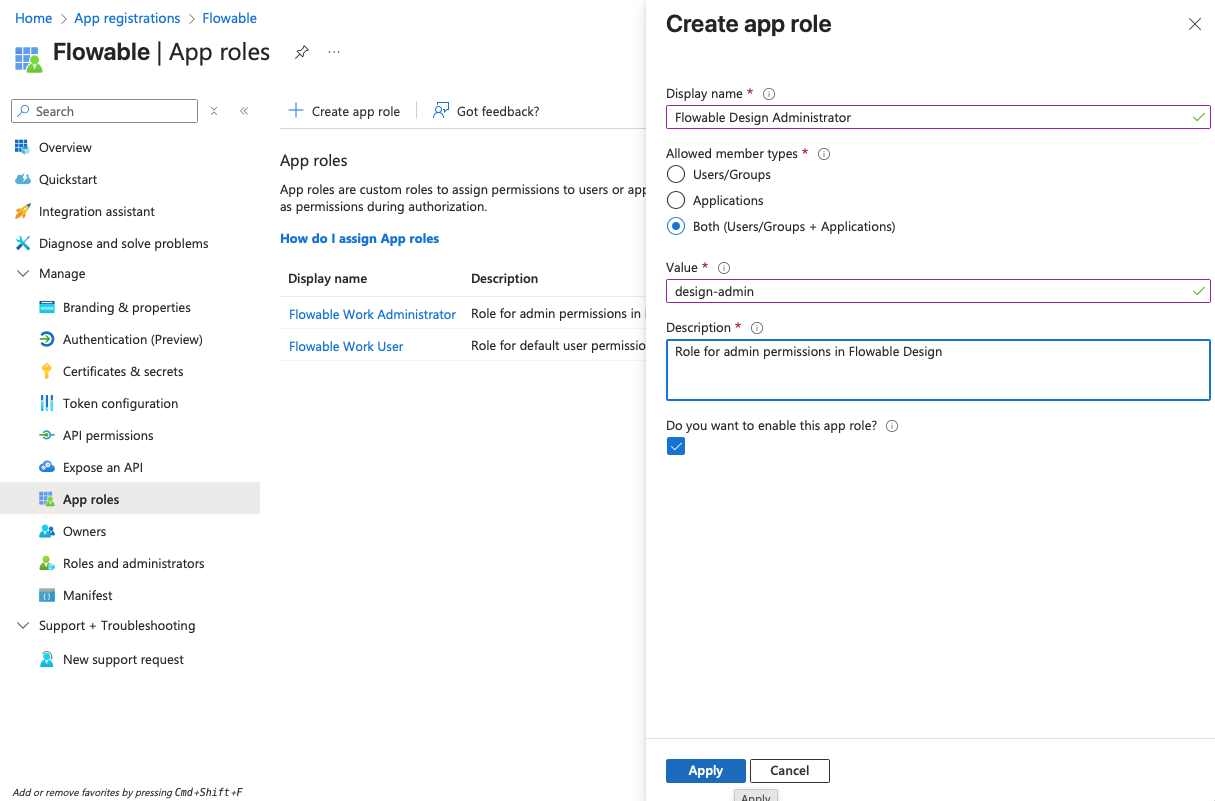
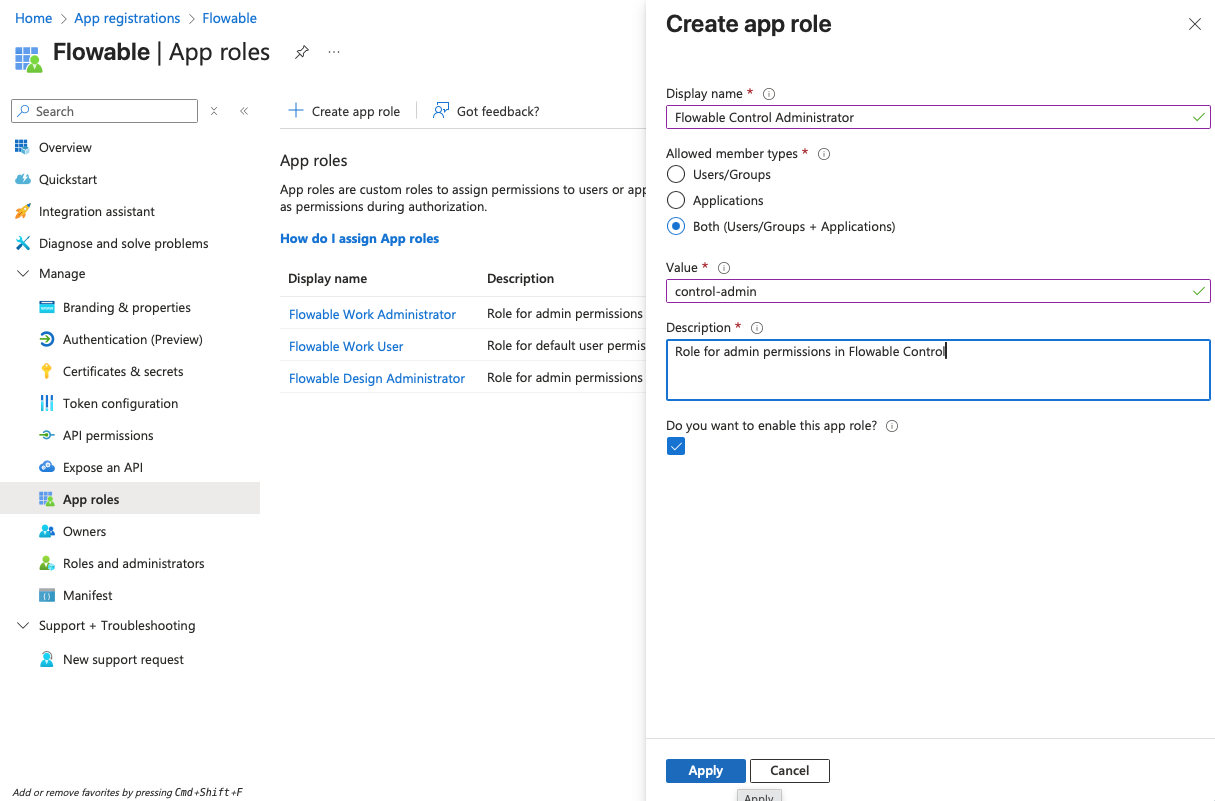
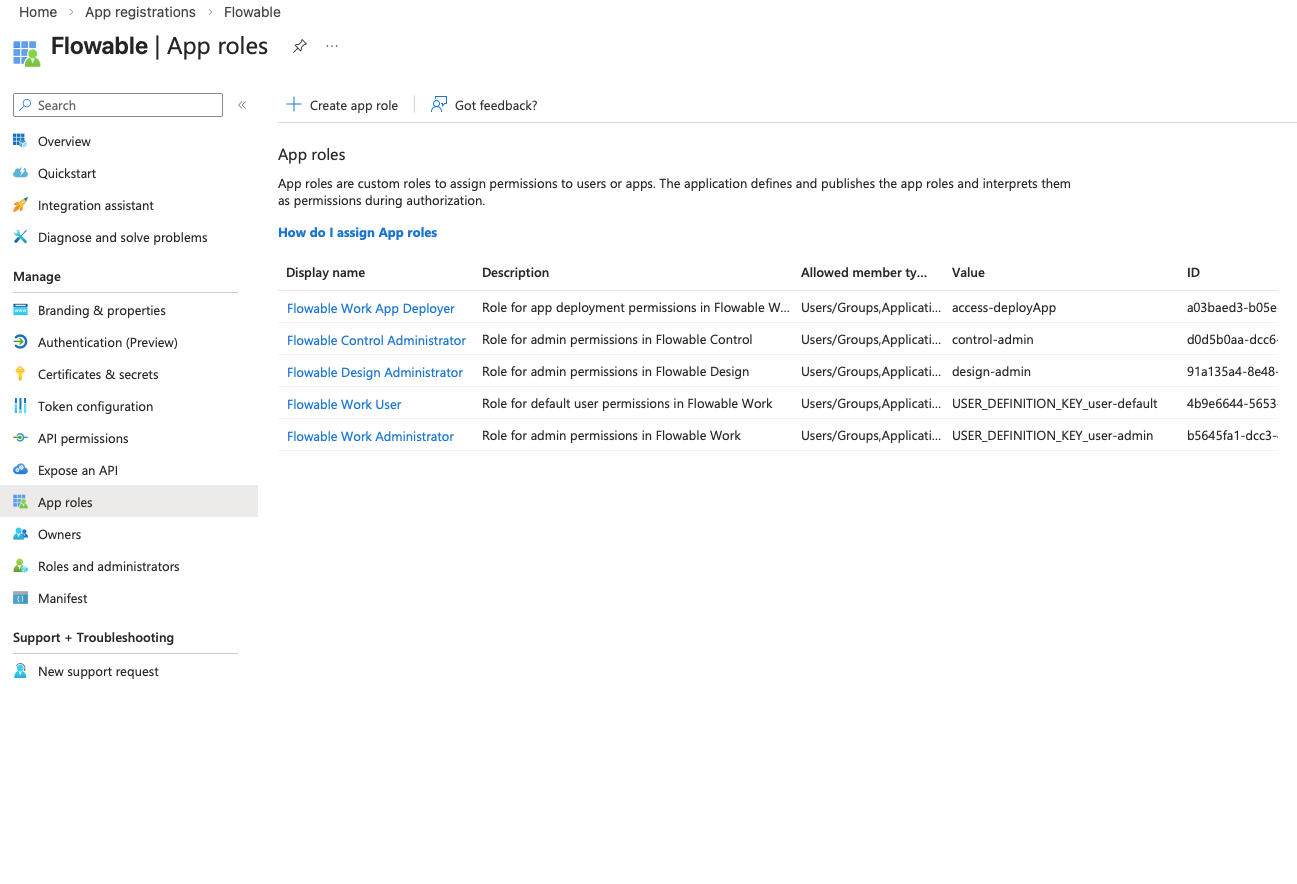
- Navigate to "App roles" and create the following app roles:
| Display Name | Allowed member types | Value | Description |
|---|---|---|---|
| Flowable Work Administrator | Both | USER_DEFINITION_KEY_user-admin | Role for admin permissions in Flowable Work |
| Flowable Work User | Both | USER_DEFINITION_KEY_user-default | Role for default user permissions in Flowable Work |
| Flowable Work App Deployer | Both | access-deployApp | Role for app deployment permissions in Flowable Work |
| Flowable Design Administrator | Both | design-admin | Role for admin permissions in Flowable Design |
| Flowable Control Administrator | Both | control-admin | Role for admin permissions in Flowable Control |


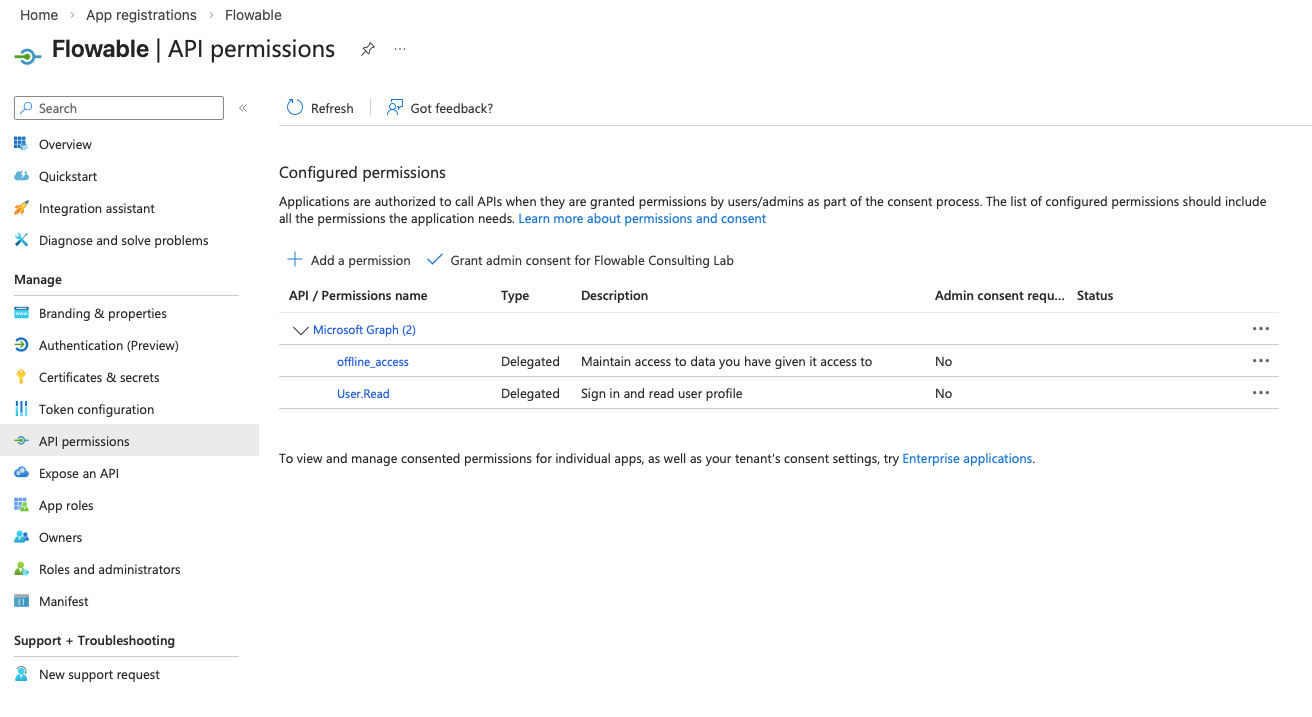
- Navigate to "API permissions" and make sure that the "User.Read" permission is added under "Microsoft Graph" as a delegated permission (should be there by default).
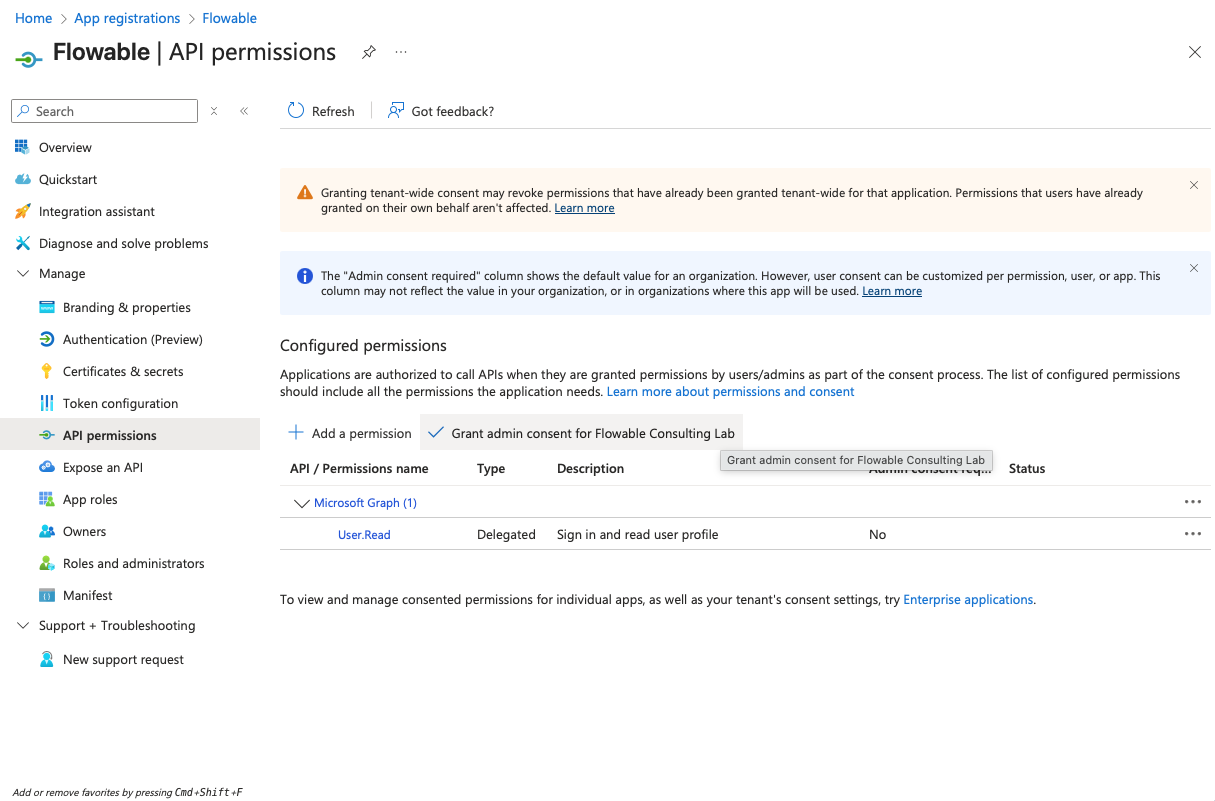
- Click on "Add a permission" → "Microsoft Graph" → "Delegated permissions" and add the "offline_access" permission.
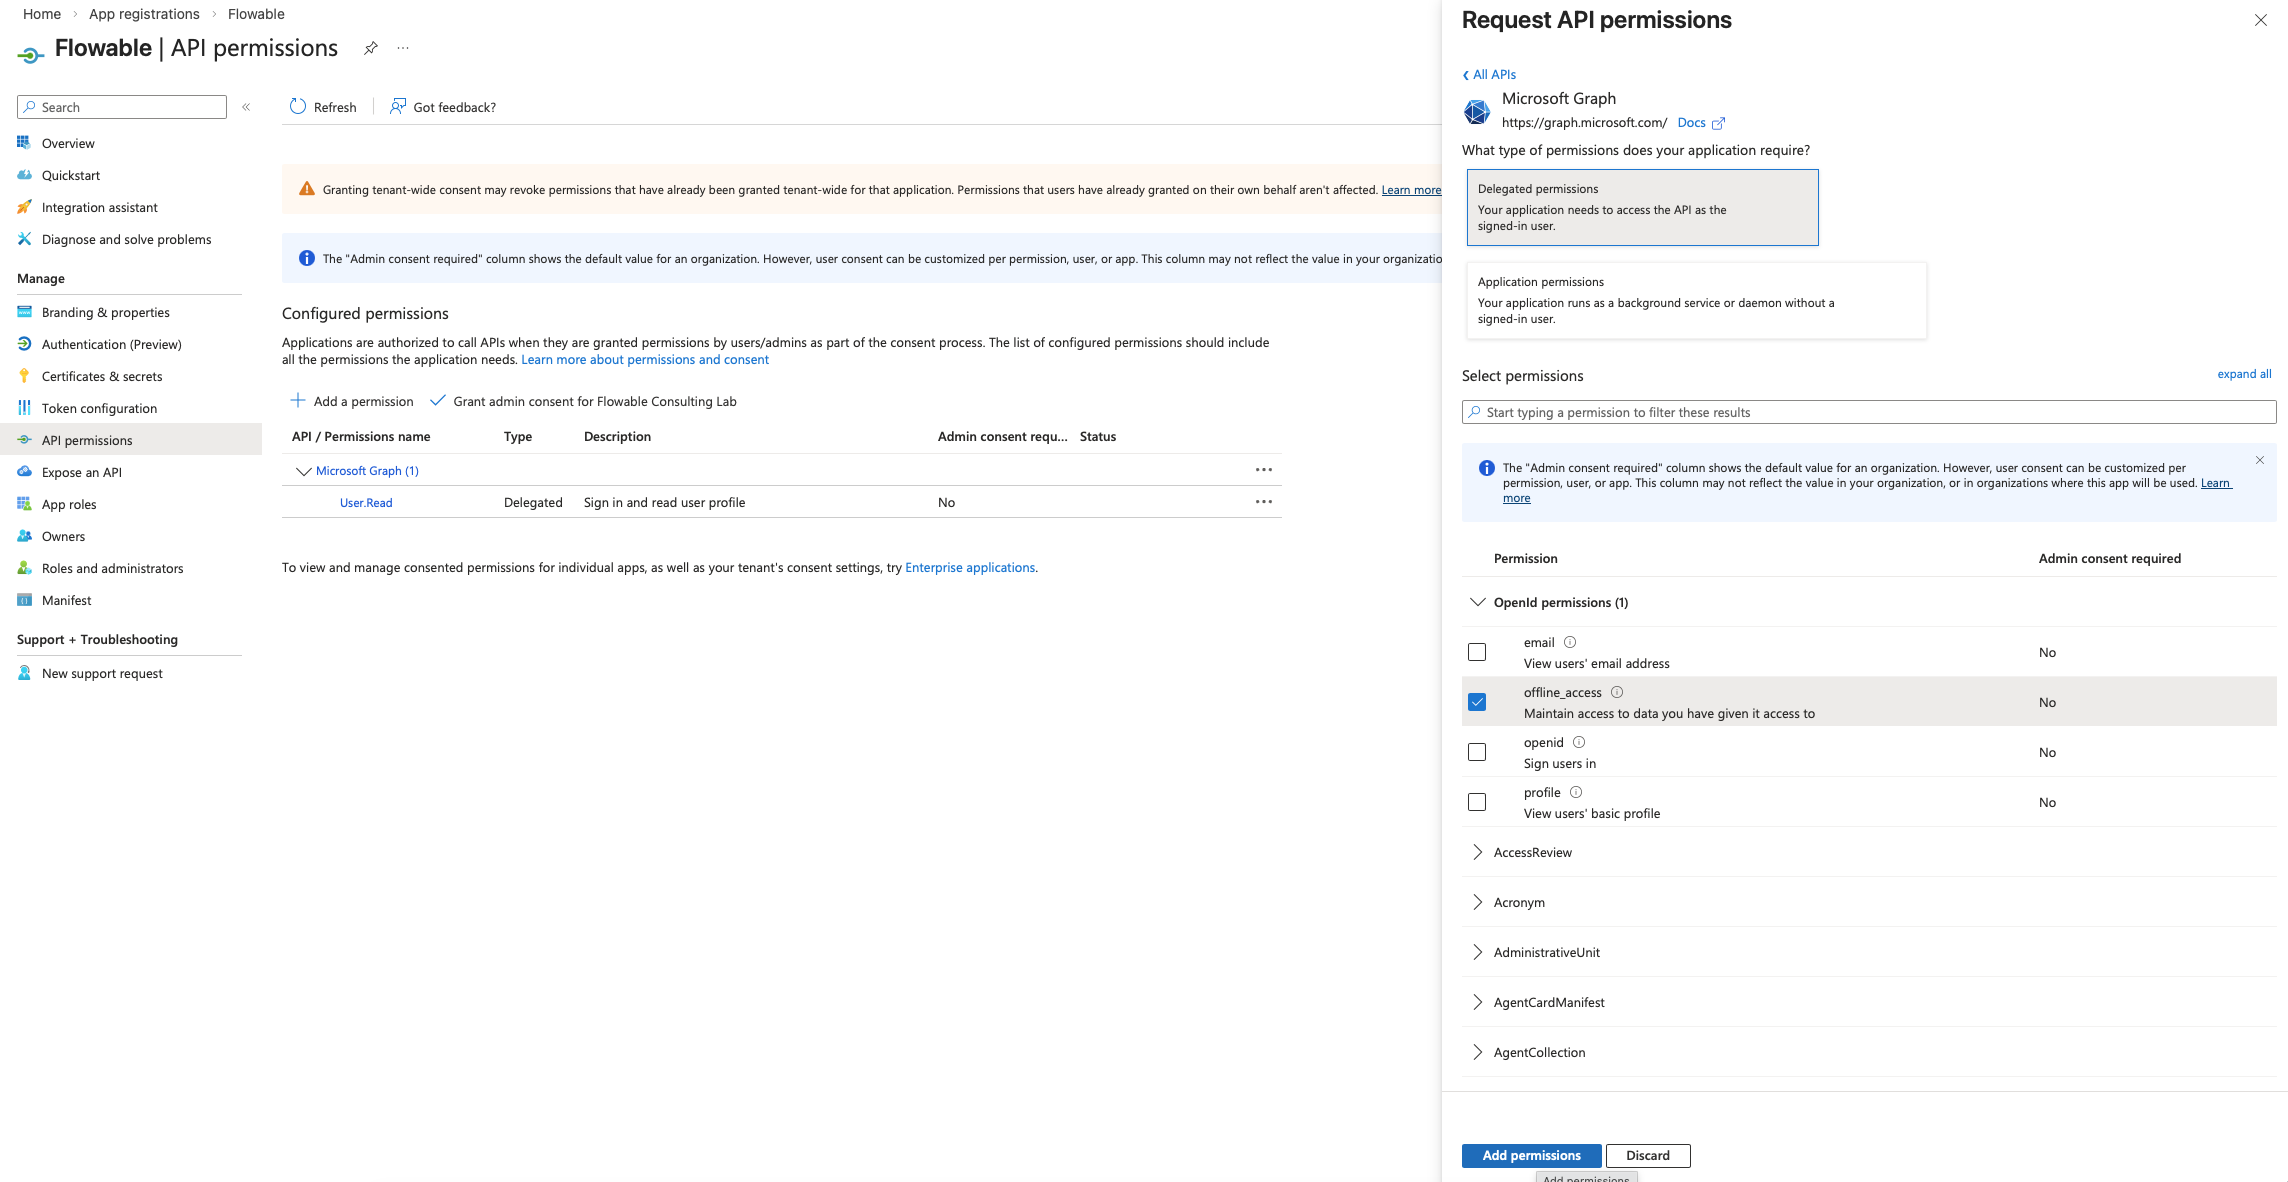
 tip
tipThe "offline_access" permission is needed for Flowable Design to be able to use refresh tokens to get an updated access token for accessing Flowable Work after the initial access token has expired (happens after 1h by default).
 caution
Usually, no admin consent is needed for this permission. However, Entra ID can be configured to require admin consent for any permission. If you run into issues during login, please check if admin consent is required and provide it if necessary.
Assigning App Roles to Users/Groups
For Entra ID users to be able to access the Flowable application with correct permissions, they need to be assigned the app roles created in the previous step.
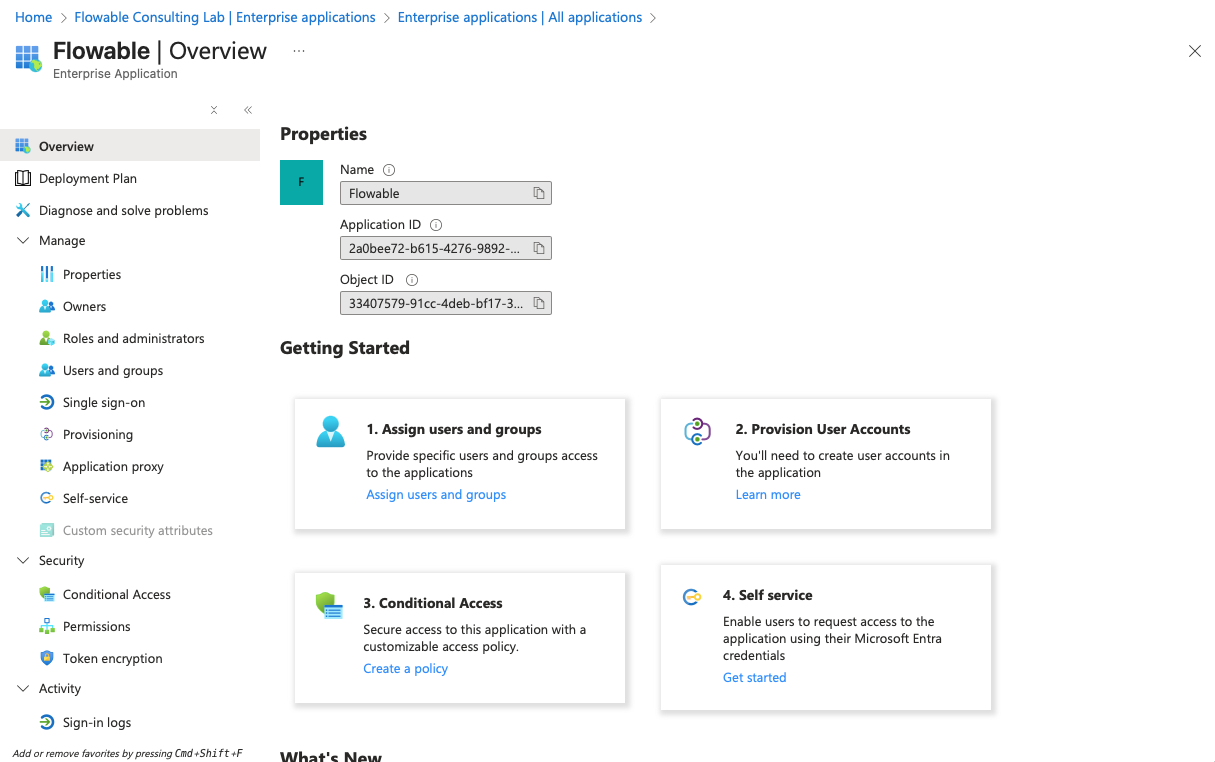
This has to be done in the "Enterprise applications" section of Entra ID. As you created an App Registration in the previous chapter, an according Enterprise Application has been created automatically.
- Open Microsoft Entra admin center (https://entra.microsoft.com) or the "Microsoft Entra ID" service in the Azure Portal (https://portal.azure.com)
- Go to "Enterprise applications" and search for the Flowable application you created in the previous chapter (e.g. "Flowable SSO NON-PROD"). Open it.
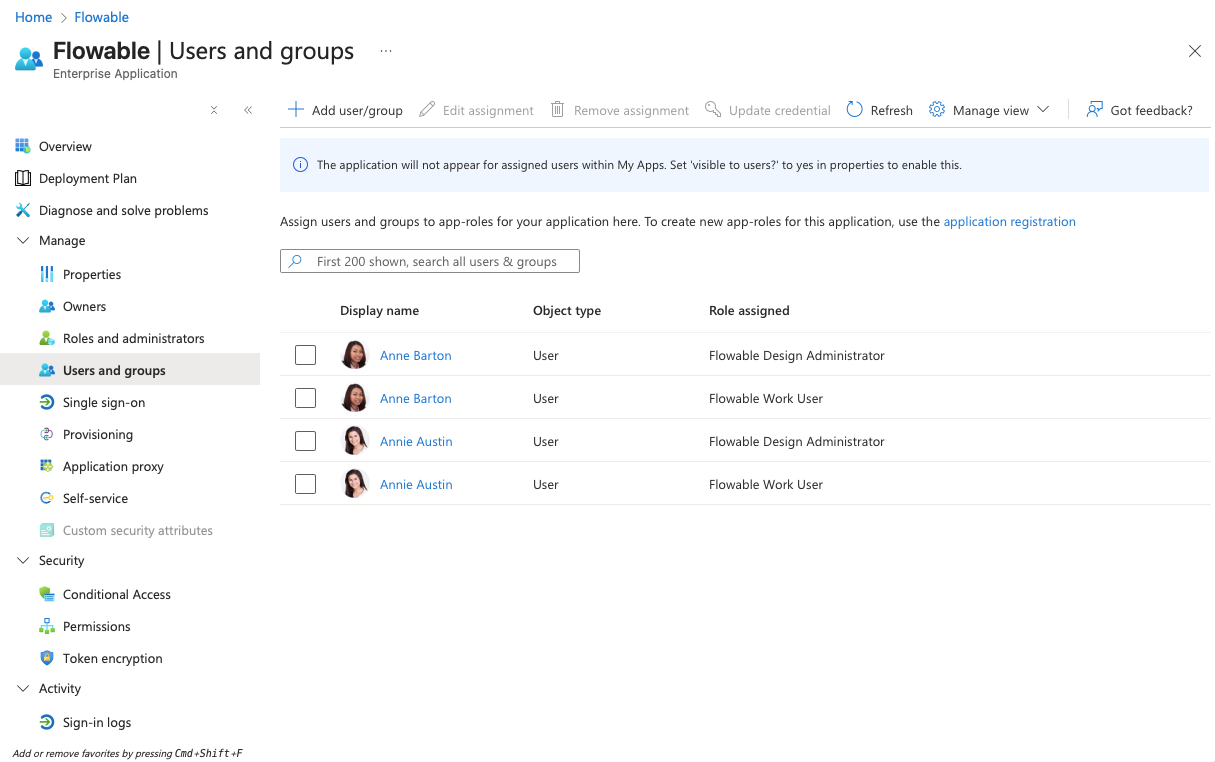
- Go to "Users and groups" and click "Add user/group".
 note
noteUnfortunately, due to Entra ID subscription plan limitations, it might not be possible for you to assign app roles to groups. This means you have to assign app roles to users one by one.
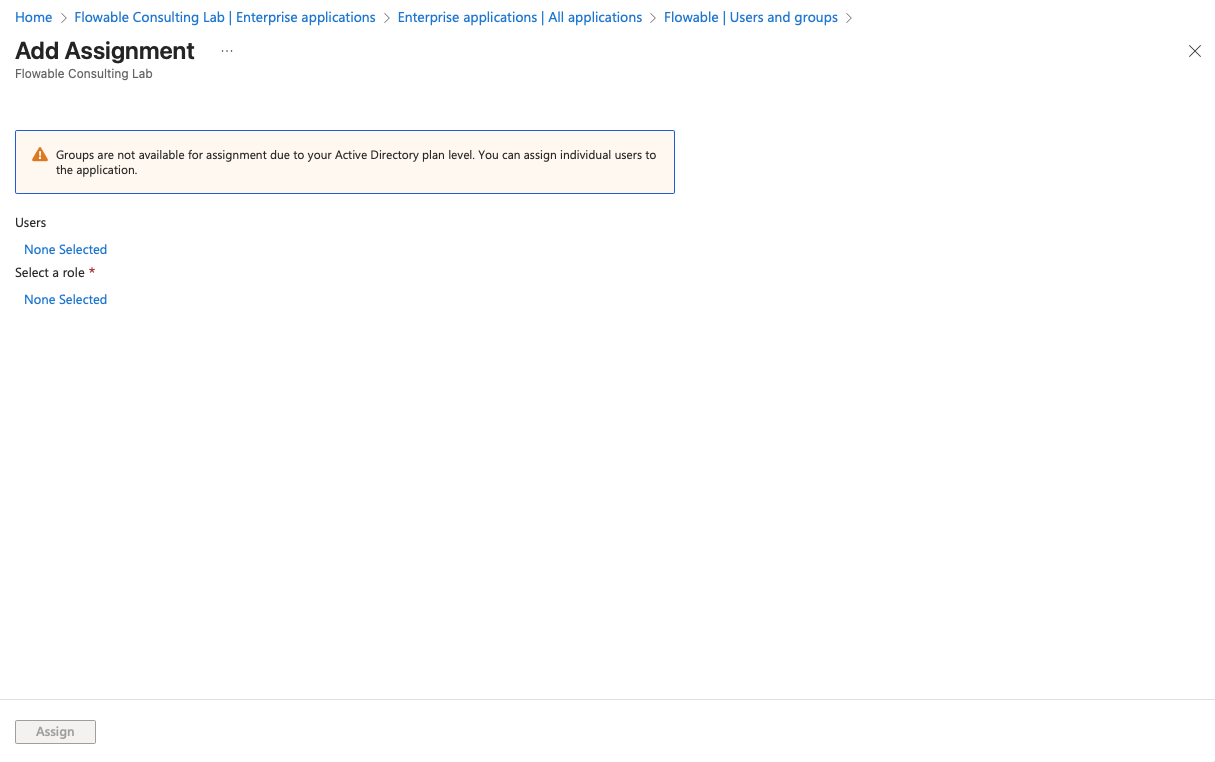
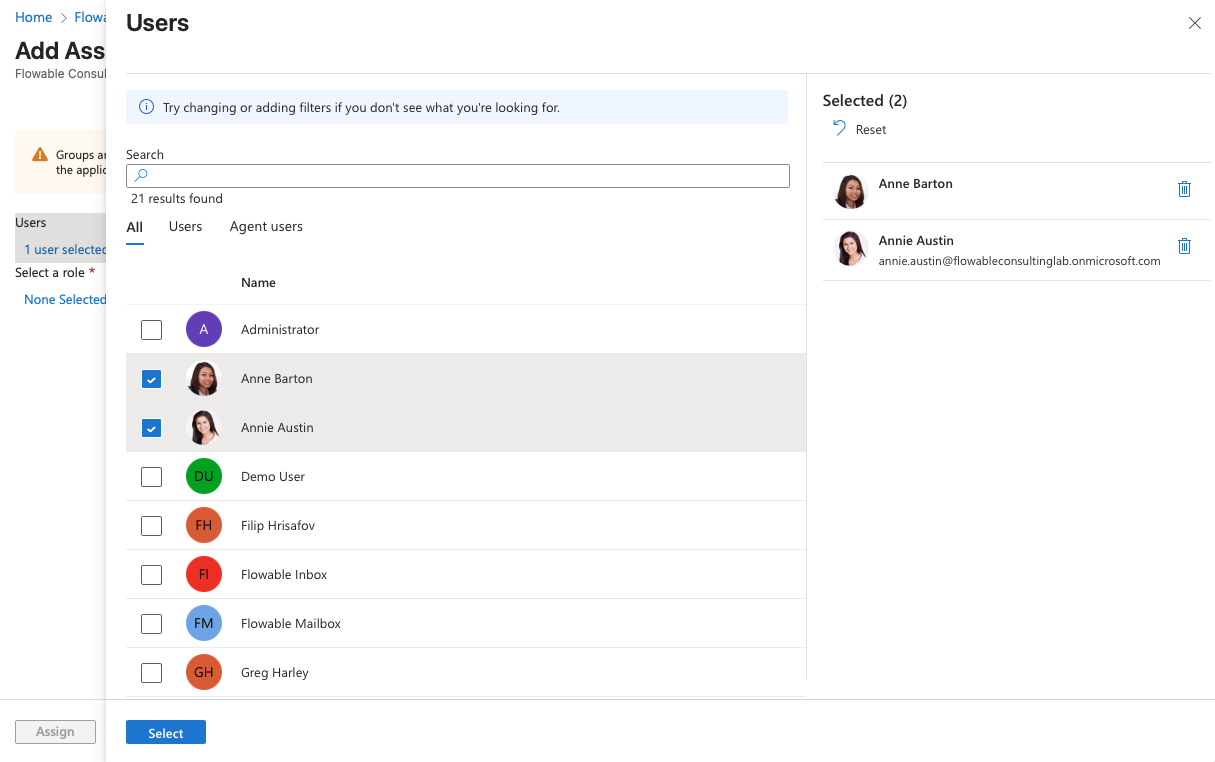
- Click on the link for users or groups you want to assign and select all the users you want to assign an app role to. Click "Select".
- Click on the link below "Select Role" and select the appropriate app role for the selected users/groups. Click "Select".
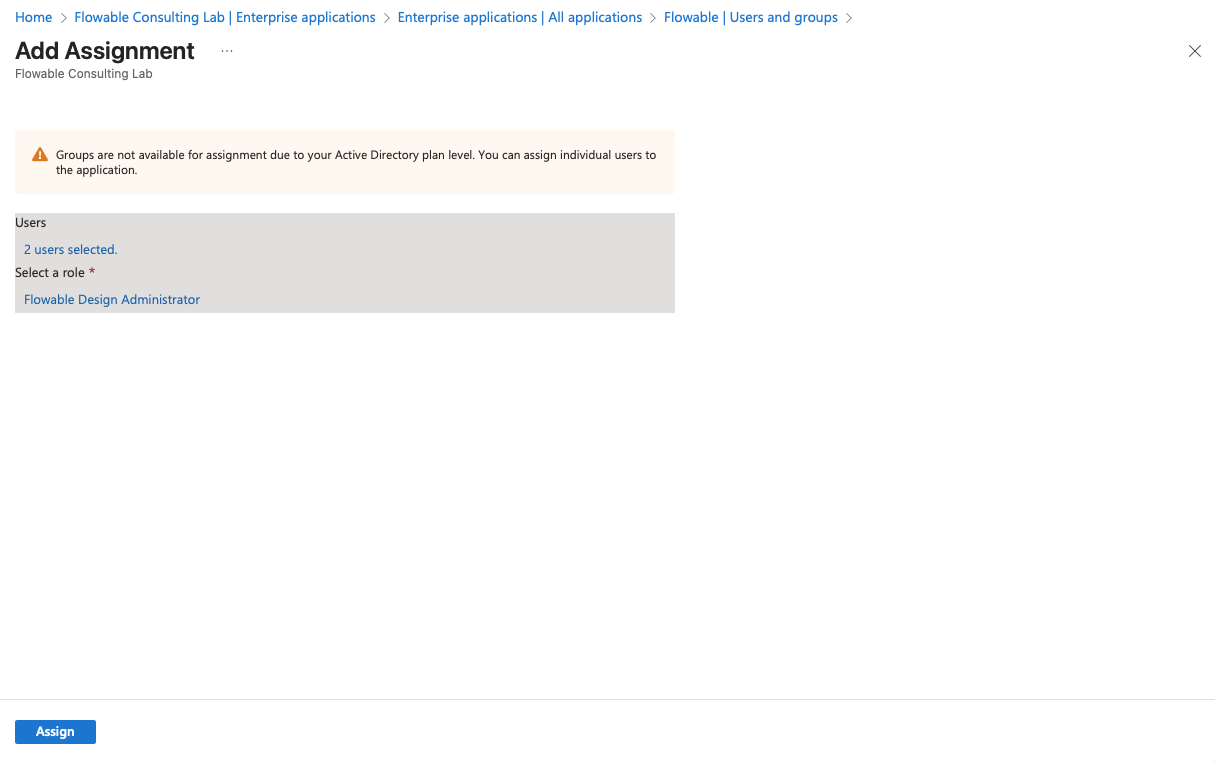
- Click "Assign" to assign the selected app role to the selected users/groups.
- Repeat steps 3-6 for all users/groups that need access to Flowable applications. Certain roles are mutually exclusive. For example, a user/group assigned the "Flowable Work Administrator" role should not be assigned the "Flowable Work User" role.
- Assign the Role "Flowable Work User" to users/groups that should have default user permissions in Flowable Work.
- Assign the Role "Flowable Work Administrator" to users/groups that should have admin permissions in Flowable Work.
- Assign the Role "Flowable Work App Deployer" to users/groups that should have permissions to deploy apps from Flowable Design to Flowable Work.
- Assign the Role "Flowable Design Administrator" to users/groups that should have access to Flowable Design.
- Assign the Role "Flowable Control Administrator" to users/groups that should have access to Flowable Control.
What to send to Flowable?
After completing the steps above, please send the following information to Flowable Support to configure the SSO for your Flowable Cloud Dedicated environment:
- Tenant ID (Directory ID)
- Client ID (Application ID)
- Client Secret Value (not the secret ID)