Case Views
This is an old version of the documentation for Flowable until version 3.13 and for the Angular-based Flowable Design 3.14/3.15. If you are running the latest version of Flowable please check out the current version of this page.
When navigating to a case details view in Flowable Work and Engage a default case view is shown.
For specific user groups this default case view can show too much information or is missing specific information necessary for that user group to complete the case work.
For this use case, the Case page feature is available that allows you to define a case view that is targeted at specific user groups.
In the case view the following elements are shown as menu options:
-
Static view elements that can be define in the case model, like links, predefined pages and custom pages.
-
Case page elements that are modeled as part of the case model.
-
CMMN human tasks and BPMN user tasks that are configured to be exposed to the case view.
Define a case view in Flowable Design
For the case view a new palette element type is available in the CMMN editor in Flowable Design called Case page.
The Case page element is similar to a user task, because a form reference and assignment can be defined.
The main difference is that a Case page can’t be completed and remains active until the stage or plan model scope is completed or terminated.
The case page element also becomes automatically active when the current stage or plan model is activated.
Ending case page element is different though as it automatically gets ended when its parent ends. If the parent ends up in a complete state,
for instance on a regular completion or an exit sentry with complete or force complete semantics, all enclosed case page items are completed as well,
however, if the parent is left in a terminated state, its case page elements also get terminated and will be left in terminate state.
This way, you can make use of that difference by rendering a terminated or completed case page differently, if you need to.
Let’s use the following case model example to explain the case view feature.
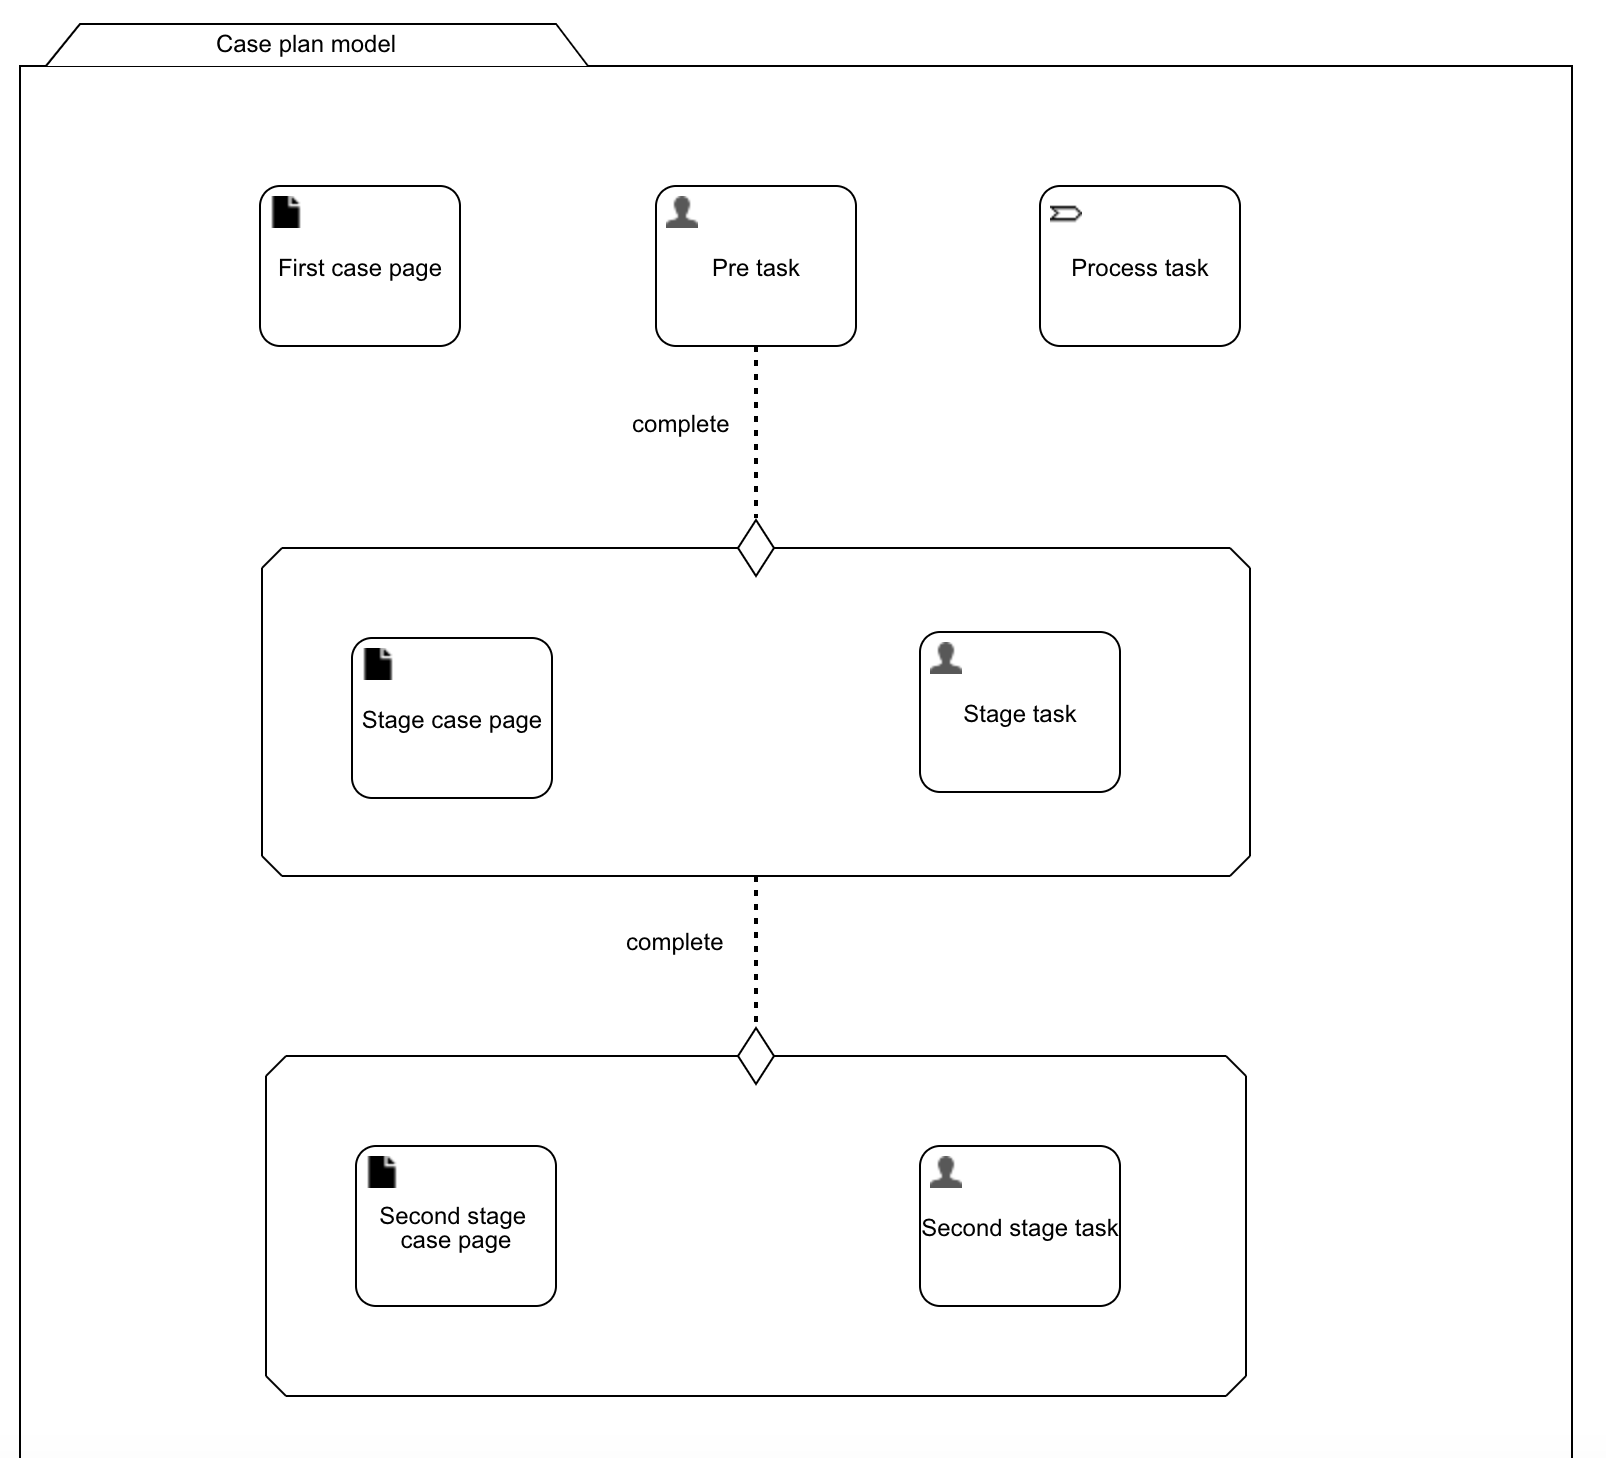
In this example three Case page elements are used: First case page, Stage case page and Second stage case page.
When a new case instance is started for this case model the First case page immediately becomes active, because it’s defined on the plan model level.
The other two case page elements will not yet be active yet, because the stages are not active yet.
To enable the case view feature for a case model at least one entry in the Case view elements property (available in the case model root property panel) is required.
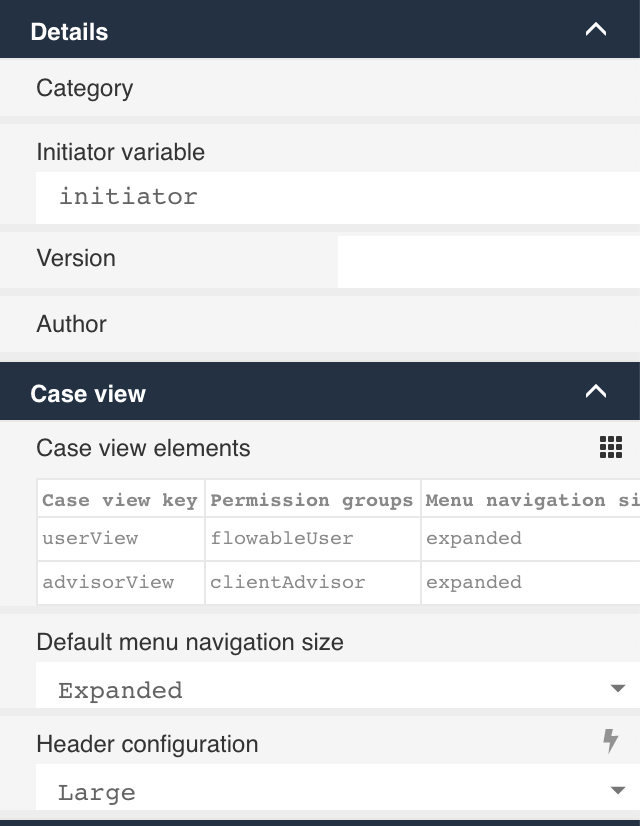
In this property a custom view key needs to be defined for one or more user groups. This basically enables the case view feature for this case model and user group.
In addition to the Case view elements property, there's also an option to define the default navigation left menu size with the Default menu navigation state property.
The value is expanded by default, but also can be set to minimized to have only icons without labels in the navigation left menu.
Lastly, there's an option to define the default header size with the Header configuration property. The headers for tasks, case pages and predefined pages will then be rendered with this default value,
if the header size is not overridden on a task, case page or predefined page level. The largest header size will render it with all the task / case header details and with the small option only the name and
type label will be shown. It's also possible to not show a header.
For each Case Page element a number of page elements can be defined for the case view. When the Case Page element is active then the page elements are also available in the case view.
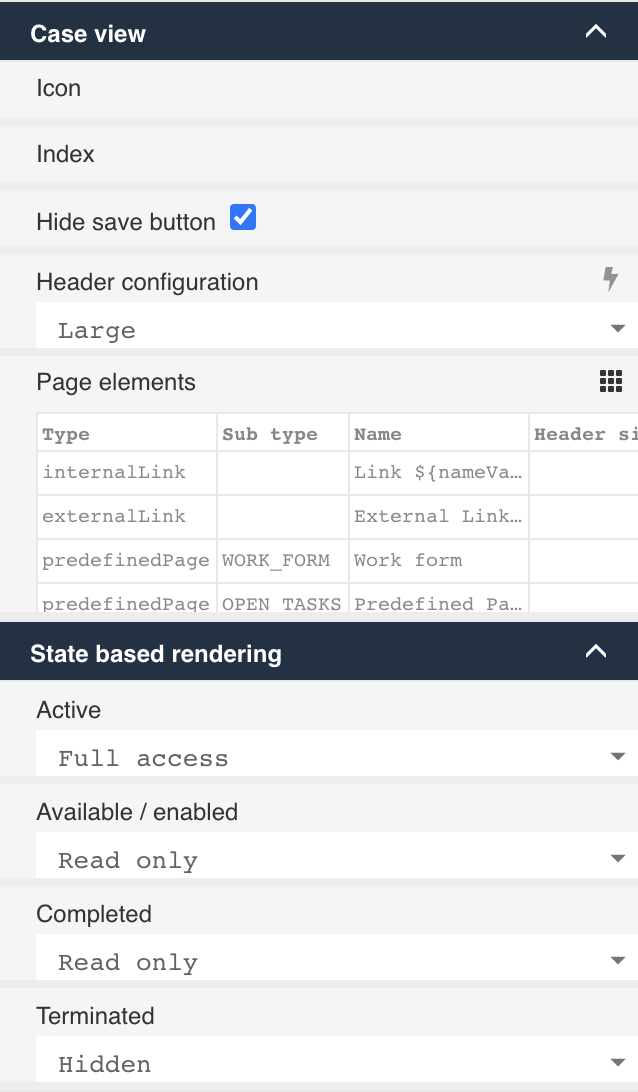
The following types of page elements are supported:
-
Internal link, can be used to reference a url within the Flowable Work and Engage application, like a dashboard page. -
External link, references an external link which is opened in a new tab in the browser. -
Predefined page, shows a component from the default case view. Supported values areOpen Tasks,Work Form,Chat,Comments,People,Sub Items,DocumentsandAudit Trail. -
Custom page, references a form key that is used to render a form.
A list of page elements can be defined that will be shown in the case page view when the Case Page element is active.
It's also possible to define when and how the case page task and the page elements should be rendered in the case view navigation elements.
This can be done in the State based rendering section. When for example the case page task is completed, it's possible to not render the case page task and page elements by using the Hidden value.
Or the elements can be made read only with the Read only value.
The ordering of the navigation elements is determined by the index value of the element. The navigation elements are sorted in ascending order based on a numeric index value.
Each element can have a specific icon that is used to render the navigation element. The icon property allows the modeler to define this icon.
If a specific Header configuration value is needed for the case page task and the page elements it can be defined here as well.
Lastly, the default save button can be configured to be hidden with the Hide save button property. If this property is enabled, there will not be save button rendered for the case page task form.
Now let's have a closer look at an example of a page elements configuration.
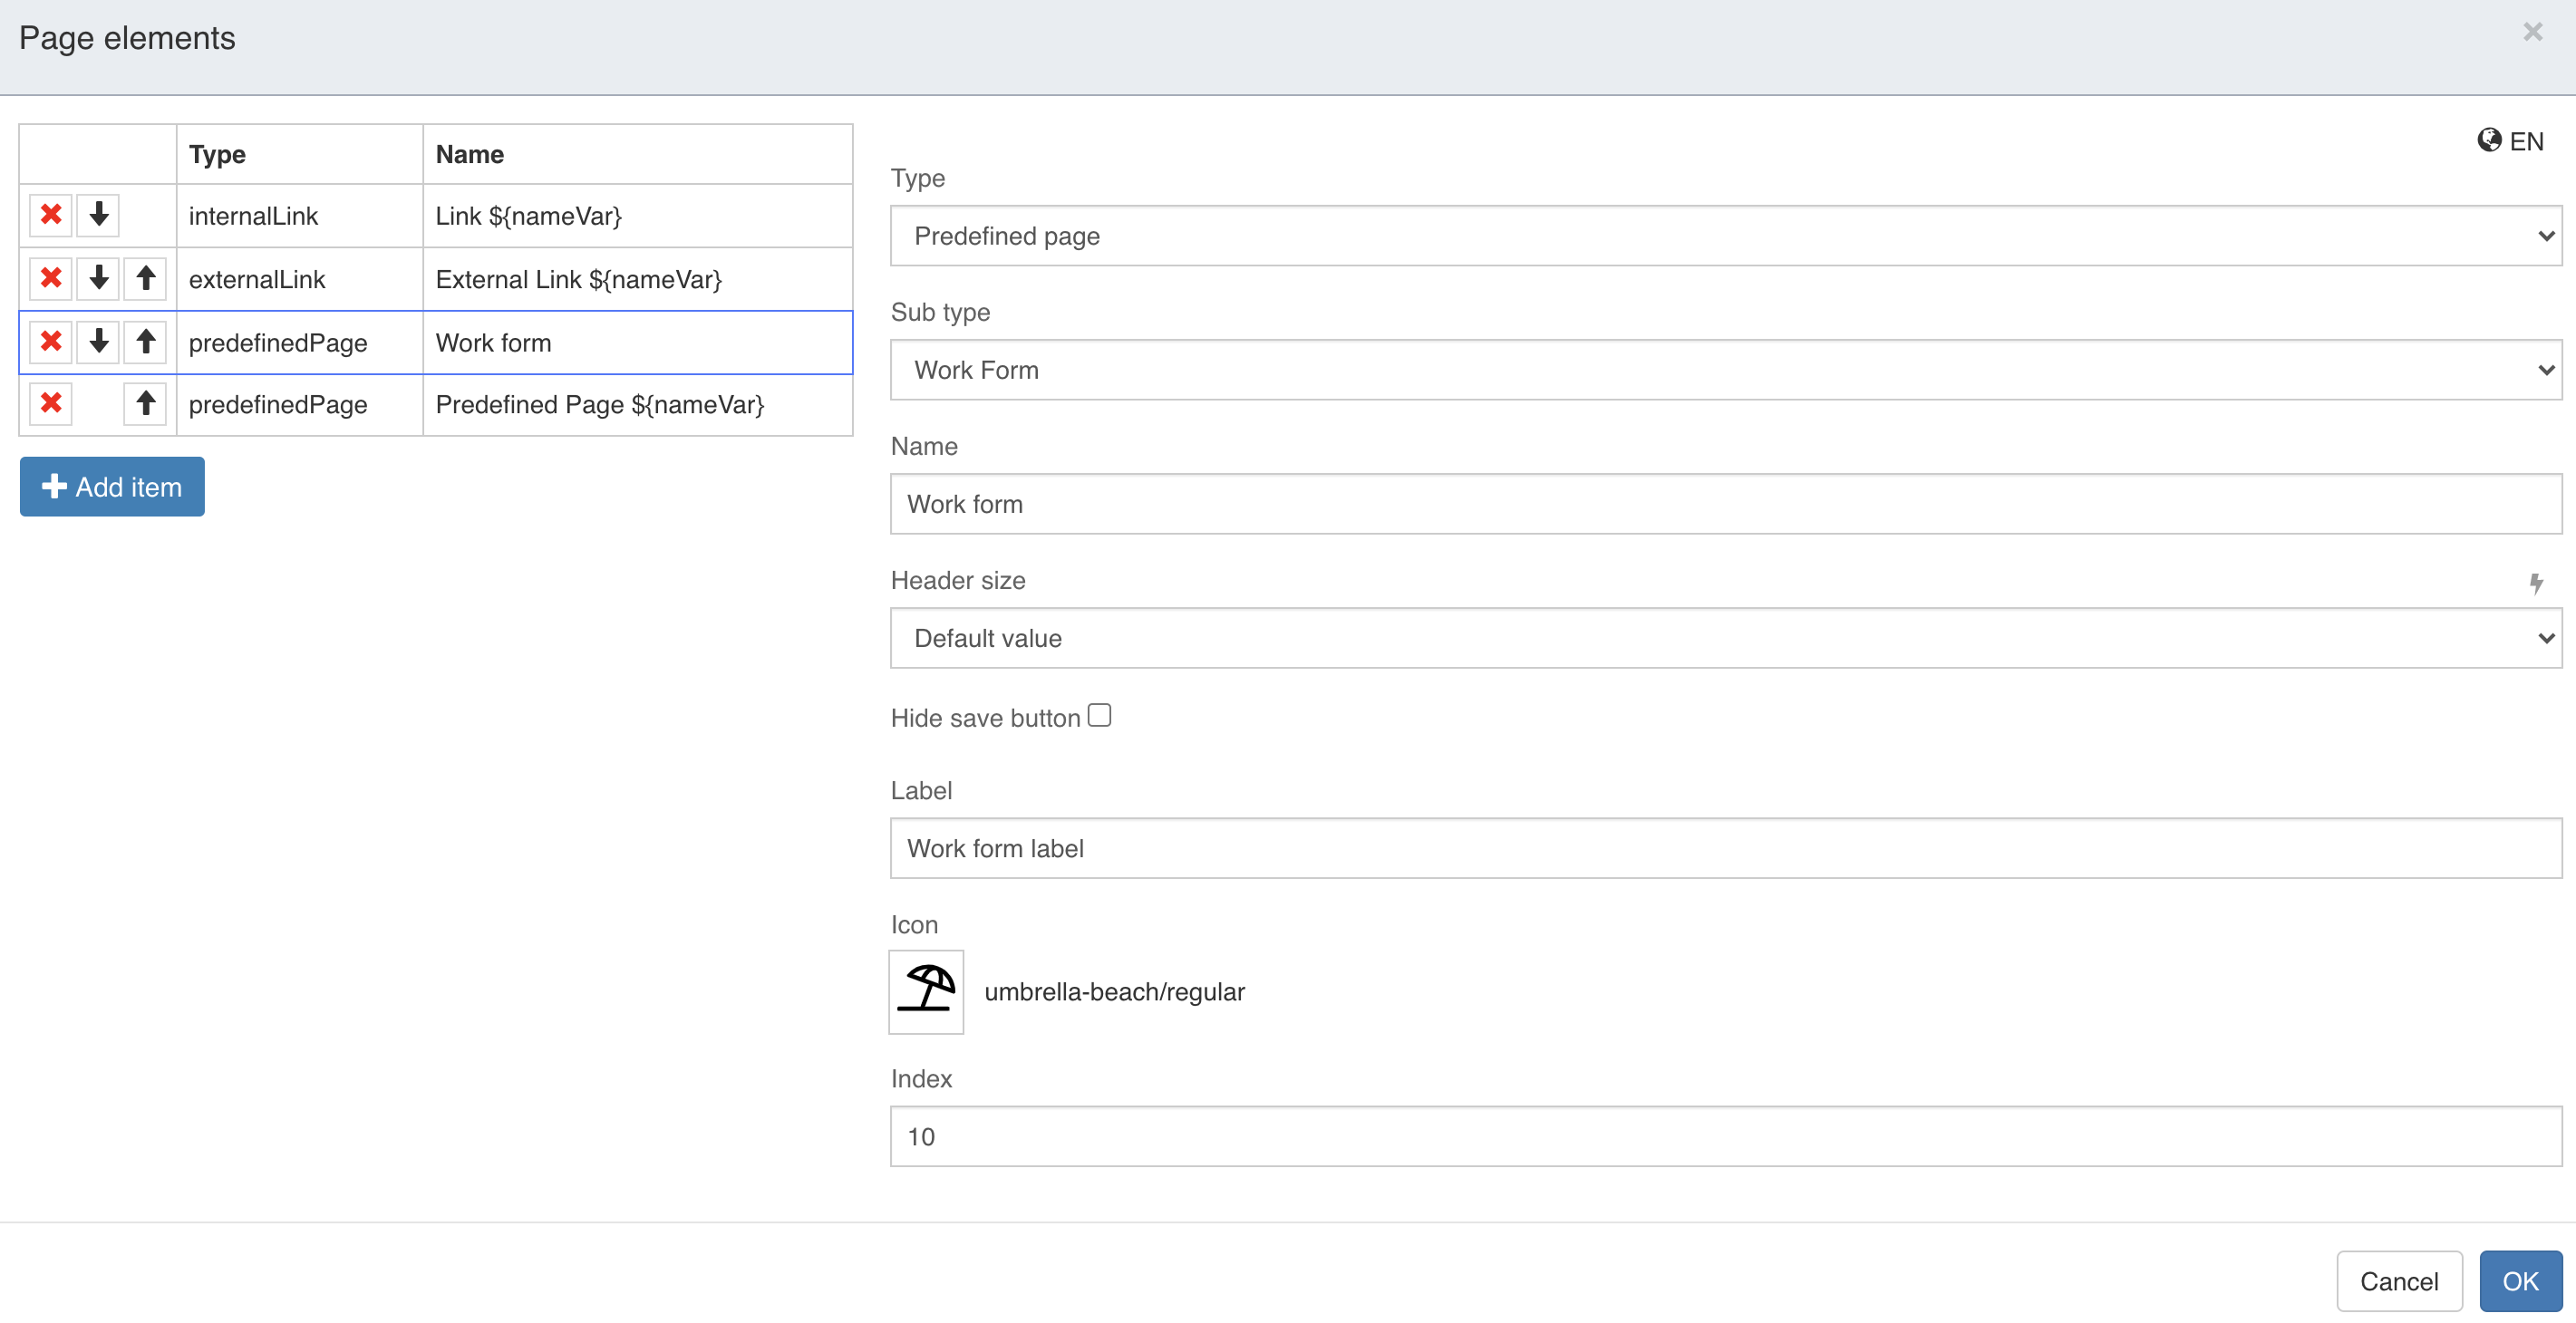
The 4 page elements that are shown in this screenshot will be shown in the case view when the Case Page element is active.
In this example, 2 predefined pages, 1 internal link and 1 external link are used as page elements.
For each page element a name and label can be configured and also an icon can be selected from the icon selector. These values are used to render the page element in the menu of the case view.
For the ordering, the index property value is used and a number value is expected here, like 10 in this example for the open tasks view element.
Like we saw before on the case and case page task level, the header configuration value can be defined for a specific page element here as well.
And for elements that show a form, like this example with the Work form, the Hide save button option can be enabled if the form should be read only.
Now with the case page and page elements explained, the last part that can be configured in Flowable Design is which human and user tasks should be exposed to the case view in addition to the
case page and view elements we already discussed. There’s an Expose to case view property available for human tasks in CMMN and user tasks in the BPMN editor.
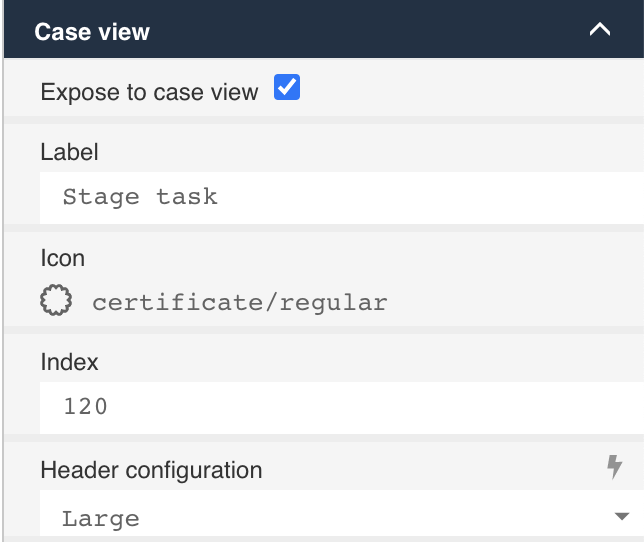
When this property is checked / set to true, the task will be available in the case view.
Using the case view in Flowable Work / Engage
When a case model with the custom page elements is deployed to Flowable Work or Engage, a custom case page view is shown when accessing the case instance with a logged-in user that matches the security groups of the custom view element. For Flowable administrator users always the default case view is shown. An example custom page view that matches the case model we’ve been discussing in the previous Flowable Design section is shown in the following screenshot.
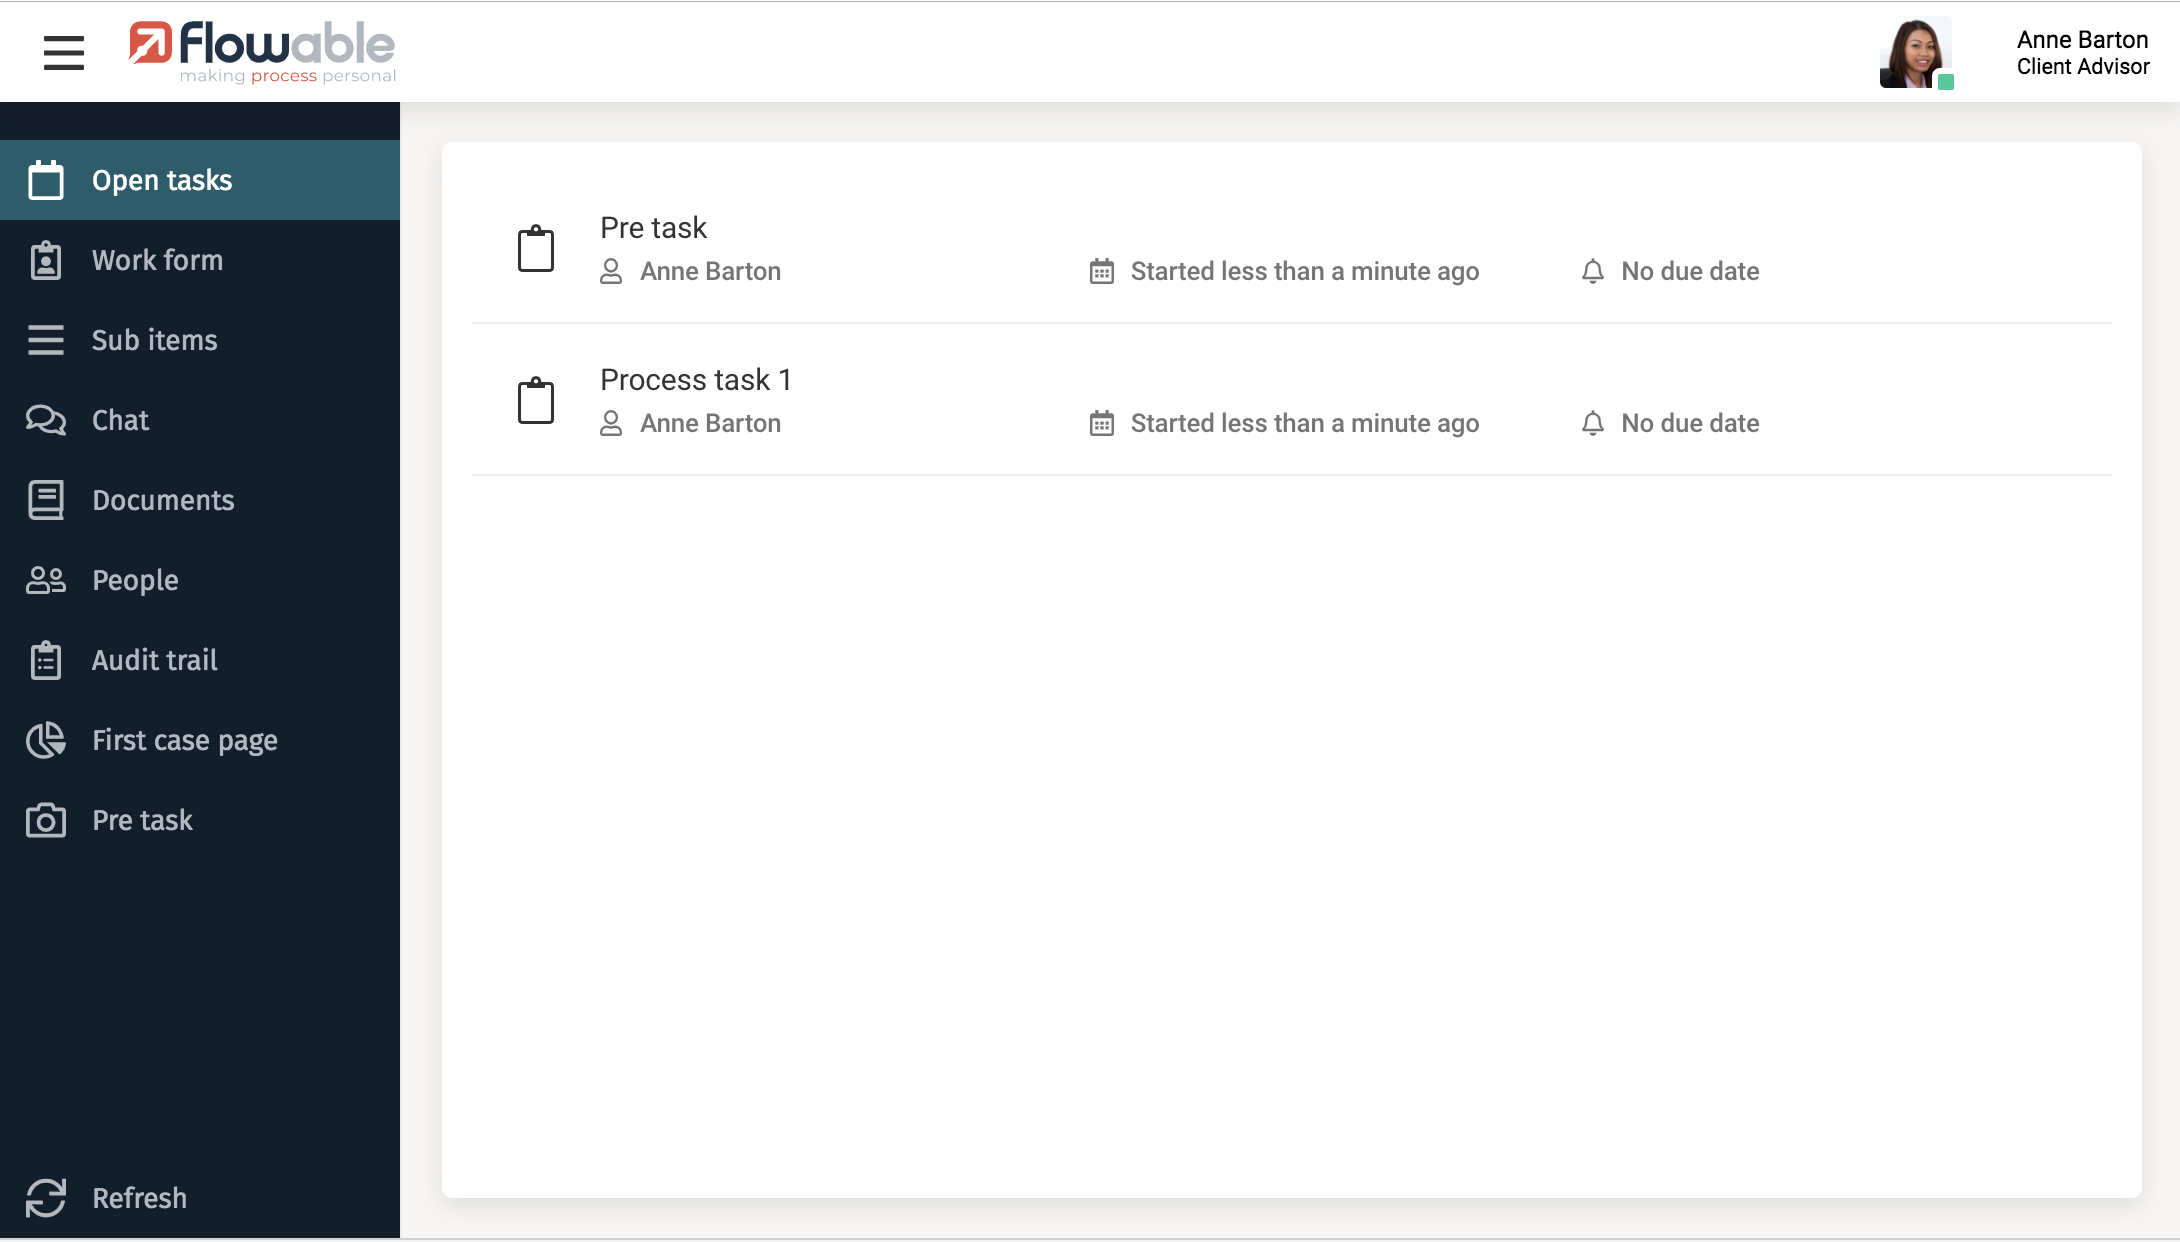
After the case instance was started the static view elements are shown in the left menu of the case view, together with the case page, human task and user task elements that
are active after starting the instance. In this example the First case page case page element and the Pre task human task elements are available at first. The child BPMN process instance
is also started with the process task, but the first BPMN task is not exposed to the case view and therefore not available yet.
In this case view example also views like the work form and documents are included in the menu, because they were defined as static view elements. If we navigate to the open tasks view
and then to the Process task 1 task we navigate away to the default task view and this task can be completed. After completing the task we the second user task in the process instance is created
and this is also exposed in the case view.
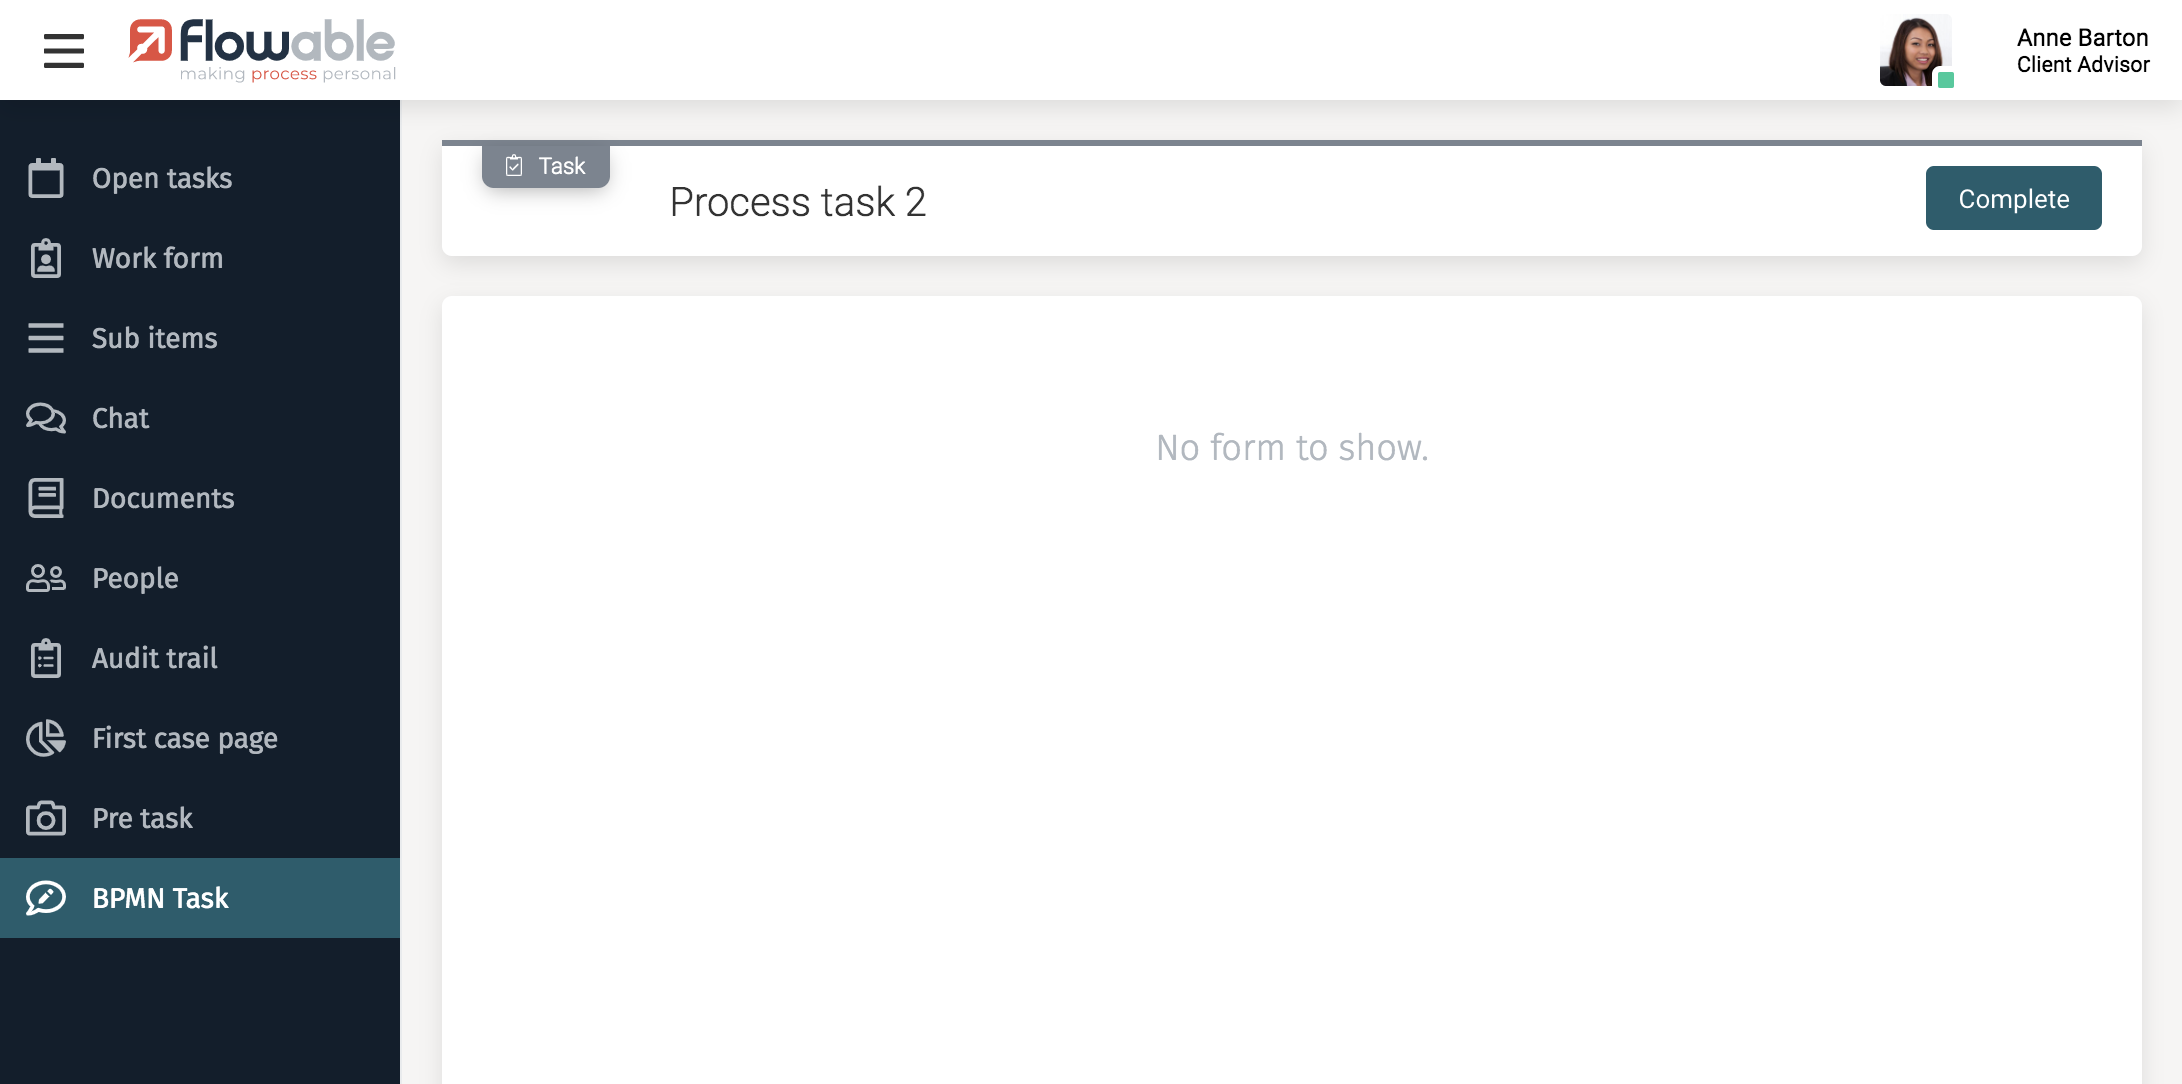
Now we can also complete this task in the case view. After completing the BPMN task it will disappear from the menu items in the case view.
Let’s also the Pre task CMMN human task and now we can see the Stage case page and Stage task menu items appearing because the Stage is activated.
The Stage case page case page element shows the form that is configured for this element in Flowable Design. This form can be saved but not completed, because case page elements can’t be completed.
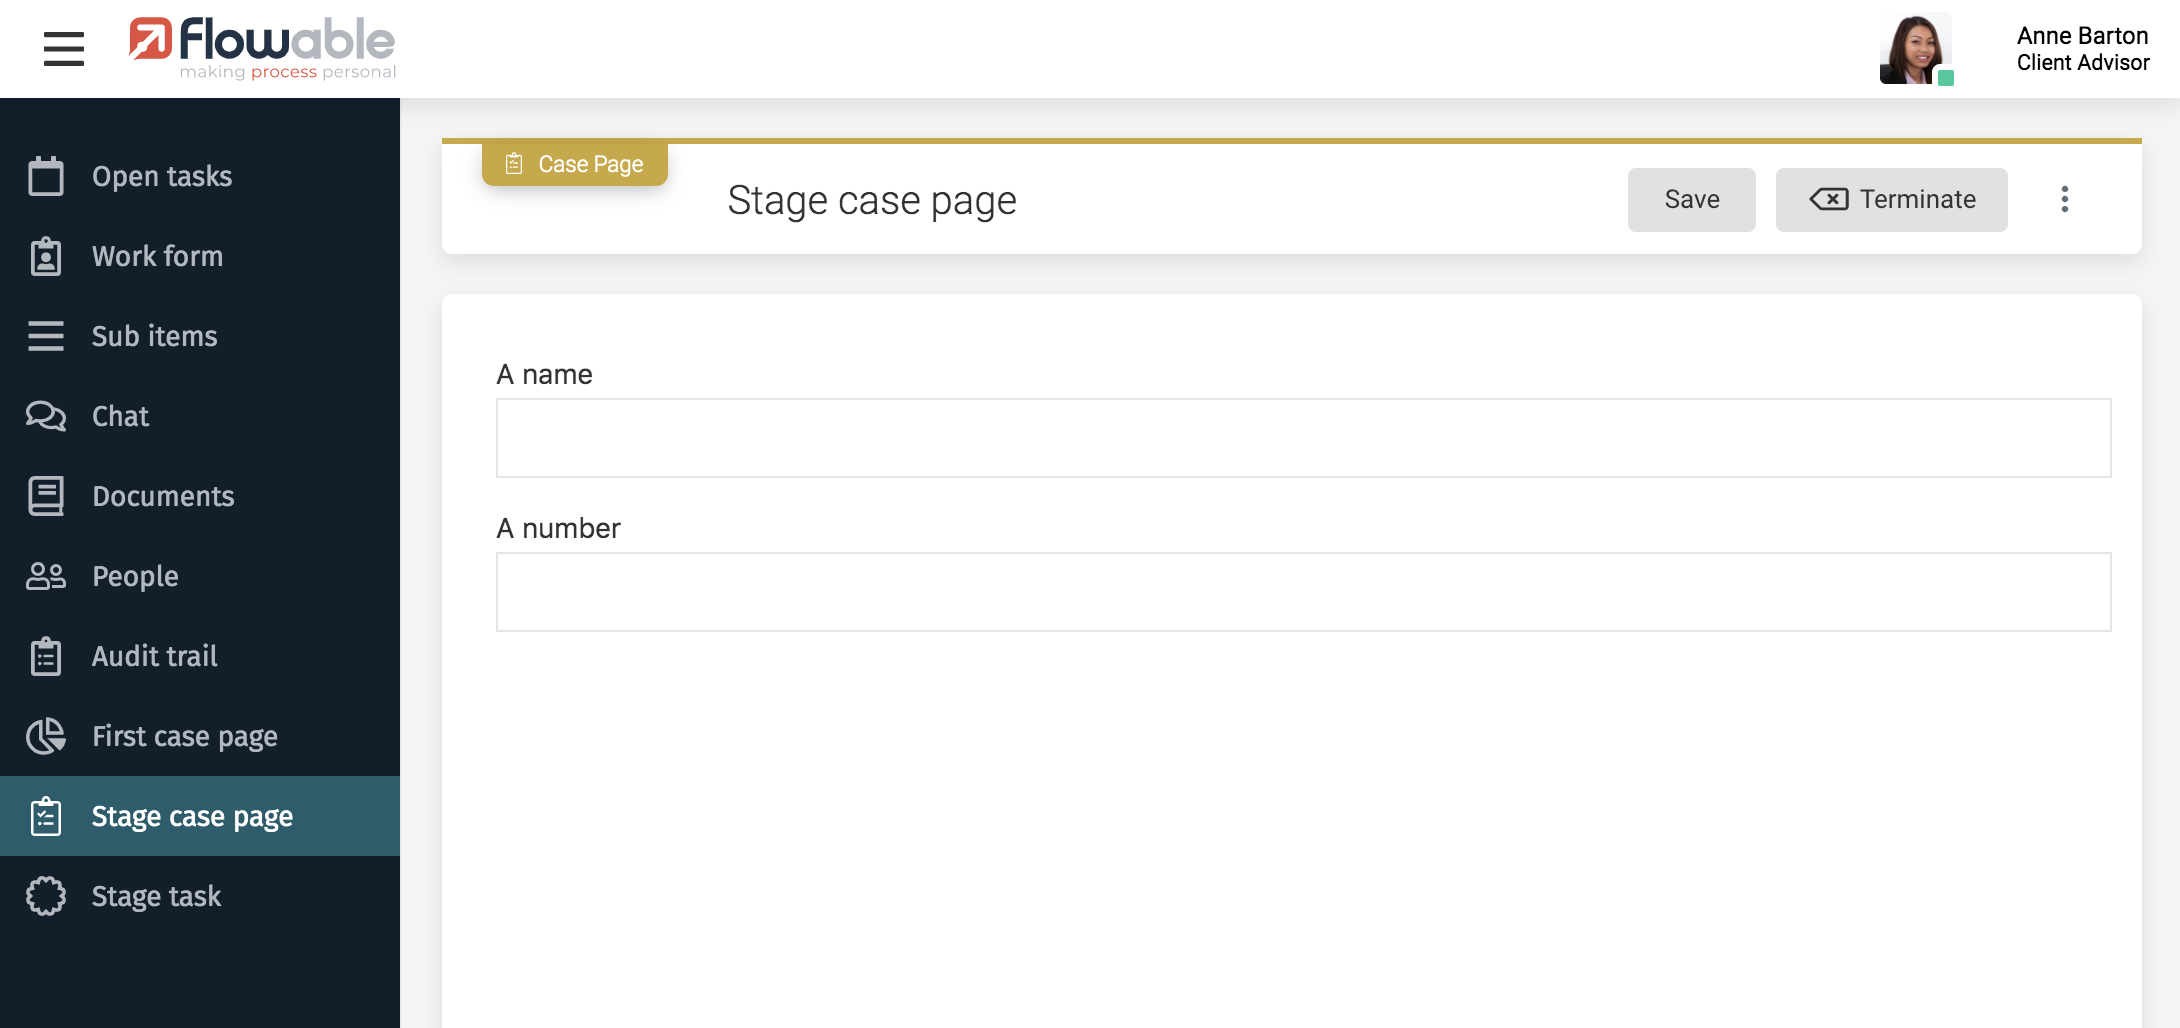
When saving the case page form, the form payload will be made available to the case instance context, like it’s also done for work forms of a case instance.