Creating a Security Policy Model
 Outdated documentation page
This is an old version of the documentation for Flowable until version 3.13 and for the Angular-based Flowable Design 3.14/3.15. If you are running the latest version of Flowable please check out the current version of this page.
Defining a Security Policy Model
A security policy is used within Flowable Work and Engage to define the permissions of roles for cases, processes, and tasks. Within a case and process model, a security policy model can be selected to define the permissions that are used for that specific case or process model. On a human task level in the case model and on a user task level in the process model, a security policy model can also be selected for task-specific permissions. Note that a security policy model is not inherited from a parent case or process model. When no security policy model is set in the model, then the system-wide default security policy model is used. The default security policy model is defined with the property flowable.policy.default-security-policy and refers to a security policy definition key.
Creating a Security Policy Model in Flowable Design
A security policy model is created in the Work section of Flowable Design.
After choosing the work model type Security policy and clicking the Create button,
a create dialog is presented:

The security policy model key is essential as it is used as the primary identifier when referencing a security policy from a case or process model. A new security policy model is pre-filled with the default permission values for each role.
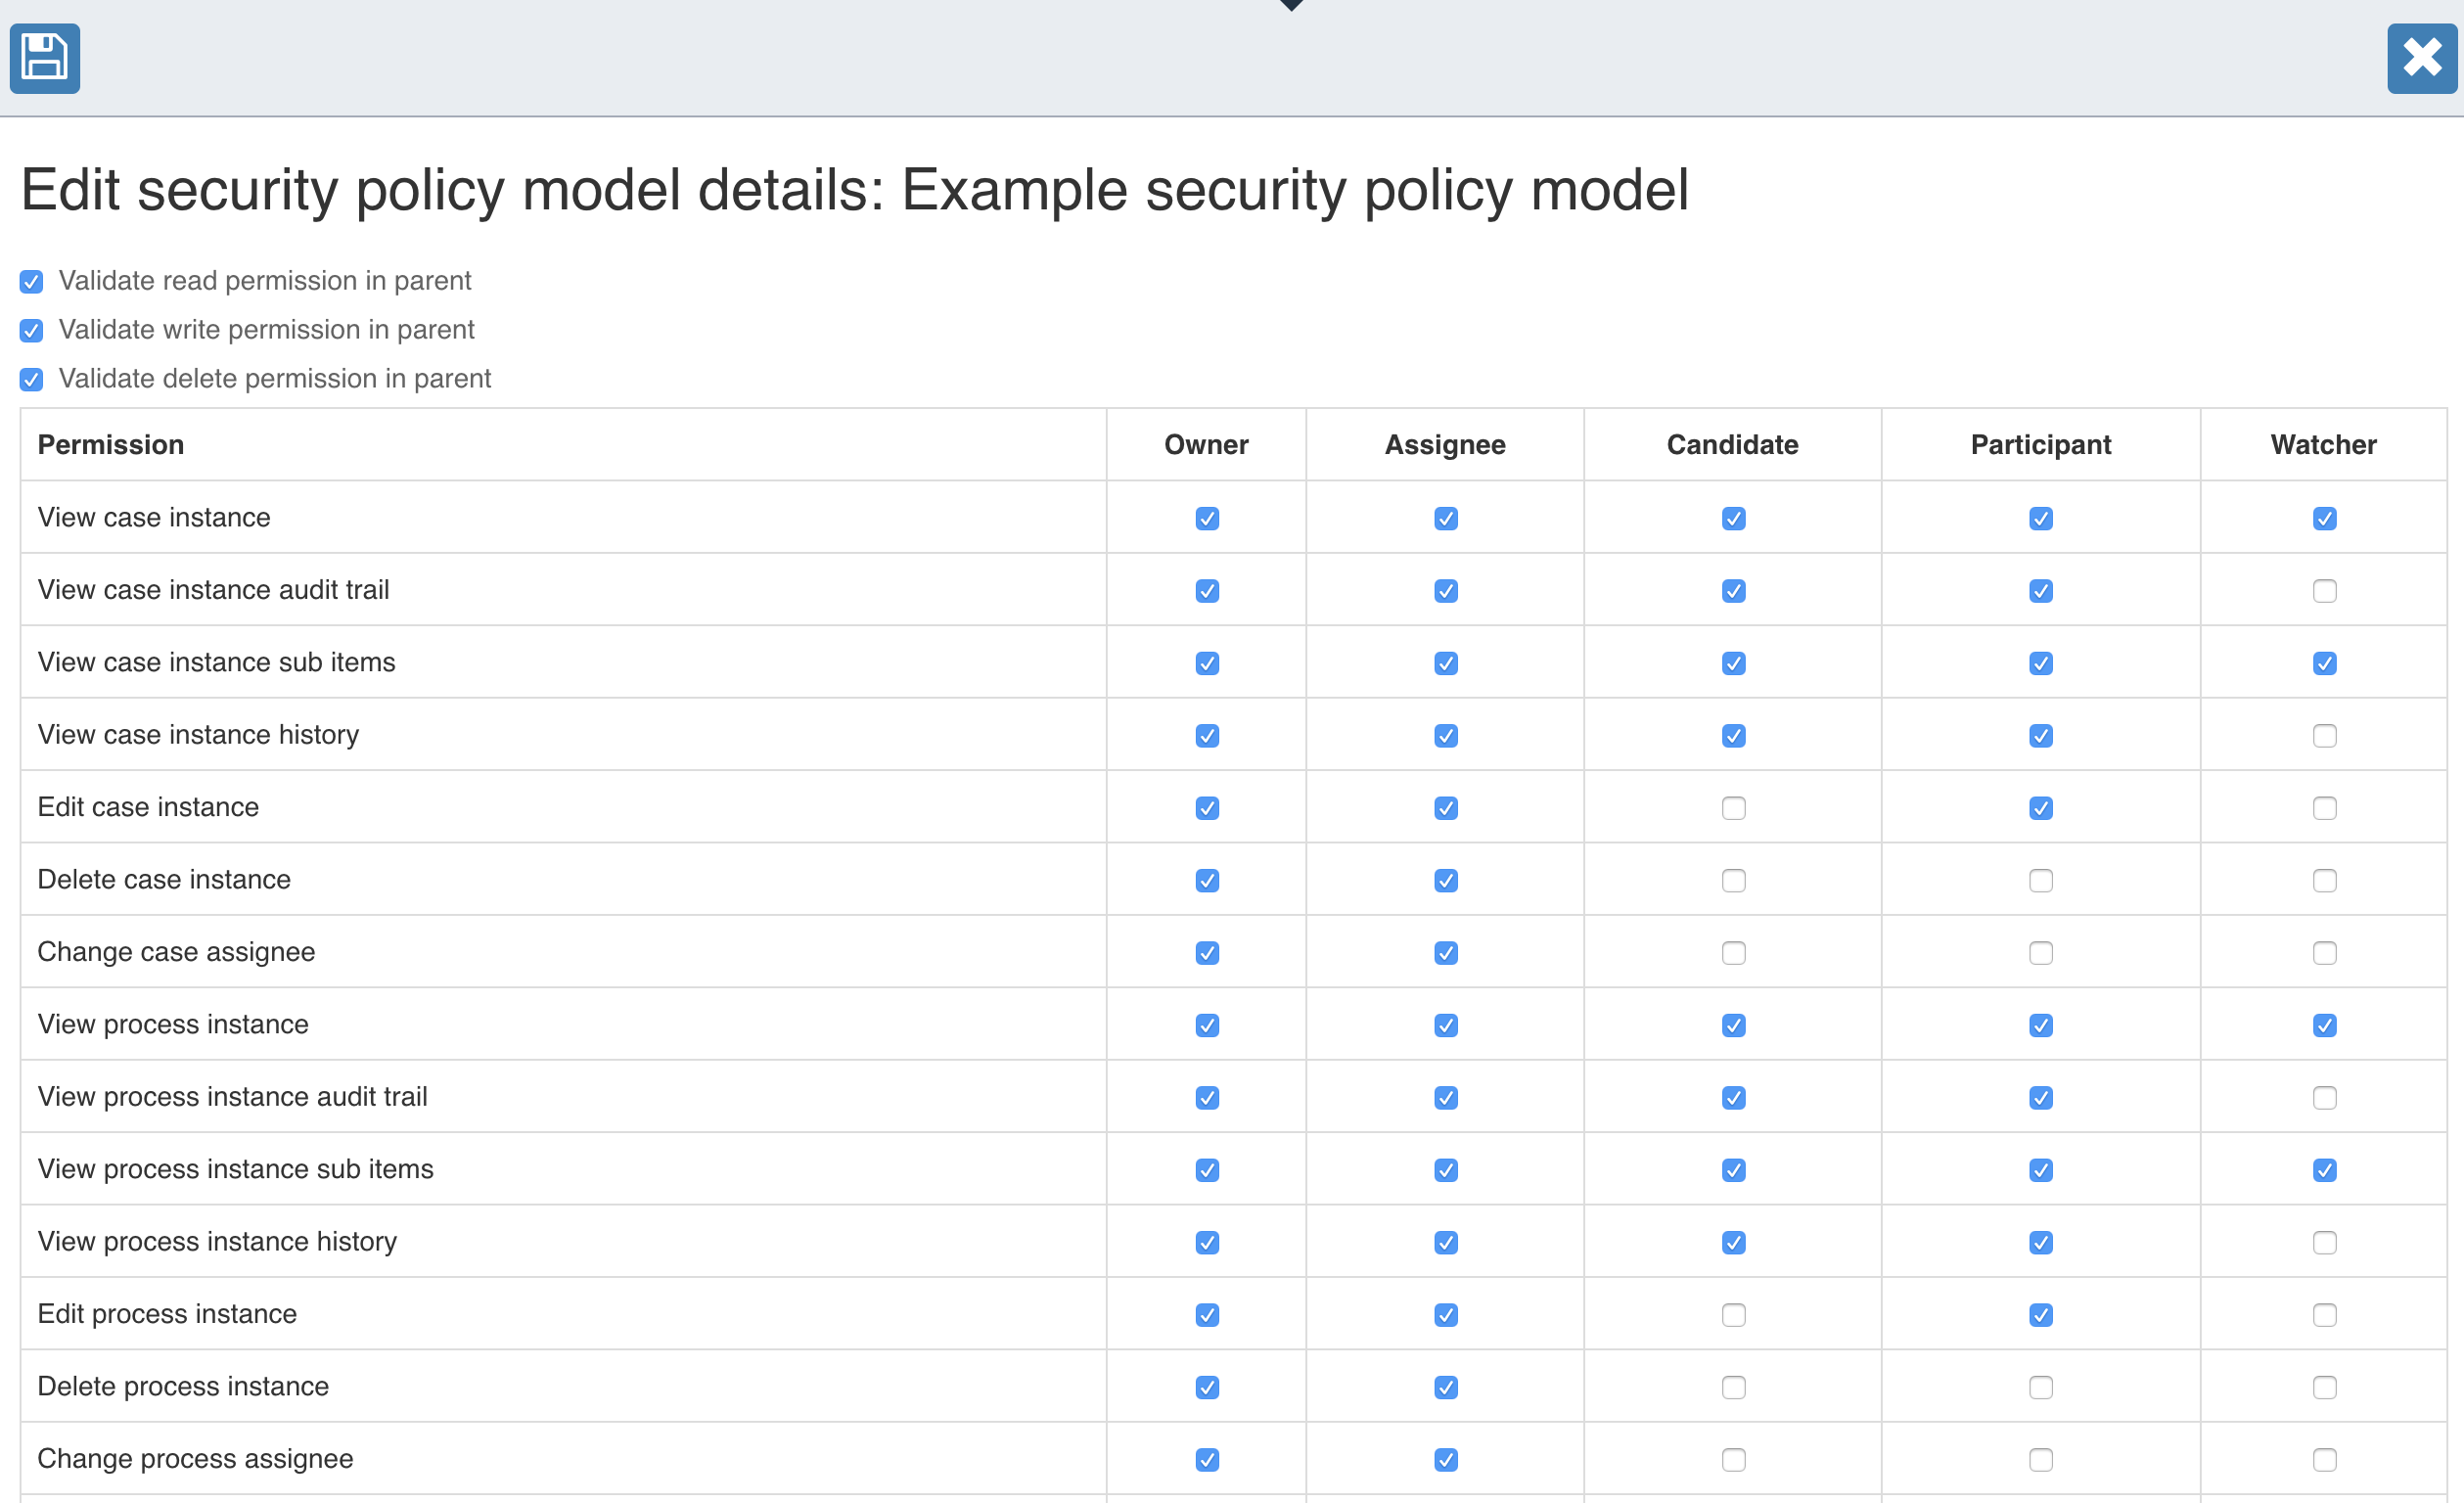
Currently, the following roles are supported:
-
Owner: The owner of the case, process, or task.
-
Assignee: The assignee of the case, process, or task.
-
Candidate: A candidate can start a case or process instance, or they can claim a task.
-
Participant: A user or group that participates in a case, process, or task.
-
Watcher: A user or group that can view information about a case, process, or task.
For each role, a permission can be set to either allow (checking the checkbox) or disallow (unchecking the checkbox). Most of the permissions are related to viewing a case, process, or task or allowing access to a specific part of it. In addition, permissions like claiming and completing a task can be set. There are also more specific permissions or permission logic that defines if a role on, for example, a task is automatically propagated to the parent case or process instance as well. This can be useful if every task owner or assignee or participant should automatically have access to the parent case or process instance.
Besides the permission configuration per role, three overall permissions can be set. These three overall permissions define if the access validation to a case, process, or task should also check its parent (if available). Let us take an example where John Doe started a case instance, and thus, John Doe is automatically set as the owner of the case instance. Then there is Task A defined as part of the case definition of this case instance, and it is assigned to Jane Doe. The Validate read permission in parent configuration defines if the read permission check when accessing Task A also takes into account the role of the currently logged-in user on the case instance. Let us assume that John Doe does not have any role on Task A, disabling the Validate read permission in parent configuration disallows access to Task A for John Doe. In the case where the permission is enabled, the permission check on Task A validates the role of John Doe on the parent case instance, and access to Task A is allowed because John Doe is the owner of the case instance.
After defining the permission and role mapping, the security policy model can be saved and used in a case or process model.
Using a Security Policy in a Process Model
With the security policy model defined, let us connect it to a newly created process model.
When the editor canvas is shown for the process model, there is a
General>Security policy property available in the properties panel:
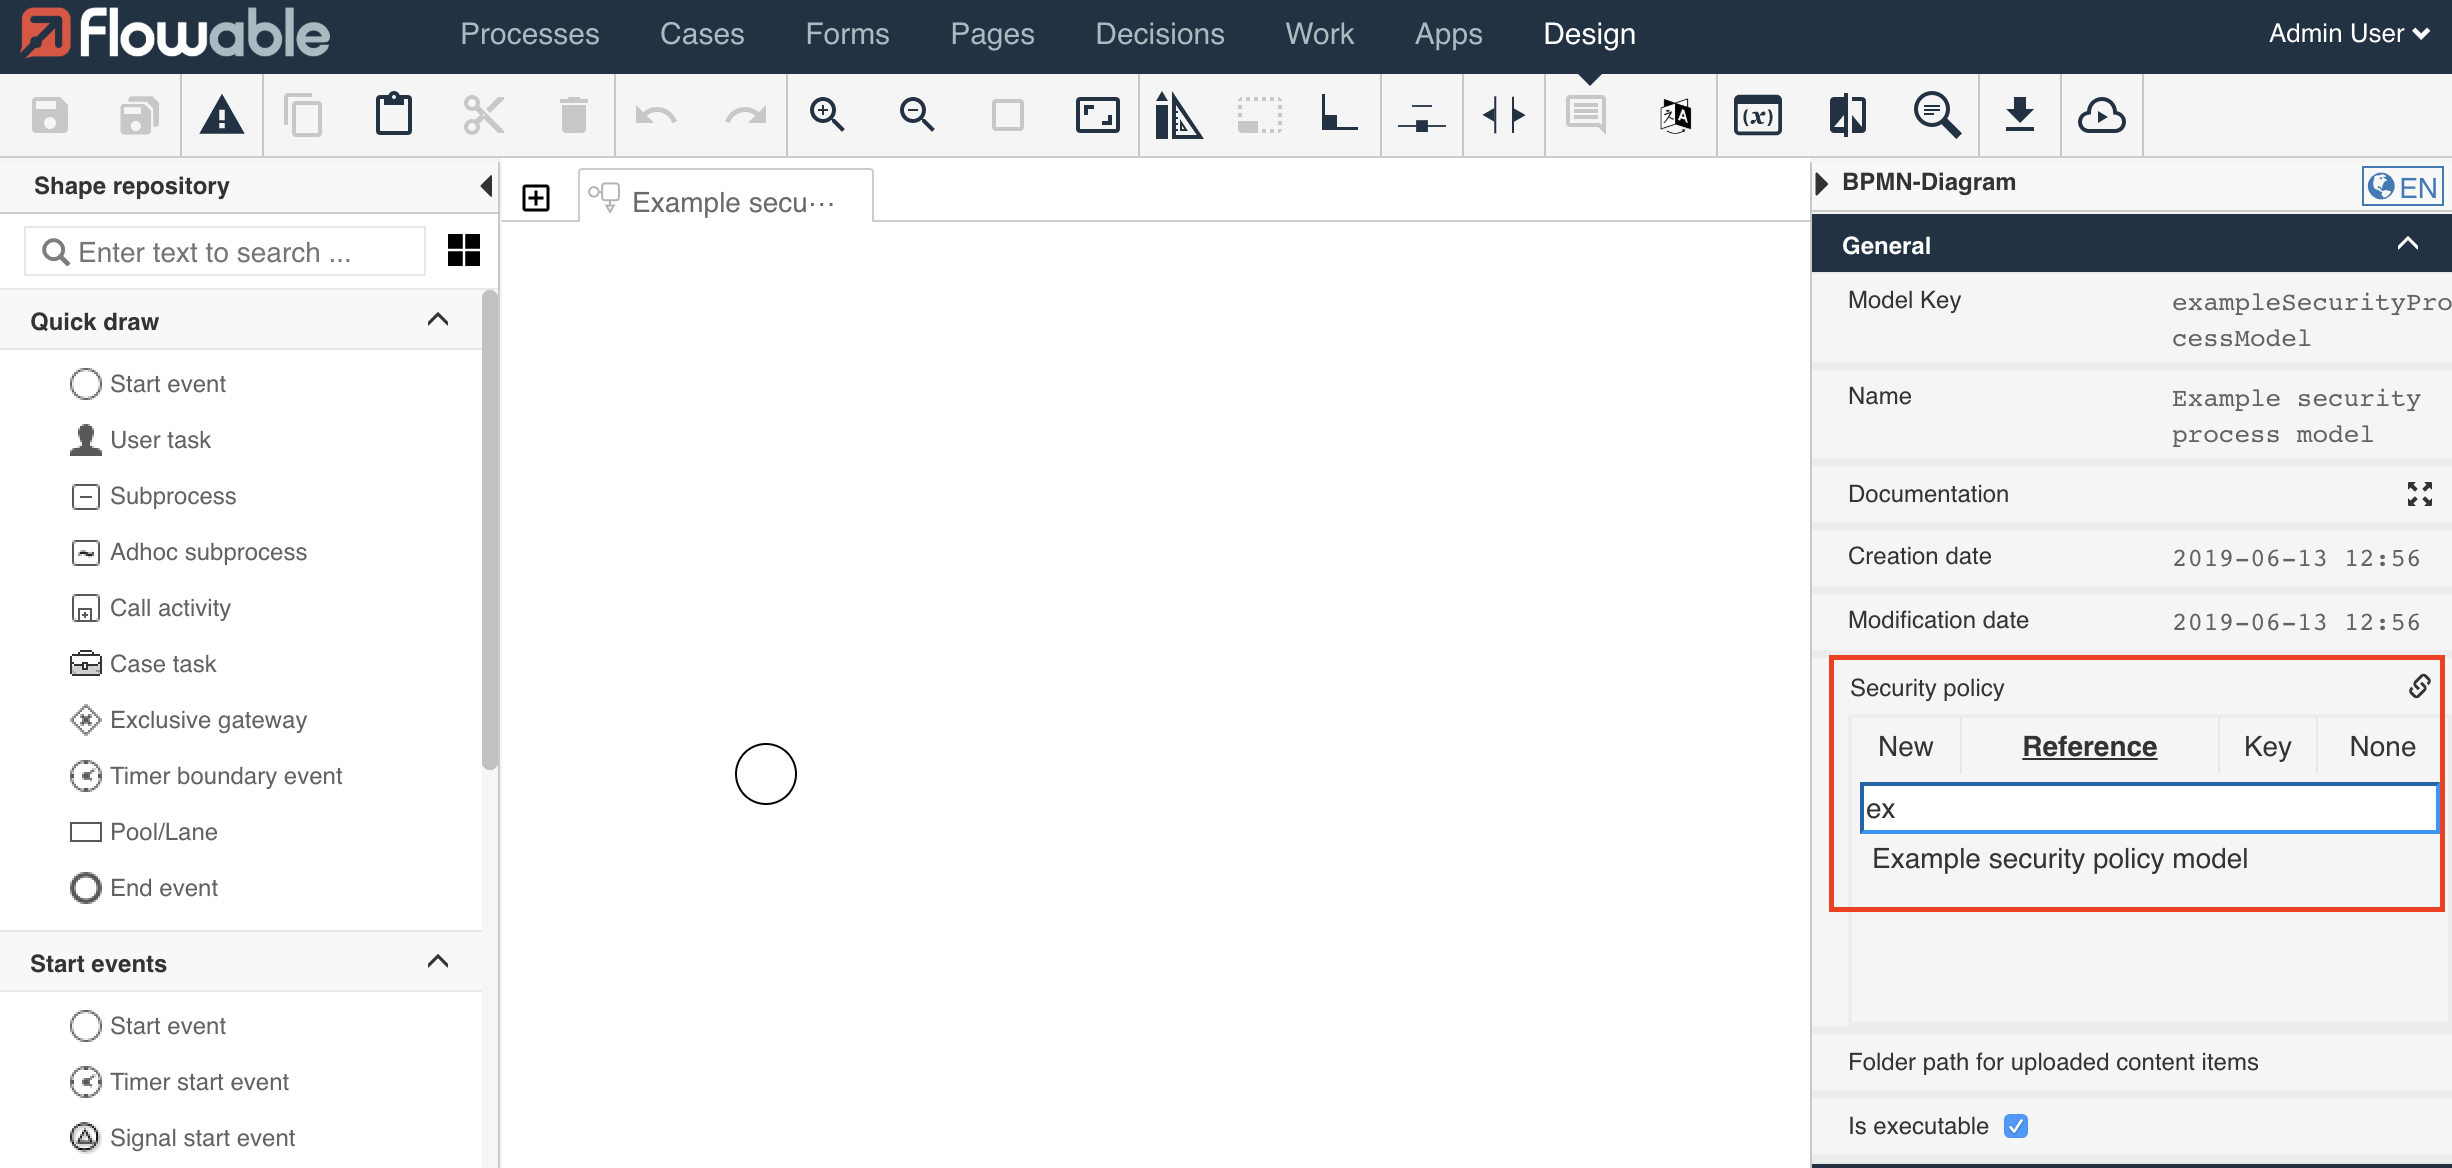
In the Security policy property, a security policy model in the model repository can be referenced, or a new security policy created. It is also possible to specify the security policy key value directly for the property. When the security policy model is referenced, this means that for the execution of this process instance and its direct user tasks, this security policy model is used for all the permission checks. On a user task level, the policy can be overridden by referencing another security policy.
With the process and security policy model defined, the next step is to create an app and include both models in the app. Now the app can be published to a Flowable Work or Engage instance.
Starting a Process Instance with a Security Policy
With the app and process model deployed, let us start a new process instance from Flowable Work or Engage with one of the example users, Ben Snow. Ben automatically becomes the owner of the process instance because he started it. Task A is however assigned directly to Anne Barton. When Ben tries to access Task A with the Validate read permission in parent permission disabled, the following screen is shown:
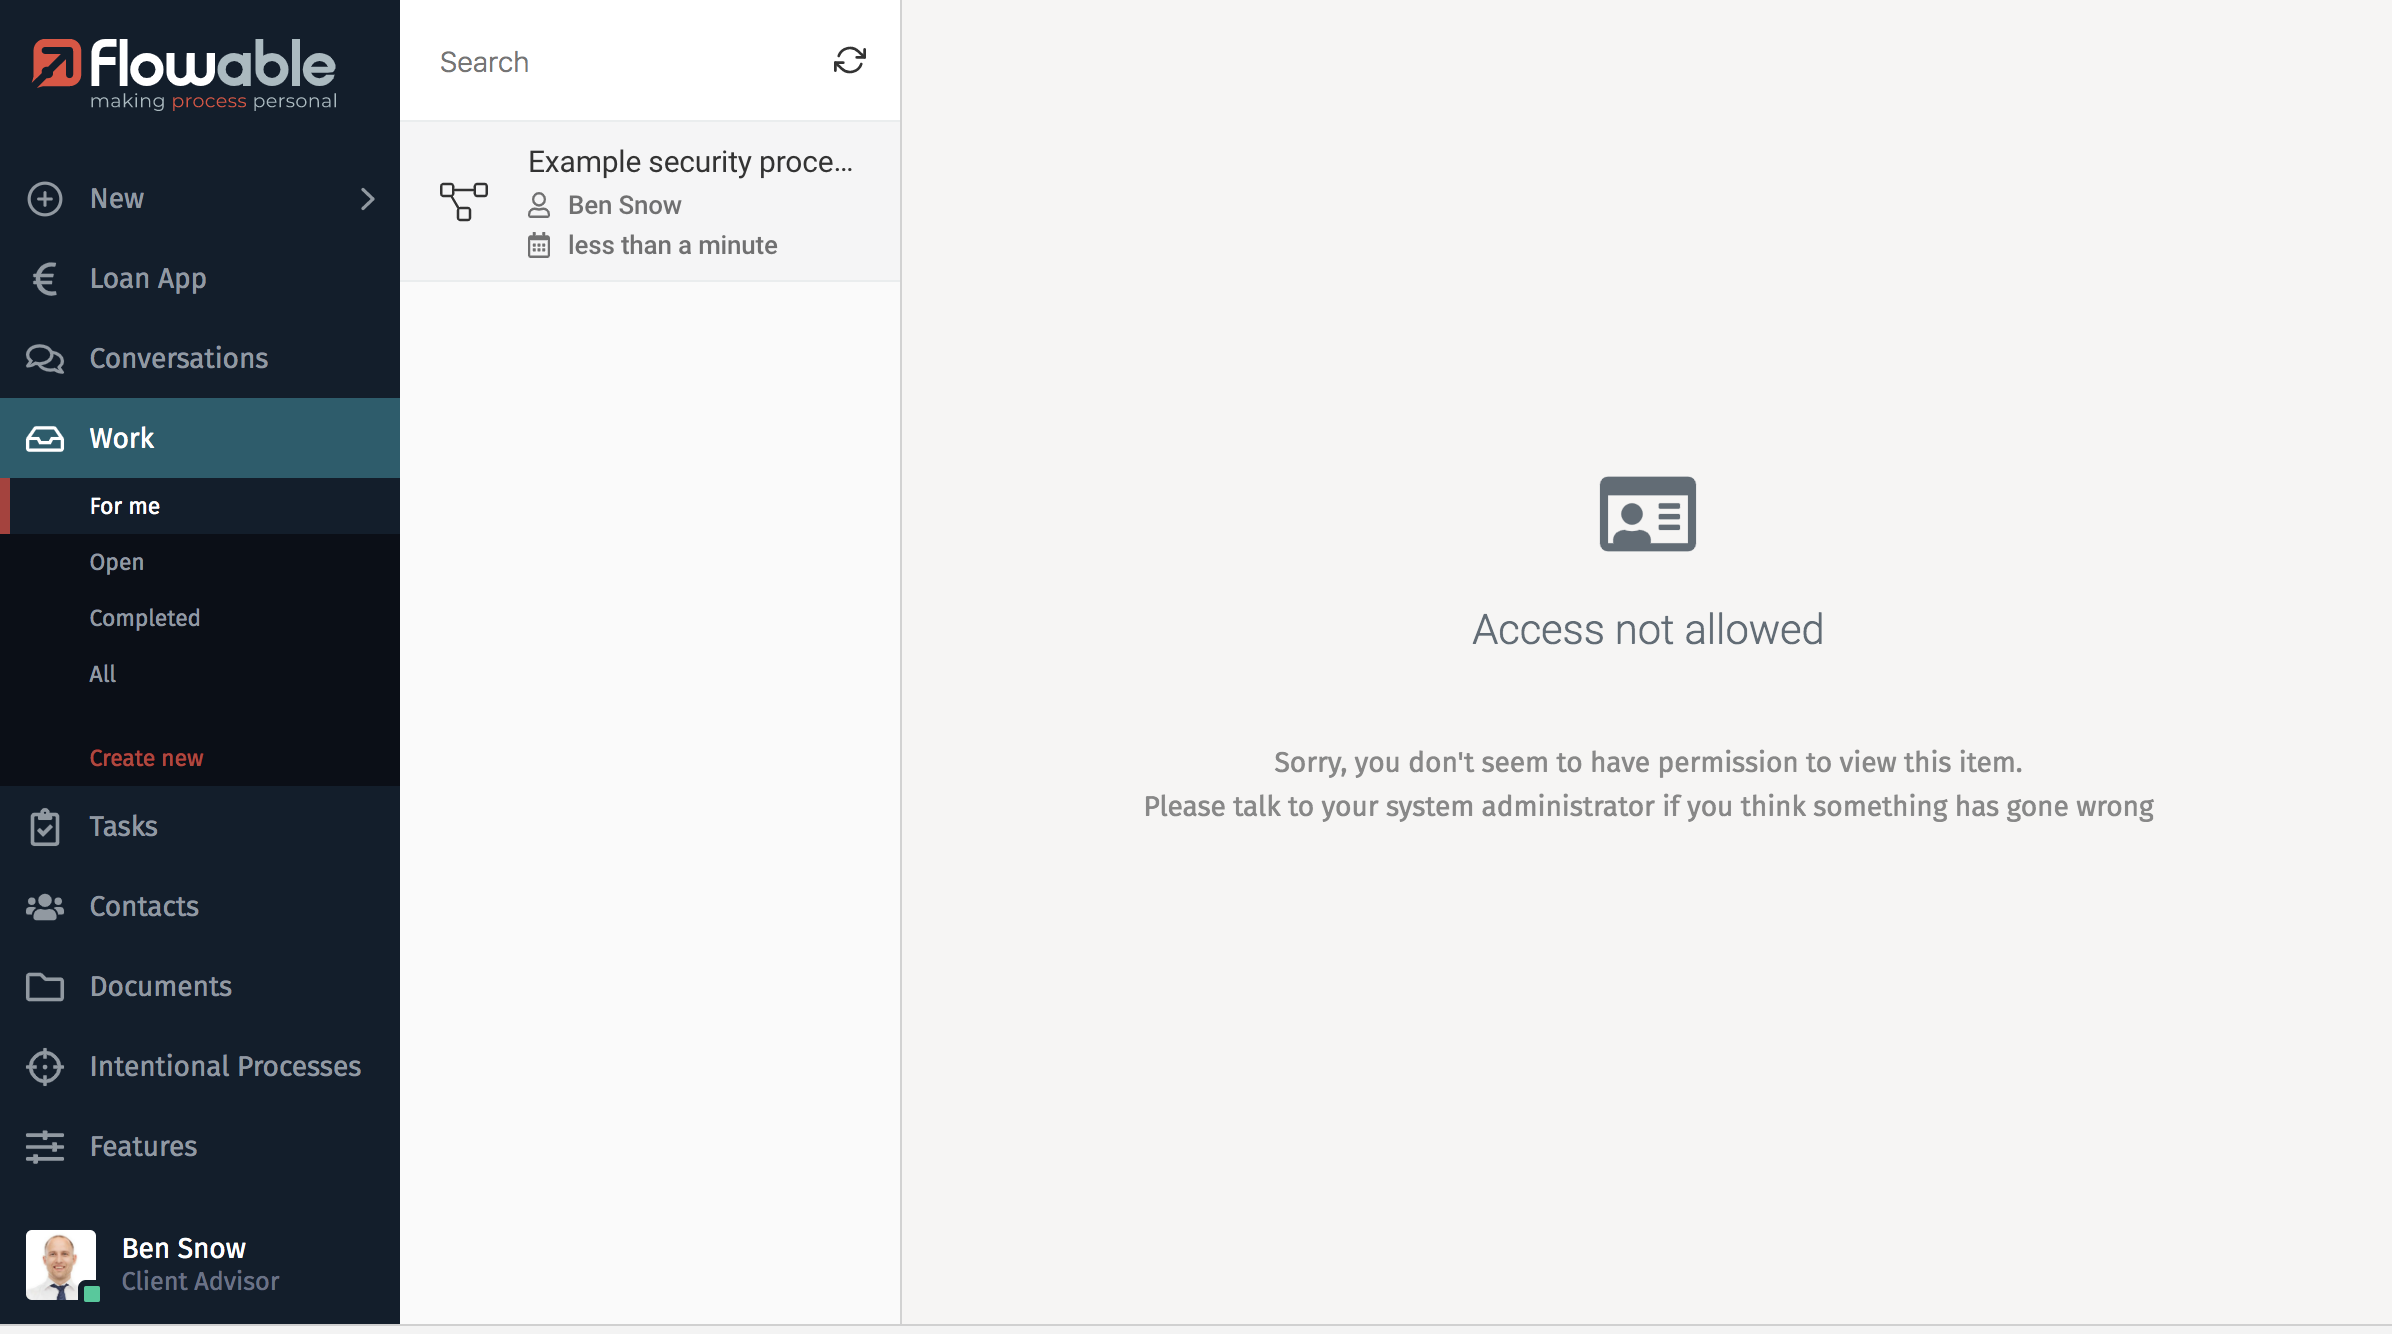
If Ben has a role in Task A or the Validate read permission in parent permission is enabled in the security policy, then Ben has access to Task A.